RECARO Performance RIDE Instruction Manual
Hide thumbs
Also See for Performance RIDE:
- Instruction manual (35 pages) ,
- Instruction manual (68 pages)
Table of Contents
Advertisement
Quick Links
- 1 Section 3: Getting to Know Your Child Restraint
- 2 Child Fit Information and Requirements
- 3 Forward-Facing
- 4 Installing the Child Restraint Rear-Facing in Your Vehicle
- 5 Section 8: Installing the Child Restraint
- 6 Section 12: Care and Maintenance
- 7 Section 13: Trim Cover Removal/Installation
- Download this manual
Child Safety Seats
Performance RIDE / ProRIDE Instruction Manual
Convertible Child Restraint System for
children 5 to 65 lbs (2.3 to 29.5 kg).
Approved in accordance with Federal Motor
Vehicle Safety Standard 213.
Only suitable for use in vehicles with 2-point
(lap), 3-point (lap & shoulder) seat belts and
LATCH anchorages.
El manual de instructiones Performance RIDE
/ ProRIDE esta disponible en español en www.
recaro.com. Por favor visite el internet para
bajar una versión en español.
Please read instructions prior to
installation. Store this manual in
the seat base.
Advertisement
Table of Contents

Related Manuals for RECARO Performance RIDE


Summary of Contents for RECARO Performance RIDE
- Page 1 Child Safety Seats Performance RIDE / ProRIDE Instruction Manual Convertible Child Restraint System for children 5 to 65 lbs (2.3 to 29.5 kg). Approved in accordance with Federal Motor Vehicle Safety Standard 213. Only suitable for use in vehicles with 2-point (lap), 3-point (lap &...
- Page 3 Never leave a child unattended in a vehicle. Prevent Child Heatstroke in Cars Even great parents can forget a child in the back seat. Unfortunately, heatstroke is one of the leading causes of death among children. Be sure to follow these three important rules to prevent child heatstroke in your car: 1.
-
Page 5: Table Of Contents
Contents Section 1: Safety Warnings ......... p. 4-6 Section 2: Register Your New Child Restraint ....p. 7 Section 3: Getting to Know Your Child Restraint ..p. 8-13 Section 4: Adjusting the Harness System to Fit Your Child ..........p. 14 Section 5: Securing the Child in the Child Restraint .. - Page 6 Dear Parents, Welcome to the RECARO family of high quality child safety products and thank you for purchasing your new RECARO Child Restraint System. RECARO has over 100 years experience in the design and manufacture of premium automotive products. To assure all products RECARO manufactures are worthy of the name, we’ve subjected them to a comprehensive development...
- Page 7 ALWAYS buckle your seat belt and your children will be much more likely to do the same. Thank you again for choosing RECARO and enjoy your child restraint. If you have any questions or need assistance of any kind please...
-
Page 8: Section 1: Safety Warnings
Section 1: Safety Warnings WARNING! DEATH or SERIOUS INJURY can occur • Failure to follow warnings provided on the child restraint labels and stickers could cause serious injury or death. • Use only with children who weigh between 5 and 65 pounds (2.3 and 29.5 Kg) and whose height is 49 inches (125 cm) or less. - Page 9 • Do NOT lubricate buckles, fasteners or any part of the child restraint. • Do NOT add accessories, toys, padding or other items to the child restraint unless provided by RECARO. • NEVER allow a child to play with the child restraint; it is NOT a toy.
- Page 10 • NEVER use a used child seat unless you know its complete history. Extreme Weather When it is HOT, RECARO recommends the following tips to reduce possible injury or discomfort to your child: • Park your vehicle in the shade to help keep the restraint cooler.
- Page 11 For recall information, call the U.S. Government’s Vehicle Safety Hotline at 1-888-327-4236 (TTY: 1-800-424- 9153) or go to http://www.NHTSA.gov. ALL information provided to RECARO on the registration card or on the online registry will NOT be sold, distributed, or used for any purposes other than to...
-
Page 12: Section 3: Getting To Know Your Child Restraint
NEVER use the child restraint system for a child who is not within the height, weight, and age ranges recommended in this instruction manual. RECARO strongly encourages keeping children rear-facing up Rear-Facing to the maximum weight or height limits of your... - Page 13 ALL of the height, weight and other fit requirements. Please measure and weigh the child to verify the Performance RIDE / ProRIDE is the correct seat for them. NOTE: If the child does NOT meet ANY of the height, weight or other fit requirements for this child restraint, the child CANNOT use it.
- Page 14 Safety Stripe System Your child restraint is equipped with the easy-to-use RECARO Safety Stripe System . You will notice that your harness has a white stripe on the outside edges.
-
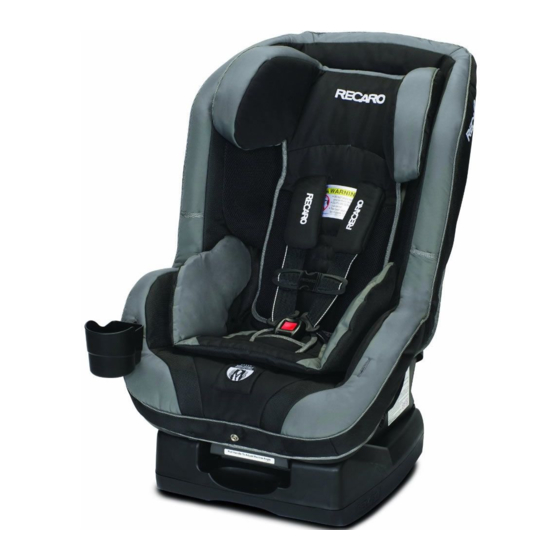
Page 15: Child Restraint Features
Child Restraint Features: It is important to become familiar with the features of your child restraint system. These diagrams help you identify key features. Integrated 5-Point Trim Cover & Headrest Harness Comfort Padding Chest Clip Latch Plates (2) Chest Clip Pockets (2) Buckle Seat Base... - Page 16 Child Restraint Features: It is important to become familiar with the features of your child restraint system. These diagrams help you identify key features. Harness System Adjustment Knobs (2) Top Tether Storage Pouch Forward-Facing Vehicle Belt Path and Belt Lock-off Harness Connector Bracket LATCH...
- Page 17 ProRIDE Standard Harness System with Shoulder Pads (2) Performance RIDE HERO Harness System Cup Holder NOTE: Only provided with Performance RIDE...
-
Page 18: To Fit Your Child
Section 5: Adjusting the Harness System to Fit Your Child Place your child in the child restraint prior to installing in the vehicle and determine if the shoulder strap height needs to be adjusted. Rear-Facing • When using in mode, the shoulder straps must be located AT or BELOW the child’s shoulders. -
Page 19: Section 5: Securing The Child In The Child Restraint
Section 4: Securing the Child in the Child Restraint 1. Loosen the harness system. Press the adjuster lever and pull the shoulder straps forward. 2. Open the chest clip by squeezing the tabs and separating. 3. Open the buckle by pressing the red button. - Page 20 8. The harness is tight enough when you cannot pinch a loop of webbing. 9. If you find the harness is not tight fitting, a newborn insert may be required. Please contact 1-888-9RECARO and RECARO will ship you a newborn insert and instructions.
-
Page 21: In Your Vehicle
Section 5: Choosing a Seating Location in Your Vehicle Forward-Facing vehicle seats must ALWAYS be used with this child restraint. If your vehicle does not have rear seats, consult your vehicle owner’s manual to help identify safety features in your vehicle or contact the vehicle manufacturer. - Page 22 RECARO and the U.S. Department of Transportation warn that children age 12 and under MUST ride in the rear seat away from front airbags.
-
Page 23: Safety Systems
Below is a diagram that helps you to identify key features. Not all vehicles will have all features described here. Airbags Top Tether Anchorage Lower LATCH Anchorage Seat Belts Some vehicles may have inflatable seat belts. As this is new technology, please refer to www.recaro.com for updates. - Page 24 WARNING! DEATH or SERIOUS INJURY can occur Because the design and operation of vehicle belts vary, make sure to observe the following guidelines: • Do NOT use motorized passive restraint shoulder belt systems. • Do NOT use passive restraints lap or shoulder belt mounted on a door.
- Page 25 Types of Seat Belt Systems Seat Belt Installation Description System Instructions LATCH LATCH straps are provided with the Page 22-25 seat. Page 33-37 Switchable One of the most common systems. Page 29-31 Retractor w/ To activate, pull the shoulder belt Page 40-41 Sliding Latch out fully.
-
Page 26: Rear-Facing In Your Vehicle
Section 8: Installing the Child Restraint Rear-Facing in Your Vehicle WARNING! DEATH or SERIOUS INJURY can occur LATCH Installation – Rear-Facing If your vehicle has lower anchors, the LATCH connector system can be used. Check your vehicle’s owner’s manual to determine if lower anchors are available and their applicable seating locations. - Page 27 3. Lengthen the LATCH strap by pressing the LATCH adjuster release button and pulling the webbing to full length. 4. Unroute one LATCH connector so both connectors sit on the side of the seat where the LATCH strap is attached to the shell.
- Page 28 6. Place the child restraint on the vehicle seat facing rearward. Attach each LATCH connector to the lower anchors in the vehicle. 7. While pressing down on the seating surface on the same side as the adjuster, pull the loop on the LATCH strap to tighten.
- Page 29 9. If the child restraint is too upright, disconnect both LATCH connectors and place a tightly rolled towel or foam pool noodle under the base below where the child’s feet will be located. NOTE: Do NOT place anything under the base, except as shown in Fig.
- Page 30 WARNING! DEATH or SERIOUS INJURY can occur Lap Belt Only Installation – Rear-Facing Do NOT use this method of installation with an emergency locking retractor. • Use ONLY in reclined position when installed Rear-Facing. 1. Adjust into the recline position by pulling the recline adjust handle and rotating the seat back.
- Page 31 4. Route the seat belt through the Rear-Facing belt path. Make certain the vehicle belt is routed behind the crotch belt. 5. Make sure the seat belt is not twisted, then buckle the seat belt. Replace the trim over the front edge of the seat bottom.
- Page 32 8. If the child restraint is too upright, loosen the seat belt and place a tightly rolled towel or foam pool noodle under the base below where the child’s feet will be located. NOTE: Do NOT place anything under the base, except as shown in Fig 8.
- Page 33 WARNING! DEATH or SERIOUS INJURY can occur Locking Lap/Shoulder Belt Installation – Rear-Facing • Use ONLY in reclined position when installed Rear-Facing. 1. Adjust into the recline position by pulling the recline adjust handle and rotating the seat back. Rotate until the recline adjust handle locks into position.
- Page 34 4. Make sure the seat belt is not twisted, then buckle the seat belt. Replace the trim cover over the front edge of the seat bottom. If necessary, switch the retractor or the latch plate to the locked mode according to your vehicle’s owners’s manual.
- Page 35 7. If the child restraint is too upright, loosen the seat belt and place a tightly rolled towel or foam pool noodle under the base below where the child’s feet will be located. NOTE: Do NOT place anything under the base, except as shown in Fig 7.
- Page 36 Rear-Facing If you have this seat belt configuration you will require a locking clip. Please contact 1-888-9RECARO and RECARO will ship you a locking clip and installation instructions. Some older vehicles (typically pre-1996 model year) have lap/shoulder belt systems which remain loose and cannot be locked for use with a child restraint unless a separate locking clip is used.
-
Page 37: Forward-Facing In Your Vehicle
Lower anchors and top tether anchors are designed to a maximum limit that can vary by vehicle. Due to this variation, the Performance RIDE/ProRIDE requires use of the vehicle seat belt for any child weighing more than 45 lbs (20.4 kg). - Page 38 1. Adjust into the upright position by pulling the recline adjust handle and rotating the seat back upright. Check to be sure it locks into position. 2. Locate the LATCH connectors at the rear of the base, press the red buttons and remove the connectors from the storage slots.
- Page 39 4b. Make sure the arrows on the LATCH connectors face up and the strap is not twisted. 5. Before attaching the LATCH connectors, locate the top tether anchor behind the seating position. Refer to your vehicle’s owner’s manual if it is difficult to find.
- Page 40 7. While pressing down on the seating surface, pull the loop on the LATCH strap to tighten. Repeat as needed until the child restraint cannot be moved more than 1 inch (2.5 cm) in any direction at the belt path. 8.
- Page 41 10. To remove the LATCH connectors from the vehicle, first loosen the adjuster by pressing the adjuster button and lengthening the strap (see figure 3). Press the red buttons on the LATCH connectors and remove from the vehicle lower anchors. 11.
- Page 42 Do NOT use this method of installation with an Emergency Locking Retractor. RECARO recommends always using the top tether when an anchor is available, regardless of the type of installation. If you do not have a top tether anchor in your vehicle, we recommend using a 3-point lap/shoulder belt for installation.
- Page 43 4. While pressing down on the seating surface, pull the end of the strap to tighten or feed back into the automatic retractor. Repeat as needed until the child restraint cannot be moved more than 1 inch (2.5 cm) in any direction at the belt path.
- Page 44 DEATH or SERIOUS INJURY can occur Locking Lap-Shoulder Belt Installation – Forward-Facing RECARO recommends always using the top tether when an anchor is avialable, regardless of the type of installation. • Use ONLY the fully upright position when installed Forward-Facing.
- Page 45 4. If necessary, switch the retractor or the latch plate to locked mode according to your vehicle’s manual. Open the belt lock-off and route the shoulder section of the seat belt up into the slot. 5. While pressing on the seating surface of the child restraint, remove slack from shoulder belt.
- Page 46 WARNING! DEATH or SERIOUS INJURY can occur Non-Locking ELR Lap-Shoulder Belt Installation – Forward-Facing Some older vehicles (typically pre-1996 model year) have lap/shoulder belt systems which remain loose and cannot be locked for use with a child restraint unless a separate locking system is used. These systems use emergency locking retractors (ELR) which lock only during a sudden stop or crash.
- Page 47 4. Open the belt lock-off and route the shoulder section of the seat belt up into the slot. 5. While pressing on the seating surface of the child restraint, remove slack from the seat belt. 6. Close the belt lock-off over the shoulder belt by pressing the arm down onto the webbing and close the handle...
-
Page 48: Section 11: Use In Aircraft
Section 10: Certification This child restraint conforms to all applicable Federal Motor Vehicle Safety Standards. Section 11: Use in Aircraft The Performance RIDE / ProRIDE is certified for use in aircraft both Rear-Facing Forward-Facing. The aircraft seat belt (which is not a LATCH system) must be used since lower anchors are not available on airplanes. -
Page 49: Section 12: Care And Maintenance
(an ordinary tea kettle will do). Brush the area with a soft brush. • Though RECARO tests many cleaning solutions, we cannot test them all—we suggest you ALWAYS test in a discrete area first to ensure that... -
Page 50: Section 13: Trim Cover Removal/Installation
Section 13: Trim Cover Removal / Installation Trim Cover Removal 1. Press the adjuster lever and pull the shoulder straps forward to loosen the harness system. 2. Open the chest clip by squeezing the tabs and separating. 3. Release the harness straps from the buckle by pressing the red button. - Page 51 Harness System – Pull the straps out of the child restraint from the front pulling above the harness pads. 5b. Performance RIDE with HERO Harness System – Pull the straps out of the child restraint from the front pulling below the HERO.
- Page 52 WARNING! DEATH or SERIOUS INJURY can occur • Do NOT remove the latch plates, chest clip or harness strap pad components from the shoulder straps! 6. Adjust the headrest to it’s highest position making sure to stop when resistance is felt. DO NOT TRY TO FORCE ADJUSTMENT PAST THIS POINT! 7.
- Page 53 8. Loosen the main seat cover by locating and unfastening all clips attached to the outer edge of the trim cover from the seat shell. 9. Carefully slide the buckle, harness adjuster strap and harness straps down through their respective slots in the trim cover.
- Page 54 Trim Cover Installation 1. Slide the trim cover onto the seat by placing the large opening in the cover over the headrest and sliding it down between the headrest and seat shell. 2. Slide the bottom of the opening under and behind the lower edge of the headrest.
- Page 55 6a. ProRIDE with Standard Harness System – Slide head restraint foam and cover onto the plastic frame of the seat. 6b. Performance RIDE with HERO Harness System - Slide head restraint foam and cover onto the plastic frame of the seat.
- Page 56 Harness System - Route the harness straps through the head restraint and seat shell. Make sure the harness straps are not twisted. 9b. Performance RIDE with HERO Harness System - Route the harness straps through the HERO, head restraint, and seat shell.
- Page 57 10. Connect the straps to the harness connector bracket, located in the back of the seat, by sliding the loop edges into the slots of the harness connector bracket. NOTE: Make sure the seat LATCH strap is not routed between the harness and the seat!the harness and the seat! 11.
-
Page 58: Section 14: Trouble Shooting
Section 14: Trouble Shooting In certain vehicle applications, you may encounter challenges to safely install and position a child in the restraint system. If you do not find an adequate solution, call us at 1-888-9RECARO for assistance. Problem: The headrest will not raise. Solution: WARNING! DO NOT FORCE the headrest knob! Severe damage to the child restraint could result! The harness must be loosened before the... - Page 59 Problem: The child restraint is not stable when driving. Solution: Check to see if there are items under the base and that the seat belts are tightly secured. Remove anything found. Some vehicle seats are deeply contoured making it difficult to safely install a child restraint.
-
Page 60: Section 15: Replacement Parts & Accessories
Section 15: Replacement Parts and Accessories RECARO offers a variety of replacement parts and accesories. Replacement Parts: Please email info-usa@recaro-cs.com or call 1-888-9RECARO and speak to one of our customer service representatives for more information about replacement parts for your RECARO product. -
Page 61: Section 16: Warranty
Improper installation, or misuse; b) Modification or alteration of the Product; c) Failure to comply with RECARO’s instructions for service and maintenance; d) Accident, unauthorized repairs or unauthorized use; e) Any attachment or replacement part that was manufactured, supplied or added by others and was not part of the Product;... -
Page 62: Section 17: Additional Contact Information
Section 17: Additional Contact Information If you need help with installation or usage, please use the following contact information: RECARO Child Safety, LLC 1600 Harmon Road Auburn Hills, MI 48326 Phone: 1-888-9RECARO (1-888-973-2276) E-mail: info-usa@recaro-cs.com Website: www.recaro.com For personal assistance in your local area, please contact a Child Passenger Safety (CPS) technician. -
Page 63: Section 18: Glossary
Section 18: Glossary 2-Point Seat Belt (Lap Belt Only): A seat belt system with two contact points, (two hip points), also referred to as a lap belt. 3-Point Seat Belt (Lap/Shoulder Belt): A seat belt with both a lap and a shoulder portion, having three contact points (one shoulder, two hips). - Page 64 5-point harness. The white stripe should always remain at the outside edge of the harness above the lower buckle. Side Impact Protection (SIP): Safety feature of all RECARO child restraints that have structure design strategically placed in areas on the child restraint where it is especially important to protect the child in a crash.
- Page 68 Tel: 1-888-9RECARO Internet: www.recaro.com, E-mail: info-usa@recaro-cs.com In the interest of product development, RECARO reserves all rights to make changes to the construction and design of its products without prior notification. RECARO does not assume the liability in case of misprint. Pictures may include extras.
Need help?
Do you have a question about the Performance RIDE and is the answer not in the manual?
Questions and answers