Table of Contents
Advertisement
Advertisement
Table of Contents

Related Manuals for Master Forge MFJ576DNC


Summary of Contents for Master Forge MFJ576DNC
-
Page 2: Table Of Contents
TABLE OF CONTENTS Package Contents ....................... 3 Hardware Contents......................4 Preparation .......................... 4 Safety Information ....................... 5 Assembly Instructions......................6 Operating Instructions ....................... 14 Care and Maintenance ...................... 16 Warranty ..........................16 Replacement Parts List ..................... 17 Lowes.com/masterforge... -
Page 3: Package Contents
PACKAGE CONTENTS PART DESCRIPTION QUANTITY PART DESCRIPTION QUANTITY Side Shelf Right Leg Assembly Lid and Firebox Assembly Caster Lid Handle Assembly Storage Basket Smoke Stack Assembly Axle Charcoal Access Door Wheel Crank Handle Left Leg Assembly Damper Handle – Right Charcoal Tray Damper Grate... -
Page 4: Hardware Contents
HARDWARE CONTENTS (shown actual size) M5 Shoulder M6x20 Bolt Bolt M8 Washer M8 Nut M6x12 Bolt Qty. 14 Qty. 8 Qty. 2 Qty. 2 Qty. 27 M6 Lock Nut Qty. 3 Cotter Pin Qty. 7 M6x30 Bolt Qty. 2 Wheel Axle Sleeve Hinge Bolt M5 Lock Nut... -
Page 5: Safety Information
SAFETY INFORMATION unit while it is in use. DO NOT or carports. A minimum clearance of 36 in. is recommended. DO NOT operate the unit under overhead construction. DO NOT use this appliance as a heater. ground. DO NOT DO NOT use this product in a manner other than its intended purpose. It is NOT intended for commercial use. -
Page 6: Assembly Instructions
ASSEMBLY INSTRUCTIONS 1. Insert axle (P) into left leg assembly (R). Attach one wheel (Q) to each side of axle (P) using one wheel axle sleeve (GG), one M8 washer (DD), and one M8 nut (EE). Hardware Used Wheel axle sleeve M8 Washer M8 Nut... - Page 7 ASSEMBLY INSTRUCTIONS 4. Attach two cart braces (L) to right leg assembly (M) using two M6x12 bolts (AA) on each side. Hardware Used M6x12 Bolt 5. Attach storage basket (O) to cart braces (L). NOTE: Make sure four hooks on storage basket (O) are fully inserted into holes on cart braces (L).
- Page 8 ASSEMBLY INSTRUCTIONS left leg assembly (R) and right leg assembly (M) using six M6x12 bolts (BB). Hardware Used M6x20 Bolt assembly (B) using four M5 shoulder bolts (CC) and four M5 lock nuts (JJ). Repeat for remaining damper (H). NOTE: For clarity, illustration is shown with front Hardware Used M5 Shoulder Bolt M5 Lock Nut...
- Page 9 ASSEMBLY INSTRUCTIONS 10. Attach ash tray handle (K) to ash tray (J) using two M6x12 bolts (AA). Hardware Used M6x12 Bolt 11. Insert damper handle – right (G) into the two holes on right side damper (H). Secure with two cotter pins (FF).
- Page 10 ASSEMBLY INSTRUCTIONS assembly (B) using four M6x20 bolts (BB). Repeat on left side with remaining side shelf (A). NOTE: First secure two upper M6x20 bolts (BB), then lower M6x20 bolts (BB). Hardware Used M6x20 Bolt assembly (B). 15. Attach smoke stack assembly (D) to lid and (AA) and three M6 lock nuts (II).
- Page 11 ASSEMBLY INSTRUCTIONS assembly (B) using two M6x12 bolts (AA). Hardware Used M6x12 Bolt assembly (B). Secure with one cotter pin (FF). Hardware Used Cotter Pin 18. Attach charcoal tray (S) to inside of lid and (AA). Hardware Used M6x12 Bolt Lowes.com/masterforge...
- Page 12 ASSEMBLY INSTRUCTIONS 19. Place one grate (T) onto the far left side of grate Slide to center of grill. 20. Place a second grate (T) on the lower grate left side). Place the third grate (T) on the upper as shown. 21.
- Page 13 ASSEMBLY INSTRUCTIONS 22. Insert one end of warming rack (U) onto M6x30 assembly (B). Repeat for other side. 23. Fully tighten M6x30 bolts (LL) on each side of lid Lowes.com/masterforge...
-
Page 14: Operating Instructions
OPERATING INSTRUCTIONS DANGER CARBON MONOXIDE HAZARD. Burning charcoal inside can kill you. It gives off carbon monoxide, which has no odor. NEVER burn charcoal inside homes, vehicles or tents. or lowered to desired height. This allows for different heat settings depending on the food you are cooking and the temperature at which you want to cook. - Page 15 OPERATING INSTRUCTIONS Rust can appear on the inside of your grill. Maintaining a light coating of vegetable oil on interior surfaces will aid in the protection of your grill. Exterior surfaces of the grill may need occasional touch up. We recommend the use of commercially available black high temperature spray paint. NEVER PAINT THE INTERIOR OF THE UNIT! Operating The Front Door, Dampers, And Smoke Stack WARNING: These metal parts could be very hot while grilling.
-
Page 16: Care And Maintenance
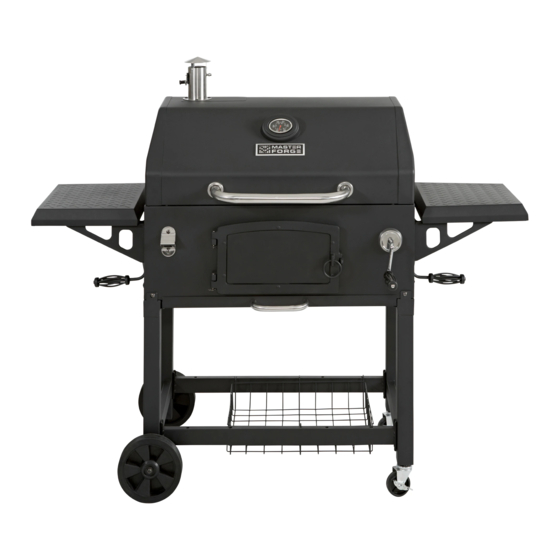
Morton Grove, IL, USA 60053-3207 Item Name: Heavy-Duty Charcoal Grill Model #: MFJ576DNC Item #: 0404331 Product Dimensions Assembled: 60.79 in. L x 27.36 in. W x 51.57 in. H (154.4 cm L x 69.5 cm W x 131 cm H) Product Weight: 90.4 lbs (41 kgs) -
Page 17: Replacement Parts List
– left or right OUT handle, temperature gauge, temperature Side shelf support-left 403-01004-01 front or right rear (same) bezel, smoke stack, Master Forge badge. Side shelf support-left 403-01004-02 rear or right front (same) Master Forge badge 404-02002-02 Bottle opener 403-01003-05 Temperature gauge –... - Page 18 For replacement parts, call our customer service department at 1-800-963-0211, 8:00 a.m. – 6:00 p.m. EST, Monday – Thursday, 8:00 a.m. – 5:00 p.m. EST, Friday. Printed in China Master Forge & M Design® are registered trademarks of LF, LLC. All rights reserved. Lowes.com/masterforge...
Need help?
Do you have a question about the MFJ576DNC and is the answer not in the manual?
Questions and answers