
Related Manuals for Computherm Q8RF


Summary of Contents for Computherm Q8RF
- Page 1 COMPUTHERM Q8RF Multi-zone programmable wireless (radio-frequency) digital room thermostat design! Operating Instructions...
- Page 2 GENERAL DESCRIPTION OF THE THERMOSTAT The COMPUTHERM Q8RF type switched-mode room thermostat is suitable to regulate the overwhelming majority of boilers and air conditioners. It can easily be connected to any gas boiler or air conditioning device that has a double wire connector for a room thermostat, regardless of whether it has a 24V or 230V control circuit.
- Page 3 The portability of the thermostat offers the following advantages: • no need to lay a cable, which is especially advantageous when old buildings are being modernized, • the optimal location of the device can be selected during operation, • it is also advantageous when you intend to locate the thermostat in different rooms in the course of the day (e.g.
-
Page 4: Basic Settings
1. LOCATION OF THE DEVICE The thermostats of the COMPUTHERM Q8RF type device can be freely moved in your residence. It is reasonable to locate them in rooms used regularly or for many hours per day so that they are in the direction of natural ventilation in the room but protected from drought or extreme heat (e.g. -
Page 5: Setting The Current Day And Time
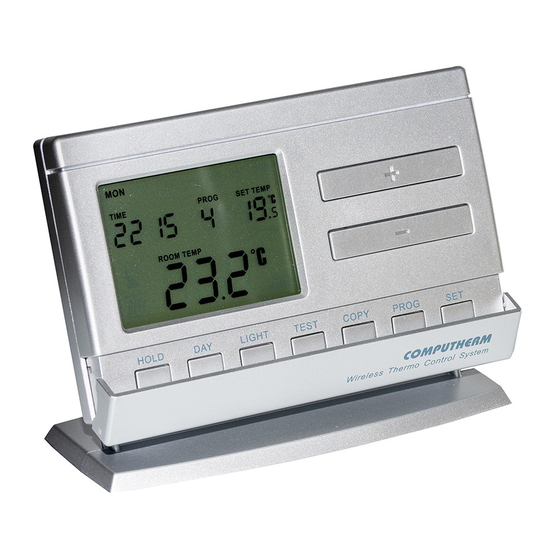
2.2 Setting the current day and time Press the “SET” button to go to the main screen, then press the “DAY” button. At this time only the first three letters of the current day will flash on the display of the thermostat and the hour and minute values can be seen. Using the large buttons on the front panel of the device, set the the current day (Monday... - Page 6 If higher comfort is needed, the switching sensitivity should be set so that it provides a steadier room temperature. On the other hand, please also take into account that the boiler should not switch on and off multiple times in an hour's time except at low outside temperatures (e.g.
-
Page 7: Programming The Thermostat
3. PROGRAMMING THE THERMOSTAT 3.1 A brief introduction to programming • Programming means the setting of switching times and selection of accompanying temperature levels. The device can be programmed for a one-week period. Its operation is automatic, and it will cyclically repeat the programs that have been keyed in. - Page 8 can be saved by pressing the “SET” button. A more detailed description of the programming steps can be found in Section 3.3. • If there are days, for which the same program is needed, than it is sufficient to create that program only once, since it can be easily copied to another day using the “COPY”...
- Page 9 Temperature program number 3.3 Programming steps a. Press the “SET” button to go to the main screen. b. Press the “SET” button again and hold it down and press the “PROG” button, too. At this point the device gets into programming mode and the abbreviations indicating the days of the week ( MON TUE WED THU FRI ) are flashing on the display.
- Page 10 If you do not want to activate any more switches for the selected day(s), then press the “PROG” button without changing the start time of the next switch from the default . This way the programming of the selected day(s) is finished, the thermostat offers another day to be programmed and the programming can be continued from step “c”.
- Page 11 3.5 Modifying the program • The previously set program can be modified any time by repeating the steps of programming. • The number of activated switches can be increased at will as described in Section 3.3. • A previously activated switch can be deactivated by setting its start time using the large buttons (or by pressing the “DAY”...
- Page 12 factory value of the button. For example, if the current switch ensures PROG a temperature of °C, it can be modified to a standard temperature that ensures °C when needed by pressing the button only once, without having to press the button several times in increments of 0.5°C.
-
Page 13: Locking The Control Buttons
display alternately show the exact time and the time remaining (TIME) (TIME LEFT) in manual control (for example that is, 3 hours and 20 minutes). After this time has elapsed, the icon disappears and the device resumes the program that has been set. If you wish to return to the set program before the time set for temperature modification has expired, please press the “SET”... -
Page 14: Changing The Battery
To activate the lock, first press the “SET” button to go to the main screen, then press the buttons together and hold them down for at least 5 seconds. After the control buttons have successfully been locked, the notice “ ”... - Page 15 the power supply for the device, but this voltage does not appear on the connection points of the relay that controls the boiler (NO and COM). We propose to connect the neutral wire of the network to point N, while the phase conductor to point L.
- Page 16 Cut or break out the outlets to the required connection points at the bottom of the receiver unit, in order to be able to connect wires to them. 9.2 Putting the receiver unit into operation Turn on the power supply to the receiver unit. A few seconds after the LED lights flash once, the receiver unit becomes ready for operation.
- Page 17 9.3 Activating the delayed start of the boiler function When designing the heating zones, in order the protect the pump of the boiler, it is reasonable to leave at least one heating circuit without a zone valve (e.g. the bathroom circuit).
-
Page 19: Technical Data
TECHNICAL DATA Technical data of the thermostats (transmitters): — temperature measurement range: 5 to 35°C (in 0.1°C increments) — adjustable temperature range: 5 to 35°C (in 0.5°C increments) — temperature measurement accuracy: ±0.5°C — temperature calibration range: ±3°C (in 0.1°C increments) —... - Page 20 • until the next interference: set the temperature using the buttons, then press the “HOLD” button briefly. The COMPUTHERM Q8RF type thermostat complies with the requirements of standards EU EMC 2004/108/EC; LVD 2006/95/EC; and R&TTE 1999/5/EC Importer: Thermostats4U Email: sales@thermostats4u.co.uk...
Need help?
Do you have a question about the Q8RF and is the answer not in the manual?
Questions and answers