CAS CL5000 Series User Manual
Hide thumbs
Also See for CL5000 Series:
- User manual (203 pages) ,
- Installation (4 pages) ,
- Operations quick reference manual (3 pages)

Related Manuals for CAS CL5000 Series


Summary of Contents for CAS CL5000 Series
- Page 1 CL5000 Series User’s Manual Rev 2006.03.13...
-
Page 2: Table Of Contents
Table of Contents 1. GENERAL ..............................8 1.1 PRECAUTIONS ............................ 8 1.2 INTRODUCTIONS ..........................10 1.3 SPECIFICATIONS ..........................11 1.4 NAME AND FUNCTIONS........................13 1.5 Basic set-up ............................15 1.6 SYMBOLS............................16 1.7 KEY FUNCTIONS ..........................16 1.8 Installation of the Label Roll ......................20 2. - Page 3 2.2.15 List Sales Message (Menu code 1242) ................. 52 2.2.16 Delete Sales Message (Menu code 1243)................53 2.2.17 Origin (Menu code 1250)....................... 53 2.2.18 New/Edit Origin (Menu code 1251) ..................53 2.2.19 List Origin (Menu code 1252) ....................54 2.2.20 Delete Origin (Menu code 1253)................... 54 2.2.21 Barcode (Menu code 1260) ....................
- Page 4 2.5.3 Weight/Count/PCS Discount (Menu code 1532/1533/1534) ..........73 2.6 Speed Key Setting ..........................74 2.6.1 Speed Key (Menu code 1160) ....................74 2.7 Traceability............................75 2.7.1 Traceability (Menu code 1330)....................75 2.7.2 New/Edit Traceability (Menu code 1331)................75 2.7.3 List Traceability (Menu code 1332) ..................76 2.7.4 Delete Traceability (Menu code 1333) ...................
- Page 5 2.11.16 Delete Currency (Menu code 1443)..................88 2.12 Programming Global Setting ......................89 2.12.1 Global Label Format (Menu code 1510) ................89 2.12.2 Barcode Format (Menu code 1520) ..................90 2.13 Printing Programming ........................93 2.13.1 Printing (Menu code 1700)....................93 2.13.2 Print label item (Menu code 1710) ..................
- Page 6 2.14.18 Printer Sensor Test (Menu code 1865) ................114 2.14.19 Memory Information (Menu code 1866) ................114 2.14.20 Firmware Version (Menu code 1867) ................114 2.14.21 Scale Parameter (Menu code 1870).................. 115 2.14.22 Function Key Define (Menu code 1880) ................116 2.15 Report ............................
- Page 7 3.7.2 % Unit Price Discount - By Weight PLU ................146 3.7.3 Unit Price Discount - By PCS PLU..................147 3.8 Add-Up Transaction ........................149 3.9 Clerk Operation..........................151 3.9.1 Standard Clerk Operation...................... 152 3.9.2 Floating Clerk Operations ..................... 153 3.10 Void..............................
-
Page 8: General
1. GENERAL 1.1 PRECAUTIONS... - Page 9 This equipment is indoor use and all the communication ※ wirings are limited to inside of the building.
-
Page 10: Introductions
We have designed this equipment with many advanced features, high quality construction, and user-friendly menu driven programming. We are confident that you will find the CAS CL5000 scale will meet all of your most demanding needs. Remember, for proper installation and maintenance please have your... -
Page 11: Specifications
1.3 SPECIFICATIONS 0~15 lb x 0.005 lb / 15~30 lb x 0.01 lb 0~30 lb x 0.01 lb / 30~60 lb x 0.02 lb Capacity 0~6 kg x 0.002 kg / 6~15 kg x 0.005 kg 0~15 kg x 0.005 kg / 15~30 kg x 0.01 kg Max. - Page 12 Number Range 3000 1-99999 Ingredient 510 character 1~999 User Defined Barcode Format 1~99 Department 1~99 Tax Type Group 1~99 Clerk 1~31 Discount 1~99 Origin 1~499 Traceability 1~99 Slaughter House 1~99 Cutting Hall 1~99 Programmable Data Traceability Country 1~99 Fixed Label Format Free Format Bitmap Image Customer...
-
Page 13: Name And Functions
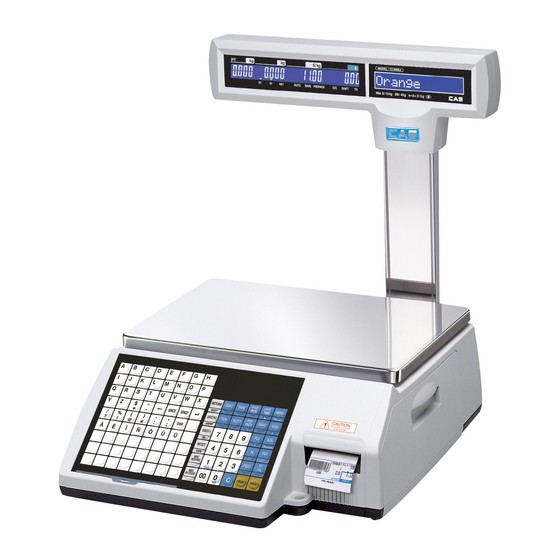
1.4 NAME AND FUNCTIONS ■ Standard Type ■ Pole Type P ■ Pole Type R ■ Hanging Type H... - Page 14 DISPLAY KEYBOARD B-Type (Standard) P Type, R-Type (pole type)
-
Page 15: Basic Set-Up
H-Type (hanging type) 1.5 Basic set-up How to install tray B,P,R type H-type tray NOTE: Push down ball connection H-type mouting method (3 suggested) -
Page 16: Symbols
1.6 SYMBOLS SYMBOLS DESCRIPTION ST ( ) Stable indicator Zero weight indicator ▶0◀ NET ( ) Net weight indicator AUTO Auto Print Mode indicator SAVE Auto clearing status indicator PREPACK Prepack Mode indicator DC ( ) Discount status indicator SHIFT ( ) Speed key shift status indicator Data transmission status indicator lb indicator... - Page 17 DATE Date & Time key. Toggles the display between time, /TIME date, scale number and department number. ▲ MENU key. This key toggles from program menu to sale mode. MENU Page up key: Used to go to previous page in program PG UP mode.
- Page 18 Return key. Used to credit sales for erroneous RETURN SHIFT transactions or returns. Shift Key. Used to SHIFT function in program Mode Discount % key. Used to discount price. DISC% INSERT Insert key: Insert mode for text typing in program mode.
- Page 19 ORIGIN Edit Origin ITEM Edit PLU Item DISC Edit Discount SKEY To assign speed key. Clerk Key Indirect Clerk Call Alpha keys. Used to type text data. Used to type $ Currenc For future Backspace key. Used to backspace and delete text ←...
-
Page 20: Installation Of The Label Roll
1.8 Installation of the Label Roll ■ Label Specifications Outer diameter of roll : 100mm Inner diameter of roll : 40mm Width of receipt roll : 40, 50, 60mm Width of label roll : 60mm(MAX) ■ Print Area Width of label : 60mm(MAX) Length of label : 120mm(MAX) - Page 21 To install the label roll at ANY time you must follow the directions in this section: 1) Press the ON/OFF key and make sure that the display is completely off. Open the printer’s side-access panel. (See fig.1) 2) Lift up TPH lever as fig 2. 3) Remove cartridge as fig.
- Page 22 5) Place the label in the scale as fig. 5 6) Press the FEED key. *If label position is not correct, you have to check follows : a, Label size.(Label setting menu) b. Feed Adjustment .(Feed adjustment menu) c. Sensor calibration(Sensor Calibration menu)
-
Page 23: Programming
2. PROGRAMMING Program Mode Menu Tree (Menu code : 1000) CODE Menu CODE Sub Menu CODE Sub Menu 1100 1110 Change Price 1120 New/Edit 1130 Discount 1131 New/Edit 1132 List 1133 Delete 1137 Delete by PLU(DC) 1138 Delete by Dept(DC) 1139 Delete All(DC) 1140... - Page 24 1600 Report 1610 X1 Report 1611 Scale 1612 1613 Misc. PLU 1614 Group 1615 Department 1616 Hourly 1617 Clerk 1620 Z1 Report 1630 X2 Report 1631 Scale 1632 1633 Misc. PLU 1634 Group 1635 Department 1636 Hourly 1637 Clerk 1640 Z2 Report 1650 Clear All...
- Page 25 1900 Communication 1910 Network Setting 1911 Service Type 1912 DHCP 1913 1914 Remote IP 1915 RS232C 1916 WLAN Setting 1917 WLAN Config 1920 Application 1930 Scale Lock/Unlock 1940 Check Scale 1950 Backup to Scale How to access PROGRAM MODE You can see the Program Menu screen by pressing the MENU key. The 2 numbers at top left (1/3) indicate the number of pages or screens.
-
Page 26: Plu Programming
1/2lb,3:unit price for 1/4lb,4:unit price for 1kg,5:unit price for 100g) ※ Fixed Weight The weight is fixed regardless of item Prefix Enter serial code for PLU (Greece version of CL5000 series) Item code Item code Use Fixed Price Type You can set wheter use Fixed Price or not ☆... -
Page 27: Create By-Weight Plu (Menu Code 1120)
Barcode No. This value can be from 0 to 99, If Global Setting is YES, it is not shown. Produced Date (0~999) This is subtracted to the current date in order to be calculated. Packed Date (0~999) This is added to the current date in order to be calculated. - Page 28 1. Enter Department No. and PLU No. NEW/ EDIT * Department should be set previously Department No. : [ 1] Default EX) Department No. = [ 1 ] Default PLU No. 1] No Data or Param PLU No. : [ 1 ] PRINT PRINT 2.
- Page 29 7. Select Label Format * If you enter “0”, standard label format (menu code PLU No. : 1 (6/△△) 1510) is used. Label No. : [ 1] * For details about label format, refer to 8. Setting Global IS6030-00001(60X30) option [SAVE]=Save [ESC]=Escape EX) 1.
- Page 30 PLU No. : 1 (13/△△) 13. Price Price : [ 10.00] EX) Price = $10.00 [SAVE]=Save [ESC]=Escape PRINT PLU No. : 1 (14/△△) 14. Special Price Special Price : [ 20.00] EX) Price = $10.00 [SAVE]=Save [ESC]=Escape PRINT 15. Tax No. * It may be changed by setting Menu code 1541.
- Page 31 PLU No. : 1 (20/△△) 20. Produced Date Produced Date : [ 1] [SAVE]=Save [ESC]=Escape PRINT PLU No. : 1 (21/△△) 21. Packed Date Packed Date : [ 1] [SAVE]=Save [ESC]=Escape PRINT PLU No. : 1 (22/△△) 22. Packed Time Packed Time : [ 1] [SAVE]=Save [ESC]=Escape PRINT...
- Page 32 PLU No. : 1 (27/△△) 27. Traceability No. Traceability No. : [ 1] * If you do not want to use, enter “0” [SAVE]=Save [ESC]=Escape PRINT PLU No. : 1 (28/△△) 28. Bonus Bonus : [ 5] * If you do not want to use, enter “5” [SAVE]=Save [ESC]=Escape PRINT PLU No.
- Page 33 35. # of Link PLU * If you do not want to use, enter “0” PLU No. : 1 (35/△△) # of Link PLU : [ 2] EX) Do use coupled PLU 2 [SAVE]=Save [ESC]=Escape PRINT 36. Link PLU1 Dept * If you do not want to use, enter “0”...
-
Page 34: Create By-Count Plu (Menu Code 1120)
2.1.2 Create By-Count PLU (Menu code 1120) (MENU -> 1. PLU -> 2.New/Edit) * You can press the SAVE key at anytime to save the current PLU data and if you want to exit without saving, press the ESC key. 1. - Page 35 PLU No. : 2 (5/△△) 6. Group Group : [ 2] * If there is no group data, enter 0 2. Fruit EX) 2. Fruit [SAVE]=Save [ESC]=Escape PRINT 7. Select Label Format * If you enter “0”, standard label format (menu code PLU No.
- Page 36 PLU No. : 2 (12/△△) 12. Use Fixed Price Type Use Fixed Price Type : [ 1] EX) Fixed price type 1 [SAVE]=Save [ESC]=Escape PRINT PLU No. : 2 (13/△△) 13. Price Price : [ 10.00] EX) Price = $10.00 [SAVE]=Save [ESC]=Escape PRINT PLU No.
- Page 37 PLU No. : 2 (19/△△) 19. Packed Time Packed Time : [ 1] [SAVE]=Save [ESC]=Escape PRINT PLU No. : 2 (20/△△) 20. Sell By Date Sell By Date : [ * This value can be from 0 to 9999 EX) 2 days [SAVE]=Save [ESC]=Escape PRINT PLU No.
- Page 38 PLU No. : 2 (27/△△) 27. Sales Msg No. Sales Msg No. : [ 0] If you do not want to use, enter “0” 1, Thank You EX) Sales Message 1 [SAVE]=Save [ESC]=Escape PRINT PLU No. : 2 (28/△△) 28. Reference PLU Department Reference PLU Dept : [ 0] * If you do not want to use reference department ID, enter “0”...
-
Page 39: Create By-Pcs Plu (Menu Code 1120)
2.1.3 Create By-PCS PLU (Menu code 1120) (MENU -> 1. PLU -> 2.New/Edit) By-PCS PLU is used depending on the Para 593. * You can press the SAVE key at anytime to save the current PLU data and if you want to exit without saving, press the ESC key. - Page 40 7. Select Label Format * If you enter “0”, standard label format (menu code PLU No. : 3 (6/△△) 1510) is used. Label No. : [ 1] * For details about label format, refer to 8. Setting Global IS6030-00001(60X30) option [SAVE]=Save [ESC]=Escape EX) 1.
- Page 41 PLU No. : 3 (13/△△) 13. Use Fixed Price Type Use Fixed Price Type : [ 1] EX) Fixed price type 1 [SAVE]=Save [ESC]=Escape PRINT PLU No. : 3 (14/△△) 14. Price Price : [ 10.00] EX) Price = $10.00 [SAVE]=Save [ESC]=Escape PRINT PLU No.
- Page 42 PLU No. : 3 (20/△△) 20. Packed Time Packed Time : [ 1] [SAVE]=Save [ESC]=Escape PRINT PLU No. : 3 (21/△△) 21. Sell By Date Sell By Date : [ * This value can be from 0 to 9999 EX) 2 days [SAVE]=Save [ESC]=Escape PRINT PLU No.
-
Page 43: Editing Plu (Menu Code 1120)
PLU No. : 3 (28/△△) 27. Sales Msg No. Sales Msg No. : [ 0] If you do not want to use, enter “0” 1, Thank You EX) Sales Message 1 [SAVE]=Save [ESC]=Escape PRINT PLU No. : 3 (27/△△) 28. Reference PLU Department Reference PLU Dept : [ 0] * If you do not want to use reference department ID, enter “0”... -
Page 44: Sample Printing (Menu Code 1170)
2.1.5 Sample Printing (Menu code 1170) (MENU -> 1. PLU -> 7.Sample Printing) If you press SAVE key during PLU creating or editing, label is printed. 2.1.6 Listing PLU (Menu code 1150) (MENU -> 1. PLU -> 5.List) List (1/2) 1. -
Page 45: Deleting Plu (Menu Code 1142)
2.1.8 Deleting PLU (Menu code 1142) (MENU -> 1. PLU -> 4.Management -> 2.Delete) There are three ways to delete PLU. Simply enter the number that you wish to delete. Press 1 key to select Delete by PLU No. DELETE (1/1) 1. -
Page 46: Selecting Plu Items (Menu Code 1144)
2.1.10 Selecting PLU Items (Menu code 1144) (MENU -> 1. PLU -> 4.Management -> 4.Select PLU Items) If you enter Y, you cannot use that item when you create PLU. To enter Y, press Y key or 1 key. SELECT PLU ITEMS (1/10) To enter N, press N key or 0 key. -
Page 47: Programming Plu Data Table I
2.2. Programming PLU Data Table I 2.2.1 Department (Menu code 1210) (MENU -> 2. PLU Data Table I -> 1.Department) If a scale is assigned to department 1 then all of the PLUs that you select on that scale will be from department 1. You can assign the department by pressing MENU, 8 and 3 keys. -
Page 48: List Department (Menu Code 1212)
2.2.3 List Department (Menu code 1212) (MENU -> 2. PLU Data Table I -> 1.Department -> 2. List ) LIST DEPARTMENT (1/1) 1. Set the department range that you wish to - Start Number see. - End Number EX) Department 1 to 10 List All-press [SAVE] key No. -
Page 49: New/Edit Group (Menu Code 1221)
2.2.6 New/Edit Group (Menu code 1221) (MENU -> 2. PLU Data Table I -> 1.Group -> 1. New/Edit ) ※ You can press the SAVE key at anytime to save the current data and if you want to exit without saving, press the ESC key. NEW/EDIT GROUP (1/1) 1. -
Page 50: Tax Rate (Menu Code 1230)
2.2.9 Tax Rate (Menu code 1230) (MENU -> 2. PLU Data Table I -> 3.TAX Rate) You can use tax number when you create PLU. 2.2.10 New/Edit Tax Rate (Menu code 1231) (MENU -> 2. PLU Data Table I -> 3.TAX Rate -> 1. New/Edit ) ※... -
Page 51: List Tax Rate (Menu Code 1232)
2.2.11 List Tax Rate (Menu code 1232) (MENU -> 2. PLU Data Table I -> 3.TAX Rate -> 2. List ) LIST TAX RATE (1/1) 1. Set the range of tax rate - Start Number EX) 1~9 - End Number List All-press [SAVE] key PRINT PRINT... -
Page 52: New/Edit Sales Message (Menu Code 1241)
2.2.14 New/Edit Sales Message (Menu code 1241) (MENU -> 2. PLU Data Table I -> 4. Sales Message -> 1. New/Edit ) ※ You can press the SAVE key at anytime to save the current data and if you want to exit without saving, press the ESC key. -
Page 53: Delete Sales Message (Menu Code 1243)
2.2.16 Delete Sales Message (Menu code 1243) (MENU -> 2. PLU Data Table I -> 4. Sales Message -> 3. Delete ) DELETE SALES MESSAGE (1/1) 1. Enter Message No. Message No : [ 1] EX) Delete message 1. PRINT 2.2.17 Origin (Menu code 1250) (MENU ->... -
Page 54: List Origin (Menu Code 1252)
2.2.19 List Origin (Menu code 1252) (MENU -> 2. PLU Data Table I -> 5.Origin -> 2. List ) LIST ORIGIN (1/1) 1. Set the List Range - Start Number Set the range of origin that you wish to check - End Number List All –... -
Page 55: New/Edit Barcode (Menu Code 1261)
2.2.22 New/Edit Barcode (Menu code 1261) (MENU -> 2. PLU Data Table I -> 6.Barcode -> 1. New/Edit ) ※ You can press the SAVE key at anytime to save the current data and if you want to exit without saving, press the ESC key. 1. - Page 56 NEW/EDIT BARCODE (2/2) 4. Enter Barcode Form Type : [ 1] EAN-13 You can select from a list of Barcode types or Form (0~4) : [1] you can create your own custom format DDIIIIIPPPPPC * Refer to below table. EX) Barcode Form = 1. Change DDIIIIIPPPPPC to GGIIIIIVPPPPC BARCODE NO.
-
Page 57: List Barcode (Menu Code 1262)
2.2.23 List Barcode (Menu code 1262) (MENU -> 2. PLU Data Table I -> 6.Barcode -> 2. List ) LIST BARCODE (1/1) 1. Set the list range - Start Number Set the range of barcode that you wish to check - End Number EX) 1~10 List All –... -
Page 58: New/Edit Tare (Menu Code 1271)
2.2.26 New/Edit Tare (Menu code 1271) (MENU -> 2. PLU Data Table I -> 7.Tare -> 1. New/Edit ) ※ You can press the SAVE key at anytime to save the current data and if you want to exit without saving, press the ESC key. 1. -
Page 59: List Tare (Menu Code 1272)
5. Exit Menu If you want to exit, press “ESC” key. * If you set Tare No. to 1 when you create PLU, tare is set to 0.010lb that is programmed here. 2.2.27 List Tare (Menu code 1272) (MENU -> 2. PLU Data Table I -> 7.Tare -> 2. List ) LIST TARE (1/1) 1. -
Page 60: Tare Key (Menu Code 1274)
2.2.29 Tare Key (Menu code 1274) (MENU -> 2. PLU Data Table I -> 7.Tare -> 4.Tare Key ) You can assign Tare Key. There are 9 Tare keys and you have to set these keys in menu 1880 (Key define). See Chapter 2.14.22 TARE KEY (1/1) 1. -
Page 61: List Unit Symbol (Menu Code 1282)
※ If you want to enter special symbol, press the CHAR key and enter the code value. (See ASCII code table on chapter 4.4 3. Exit menu If you want to exit, press “ESC” key. 2.2.32 List Unit Symbol (Menu code 1282) (MENU ->... -
Page 62: Programming Plu Data Table Ii
2.3 Programming PLU Data Table II 2.3.1 Ingredient (Menu code 1310) (MENU -> 3. PLU Data Table II -> 1.Ingredient) 2.3.2 New/Edit Ingredient (Menu code 1311) (MENU -> 3. PLU Data Table II -> 1.Ingredient -> 1. New/Edit ) ※ You can press the SAVE key at anytime to save the current data and if you want to exit without saving, press the ESC key. -
Page 63: List Ingredient (Menu Code 1312)
2.3.3 List Ingredient (Menu code 1312) (MENU -> 3. PLU Data Table II -> 1.Ingredient -> 2. List ) LIST INGREDIENT (1/1) 1. Set the list range - Start Number - End Number EX) 1~10 List All – Press [SAVE] Key PRINT PRINT No. -
Page 64: New/Edit Nutrition Facts (Menu Code 1321)
Sugars Protein Vitamin A Calcium Vitamin C Iron 2.3.6 New/Edit Nutrition Facts (Menu code 1321) (MENU -> 3. PLU Data Table II -> 2. Nutrition Facts -> 1. New/Edit ) ※ You can press the SAVE key at anytime to save the current data and if you want to exit without saving, press the ESC key. - Page 65 NEW/EDIT NUTRIFACT (3/10) 6. Calories from fat Calories 230 ] Calories From Fat: [ 120 ] EX) Calories From Fat= 120 PRINT NEW/EDIT NUTRIFACT (4/10) 7. Toral Fat Total Fat 14 ] g Saturated Fat 0 ] g EX) Total fat = 14 g PRINT NEW/EDIT NUTRIFACT (4/10)
- Page 66 NEW/EDIT NUTRIFACT (7/10) 14. Protein Sugars 3 ] g Protein 11 ] g EX) Protein = 11 g PRINT NEW/EDIT NUTRIFACT (8/10) 15. Vitamin A Vitamin A 20 ] % Calcium 0 ] % EX) Vitamin A = 20% PRINT 16.
-
Page 67: List Nutrition Facts (Menu Code 1322 )
2.3.7 List Nutrition Facts (Menu code 1322 ) (MENU -> 3. PLU Data Table II -> 2.Nutrition Facts -> 2. List ) LIST NUTRIFACT (1/1) 1. Set the list range - Start Number - End Number EX) 1~10 List All – Press [SAVE] Key PRINT No. -
Page 68: Discount Programming
2.4 Discount Programming 2.4.1 Discount (Menu code 1130) (MENU -> 1. PLU -> 3.Discount) You have to set discount information for each PLU. 2.4.2 New/Edit Discount (Menu code 1131) (MENU -> 1. PLU -> 3.Discount -> 1. New/Edit ) ※ You can press the SAVE key at anytime to save the current data and if you want to exit without saving, press the ESC key. - Page 69 Free Item - Set free of charge item. Free Addition - By Weight PLU: Set discount weight. - By Count/PCS PLU: Set discount number Total Price by total price Set a discount amount of total price for current total price. % Total Price by Total - Set a discount % of total price for current total price Price...
-
Page 70: List Discount (Menu Code 1132)
4. Discount Condition 1 : (Set the day of NEW/EDIT DISCOUNT (5/7) Input ‘1’ or ‘0’ : [SMTWTFS] week ) 0000111 Day of Week 1-> Discount 0-> Do not discount EX) Discount Thursday, Friday PRINT 5. Discount Condition 2 : (Set date and time) NEW/EDIT DISCOUNT (6/7) ※... -
Page 71: Delete Discount (Menu Code 1133)
LIST DISCOUNT (2/2) 2. Enter PLU range to check Start PLU No EX) PLU 1~10 End PLU No List All – Press “ SAVE” Key PRINT PRINT Type Unit price discount ※ If you want to print list, press the TEST key. 2.4.4 Delete Discount (Menu code 1133) (MENU ->... -
Page 72: Delete All (Dc) (Menu Code 1139)
2.4.7 Delete ALL (DC) (Menu code 1139) (MENU -> 1. PLU -> 3.Discount -> 3.Delete->3.Delete ALL(DC) Press 3 key to select Delete all(DC) DELETE (1/1) 1. Delete by PLU No. (DC) 2. Delete by Dept. No. (DC) PRINT 3. Delete All (DC) 1. -
Page 73: Global Discount Programming
2.5 Global Discount Programming 2.5.1 Global Discount (Menu code 1530) (MENU -> 5. Global Setting -> 3.Discount) You can apply same discount regardless of PLU. 2.5.2 Priority Setting (Menu code 1531) (MENU -> 5.Global -> 3.Discount -> 1.Priority) You can set discount type. Refer to Discount Priority Setting Table as below.. You can see discount information on the display by setting of menu 1871 and also you can check it on a label. -
Page 74: Speed Key Setting
2.6 Speed Key Setting This menu is to set “speed keys”, one-touch keys, for most frequently used PLUs to simply call up them. You can program up to 5 speed key set. Remember that there is a SHIFT key that allows you to double-use the Speed Keys. The Speed keys are numbered left-to-right and top-to-bottom. -
Page 75: Traceability
2.7 Traceability 2.7.1 Traceability (Menu code 1330) (MENU -> 3. PLU Data Table II -> 3.Traceability) You can use this traceability number when you program PLU. 2.7.2 New/Edit Traceability (Menu code 1331) (MENU -> 3. PLU Data Table II -> 3.Traceability -> 1. New/Edit ) ※... -
Page 76: List Traceability (Menu Code 1332)
5. Slaughter house numer NEW/EDIT TRACEABILITY (3/3) Slaughter House No. : [ 12] EX) Slaughter house No. = 12. BILLY’S Cutting Hall No. : [ 1] BILLY’S Note : To program slauter house, see page 76 (2.9 Slauter house programming). PRINT NEW/EDIT TRACEABILITY (3/3) -
Page 77: Country Programming
2.8 Country Programming 2.8.1 Country (Menu code 1340) (MENU -> 3. PLU Data Table II -> 4.Country) You can use country data when you program traceability. 2.8.2 New/Edit Country (Menu code 1341) (MENU -> 3. PLU Data Table II -> 4.Country -> 1. New/Edit ) ※... -
Page 78: Delete Country (Menu Code 1343)
2.8.4 Delete Country (Menu code 1343) (MENU -> 3. PLU Data Table II -> 4.Country -> 3. Delete ) DELETE COUNTRY (1/1) 1. Enter country number to delete Enter Country No : [ 1] EX) Delete country no. 1 PRINT 2.9 Programming Slaughter House 2.9.1 Slaughter House (Menu code 1350) (MENU ->... -
Page 79: List Slaughter House (Menu Code 1352)
2.9.3 List Slaughter House (Menu code 1352) (MENU -> 3. PLU Data Table II -> 5.Slaughter house -> 2. List ) LIST SLAUGHTER HOUSE (1/1) 1. Set the list range - Start Number Enter list range to check - End Number EX) 1~10 List All –... -
Page 80: List Cutting Hall (Menu Code 1362)
2. Enter cutting hall information Enter cutting hall name or registered number. NEW/EDIT CUTTING HALL (1/1) EX) Cutting hall registered number = KSH12 Enter Cutting Hall House No. : [ Hall : [KCH12 PRINT Country : [ 0] 3. Cutting hall Country number You can use contry number which is programmed at NEW/EDIT CUTTING HALL (1/1) -
Page 81: Programming Store Data
2.11 Programming Store Data This chapter explains how to access, program STORE data table (Price Look Up) in CL5000 series. 2.11.1 Store Data (Menu code 1410) (MENU -> 4. Store Data Table ->1.Store) This section shows how to create, edit, list and delete store, customer, and advertisement message data. -
Page 82: List Store (Menu Code 1412)
2.11.3 List Store (Menu code 1412) (MENU -> 4. Store Data Table ->1.Store -> 2.List Store ) This menu shows the list of STORE saved. Press “2” in STORE menu to get into LIST STORE menu. Press “SAVE” key to list all of STORE information saved. LIST STORE (1/1) 1. -
Page 83: New/Edit Customer (Menu Code 1421)
2.11.6 New/Edit Customer (Menu code 1421) (MENU -> 4. Store Data Table -> 2.Customer -> 1.New/Edit ) 1. Enter Customer number and press “PRINT” NEW/EDIT CUSTOMER (1/3) Customer No. : [ 1 ] key. EX) Customer No.=1, PRINT 2. Enter other informations in [ ], such as NEW/EDIT CUSTOMER (2/3) -
Page 84: Delete Customer (Menu Code 1423)
LIST COTOMER (1/1) 1. Set the list range Start Number Set the list range to check End Number EX) 1~10 No. reference(descript.) PRINT PRINT 1 BILLY 200.00 ※ If you want to print list, press the TEST key. 2.11.8 Delete Customer (Menu code 1423) (MENU ->... -
Page 85: Edit Scroll Message (Menu Code 1432)
2.11.11 Edit Scroll Message (Menu Code 1432) (MENU -> 4. Store Data Table -> 3. Scroll Message ->2. Edit Scroll Message) EDIT SCROLL MESSAGE (1/7) 1. Input and edit Message Message No. : [1] Message : [Scroll Message..User may input up to five messages and select two different scrolling effect. -
Page 86: List Scroll Message (Menu Code 1433)
2.11.12 List Scroll Message (Menu Code 1433) (MENU -> 4.Store Data Table -> 3.Scroll Message -> 3.List) This function is to set the scrolling advertisement on LCD Display. LIST COTOMER (1/1) 1. Set the list range - Start Number Set the list range to check - End Number EX) 1~10 List All –... - Page 87 NEW/EDIT CURRENCY (2/3) 3. Currency Rate. Currency Rate : [ 12.800] Enter comparative rate of currency to default Primary Sign : [ currency set. EX) Default currency = $1.00 Comparative currency rate to default currency = € 1.2800. PRINT NEW/EDIT CURRENCY (2/3) 4.
-
Page 88: List Currency (Menu Code 1442)
2.11.15 List Currency (Menu Code 1442) (MENU -> 4. Store Data Table -> 4.Currency -> 2.List) LIST CURRENCY (1/1) 1. Set the list range - Start Number Set the list range to check - End Number EX) 1~4 List All – press [SAVE] key PRINT PRINT reference(descript.) -
Page 89: Programming Global Setting
2.12 Programming Global Setting 2.12.1 Global Label Format (Menu code 1510) (MENU -> 5. Global Setting -> 1.Label Format) Pre-programmed fixed label formats are from #1 to #10 and these formats cannot be modified. Label format #11~#30 are free formats that users may modify at their needs. Users may download one into the scale and set a specific free label format. -
Page 90: Barcode Format (Menu Code 1520)
5. Set printing direction of total label LABEL FORMAT (3/3) EX) Reverse Total Label = “Y” Reverse Total Label : [ Y ] Reverse Item Label : [ N ] PRINT 6. Set printing direction of PLU and Misc. item LABEL FORMAT (3/3) - Page 91 3. Set barcode number for by-count PLU BARCODE (1/4) Use Global Barcode (1=Y/0=N) : [ Y ] EX) PLU Count barcode No. = 2 PLU Weight Barcode No. : [ 2 ] PLU Count Barcode No. : [ 2 ] PRINT 4.
- Page 92 10. Set barcode number for floating Total BARCODE (4/4) Floating TTL Barcode No. : [ 0 ] EX) Floating TTL barcode No. = 2 PRINT 11. Exit menu If you want to exit, press “ESC” key.
-
Page 93: Printing Programming
2.13 Printing Programming This chapter explains how to set printing-related environments, such as print label item, markdown, Hardware, serial number format, and ticket. 2.13.1 Printing (Menu code 1700) PRINT (1/2) 1. Print Label Item (MENU -> 7. Print) 2. Markdown 3.Printer Hardware PRINT (2/2) - Page 94 ▶ “Print Label Item” Page Item Department Name Department Number Group Number PLU Number PLU Name 1 PLU Name 2 PLU Name 3 Item Code Unit Weight Tax Rate Tax Price Tare Weight Pieces Unit Symbol Sell By Date Sell By Time Packed On Date Packed On Time Produced Date...
-
Page 95: Markdown (Menu Code 1720)
Day of Week Currency Rate Second Total Price Second Unit Price Traceability Nutrition Fact Label Caption Total Tax Price Second Add Total Barcodes Image 2.13.3 Markdown (Menu code 1720) (MENU -> 7. Print -> 2.Markdown) Markdown is to select “Yes” or “No” to print both of original and discount information on the label. -
Page 96: Printer Hardware (Menu Code 1730)
2.13.4 Printer Hardware (Menu code 1730) (MENU -> 7. Print -> 3.Printer Hardware) This section is to explain how to set printing H/W environments in the following table. 1.Press “3” to get into H/W setting mode on Print PRINTER HARDWARE (1/3) 1. -
Page 97: Label Size/Ticket Size (Menu Code 1732)
2.13.6 Label Size/Ticket Size (Menu code 1732) (MENU -> 7. Print -> 3. Printer Hardware -> 2.Label Size) Enter values for “Width”, “Height”, “Gap Length”. LABEL SIZE (1/1) If you press “TEST” key, height and gap length of Width :[60]mm Height:[40]mm current label is measured. -
Page 98: Adjust Feed Length (Menu Code 1736)
2.13.10 Adjust Feed Length (Menu code 1736) (MENU -> 7. Print -> 3. Printer Hardware -> 6.Adjust Feed Length) Enter any value of the feed alignment from “-200” ADJUST FEED LENGTH (1/1) Feed Adjustment (-200~+200):[+ 0] to “+200”. [TEST]=Test, [ZERO]=+ or - Press “ZERO”... - Page 99 Meaning I: Item Code N: PLU Number P: Price U: Unit Price W: Weight Q: Quantity D: Department G: group A: Ticket Counter (Ticket Mode) B: Scale Transaction Counter F: PLU Prefix Character T: Text Character R: Transaction Counter of Each PLU L: Clerk Number %: Print Fixed Character in the Next Space.
-
Page 100: Add-Up Total (Menu Code 1750)
2.13.13 Add-Up Total (Menu code 1750) (MENU -> 7. Print -> 5.Add-up Total) This section shows how to set printing environments of total label and item label when you use ADD-UP sales. ① Press “5” to get into ADD-UP TOTAL menu in ADD-UP TOTAL (1/1) Prt. -
Page 101: Select Ticket Item (Menu Code 1761)
2.13.15 Select Ticket Item (Menu code 1761) (MENU -> 7. Print -> 6.Ticket ->1.Select Ticket Item) ② Press “1” to go to SELECT TICKET ITEM menu. SELECT TICKET ITEM (1/1) Prt. List : [ Y ] Select “Yes” or “No” for “Print List”, Prt. -
Page 102: Select List Item (Menu Code 1762)
2.13.16 Select List Item (Menu code 1762) (MENU -> 7. Print -> 6.Ticket ->2.Select List Item) * Before setting list item, you have to set “Print List” to “Y” in menu 1761. ① Press “2” to get into SELECT LIST ITEM menu. SELECT LIST ITEM (1/3) Prt. - Page 103 * Ticket Format SELECT TICKET ITEM (1/1) Prt. List : [ Y ] Prt. Total Barcode : [ Y ] Prt. Total Label : [ Y ] LIST 0 1 0 0 0 0 0 0 0 1 5 0 9 * List Format Ticket Head Label Form SELECT LIST ITEM...
-
Page 104: Programming Scale Configuration
2.14 Programming Scale Configuration 2.14.1 Scale Configuration (Menu code 1800) (MENU -> 8. Scale Config) This chapter explains how to configure the scale. The main menu of “Scale Configuration” is shown as below. SCALE CONFIG (1/3) SCALE CONFIG (2/3) 1.Sale Mode 4. - Page 105 ▶ Selecting one of following sale modes, user may select an one-stop setting for Clerk, Operation, Print, and Prepack mode. MODE Clerk Mode Operation Mode Print Mode Prepack Mode 1. REG: Ticket & Floating Floating Clerk Regist Ticket 2. REG: Label No Clerk Regist Label...
-
Page 106: Operation Mode (Menu Code 1820)
2.14.3 Operation Mode (Menu code 1820) (MENU -> 8. Scale Config -> 2.Operation Mode ) This section is to select a clerk and operation mode. There are three different operation modes, REGISTRATION, RE-PACK, MANAGER and three different clerk modes, NO CLERK, STANDARD CLERK, and FLOATING CLERK. ▶... -
Page 107: Date & Time (Menu Code 1840)
1. Select “DEPARTMENT No.” and “STORE ID”. EX) DEPARTMENT No.= 2 (Grocery) DEPARTMENT (1/1) Dept No. : [2] Grocery PRINT Store No. : [1] Branch #1 STORE No.= 1 (Branch #1) PRINT 2.14.5 Date & Time (Menu code 1840) (MENU -> 8. Scale Config -> 4.Date/Time ) This section is to set scale’s DATE &... -
Page 108: User/ Security Configuration (Menu Code 1850)
2.14.6 User/ Security Configuration (Menu code 1850) (MENU -> 8. Scale Config -> 5.User/Security Configuration ) This section is to create, edit, change, list, delete clerk’s security information and configure security level. 2.14.7 New/Edit User(Menu code 1851) (MENU -> 8. Scale Config -> 5.User/Security Con-> 1. New/Edit ) Enter appropriate USER data for CLERK number, NEW/EDIT USER (1/2) -
Page 109: Change Password (Menu Code 1852)
Clerk level : This value can be from 0 to 3. This level is related to menu 1855(Config permission). If clerk 2 is set to level 2, this clerk can use the function which is set to level 1, 2 in menu 1855 and cannot use the function which is set to level 3. -
Page 110: Delete User (Menu Code 1854)
2.14.10 Delete User (Menu code 1854) (MENU -> 8. SCALE CONFIG -> 5.User/Security Con. -> 4. Delete ) DELETE USER (1/1) 1. Enter clerk number to delete Clerk No. : [ 2] LEE EX) Delete clerk no. 2 2.14.11 Config Permission (Menu code 1855) (MENU ->... - Page 111 Set a permission level for Input weight key(You can Use Input Weight Key define this function key in menu 1880 on chapter 2.14.22) Set a permission level for discount (You can define Use Discount Key this function key in menu 1880 on chapter 2.14.22) Allow Clerk Sale Set a permission level for password in floating mode Allow Void...
-
Page 112: Clerk Key ( Menu Code 1856 )
2.14.12 Clerk Key ( Menu code 1856 ) (MENU -> 8. SCALE CONFIG -> 5.User/Security Con. -> 6. Clerk Key ) You can assign Clerk key to clerk. There are 31 Clerk keys and you have to set these keys in menu 1880 (Key define). See chapter 2.14.22. CLERK KEY (1/1) 1. -
Page 113: Display Test (Menu Code 1861)
2.14.14 Display Test (Menu code 1861) (MENU -> 8. SCALE CONFIG -> 6.Test -> 1. Display ) To test the display, press “1” on Test menu screen. It automatically tests it. User may exit from testing, using “X/ESC” key. 2.14.15 A/D Test (Menu code 1862) (MENU ->... -
Page 114: Printer Sensor Test (Menu Code 1865)
2.14.18 Printer Sensor Test (Menu code 1865) (MENU -> 8. SCALE CONFIG -> 6.Test -> 5. Printer Sensor ) To test printer sensor, press “5” on Test menu PRINTER SENSOR TEST (1/2) Peel-off : [UNLOCKED] screen. The scale shows the condition of current Head-up : [CLOSED printer sensor. -
Page 115: Scale Parameter (Menu Code 1870)
2.14.21 Scale Parameter (Menu code 1870) (MENU -> 8. Scale Config -> 7.Scale Parameter) You can set scale’s environment as below. ▶ Scale Parameter Menu Sub-menu Setting Value Description Display Discount Info The scale shows discount information. 1. Display Show Clerk Nickname The scale shows clerk’s nickname (Menu 0: Left alignment... -
Page 116: Function Key Define (Menu Code 1880)
2.14.22 Function Key Define (Menu code 1880) (MENU -> 8. Scale Config -> 8.Function Key Define) You can define function keys to Speed keys. It is recommended that you define function key to higher number Speed key because you can not use that PLU key. FUNCTION KEY DEFINE (1/1) 1880... - Page 117 [ PLU REFERENCE] Reference PLU Key [IN WEIGHT] In-Weight Key [LABEL/TICKET] Toggle between the Label and Ticket [LEDON] LCD Backlight On/Off Key [MISC WEIGHT] Misc. Weight Key [MISC COUNT] Misc. Count Key [MISC PCS] Misc. PCS Key [EDIT SELL] Sell By Date Change Key [EDIT ORIGIN] Origin Change Key.
-
Page 118: Report
2.15 Report 2.15.1 Introduction X mode is used to read (i.e. print and display) sales data. There are variety of reports that you can generate from X mode. Each of these reports is kept in two separate counters or “books” called X1 and X2. The X1 and X2 reports allow you to print reports at any time for either of the reporting periods. -
Page 119: X1/X2 Scale Sales Report (Menu Code 1611/1613)
Submenu Description Scale Print and display scale sales report Print and display PLU sales report Misc. PLU Print and display Misc. PLU sales report Group Print and display group sales report Department Print and display department sales report Hourly Print and display hourly sales report Clerk Print and display clerk sales report 2.15.4 X1/X2 Scale Sales Report (Menu code 1611/1613) - Page 120 *Sample – Scale Report S C A L E R E P O R T AUG-23-04(MON) 09:46:36 AM Last Reset AUG-16-04(MON) 03:33:14 PM ======================================================= SCALE #01 ------------------------------------------------------- TOTAL COUNT TOTAL PRICE $ 5693.70 VOID COUNT VOID PRICE $ 27.30 REPACK COUNT REPACK PRICE $ 0.00 OVERRIDE COUNT...
-
Page 121: X1/X2 Plu Report (Menu Code 1612/1632)
2.15.5 X1/X2 PLU Report (Menu code 1612/1632) (MENU -> 6. Report -> 1.X1 Report/3.X2 Report -> 2. PLU Report) X1 PLU SALES REPORT (1/1) Press “2” key on X1/X2 Report menu screen. Dept[ 1] PLU[ 1]..to[99999] X1 PLU SALES REPORT (1/1) Enter PLU range to check. - Page 122 *Sample – PLU Report P L U R E P O R T AUG-23-04(MON) 09:46:36 AM Last Reset AUG-16-04(MON) 03:33:14 PM Start No:00000, End No:99999 ======================================================= DEPT #01 Default ------------------------------------------------------- PLU #00001 APPLE TRANSACTION COUNT WEIGHT 74.828 lb QUANTITY PRICE $ 681.79 TAX PRICE $ 67.39...
-
Page 123: X1/X2 Miscellaneous Plu Report (Menu Code 1613/1633)
2.15.6 X1/X2 Miscellaneous PLU Report (Menu code 1613/1633) (MENU -> 6. Report -> 1.X1 Report/3.X2 Report -> 3. MISC. PLU ) X1 MISC. SALES REPORT (1/1) Press “3” key on X1/X2 Report menu screen. Misc(0-2)[0]..to[2] X1 MISC. SALES REPORT (1/1) Enter the number to check. - Page 124 *Sample – Miscellaneous Report M I S C . R E P O R T AUG-23-04(MON) 09:46:36 AM Last Reset AUG-16-04(MON) 03:33:14 PM Start No:0, End No:2 ======================================================= ------------------------------------------------------- PLU # Misc By Weight TRANSACTION COUNT WEIGHT 74.828 lb QUANTITY PRICE $ 681.79 TAX PRICE...
-
Page 125: X1/X2 Group Report (Menu Code 1614/1644)
2.15.7 X1/X2 Group Report (Menu code 1614/1644) (MENU -> 6. Report -> 1.X1 Report/X2 Report -> 4. Group) X1 GROUP SALES REPORT (1/1) Press “4” key on X1/X2 Report menu screen. No. from[ 0]..to[99] X1 GROUP SALES REPORT (1/1) Enter group range to check No. - Page 126 *Sample – Group Report G R O U P R E P O R T AUG-23-04(MON) 09:46:36 AM Last Reset AUG-16-04(MON) 03:33:14 PM Start No:00, End No:99 ======================================================= GROUP #00 NO Assigned PLU Group ------------------------------------------------------- TOTAL COUNT TOTAL PRICE $5993.70 PREPACK COUNT PREPACK PRICE $ 3.05...
-
Page 127: X1/X2 Deptment Sales Report (Menu Code 1615/1635)
2.15.8 X1/X2 Deptment Sales Report (Menu code 1615/1635) (MENU -> 6. Report -> 1.X1 Report/3.X2 Report -> 5. Department ) X1 DEPT SALES REPORT (1/1) Press “5” key on X1/X2 Report menu screen. No. from[ 1]..to[99] X1 DEPT SALES REPORT (1/1) Enter department range to check. - Page 128 *Sample – Department Report D E P A R T M E N T R E P O R T AUG-23-04(MON) 09:46:36 AM Last Reset AUG-16-04(MON) 03:33:14 PM Start No:01, End No:99 ======================================================= DEPT #01 Default ------------------------------------------------------- TOTAL COUNT TOTAL PRICE $5993.70 PREPACK COUNT PREPACK PRICE...
-
Page 129: X1/X2 Hourly Sales Report (Menu Code 1616/1636)
2.15.9 X1/X2 Hourly Sales Report (Menu code 1616/1636) (MENU -> 6. Report -> 1.X1 Report/3.X2 REport -> 6. Hourly) X1 HOURLY SALES REPORT (1/1) Press “6” key on X1/X2 Report menu screen. No. from[ 0]..to[23] X1 HOURLY SALES REPORT (1/1) Enter time to check. - Page 130 *Sample – Hourly Report H O U R L Y R E P O R T AUG-23-04(MON) 09:46:36 AM Last Reset AUG-16-04(MON) 03:33:14 PM Start No:00, End No:23 ======================================================= HOUR #10 ------------------------------------------------------- TOTAL COUNT TOTAL PRICE $5993.70 PREPACK COUNT PREPACK PRICE $ 3.05 ------------------------------------------------------- HOUR #11...
-
Page 131: X1/X2 Clerk Sales Report (Menu Code 1617/1637)
2.15.10 X1/X2 Clerk Sales Report (Menu code 1617/1637) (MENU -> 6. Report -> 1.X1 Report/3.X2 Report -> 7. Clerk) X1 CLERK SALES REPORT (1/1) Press “7” key on X1/X2 Report menu screen. No. from[ 0]..to[99] X1 CLERK SALES REPORT (1/1) Enter clerk range to check. - Page 132 *Sample – Clerk Report C L E R K R E P O R T AUG-23-04(MON) 09:46:36 AM Last Reset AUG-16-04(MON) 03:33:14 PM Start No:00, End No:99 ======================================================= CLERK #00 MANAGER ------------------------------------------------------- TOTAL COUNT TOTAL PRICE $ 5693.70 VOID COUNT VOID PRICE $ 27.30 REPACK COUNT...
-
Page 133: Z1/Z2 Report (Menu Code 1620/1640)
2.15.11 Z1/Z2 Report (Menu code 1620/1640) (MENU -> 6. Report -> 2.Z1 Report / 4. Z2 Report) Z1 SCALE SALES REPORT (1/1) If you select menu code 1620, you will see Count:296 following screen. Total:$6429.48 [TEST]=print & clear If you want to print and clear the data, press Are you sure?(1=y/0=N) TEST key. -
Page 134: Clear All Report (Menu Code 1650)
2.15.12 Clear All Report (Menu code 1650) (MENU -> 6. Report -> 5.Clear All) CLEAR ALL (1/1) If you select menu code 1650, you will see Are you sure?(1=Y/0=N) following screen. REPORT (2/2) To clear all report, press 1 key. If you do not 4. -
Page 135: Sales Operation
3.1 Basic Operation This chapter explains basic operation of scale, such as how to set zero, tare, call up a PLU and override unit price in CL5000 series. In order to make sales transaction user should access REGISTRATION mode. ■ How to access REGISTRATION MODE: Turn ON the scale. -
Page 136: Tare
3.3 Tare You can enter tare weights as long as there are no PLUs or MISC PLUs called-up. If you need to temporarily override a PLU’s tare weight, you must enter the tare weight first and then call-up that PLU. There are two ways to enter a tare weight and both ways will only work if there is no PLU or MISC PLU called-up. -
Page 137: How To Clear Tare
3.3.3 How to Clear Tare ① Remove the item from the platter 11:36 AM 0.000 -0.150 0.00 0.00 ② Press “TARE” key again. 11:36 AM 0.000 0.000 0.00 0.00 3.3.4 Preset Tare ① Call up a PLU including tare(weight of container). EX) PLU #3’s tare =0.15 lb 11:35 AM 0.150... -
Page 138: Using Speed Key
displayed depending on the setting time. It takes time to call up a PLU depending on the setting of parameter, 586 “Indirect PLU Call Time”. 3.4.2 Using Speed Key To call-up PLU number 79, and you programmed Speed key #5 to be PLU number 79, then you need to press the following key: Speed key #5. -
Page 139: By-Count Plu
R1 11:35 AM 0.000 0.272 1.50 0.41 MEAT ③ Press PRINT key to print label. PRINT R1 11:35 AM 0.000 0.272 0.00 0.00 3.5.2 By-Count PLU - PLU# 2.APPLE ( PLU Type: By count, Unit Price : 1.00$). ① Press OVERRIDE key. OVER RIDE R1 11:35 AM... -
Page 140: By-Pcs Plu
11:35 AM 0.000 0.000 0.00 0.00 3.5.3 By-PCS PLU - PLU# 3.Eggs ( PLU Type: By PCS, Pieces : 3, Unit Price : 30.00$). ① Press OVERRIDE key. OVER RIDE R1 11:35 AM 30.00 30.00 0.000 3- 3 Eggs ② Enter QUANTITY and press FOR key. R2 11:35 AM 5- 3 30.00... -
Page 141: Sales Operation
③ Enter PIECES and press FOR key R3 11:35 AM 0.000 5- 2 30.00 75.00 Eggs ③ Enter new unit price. R3 11:35 AM 0.000 5- 2 35.00 87.50 Eggs ④ Press PRINT key to print label. PRINT 11:35 AM 0.000 0.00 0.00... - Page 142 User may call up a PLU by pressing speed key or numeric key. Please refer to chapter 3.4 for details. ② Place the item(s) on the platter. 11:35 AM 0.000 1.000 1.50 1.50 ONION ③ Press “PRINT” key to print a label and complete current transaction.
-
Page 143: By Count Item
3.6.2 By Count Item EXAMPLE: - PLU No: 31, PLU Name: MANGO, PLU type= By-Count, Unit Price: 1.99$, - Sales 20 pieces. ① Press numeric key(s) to call up a PLU. 11:35 AM 0.000 1.99 1.99 MANGO User may call up a PLU by pressing speed key or numeric key. Please refer to chapter 3.4 for details. -
Page 144: Discount
① Press numeric key(s) to call up a PLU. 11:35 AM 0.000 5- 5 1.99 1.99 ORANGE User may call up a PLU by pressing speed key or numeric key. Please refer to page 143 for details. ② Enter QUANTITY [the number of Pieces]. EX) 20 pieces. - Page 145 Target of Discount: “Discount amount from unit price”=1.00 for weight ≥ 1.000. ① Calll up a PLU. DC 0.00-0.00 11:35 AM 0.000 0.000 20.00 0.00 W.Melon ② Place an item on the platter. In this case, discount is not available because the weight of this item(0.489 lb) is lower than 1 target(0.500 lb).
-
Page 146: Unit Price Discount - By Weight Plu
- You can set four markdown information in menu 1720 of program mode.(See chapter 2.13.3) - If you set “display discount info.” to “Y” in menu 1871 of program mode, you can see total price and discount information on the display. (See chapter 2.14.21) 3.7.2 % Unit Price Discount - By Weight PLU EXAMPLE: PLU# 29=ORANGE (By-Weight PLU), Unit price=20.00 Target of Discount: “10 % off from unit price”... -
Page 147: Unit Price Discount - By Pcs Plu
② Place an item on the platter. In this case, discount is not available because the weight of this item(0.489 lb) is lower than 1 target(0.500 lb). DC 9.78-0.00 11:36 AM 0.000 0.489 20.00 9.78 ORANGE ③ Place items on the platter. In this case, the weight of items(0.526 lb) is greater than 1 target(0.500 lb) therefore you can have 10% discount. - Page 148 ① Call up a PLU. DC 6.00-0.00 11:35 AM 0.000 3- 3 6.00 6.00 P.MANGO ② Enter quantity. In this case, 5 is greater than 1 Target (5), unit price(0.20$) is discounted. DC 10.00-0.33 11:35 AM 0.000 5- 3 5.80 9.67 P.MANGO ③...
-
Page 149: Add-Up Transaction
3.8 Add-Up Transaction If you press the ADD key instead of the PRINT key, you will initiate the ADD-UP process. You can ADD-UP 100 items maximum. EXAMPLE: PLU# 32=SIRLOIN, PLU Type = By-Weight, Unit Price=20.00, PLU# 35=T-bone Steak, PLU Type = By-PCS, Pieces=3, Unit Price=6.00 ①... - Page 150 ⑤ You can repeat the ADD-UP process up to 100 times or you can press the ST/TTL key at anytime to see the grand-total. TEST Total Count 2, Void Count 0 0.000 0.000 0.00 0.00 Total $ 13.78 ⑥ To complete the sale, press the PRINT key. (To repeat the ADD-UP process, press the ESC key.) PRINT 04-03-02...
-
Page 151: Clerk Operation
3.9 Clerk Operation There are three clerk modes as below. ▶ Clerk Modes Clerk Modes Description Sales clerk does not log in and makes sales using “PRINT” key. No Clerk Generating a standard clerk transaction is the same as any sales Standard Clerk mode transaction except that you do NOT press the PRINT key;... -
Page 152: Standard Clerk Operation
☞ Note: You have to set Clerk log out time in menu 1874 of program mode. (See chapter 2.14.21) If you do not call a PLU and do not operate the scale, time is computed. To set 30 seconds for logout time, enter 300. If you do not want to log out, enter 0. When there is no PLU, you can print ticket again by pressing X key (It depends on the setting of parameter 599, Print last ticket) 3.9.1 Standard Clerk Operation... -
Page 153: Floating Clerk Operations
④ Place an item and press V1 key. You will get a label INSERT automatically. 11:35 AM 0.000 1.200 20.00 24.00 ORANGE ⑤ Press the PRINT key to complete transaction. If you are in ADD-UP mode, you can have label for grand PRINT total price. - Page 154 ② Place an item on the platter and press the V1 key. This INSERT transaction is save to memory. 11:35 AM 0.000 1.200 10.00 12.00 APPLE ③ Call up a PLU #2. 11:35 AM 0.000 0.000 20.00 0.00 ORANGE ④ Place an item on the platter and press the V1 key. This INSERT transaction is saved to memory.
-
Page 155: Void
3.10 Void You can press the VOID key to undo transaction in add-up process or floating clerk operation. Assumption) You sold several items If there is no PLU or price is zero. ① Press the VOID key, you will see following screen. VOID NUMBER [ 0] 3 list 9.78... -
Page 156: Payment & Change
② Press VOID key then this sale is cleared. 11:36 AM 0.000 0.489 20.00 9.78 VOIDED $ 9.78 ※ If price is not same, void list screen is shown on the display automatically. 3.11 Payment & Change ▶ Payment Type Cash Pin/chip Check... - Page 157 ③ Enter 6.00 SUBTOTAL 15.00 Payment Coupon COUPON 6.00] ④ Press PRINT key then you can select payment type again. SUBTOTAL 15.00 Payment Coupon COUPON 9.00] ⑤ Select Payment type (0 cash) and press PRINT key. SUBTOTAL 15.00 Payment Cash CASH 9.00 ] ⑤...
-
Page 158: Return
3.12 Return The RETURN key is used to delete erroneous sale transactions. You can use the RETURN key to undo erroneous sales transactions like pressing the PRINT key inadvertently, selecting and printing the wrong PLU, an inadvertent Auto-Print in Pre-Pack mode, or perhaps adjusting the sales totals for a damaged or ruined package. -
Page 159: Prepack Key
3.13 Prepack Key When the scale is in Pre-Pack mode, it prints labels automatically. When it is in MANUAL mode, you must press the PRINT key (or ADD key) to get a label. In Pre-Pack mode, you cannot select AUTO mode. Pre-Pack works like AUTO and SAVE mode except that the weight does not need to return to zero for every auto-print. -
Page 160: Key
④ Remove the item(s) from the platter. 11:35 AM 0.000 0.00 0.000 1.50 ONION ☞ Note : If the scale is in Prepack mode then it will always auto-print if the Total price is greater than 0.00 and: 1. The weight deviates by an amount greater than or equal to the Parameter 862 setting(Min. - Page 161 ② Place the item(s) on the platter. 11:35 AM 0.000 1.000 1.50 1.50 ONION ③ Type the number of labels you require and press the PRINT key. X 00 LABELS 11:35 AM 0.000 1.000 1.50 1.50 ONION ④ Remove the item(s) from the platter. 11:36 AM 0.000 0.000...
-
Page 162: Non-Weighed Plu
3.14.2 Non-Weighed PLU You can use X key for by Count, By PCS PLU without any setting. The way of using X key is same as by-weight PLU except weighing item. 3.15 How to Change Sell By Date/Time ① Call up a PLU. ONION 11:35 AM 0.000... -
Page 163: How To Change Origin
3.16 How to Change Origin ① Call up a PLU. ONION 11:35 AM 0.000 0.000 1.50 0.00 ONION ② Press ORIGIN key to retrieve one of origin data saved. Origin CHANGE ORIGIN (1/1) 0.000 0.000 1.50 0.00 Origin No 1. USA ☞... -
Page 164: Direct Discount
3.18 Direct Discount If there is no discount information in PLU, you can use this function. 3.18.1 Fixed Price Key ① Call up a PLU # 1 and press “Fixed Price” key. Fixed Price 11:35 AM 0.000 5.00 5.00 APPLE ②... -
Page 165: Discount Price Key
3.18.2 % Discount Price Key ① Call up a PLU(#1.APPLE) and press “%Discount” key DISC% 11:35 AM 0.000 0.00 0.000 5.00 APPLE ② Enter % amount to discount and press PRINT key Print - Ex) 20% DISCOUNT (%) [20] 0.000 0.000 5.00 0.00... -
Page 166: Coupled Plu Function
3.19.2 Coupled PLU Function Automatically coupled PLU is called up after transaction. You can use this function when you sell two or more items as package. ☞ To use this function, you have to set coupled department and coupled PLU when you create PLU. -
Page 167: Appendix
4. Appendix 4.1 Label Format There are fixed label format and user label format Fixed Label Format User Label Format 1~50 51~99 Quantity Method Built in CL5000 Download from PC Features You cannot edit format. Using the PC program, you can program format numbers 51 to 99. - Page 170 *Total Label...
-
Page 173: Label Format Sample
4.2 Label Format Sample (1) Label Sample 1 PLU Name1 PLU Name2 Packed On Date Barcode Sell By Date Weight PLU Number Store Name Total Price Store Tel Unit Price Store Text Label Serial No (2) Label Sample 2 PLU Name2 PLU Name1 Packed On Date Sell By Date... -
Page 174: Label Field
4.3 Label Field Label Format has several fields and each field has own ID. Item label print the information of each PLU sale and Total label print the information of grand total of PLUs. Item Label field is separate from Total Label field. But the information of store and clerk is common item. - Page 175 30 Percent Tare Limit Print percent tare limit. It is printed with %. 31 Weight 101 Print weight when it is not applied Markdown (By- Weight PLU) 32 Discount Weight 132 Print new weight when it is applied Markdown (By- Weight PLU) 33 Discount Weight...
- Page 176 11 (C)Produced Date 180 Print the caption of Produced Date. If the value is 0, it is not printed. 12 (C)Packed On Time 181 Print the caption of Packed On Time 13 (C)Sell By Time 182 Print the caption of Sell By Time. If the value is 0, it is not printed.
-
Page 177: Total Label Field
12 (N)Protein 151 Print Protein 13 (N)Vitamin A 152 Print Vitamin A 14 (N)Calcium 153 Print Calcium 15 (N)Vitamin C 154 Print Vitamin C 16 (N)Iron 155 Print Iron 17 (N)Total Fat DV 156 Print Daily Value of Total Fat 18 (N)Saturated Fat DV 157 Print Daily Value of Saturated Fat 19 (N)Cholesterol DV... - Page 178 (C)Total Count for Total Print the caption of total Item number Label (C)Payment Price for Total Print the caption of payment Label (C)Change Price for Total Print the caption of change price Label (C)Total Price Total Print the caption of total price Label (C)Total Tax for Total Label 197 Print the caption of total tax price...
-
Page 179: Ascii Code Table
4.4 ASCII Code Table Microsoft Window Codepage 1252 Note : To enter “A”, first you have to read 40 in a row and 01 in a column and type 41.
Need help?
Do you have a question about the CL5000 Series and is the answer not in the manual?
Questions and answers