Table of Contents

Related Manuals for Motorola V700


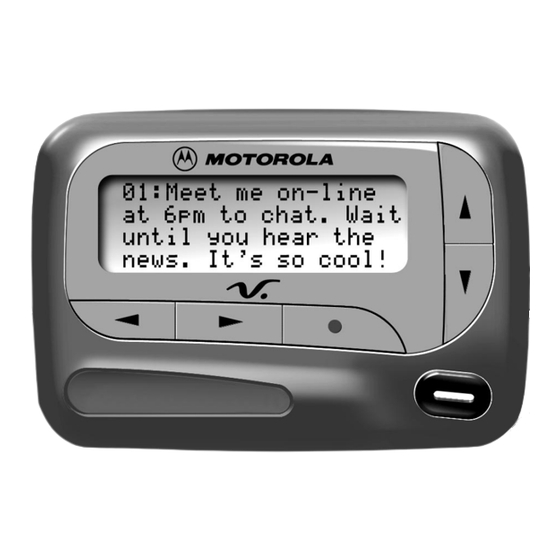
Summary of Contents for Motorola V700
-
Page 2: Table Of Contents
Introduction ... 1 Getting Started Installing/Replacing the Battery... 2 Control Buttons... 4 Turning Your Pager On ... 5 Turning Your Pager Off ... 6 Using the Features Menu ... 7 Message-Status Screen ... 9 Backlight... 10 Receiving/Reading Personal Messages ... 10 Display Zoom ... -
Page 3: Introduction
Congratulations on purchasing a V700 Word Message FLEX pager. Your new pager provides exciting capabilities in messaging and can become a vital part of your business and personal life. The pager’s four-line display and expanded functionality incorporates many of the most advanced electronic, communications and wireless technologies available. -
Page 4: Installing/Replacing The Battery
Effective Use of Your Pager Your pager can help you keep in contact with everyone important to you. By giving your pager number to your business associates, family, and friends, you can be contacted whenever needed. If you have a cellular phone, give your pager number instead of your cellular number. - Page 5 Lift the battery door away from the housing to remove it. Lift the battery out of the battery compartment, taking note of the positive (+) and negative (-) markings on the battery and the pager housing. Ì V700 Word message FLEX pager...
-
Page 6: Control Buttons
To install a new battery, reverse this procedure, taking note of the positive (+) and negative (-) markings. CAUTION : Do not insert the battery backwards or all messages will be erased. Control Buttons Left/Right Directional Buttons Features/ Select Button Left/Right Directional Buttons... -
Page 7: Turning Your Pager On
Directional Buttons Turning Your Pager On Press . A start-up screen is momentarily displayed and your pager activates the currently selected alert. Note: Press any button to stop the alert. Used to display the Features menu, to select a pager feature, and to activate your selection. -
Page 8: Turning Your Pager Off
Musical Alarm Example of the Standby Screen When the pager is on and no activity is taking place, the Standby screen is displayed. The Standby screen displays the power-on indicator N and may display other pager status indicators. Turning Your Pager Off Press to display the Features menu. -
Page 9: Using The Features Menu
Sending a Test Page to Yourself It’s a good idea to test your pager and service by sending a page to yourself. Start by using the phone number, web site, or email address (and a PIN, if required) your service provider gave you, then enter a short message. - Page 10 To exit from the Features menu without making any changes press Note: Some symbols may not display on your pager, depending upon your pager’s features and whether it has messages. VVjV...
-
Page 11: Message-Status Screen
For example, unread messages are indicated by a flashing locked messages are indicated by g. The Message-status screen also displays the time and date and any activated pager settings. The Message-status screen can be accessed by pressing H, I, G, or F from the Standby screen. mgmmomm... -
Page 12: Backlight
Standby screen. Receiving/Reading Personal Messages Your pager can receive up to 19 personal messages. When a message is received, your pager alerts according to the current alert setting (musical, vibrate, or no message alert). A new message is indicated by a flashing symbol. - Page 13 • Press H or I while reading a message to read the previous or next message. Note: When an unread message exists, your pager gives a periodic reminder alert until all unread messages are read, or for up to 30 minutes.
-
Page 14: Display Zoom
From the Features menu, press H to move the cursor to 1. Press . Display zoom is now active. All new and stored messages including notebook messages are displayed in a 2-line format. Pager prompts are not enlarged in the zoom mode. -
Page 15: Setting The Time And Date
To Disable Display Zoom From the Features menu, press H to move the cursor to 4. Press . Display zoom is now turned off. Setting the Time and Date From the Features menu, press H to move the cursor to v. Press to display the Set-time-and-alarm screen. - Page 16 Press to activate the time and date setting. c12:00AM --/--/-- If you move the cursor past the last symbol in the row (far right), it automatically wraps around to the first symbol in the beginning of the same row (far left). Note: To exit from any screen without making changes, press 3:15PM 09/05/99z SET TIME...
-
Page 17: Setting The Incoming Message Alert
Setting the Alert Pattern You can set your pager to alert musical with a standard alert (1), one of seven musical (pleasing) alerts (2-8), a chirp alert (j), or a chirp and vibrate alert (|). You can also select no message alert (r). - Page 18 From the Features menu, press H to move the cursor to l. Press to display the Choose alert menu. Press H or I to move the cursor to the desired alert. The pager gives a sample of each alert as you move through the selections. Press to activate your selection.
-
Page 19: Locking And Unlocking Messages
Locking and Unlocking Messages Up to 10 messages can be locked to prevent them from being deleted or from being replaced when memory is full. When a message is locked, the m symbol is replaced by the g symbol indicating the message is locked. To Lock or Unlock a Message From the Message-status screen, press H or I to select the message you want to lock or unlock. -
Page 20: Deleting Messages
Deleting Messages This feature allows you to delete unlocked and un-alarmed messages. To Delete a Single Message From the Message-status screen, press H or I to select the message you want to delete. Press Press I to move the cursor to A. Press DELETE MESSAGE? Press... -
Page 21: Pager Alarm
Pager Alarm Your pager has an alarm that can be set for a specific time and date, or a specific time on a daily basis. At the selected alarm time, your pager alerts. If the alarm times passes without being acknowledged, Q flashes until any button is pressed. - Page 22 The alarm symbol shows the current alarm status. cis displayed if the alarm is turned on, e is displayed if the alarm is turned off. Press I to move the cursor to the alarm symbol. Press F or G until c is displayed. Press I to move the cursor to the hour digits.
-
Page 23: Set The Alarm To Alert Daily
To Set the Alarm to Alert Daily Follow steps 1 through 8 in “To Set a One-Time Alarm” to set the alarm time. When setting the date in step 8, press G until you see double dashes for the month, day, and year (--/--/--). Example of Set-Alarm Screen for a Daily Alert Press to activate your selection. -
Page 24: Message Alarms
Message Alarms This feature allows you to set a one-time or daily alarm for a selected personal message. You can set an alarm for up to five personal messages. When a message alarm is set, b replaces m in the Message-status screen. - Page 25 Press . The Set-message-alarm screen is displayed. zv 03:15PM 05/05/7z Example of Set-Message-Alarm Screen The alarm symbol shows the current alarm status. c is displayed if the message alarm is turned on, e is displayed if the message alarm is turned off.
-
Page 26: Set A Daily Message Alarm
Press F or G to adjust the hour digits. Repeat steps 6 and 7 to adjust the minutes, AM/PM/24 hr., and date. Press to activate your selection. You can also set a message alarm while reading the message by following steps 2 through 9 above. -
Page 27: Private Time
Private Time You can select a time period during which your pager is completely silent. Your pager still receives messages but is does not alert. The pager alerts only if an alarm expires or a priority message is received. To Set Private Time From the Features menu, press H to move the cursor to 3. - Page 28 Press and release G until 3 is displayed. Press I to move the cursor to the hour digit. Press F or G to adjust the hour digit. Repeat steps 4 and 5 to adjust the on and off time setting. Press K to activate your selection.
-
Page 29: Maildrop/Information Service Option
Maildrop/Information Service Option Your pager is capable of receiving maildrop messages, also known as information services. Information Services messages are received and read the same way as personal messages and the icon indicators are located on the second row of the display. - Page 30 Information Services Alerts When this option is turned on, you can set your pager to alert when information services messages are received. • A V in the information services message area indicates the alert is off for that information services. A j indicates the alert is on for that information services.
- Page 31 Press I to move the cursor to j. Press . The choose alerts menu is displayed. Press H or I to move the cursor to the desired alert. Press to activate the alert. The pager gives a sample of the alert, unless no message alert is selected.
-
Page 32: Notebooks
Notebooks Your pager has two notebook areas, a personal notebook for storing personal messages, and a information services notebook for storing information service messages. Notebook messages are indicated by Personal messages are indicated on the first row of the display. Information Services messages are indicated on the second row of the display. -
Page 33: Storing Personal And Information Services Messages In Your Notebooks
Storing Personal and Information Services Messages in Your Notebooks From the Message-status screen, press F , G, H, or I to move the cursor to the personal or information services message you want to move into the notebook. Press Press I to move the cursor to u. Press . - Page 34 Press F or G to scroll through the list until beginning of the notebook message you want to delete. Pick me up for school Lets meet at the mall Check out Web site Example of Notebook Screen in Delete Mode Press to display the Features menu.
-
Page 35: Features
Out of Range If your pager has this feature, and if you are outside your paging coverage area, is displayed. As long as is displayed, your pager cannot... - Page 36 Key Click If this feature is turned on, and the pager is in the musical mode, a “click” is emitted when any of the pager’s buttons are pressed. The click is not emitted when the pager is in the vibrate mode.
-
Page 37: Cleaning Your Pager
Do not use alcohol or other cleaning solutions. Questions? If you have any questions about the use of your Motorola pager call 1-800-548-9954 or 1-800-793-7834 (TTY) in the U.S. If you have questions about your paging service, contact your paging service provider. For information about other Motorola products, please visit our web site at www.motorola.com... -
Page 38: Care And Use
For more information about warranties, please contact either your paging service provider, retailer, or Motorola, Inc. at 1-800-548-9954. For repairs, call Motorola, Inc. at 1-800-548-9954 in the U.S. or 1-800-323-9685 in Canada. In the U.S., to contact Motorola, Inc. on your TTY, call 1-800-793-7834. -
Page 39: Fcc Information
FCC Information This device complies with part 15 of the FCC Rules. Operation is subject to the following two conditions: (1) This device may not cause harmful interference, and (2) this device must accept any interference received, including interference that may cause undesired operation. - Page 40 EXTENT SUCH MAY BE DISCLAIMED BY LAW. Motorola pagers are shipped from the factory with a standard limited warranty of one (1) year on parts and labor from date of purchase by the original end user purchaser, based on proof of purchase. In the event of a defect, malfunction, or failure to conform to specifications during the warranty period, Motorola, at its option, will either repair, replace or refund the purchase price of the pager.
- Page 41 • Pagers whose serial numbers do not match on the boards, or pagers in which the board serial numbers don’t match the housing. • Pagers that have been opened by, or had work performed by, anyone other than a Motorola authorized pager service center.
- Page 43 Personal Numbers Use the spaces provided below to write down your pager and personal identification number (PIN), and the number of your service provider. Additional spaces have been provided to write down the pager and PIN of your family and friends.
- Page 44 This Motorola product is manufactured under one or more Motorola U.S. patents. These patent numbers are listed inside the housing of this product. Other U.S. patents for this product are pending. t, Motorola and are trademarks or registered trademarks of Motorola, Inc.
- Page 45 V700 Word Message Turning Your Pager On Press Turning Your Pager Off From the Features Menu, press move the cursor to Press twice. Features Menu Provides access to the features described in this quick reference card and in your user’s guide.
- Page 46 Press to move the cursor to Press Follow steps 3 through 6 in Setting the Time and Date . Note: To set a daily pager or message alarm, press displayed for the month, day, and year (--/--/--). until is displayed.
- Page 47 To Turn On/Turn Off Display Zoom From the Features menu, press move the cursor to turned off. Press Pager Symbols Power On Musical Alert Mode on Private Time turned on Alarm turned on to activate your selection.
- Page 48 Set Time and Alarm Set Private Time Display Zoom On Display Zoom Off Set Vibrate Alert Set Musical Alert Turn Pager Off Escape (to Message-status screen) Delete Message Delete All Messages Lock Message Unlock Message Turn Information Services Alert On...