Table of Contents
Advertisement
Advertisement
Table of Contents

Summary of Contents for Body Sculpture BR-3130
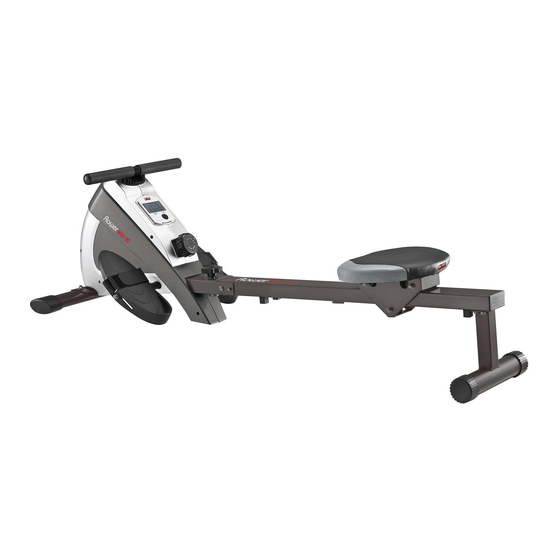
- Page 1 BR-3130 MAGNETIC ROWING MACHINE...
- Page 3 Impo rtan t Safety I nformation Exploded View Parts List Assembly Instructions Folding For Storages Exercise Guide Exercise Instructions . .. Trouble Shooting Computer Exercise Notes...
- Page 5 Please keep this manual in a safe place for reference. 1. It is important to read this entire manual before assembling and using the equipment. Safe and efficient use can only be achieved if the equipment is assembled, maintained and used properly. It is your responsibility to ensure that all users of the equipment are informed of all warnings and precautions.
- Page 7 PART PART DESCRIPTION Q'TY DESCRIPTION Q'TY End Cap Cushion Cover Foam Grip Bushing Handlebar Magnet Bracket Computer Nut (M10*1.25) Plastic Bushing Screw (ST4.2*15) Lock Nut(M8) Front End Cap Washer(φ8) Front stabilizer Pedal Curve Washer (φ8) Chain Cover (Left) Screw Screw (ST4.2*19) Wire holder Screw (M5*10) Main Frame...
- Page 9 STEP 2 STEP 1 Attach the seat bracket (pt.15) to the Slide the Seat Bracket (pt.15) into the Rower frame (pt.12) then lock the stoppers (pt.23) to the Rower underside of the seat (pt.14) using the four frame (pt.12) using two sets of Flat Washer (φ10) Washers (φ6) (pt.16) and Screw (M6*15) (pt.22) and Cross screw (ST4.2*19) (pt.21).
- Page 10 STEP5 Insert the Axle for Pedal (pt.50) to the Main Frame (pt.46), cover the Plastic Bushing (pt.5), pedal (pt.8) and Washer (φ8) (pt.7) in order. Then fix tightly by lock Nut (M8) (pt.6) . STEP 6 Attach Rower frame (pt.12) to the Main frame (pt.46), connect Upper wire (pt.52) with lower wire (pt.26).Fix them tightly by Pivot (pt.28) and Bolt (M6*10) (pt.51) ,then insert Pull Pin (pt.27), at last tight tighten adjustment knob (pt.31).
- Page 11 1 1 1 1 2 2 2 2 Unscrew the adjustment knob (pt.31) from the mainframe (pt.46) and remove the pull pin (pt.27), then pull the rower frame (pt.12) in towards the main housing unit and replace the pull pin to keep the rower in a folded position. (NB please ensures that the sensor cables do not get trapped when tilting the mainframe bar in towards the main housing).
- Page 12 Rowing is an extremely effective form of exercise. It strengthens the heart and improves circulation as well as exercising all the major muscle groups; the back, waist, arms, shoulders, hips and legs. The Basic Rowing Stroke 1) Sit on the saddle and fasten your feet to the pedals using the Velcro straps. Then take hold of the rowing bar. 2) Take up the starting position, leaning forward with your arms straight and knees bent as shown in (Fig 1).
- Page 13 Using your MAGNETIC ROWING MACHINE will provide you with several benefits. It will improve your physical fitness, tone your muscles and, in conjunction with a calorie-controlled diet, help you lose weight. 1. The Warm-Up Phase This stage helps get the blood flowing around the body and the muscles working properly. It will also reduce the risk of cramp and muscle injury.
- Page 14 To tone muscle while on your MAGNETIC ROWING MACHINE you will need to have the resistance set quite high. This will put more strain on our leg muscles and may mean you cannot train for as long as you would like. If you are also trying to improve your fitness you need to alter your training program.
- Page 15 Appearance Functions and Operations 1. Batteries Installation Please install 2 pieces of AA 1.5V batteries in the battery case on the back of monitor. (Whenever Batteries are removed, all the functions values will be reset to zero.) 2. Auto On/Off While the user starts to do exercise, the Display will show out the workout value automatically.
- Page 16 7. Calories Display the calories consumption during training from 0.0 to 999.9. User also can press the button until the ARROW points to display the calories consumption value. 8. Count/Min Display current rotation per minute from 0.0 to 3000. User also can press the button until the ARROW points to display the Count/Min.
- Page 19 COPYRIGHT ©2010 BY BODY SCULPTURE INTERNATIONAL EUROPE LTD ALL RIGHTS RESERVED. UNAUTHORIZED DUPLICATION IS A VIOLATION OF LAW.


Need help?
Do you have a question about the BR-3130 and is the answer not in the manual?
Questions and answers