Hilti PD 42 Operating Instructions Manual
Hide thumbs
Also See for PD 42:
- Operating instructions manual (25 pages) ,
- Operating instructions manual (181 pages)
Table of Contents
Advertisement
Advertisement
Table of Contents

Related Manuals for Hilti PD 42


Summary of Contents for Hilti PD 42
- Page 1 PD 42 Bedienungsanleitung Operating instructions Mode d’emploi Istruzioni d’uso Manual de instrucciones Manual de instruções Gebruiksaanwijzing Οδηγιες χρησεως Kulllanma Talimatı Printed: 20.12.2013 | Doc-Nr: PUB / 5140863 / 000 / 01...
-
Page 2: Parts, Operating Controls And Indicators
+≠ +± +“ +Ç Printed: 20.12.2013 | Doc-Nr: PUB / 5140863 / 000 / 01... -
Page 3: Optical Sight
Printed: 20.12.2013 | Doc-Nr: PUB / 5140863 / 000 / 01... - Page 4 Printed: 20.12.2013 | Doc-Nr: PUB / 5140863 / 000 / 01...
-
Page 5: Table Of Contents
ORIGINAL OPERATING INSTRUCTIONS PD 42 laser range meter 1 These numbers refer to the corresponding illustra- It is essential that the operating instructions tions. The illustrations can be found on the fold-out cover are read before the tool is operated for the pages. -
Page 6: Product Overview
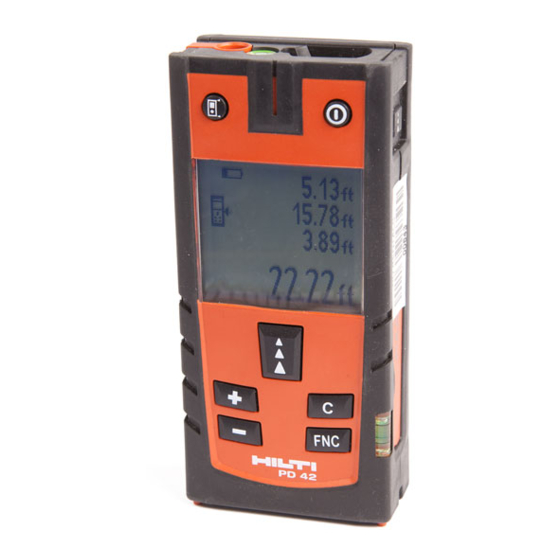
The type designation and serial number can be found on the type identification plate on the tool. Make a note of this data in your operating instructions and always refer to it when making an enquiry to your Hilti representative or service department. Type: Serial no.:... - Page 7 To avoid the risk of injury, use only genuine Hilti accessories and additional equipment. Modification of the tool is not permissible. NOTE Observe the permissible operating and storage temperatures. 2.2 Display The measurements, settings and tool status are shown in the display. When the tool is in measuring mode, the measurements taken are shown at the bottom of the display area (the result line).
- Page 8 = 100 % capacity = 75 % capacity = 50 % capacity = 25 % capacity Fully discharged 2.10 Items supplied as standard PD 42 laser range meter Hand strap PDA 51 target plate Batteries Battery compartment key Operating instructions Manufacturer’s certificate...
-
Page 9: Insert Tools, Accessories
The measuring extension is made from aluminium and is equipped with a non-conductive plastic grip. The screw on the measuring extension should be screwed into the threaded bush on the rear contact surface of the PD 42. When the measuring extension is screwed onto the tool, the rear reference is then relocated to the tip of the measuring extension, i.e. -
Page 10: Safety Instructions
2. Have the tool repaired only at a in each of the sections of these operating instructions, Hilti service center. the following points must be strictly observed at all d) Check that the tool functions correctly each time times. -
Page 11: Before Use
Do measurements by other means when working under such not direct the laser beam toward persons. conditions or if you are unsure. Likewise, Hilti cannot rule out the possibility of interference with other devices (e.g. 5.7 Transport aircraft navigation equipment). -
Page 12: Switching On/Off
Unscrew the battery compartment cover from the 6.5 Measuring references rear of the tool. NOTE Remove the batteries from the packaging and insert The tool can take measurements from 5 different refer- them in the tool. ence (contact) points. The “Reference” button on the top NOTE Take care to observe correct polarity (see left on the front of the tool is used to switch between symbols in battery compartment). - Page 13 the tool can be aimed accurately at targets even at great distance. When the tool is switched on, the laser spot can be seen in the optical sight. If the laser spot cannot be seen in the optical sight, either the measurement has been successfully completed or the laser beam has switched itself off after the corresponding time interval.
- Page 14 Position the range meter with the spike at the desired The tool can, of course, be switched on again at any time starting point for the measurement and aim toward by pressing the “Measure” button. Pressing the C-button the target. clears all currently displayed values.
-
Page 15: Operation
6.7.10.2 Reduced measuring range The range of the tool may be reduced when measure- ments are taken through glass or when objects lie within Measuring range may be reduced in bright conditions, the path of the laser beam. e.g. in bright sunlight or when working under very power- The range of the tool may be reduced when measure- ful floodlights. - Page 16 Aim the range meter at the target. 7.5 Measuring areas Press the “Measure” button. The first distance will be measured and displayed (the laser then switches off). Press the “Minus” button. The first distance is then 5.489 5.489 displayed in the middle result line and a minus sign appears in the lower (intermediate) result line (the 12.349 12.349...
- Page 17 The C-button can be pressed at any time to stop 10. The C-button can be pressed at any time to stop the measuring operation. Each measurement can the measuring operation. Each measurement can then be cleared, one after the other, and measuring then be cleared, one after the other, and measuring restarted.
- Page 18 Press the “Measure” button to stop measuring. 7.8.2 Setting out given distances The maximum distance, minimum distance and the Press the FNC-button to activate the “Setting out” difference between minimum and maximum are then function. shown in the display. NOTE When the “Setting out” function is activated, The C-button can be pressed at any time to stop the the laser beam is already switched on.
- Page 19 Press the “Plus” button and measure the next length. 7.10.1 The “Single Pythagoras” method The sum of the two lengths is shown in the results line. Press the “Plus” button again to make the tool ready to measure the next length. The total length is then displayed in the top interme- 8.642 diate result line.
- Page 20 7.10.2 The “Double Pythagoras” method 7.10.3 The “Combined Pythagoras” method 8.642 m 7.823 m 5.123 4.762 5.430 3.894 8.76 4.044 Follow the symbols in the display. The blinking side of the Follow the symbols in the display. The blinking side of the triangle indicates the measurement to be taken.
-
Page 21: Calibration And Adjustment
8.3 Transport water. NOTE Do not use any other liquids as these may Use the Hilti toolbox or packaging of equivalent quality damage the plastic components. for transporting or shipping your equipment. The temperature limits for storage of your equipment CAUTION must be observed, especially in winter / summer. -
Page 22: Troubleshooting
PD 42 laser 8.4.2 Adjustment range meter yourself (see ISO 17123-4: Field Process for To ensure that the laser range meter is adjusted correctly, Accuracy Examination of Geodetic Instruments: Part 6, we recommend that it is returned to a Hilti Service Center Close-range Opto-electrical Range Meters). -
Page 23: Disposal
Most of the materials from which Hilti tools or appliances are manufactured can be recycled. The materials must be correctly separated before they can be recycled. In many countries, Hilti has already made arrangements for taking back old tools and appliances for recycling. -
Page 24: Ec Declaration Of Conformity (Original)
We declare, on our sole responsibility, that this product Deutschland complies with the following directives and standards: 2006/95/EC, 2004/108/EC, 2011/65/EU, EN ISO 12100. Hilti Corporation, Feldkircherstrasse 100, FL‑9494 Schaan Paolo Luccini Matthias Gillner Head of BA Quality and Process Man-... - Page 25 Tel.: +423 / 234 21 11 Fax:+423 / 234 29 65 www.hilti.com Hilti = registered trademark of Hilti Corp., Schaan W 3399 | 1213 | 00-Pos. 1 | 1 Printed in Liechtenstein © 2013 Right of technical and programme changes reserved S. E. & O 320298 / A3 Printed: 20.12.2013 | Doc-Nr: PUB / 5140863 / 000 / 01...
Need help?
Do you have a question about the PD 42 and is the answer not in the manual?
Questions and answers
how do i CHANGE FROM METERS to feet