
Related Manuals for Hilti PD 32


Summary of Contents for Hilti PD 32
- Page 1 PD 32 Operating instructions 1–30 Mode d’emploi 31–60 Istruzioni d’uso 61–90 Manual de instruções 91–120 Manual de instrucciones 121–150 Printed: 07.07.2013 | Doc-Nr: PUB / 5070013 / 000 / 00...
- Page 2 Printed: 07.07.2013 | Doc-Nr: PUB / 5070013 / 000 / 00...
- Page 3 PDA 50 PDA 80 PDA 60 PDA 81 PDA 61 PDAW 80-1 PDA 62 PDAW 80 / 81-1 PDA 70 PDAW 80 / 81-2 PUA 60 PDAW 80 / 81-3 PDAW 81-1 Printed: 07.07.2013 | Doc-Nr: PUB / 5070013 / 000 / 00...
-
Page 4: Table Of Contents
PD 32 side measurement key . . . 4 Control panel 2.4.3. PD 32 optical sight ... 4 Receiving lens Plastic casing Tools and accessories ..5 Horizontal bubble 3.1. - Page 5 Adjustment ....27 7.4. Measuring distances..15 9.3. Hilti calibration service ..27 7.4.1. Measuring references ..15 7.4.2.
-
Page 6: General Information
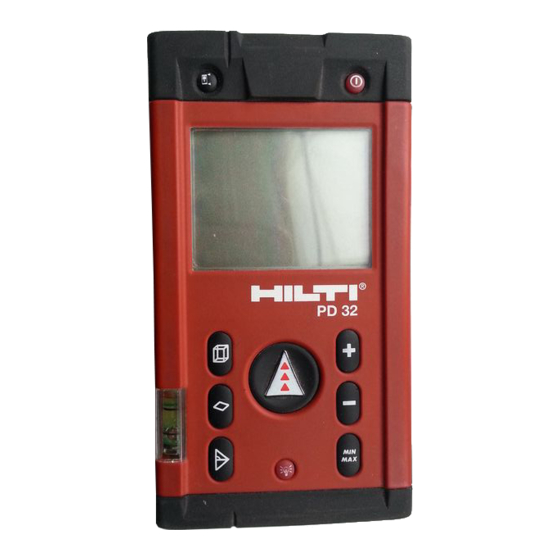
Keep these pages open when studying the oper- ating instructions. In these operating instructions, the PD 32 laser range meter is referred to as "the range meter". Printed: 07.07.2013 | Doc-Nr: PUB / 5070013 / 000 / 00... -
Page 7: Description
Display illumination – Measurement of distances – Calculation of areas, volumes and distances – Addition and subtraction of distances 2.4.2 PD 32 Side measurement key – Operation and storage in the specified temperatures 2.2 Items supplied 1 PD 32 laser range meter 1 PDA 50 target plate 2.4.3 PD 32 Optical sight... -
Page 8: Tools And Accessories
3. Tools and accessories 3.1 PDA 50 target plate 3. Tools and accessories The PDA 50 target plate is made of durable plastic with a special reflective coating. In Description Designation poor light conditions, it is advisable to use Target plate PDA 50 the target plate for distances above 10 m (30 ft). -
Page 9: Pdaw 80-1 Mains Adaptor
NiMH batteries of With the help of the belt clip the range the PD 32, it may not be replaced by other meter attaches to the measuring extension. types of car battery plugs. -
Page 10: Technical Data
– Ambient light conditions Alkaline: 15’000 - 20’000 In case measurements are not NiMH: 8’000 - 10’000 possible, use the Hilti PDA 50 target plate. Operating temperature - 10°C…+ 50°C (14°F… 122°F) Accuracy Storage temperature ±1.5 mm (±1/16 inch) is typical - 30°C…+ 70°C (- 22°F…... -
Page 11: Safety Information
– Have the range meter repaired only at a before use. If the range meter is found to Hilti service center. Unauthorized be damaged, have it repaired at a Hilti opening of the range meter may cause service centre. The accuracy of the range... -
Page 12: Proper Organization Of Workplace
Laser information plates for the US the strict requirements of the relevant based on CFR 21 § 1040 (FDA) guidelines, Hilti cannot entirely rule out the following possibilities: This laser product complies with 21 CFR – The range meter might cause 1040, as applicable. -
Page 13: Getting Started
6. Getting started 6. Getting started – Always use rechargeable batteries of the same age and charged to the same level. – New rechargeable batteries are mostly empty and have to be charged prior to first use. – Use only NiMH batteries with 1.2 V 6.1 Inserting alkaline / rechargeable and 1500 –... -
Page 14: Fast Battery Charging
6.2.2 Fast battery charging You have taken the first distance The charging process ensures that within measurement with the PD 32 range meter. 15 minutes of charging with the PDAW 80/81-2 car battery plug the battery receives enough power for a further 150 to 200 measurements. -
Page 15: And Off
6. Getting started / 7. Operation 6.4 Settings 7. Operation 6.4.1 Activating the setting menu 7.1 General controls The menu is activated by pressing the "On / Off" key pressed for about 2 seconds 7.1.1 Control panel while the range meter is switched off. The beep and the units may be set Beep Units... -
Page 16: Measure Keys
7. Operation 7.1.3 Measure keys Minus – activates "distance "Measure" key subtraction" and deactivates – switches the range meter On every other function. – activates the laser beam for aiming at the target, Indirect distance – activates single distance measurement measurement –... -
Page 17: Symbols Displayed
General hardware error light or use the target plate Switch the range meter Off PDA 50. and then back On. If the error persists, notify the local Hilti Laser switched on service centre. – moving dashed line Indirect distance Display reference status measurement –... -
Page 18: Display Illumination
7. Operation 7.2.2 Display illumination Diagram of optical sight = Illumination key The illumination key, switches the display Laser illumination On or Off. In the dark or in very bright light, e.g. sunlight or a strong Sighting spotlight the display illumination helps the user to read the display more easily. -
Page 19: Measuring Distances Step By Step
7. Operation Display Reference position 3. Aim to the target. 4. Press the "Measure" key once again Front edge to measure the distance. Rear edge The result appears in the result line normally in less than a second. The laser beam switches off. -
Page 20: Measuring From Corners
7. Operation 7.4.3.1 Single distance measurement 7.4.4 Measuring from corners (Measure key) The spike is used when measuring 1. Switch on the laser beam by pressing diagonally across rooms or from the "Measure" key. inaccessible corners. 2. Press the "Measure" key once again. Generally, the measured distance will be 1. -
Page 21: Measuring With The Aid Of Target Objects
7.4.6 Measuring in bright surroundings the range or a measurements to the actual The PD 32 has a built-in optical target light reflex from elsewhere must be sight. When measuring to very bright expected. -
Page 22: Taking Measurements To
7. Operation / 8. Applications 7.4.10 Taking measurements to 8. Applications and calculation transparent surfaces functions It is not possible to measure distances to transparent materials, e.g. liquids, foam The individual steps within all functions are polystyrene, etc. This is because light pen- mostly supported, on principle, by graphics etrates these materials and therefore meas- on the display. -
Page 23: Historical Data Memory
8. Applications 8.1.2 Historical data memory 1. At the start of the area function, the The range meter saves the last five laser beam is switched on. measurements or calculation including the 2. Aim the range meter at the target. graphics. -
Page 24: Adding Distances
8. Applications The individual steps for determining a 8.4 Adding distances volume are supported by a corresponding Single distances can be conveniently added. graphic display. To determine the volume This is useful for determining door or of a room, for example, the following window openings or to add several partial procedure must be followed: distances to form the perimeter. -
Page 25: Subtracting Distances
8. Applications pressing the "Plus" key. The previous three measurement and calculation results will be in the intermediate displays. 8.5 Subtracting distances Single distances can be conveniently subtracted from each other. This is useful This procedure can be followed until all for determining, for example, offsets to distances have been subtracted. -
Page 26: Measuring Criteria
8. Applications measurements. To obtain the best possible 8.6.3 Indirect measurement result, attention must be paid to the geom- (combined version) etry, e.g. right angle and triangle arrangement. The best results are obtained when: 90∞ a) the tool is aimed accurately at the ends of the line 90∞... -
Page 27: Version
8. Applications 8.6.4 Indirect measurement Both functions are activated simultaneously (simple version) by pressing the "Min / Max" key. In addition, the difference between minimum and maximum is shown. 8.7.1 Maximum measurement ? m ( ? ft ) The continuous measurement mode is 90∞... -
Page 28: Combined Measurement
8. Applications 8.7.2 Minimum measurement 8.7.3 Combined measurement The minimum measurement is taken in the The combination of simultaneous display continuous measurement mode which of maximum and minimum distances updates the display every time the permits the calculation of offsets, measured distance decreases. -
Page 29: Setting Out
(See also section 7.4.3.2 You may carry out the inspection, Continuous measurement.) measuring and test of the PD 32 laser Hold the "Measure" key pressed for approx. range meter as specified in ISO 900X... 2 seconds to activate the continuous (See ISO 17123-4 Field Process for measurement mode. -
Page 30: Adjustment
(storage temperatures: -30°C to +70°C / -22°F to +158°F). As a part of the Hilti calibration service, it – Replace damaged parts. is verified that on the day of the check the specifications of the range meter comply 10.2 Storage... -
Page 31: Disposal
11. Disposal / 12. Manufacturer's warranty – tools 11. Disposal 12. Manufacturer's warranty – tools - CAUTION - Hilti warrants that the tool supplied is free Improper disposal of the equipment may of defects in material and workmanship. have serious consequences:... -
Page 32: Fcc Statement
13 FCC statement (applicable Product information plate in US) AVOID EXPOSURE - WARNING - Hilti = registered trademark of Hilti Corporation, Laser radiation is emitted Schaan, LI from this aperture Type: PD 32 This equipment has been tested and has... -
Page 33: Ec Declaration Of Conformity
14. EC conformity 14. EC conformity Designation: Laser range meter Type: PD 32 Year of design: 2003 In conformance with We declare, on our own responsibility, that this product complies with the following standards or standardization documents: EN 50081-1 and EN 61000-6-2 according to the stipulations of the directive 89/336/EEC. - Page 34 Fax: +423 / 234 29 65 www.hilti.com Hilti = registered trademark of Hilti Corp., Schaan W 2906 0306 20-Pos. 1 1 Printed in Liechtenstein © 2006 Right of technical and programme changes reserved S. E. & O. Printed: 07.07.2013 | Doc-Nr: PUB / 5070013 / 000 / 00...
Need help?
Do you have a question about the PD 32 and is the answer not in the manual?
Questions and answers
How do I make my hilti pd32 open