Table of Contents
Advertisement
Advertisement
Table of Contents

Related Manuals for Roberts classic blutune


Summary of Contents for Roberts classic blutune
- Page 1 DAB / DAB+ / FM RDS Bluetooth digital radio Please read this manual before use...
-
Page 2: Table Of Contents
Contents Controls ................2-3 Setting the clock format .............25 Battery operation ..............4 Setting the clock manually ........... 26-27 Using the radio for the fi rst time...........5 Automatically updating the clock ........28 Operating your radio and selecting a station - DAB ....6 Display brightness control ..........29 Secondary services - DAB...........7 Auto-standby feature - Bluetooth ........29... -
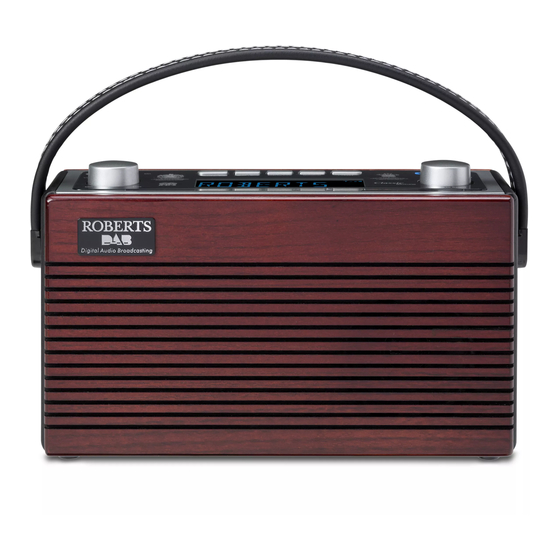
Page 3: Controls
Controls (Top) 1. LCD display 7. Menu / Info button 2. Volume control 8. Dimmer button 3. On / Off button 9. Preset button 4. On indicator 10. Telescopic aerial 5. Mode button 11. Tuning / Select control 6. Auto Tune button... - Page 4 Controls (rear) 12. Headphone socket 13. Line out socket 14. USB socket (for software upgrade only) 15. DC input socket 16. Battery compartment...
-
Page 5: Battery Operation
4. If the radio is not to be used for any extended period of time it is recommended that the batteries are removed from the radio. We would recommend for economy that the Classic Blutune is used via the AC adaptor whenever possible with battery operation for occasional or standby use only. -
Page 6: Using The Radio For The Fi Rst Time
Using the radio for the fi rst time 1. Place your radio on a fl at surface. 2. Carefully fully extend the telescopic aerial located on the rear of your radio. 3. Insert the adaptor plug into the DC socket located on the rear of your radio. -
Page 7: Operating Your Radio And Selecting A Station - Dab
Operating your radio and selecting a station - DAB 1. Press and release the On/Off button to switch on your radio. 2. Press and release the Mode button until the DAB mode is selected. The display will show the name of the radio station currently selected. 3. -
Page 8: Secondary Services - Dab
Secondary services - DAB 1. Certain radio stations have one or more secondary services associated with them. If a station has a secondary service associated with it then the secondary service will then appear immediately after the primary service as you rotate the Tuning control. 2. -
Page 9: Display Options - Dab
Display options - DAB Your radio has a range of display options when in DAB mode:- 1. Press and release the Menu / Info button to cycle through the various options. All display options except the scrolling text display will revert to the clock display after about 20 seconds. -
Page 10: Display Options - Dab
Display options DAB - cont e. Programme type Displays the type of station being listened to e.g. Pop, Classic, News, etc. f. Multiplex Name Displays the name of the DAB multiplex to which the current station belongs. g. Frequency Displays the frequency for the currently tuned DAB station. -
Page 11: Finding New Stations - Dab
Finding new stations - DAB From time to time, new DAB radio stations may become available. Or you may have moved to a different part of the country. In this case you may need to cause your radio to scan for new stations. 1. -
Page 12: Manual Tuning - Dab
Manual tuning - DAB Manual tuning allows you to tune your radio to a particular DAB frequency in Band III. Any new stations found will be added to the station list. This function can also be used to assist the positioning of the aerial or the radio to optimise reception for a specifi... -
Page 13: Dynamic Range Control (Drc) - Dab
Dynamic Range Control (DRC) - DAB The DRC facility can make quieter sounds easier to hear when your radio is used in a noisy environment. There are three levels of compression: DRC 0 No compression applied. (default) DRC 1/2 Medium compression applied. DRC 1 Maximum compression applied. -
Page 14: Prune Stations - Dab
Prune stations - DAB Over time, some DAB services may stop broadcasting, or may change location and then not be able to receive a station. In order to remove such stations from the DAB station list, the Prune stations function will delete the DAB stations from your station list that can no longer be received. -
Page 15: Operating Your Radio - Fm Auto-Tune
Operating your radio - FM auto-tune 1. Carefully fully extend the telescopic aerial located on the rear of your radio. 2. Press and release the On/Off button to switch on your radio. 3. Press and release the Mode button until the FM mode is selected. 4. -
Page 16: Manual Tuning - Fm
Manual tuning - FM 1. Carefully fully extend the telescopic aerial located on the rear of your radio. 2. Press and release the On/Off button to switch on your radio. 3. Press and release the Mode button until the FM mode is selected. 4. -
Page 17: Display Options - Fm
Display options - FM Your radio has a range of display options for the FM mode:- The Radio Data System (RDS) is a system in which inaudible digital information is transmitted in addition to the normal FM radio programme. RDS offers several useful features. The following are available on your radio. 1. -
Page 18: Scan Sensitivity Setting - Fm
Scan sensitivity setting - FM Your radio will normally scan for FM broadcasts which are strong enough to give good reception. However, you may wish the Auto-scan function to also be able to fi nd weaker signals, possibly from more distant radio transmitters. -
Page 19: Presetting Stations
Presetting stations You may store your preferred DAB and FM radio stations to the preset station memories. There are 20 memory presets in your radio, 10 for DAB and 10 for FM. Presets are remembered by your radio in the event of a power failure. -
Page 20: Recalling A Preset Station
Recalling a preset station 1. Press and release the On/Off button to switch on the radio. 2. Press and release the Mode button to select either the FM or DAB mode. 3. Press and release the Preset button. The display will show, for example, 'Empty 1' if no station has been stored to that preset. -
Page 21: Bluetooth Mode
● When a Bluetooth enabled device such as your Classic Blutune radio effect. Metal pipes, foil-lined plasterboard, metal window frames and is in a 'discoverable' state other Bluetooth devices can detect, pair domestic wiring can also have an effect. -
Page 22: Connecting Bluetooth Devices
'Classic Blutune'. Just occasionally it may take longer for the radio to be found by your device. 5. Select 'Classic Blutune' to cause your phone, tablet or PC to pair with your radio and to establish a connection. -
Page 23: Playing Audio Fi Les In Bluetooth Mode
Playing audio fi les in Bluetooth mode When you have successfully connected your radio with your chosen Bluetooth device you can start to play your music using the controls on ‘ the device. 1. Once playing has started adjust the volume to the required setting using the Volume controls on your radio and on the connected device. -
Page 24: Connecting And Disconnecting A Bluetooth Device
3. If you no longer want your Bluetooth device to be paired with your radio you will need to delete the 'Classic Blutune' pairing on the device. Please refer to the Bluetooth documentation for your phone, tablet, PC etc. for details of how to cancel current pairings. -
Page 25: Display Options - Bluetooth Mode
Display options - Bluetooth mode ‘ Your radio has a range of display options when in Bluetooth mode:- 1. Press and release the Menu / Info button to cycle through the various options. The display will revert to displaying the time approximately 20 seconds after the last button press. -
Page 26: Setting The Clock Format
Setting the clock format The clock display used in standby mode and when the radio is in use can be set to 12 or 24 hour format. The clock format can only be set while the unit is playing. 1. Press and release the On/Off button to switch on the radio. 2. -
Page 27: Setting The Clock Manually
Setting the clock manually Normally your radio will set its clock automatically using the DAB radio signal. If no DAB signal is available and you need to set the time manually, please follow the procedure shown below. 1. Press and release the On/Off button to switch on the radio. 2. - Page 28 Setting the clock manually - cont 10. Press and release the Tuning control to enter the minutes setting. The day will then fl ash on the display. 11. Rotate the Tuning control to select the current day. 10-16 12. Press and release the Tuning control to enter the day setting. The month will then fl...
-
Page 29: Automatically Updating The Clock
Automatically updating the clock Your radio will usually set the clock time using the DAB signal. You may specify that the radio sets its clock from the DAB or FM radio signals, either signal, or neither. If you choose neither then you will need to set the clock manually if you would like the radio to be able to display the time correctly. -
Page 30: Display Brightness Control
Display brightness control The brightness of the display can be adjusted and has separate settings for when the radio is in standby or when it is in use. 1. In order to adapt the intensity of the display to suit the ambient room lighting press and release the Dimmer button on your radio. -
Page 31: Software Version
Software version The software display cannot be altered and is just for your reference. Ensure your radio is switched on. 1. Press and release the On/Off button to switch on your radio. 2. Press and hold the Menu button. 3. Rotate the Tuning control until 'SYSTEM' shows on the display. 4. -
Page 32: Language Function
Language function Your radio can be confi gured to a different language. Ensure your radio is switched on. 1. Press and release the On/Off button to switch on your radio. 2. Press and hold the Menu button. 3. Rotate the Tuning control until 'SYSTEM' shows on the display. 4. -
Page 33: System Reset
System reset If your radio fails to operate correctly, or some digits on the display are missing or incomplete carry out the following procedure. 1. Press and release the On/Off button to switch on the radio. 2. Press and hold the Menu button. 3. -
Page 34: Headphone Socket
Headphone socket A 3.5mm Headphone Socket located on the rear of your radio is provided for use with either headphones or an earpiece. Inserting a plug automati- cally mutes the internal loudspeaker. Please be aware that the sensitivity of headphones can vary widely. We therefore recommend setting the volume to a low level before connecting headphones to the radio. -
Page 35: Cautions
Cautions Do not allow this radio to be exposed to water, steam or sand. Do not • Your radio should not be exposed to dripping or splashing and that no leave your radio where excessive heat could cause damage such as in objects fi... -
Page 36: Guarantee
In the event that it is not possible to return the product to the Roberts dealer from whom it was purchased, please contact Roberts Radio using the contact details on the www.robertsradio.com website.
Need help?
Do you have a question about the classic blutune and is the answer not in the manual?
Questions and answers