Table of Contents
Advertisement
Advertisement
Table of Contents

Related Manuals for Roberts RD-1


Summary of Contents for Roberts RD-1
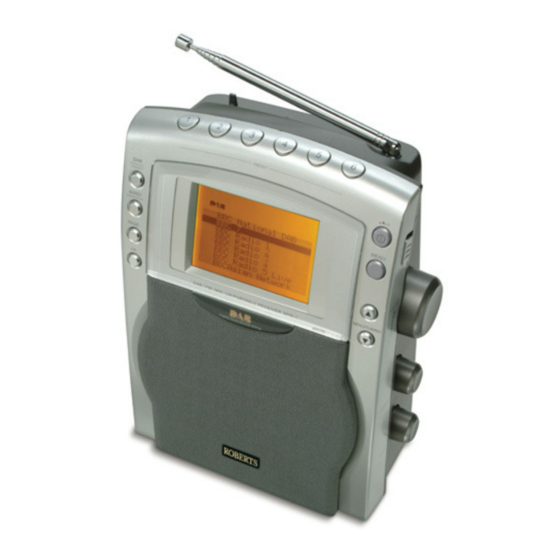
- Page 1 RD-1 FM /DAB digital radio with Gemini 1 Please read this manual before use...
-
Page 2: Table Of Contents
Contents Controls ................2-4 Audio outputs ............... 31 Battery operation ..............5 Audio 2 setup - DAB ............31 Using the AC adaptor ............4 Operating your radio autosearch - FM ........ 32 Operating your radio - DAB ..........6-7 Operating your radio manual tune - FM ...... -
Page 3: Controls
Controls Station Presets (Front) Pause Band Rewind Play Display stop Set-up RD-1 FM /DAB Digital Radio Record 1. Record button 2. Play button 3. Rewind button button 5. Preset buttons 6. On/Off and sleep button 7. Band button 8. Display button 9. - Page 4 Controls (Left side) Digital Audio Aerial Analogue Audio Out LEFT RIGHT DC IN 9. DC input socket 9~12V 2A 10. Headphone socket 11. Telescopic aerial 12. RDI output socket 13. Digital audio output socket 14. Analogue audio 2 output socket 15.
-
Page 5: Controls
Controls (Right side) TUNING Press to select VOLUME TREBLE 16. Bass control BASS 17. Treble control 18. Volume control 19. Tuning control 20. SD card socket 21. Lock Switch 22. Battery compartment If you need any further advice, please call our Technical Helpline on :- 020 8758 0338 (Mon-Fri) -
Page 6: Battery Operation
Battery operation 1. Remove the Battery cover on the rear of the unit by pushing the catches as shown. 2. Insert four LR20 (D size) batteries into the spaces in the compart- ment. Take care to ensure all batteries are inserted with the correct polarity as shown inside the battery compartment. -
Page 7: Operating Your Radio - Dab
Operating your radio - DAB 1. Fully extend the telescopic aerial. 12:00 Wednesday 2. Press the On/Off button to switch on your radio. If this is the first time the radio is used the display will show DAB Auto Tune and a 06-March-2002 quick scan of UK Band III DAB channels will be carried out. - Page 8 Operating your radio - DAB 1. Fully extend the telescopic aerial. 2. Press the On/Off button to switch on your radio. 3. Rotate the Tuning control until the station list appears. AUTO TUNING 1Xtra - BBC 4. Continue to rotate the Tuning control until the required station Press appears between the two black bars on the display.
-
Page 9: Secondary Services - Dab
Secondary services - DAB Secondary TUNING AUTO 1. Certain radio stations have one or more secondary services BBC Radio 4 Press associated with them. If a station has a secondary service the top to select Rumpole or the Bailey line of the display will show Secondary. To select the secondary Coming next - Life Death and Sex with Mike and Sue service Press in and release the Tuning control. -
Page 10: Using Your Radios Pause Plus Feature - Dab
Using your radio's Pause Plus feature - DAB AUTO How many times has your favourite radio station been interrupted BBC Radio 1 by that phone call from a double glazing firm or someone selling that must have item? Sound familiar? Now with a single press of the Paused From : 10:10 For : 01:15 (15:00) button you can put your favourite station on hold while... -
Page 11: Pause Plus Rewind - Dab
Pause Plus Rewind - DAB Rewind AUTO 1. As soon as you switch on your radio the feature is BBC 7 working silently in the background so, say for example, you want Rewind : 01:15 to hear a news item again press the Rewind button and rotate the tuning control clockwise to scroll back to the item you wish to listen. -
Page 12: Pause Plus Record (Internal Memory) - Dab
Pause Plus Record (internal memory) - DAB AUTO 1. Your radio can record to its internal memory for typically 30 minutes Recording but can be up to 1 hour depending on DAB storage settings (see page BBC 7 13) and the programme you are listening to. Recording 0:01:00 Rec Available 0:51:00 Record... -
Page 13: Pause Plus - Record (Sd Card) - Dab
Pause Plus - record (SD card) AUTO Your radio is supplied with a 32MB SD card which will give typically 30 Information minutes record time but can be over 1 hour depending on program type. SDCard Inserted 1. Insert the SD card into the slot located on the top right side of your radio. -
Page 14: Pause Plus Storage Settings - Dab
Set-up Pause Plus storage settings - DAB AUTO Your radio's Pause Plus internal storage can be allocated to either Pause/ Set-Up Rewind or to Record. By default the settings are 50% Pause/Rewind and 50% Record. Buzzer Alarm The default settings are allocated so as to allow typically 15 minutes Radio Alarm Pause/Rewind and 15 minutes Record but can be up to 30 minutes for Record Timer... - Page 15 Pause Plus storage settings - DAB (cont.) TUNING AUTO 6. Rotate the Tuning control until the highlight appears on the Press Storage Control line. to select Audio 2 Optical output RDI Enable 7. Press in and release the Tuning control to select the Storage Storage Storage Control Control section.
- Page 16 Set-up Pause Plus Storage settings - DAB (cont.) AUTO Your radio has three settings for Pause Plus storage. The settings are Set-Up Off, On and On with AC. With the Pause Plus storage Off the battery life will be extended (typically 25 hours). Buzzer Alarm Radio Alarm Record Timer...
- Page 17 Pause Plus Storage settings - DAB (cont.) TUNING AUTO 6. Rotate the Tuning control until the highlight appears on the Press Storage line. to select Audio 2 Optical output RDI Enable 7. Press in and release the Tuning control to select the Storage Storage Storage Control section.
-
Page 18: Record Timer - Dab
Record Timer - DAB TUNING AUTO Note: Timer record is only available on DAB via SD card and is Set-Up Press provided for personal use only. to select Radio Alarm 1. Press the Setup button to enter Setup mode. Record Timer Clock 2. - Page 19 Record Timer - DAB cont. TUNING AUTO 10. Press in and release the Tuning control to confirm selection. Record Timer Press Rotate the Tuning control to select the required minute. to select Timer Days SMTWTFS Start 11. Press in and release the Tuning control to confirm the selection. Stop 00:00 Station...
- Page 20 SD card after WARNING each days recording otherwise the recording will be overwritten. The filing system on your RD-1 only allows one Record Timer Set Insert SDCard! recording per SD card regardless of recording length.
-
Page 21: Sd Card Format - Dab
Set-up SD Card Format - DAB AUTO This formats your SD card erasing any previously recorded files. It also Set-Up allows an SD card formatted on another device to be re-formatted for use on your radio. Buzzer Alarm Radio Alarm Record Timer 1. - Page 22 SD Card Format - DAB cont. TUNING AUTO 6. Rotate the Tuning control until the highlight appears on the Press Storage Control line. to select Audio 2 Optical output RDI Enable 7. Press in and release the Tuning control to select the Storage Storage Storage Control Control section.
-
Page 23: Programme Type - Dab
Set-up Programme Type - DAB AUTO Your radio can be set so that only one particular type of programme Set-Up appears in the station list e.g. Rock, Pop, Classic, etc. The default setting is All. Buzzer Alarm Radio Alarm Record Timer 1. -
Page 24: Favourites - Dab
Set-up Favourites - DAB AUTO When this setting is switched on the most listened to stations will move Set-Up to the top of the station list and be marked with the symbol. Buzzer Alarm 1. Press the Setup button to enter Setup menu. Radio Alarm Record Timer 2. -
Page 25: Manual Tuning - Dab
Set-up Manual Tuning - DAB AUTO Manual tuning allows you to tune directly to the various DAB Band III Set-Up channels. UK DAB stations are located in the range 11B to 12D. Buzzer Alarm 1. Press the Setup button to enter Setup menu. Radio Alarm Record Timer 2. -
Page 26: Service Status - Dab
Set-up Service Status - DAB AUTO This display gives extended information about the currently selected Set-Up station. Buzzer Alarm Press the Setup button to enter the Setup menu. Radio Alarm Record Timer 2. Rotate the Tuning control until the DAB section appears between the two black lines on the display. - Page 27 Service Status cont. TUNING AUTO 6. Rotate the Tuning control until the highlight appears on the Service Press Status line. to select Audio 2 Optical output RDI Enable 7. Press in and release the Tuning control to select the Service Storage Storage Control Status.
-
Page 28: Dynamic Range Control (Drc) Settings - Dab
Set-up Dynamic Range Control (DRC) settings - DAB AUTO DRC can make quieter sounds easier to hear when your radio is used Set-Up in a noisy environment. Currently only BBC Radio 3 broadcasts a DRC level. Buzzer Alarm Radio Alarm Record Timer 1. -
Page 29: Tuning Range - Dab
Should you take your radio to another country which also has Band III Buzzer Alarm DAB broadcasts it may be necessary to change the default tuning range. Radio Alarm Your RD-1 will tune across the full DAB Band III range. Record Timer 1. Press the Setup button to enter Setup menu. TUNING AUTO 2. -
Page 30: Digital Output - Dab
Set-up Digital output - DAB AUTO Your radio is equipped with a digital optical output (TosLink) socket Set-Up which can be used to connect your radio to a Hi-Fi or mini disc for playback or external recording. Buzzer Alarm The default setting for the Digital Output is Off (so as to conserve battery Radio Alarm Record Timer life). -
Page 31: Radio Data Interface (Rdi) Output - Dab
Set-up Radio Data Interface (RDI) output - DAB AUTO Your radio is equipped with an RDI optical output socket (TosLink) which Set-Up can be used to connect your radio to an external data decoder. Buzzer Alarm The default setting for the RDI optical output is Off (so as to conserve Radio Alarm Record Timer battery life). -
Page 32: Audio Outputs
Set-up Audio outputs (analogue) AUTO Your radio has two analogue audio outputs:- Audio 1 outputs to your Set-Up radio's loudspeaker and to Audio output socket 1. Audio 2 outputs to Audio output socket 2 and can be set to output a different station from Buzzer Alarm Audio 1 providing it is within the same multiplex. -
Page 33: Operating Your Radio Autosearch - Fm
Operating your radio - FM auto search 1. Fully extend the telescopic aerial. 2. Press the On/Off button to switch on your radio. Band 3. Press the Band button to select the FM band AUTO 87.50MHz 4. Press in and release the Tuning control the display will show Auto Search 5. -
Page 34: Operating Your Radio Manual Tune - Fm
Operating your radio - FM manual tune 1. Fully extend the telescopic aerial. 2. Press the On/Off button to switch on your radio. Band 3. Press the Band button to select the FM band AUTO 87.50MHz 4. Rotate the Tuning control a clockwise to tune up in frequency or rotate the Tuning control anti-clockwise to tune down in fre- quency. -
Page 35: Presetting Stations - Dab & Fm
Presetting stations - DAB and FM There are 6 memory presets for each of the 2 wavebands. 1. Press the On/Off button switch on the radio. 2. Tune to the required station as previously described. 3. Press and hold down the required Preset button until the display BBC Radio 3 shows Stored. -
Page 36: Clock Settings
Set-up Clock settings AUTO Your radio's clock and date is by default automatically set when first Set-Up tuned to a DAB station. The clock format (12/24hrs) and date format (dd- mmm-yyyy) may also be changed to suit your preferences. Buzzer Alarm Radio Alarm Record Timer 1. - Page 37 Clock settings cont. TUNING AUTO 8. Press in and release the Tuning control to confirm the selection. Clock Press Rotate the Tuning control to select the required minute. to select DAB Auto Set Time Set [ 08 Date Set 01-Jun-2004 9.
- Page 38 Clock cont. TUNING AUTO 15. Rotate the Tuning control until the 24-Hour Format line is high- Clock Press lighted in the display. Press in and release the Tuning control to to select DAB Auto Set enter adjustment mode (default is 24 hours) Time Set 08:57 Date Set...
-
Page 39: Alarms
Alarms Set-up Your radio has two alarms - buzzer and radio. Both alarms have a Humane wake system whereby the alarms start at a low level and gradually work up to a high level. The radio alarm can be set so that you can wake to your favourite station on either of the two wavebands. -
Page 40: Buzzer Alarm
Buzzer Alarm cont. TUNING AUTO 5. Press in and release the Tuning control to confirm selection Buzzer Alarm Press to select Alarm Days SMTWTFS 6. Rotate the Tuning control until Days line is highlighted in the Time Set 00:00 display. (default is all days active) 7. -
Page 41: Radio Alarm
Set-up Radio Alarm Note: Alarm time format (12 or 24 hour) is dependent on the clock settings made on page 37 (default is 24 hour) 1. Press the Setup button to enter Setup mode. 2. Rotate the Tuning control until Radio Alarm line appears between AUTO TUNING the two black bars on the display... - Page 42 Radio Alarm cont. TUNING AUTO 6. Press in and release the Tuning control to confirm selection Radio Alarm Press to select Alarm Days SMTWTFS 7. Rotate the Tuning control until Days line is highlighted in the Time Set 00:00 display. (default is all days active) Mode Current Station...
-
Page 43: Radio Alarm
Radio Alarm cont. AUTO TUNING 14. Rotate the Tuning control until Mode line is highlighted in the Radio Alarm display (default is Current) Press Alarm to select Days SMTWTFS Time Set 15. Press in and release the Tuning Control to select. Rotate the Mode Current Station... -
Page 44: Snooze Function
Snooze function Set-up AUTO Set-Up 1. The radio or buzzer alarm can be silenced for 5 minutes by pressing Any button (except On/Off). This sequence can be repeated during the 60 minutes alarm period. Buzzer Alarm Radio Alarm Record Timer 12:22 16-May-2004 Sleep timer... -
Page 45: Sleep Timer
Sleep timer cont. TUNING AUTO 5. Rotate the Tuning control to set the Sleep time (max 1 hour 30 Sleep Press minutes in 5 minute steps). This now becomes new default sleep to select Sleep 00 30 time. 6. Press in and release the Tuning control to confirm the selection. 7. -
Page 46: Display Settings
Set-up Display settings AUTO Your radio has three user configurable display settings:- Set-Up Display settings - Display saving Buzzer Alarm Radio Alarm Record Timer Enables screen to be blanked when radio is switched off i.e. no Clock/ Date display. 1. Press the Setup button to enter Setup menu. AUTO TUNING Set-Up... -
Page 47: Display Settings - Display Backlight
Set-up Display settings - Backlight AUTO This can be set to Off (always off), On (always on), On with AC (on when Set-Up using AC adaptor) or Keypress (backlight switches on for 12 seconds following any key press). Buzzer Alarm Radio Alarm Record Timer Note: If backlight is set to On (always on) battery life will be... -
Page 48: Display Settings - Contrast
Set-up Display settings - Contrast AUTO This can be changed to suit lighting conditions (default setting is 12) Set-Up Buzzer Alarm 1. Press the Setup button to enter Setup menu. Radio Alarm Record Timer 2. Rotate the Tuning control until the Display section appears between the two black lines on the display. -
Page 49: Keypress Settings - Timeout
Set-up KeyPress settings - Timeout AUTO The tuning display screen can be set to have a Timeout e.g. if no Set-Up keypress within 5 seconds display will revert to previous screen. Buzzer Alarm 1. Press the Setup button to enter Setup menu. Radio Alarm Record Timer 2. -
Page 50: Keypress Settings - Keybeep
Set-up KeyPress settings - KeyBeep AUTO Your radio can be set to provide an audible beep each time a key is Set-Up pressed. Buzzer Alarm 1. Press the Setup button to enter Setup menu. Radio Alarm Record Timer 2. Rotate the Tuning control until the KeyPress section appears between the two black lines on the display. -
Page 51: Factory Default
Set-up Factory default AUTO This setting clears all station presets, service list and returns all variable Set-Up settings to their factory defaults. Buzzer Alarm Radio Alarm 1. Press the Setup button to enter Setup menu. Record Timer 2. Rotate the Tuning control until the Factory Default line is high- lighted in the display. -
Page 52: Headphone Socket
Headphone socket 1. A 3.5mm Headphone Socket located on the left side of your radio is provided for use with either headphones or an earpiece. Inserting a plug automatically mutes the internal loudspeaker. 2. On the FM band if a station being received is weak some hiss may Digital Audio be audible. -
Page 53: General
General Do not allow this radio to be exposed to water, steam or sand. Do not leave your radio where excessive heat could cause damage. It is recommended that the DAB band be used wherever possible as better results in terms of quality and freedom from interference will usually be obtained than on the FM band. -
Page 55: Guarantee
In the event that it is not possible to return the instrument to the Roberts' dealer from whom it was purchased, please contact Roberts Radio Technical Services at the address shown on the rear of this manual. - Page 56 ROBERTS RADIO TECHNICAL SERVICES 97-99 Worton Road Isleworth Middlesex TW7 6EG Technical Helpline :- 020 8758 0338 (Mon-Fri during office hours) Issue 1...
Need help?
Do you have a question about the RD-1 and is the answer not in the manual?
Questions and answers