Yamaha MusicCast MCX-CA15 Install Manual
Distributedaudio controller/ distributedaudio amplifier
Hide thumbs
Also See for MusicCast MCX-CA15:
- Owner's manual (229 pages) ,
- Install manual (115 pages) ,
- Service manual (52 pages)
Table of Contents
Advertisement
Quick Links
eYAMAHA
•••
MusicCAST ••
MCX-C15
Distributed Audio Controller
MCX-CA15
Distributed Audio Amplifier
INSTALL MANUAL
ATTENTION:
These units must be installed by a qualified
technician. Do not attempt to install these
units yourself.
eYAMAHA
•••
MusicCAST ••
MCX-C15
Distributed Audio Controller
MCX-CA15
Distributed Audio Amplifier
INSTALL MANUAL
ATTENTION:
These units must be installed by a qualified
technician. Do not attempt to install these
units yourself.
Advertisement
Chapters
Table of Contents

Related Manuals for Yamaha MusicCast MCX-CA15


Summary of Contents for Yamaha MusicCast MCX-CA15
- Page 51 UBCAG MCX-C15 Distributed Audio Controller MCX-C15 MENU FAVORITES OWNER’S MANUAL...
- Page 52 Broadcast function........39 LISTENING TO EXTERNAL COMPONENTS ........41 Listening to components connected to the MCX-CA15......41 Listening to YAMAHA AV receiver radio station presets......42 Using YAMAHA AV link technology... 43 Listening to components connected to the server ........46...
-
Page 53: Features
◆ IR wireless remote control ◆ AV link functionality for integrated control of YAMAHA AV receivers About this manual • y indicates a tip for your operation. • For details regarding client installation and network configuration, refer to the Install Manual provided. -
Page 54: Musiccast System Overview
MusicCAST SYSTEM OVERVIEW With a variety of network configuration methods possible using a Local Area Network (LAN), the MusicCAST system allows everyone in the family to store their music collection in one central location for playback from other locations around your home. Once music data is stored, you can have fun creating playlists, bookmark songs, and even register your favorite music for instant access at the press of a button. -
Page 55: The Server
MusicCAST SYSTEM OVERVIEW The server MCX-1000 Digital Audio Server The server can store approximately 1,000 music CDs in MP3 format or 100 music CDs in PCM format on its internal hard disk drive for playback from the server or its connected clients. The server automatically stores song, artist and album names as well as genre information for each CD during the recording process, allowing easy access to your music without the need to enter any data manually. -
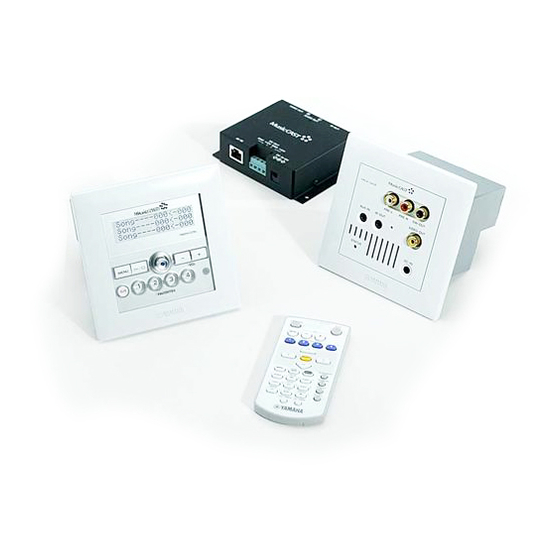
Page 56: Supplied Accessories
SUPPLIED ACCESSORIES After unpacking, check that you received all of the following parts. Remote control Quick Manual Install Manual LIBRARY MUTE FAVORITES MCX-C15 MCX-C15 SELECT Distributed Audio Controller Distributed Audio Controller MCX-CA15 Distributed Audio Amplifier BOOKMARK PLAY MENU INPUT INFO. PAUSE RANDOM STOP... -
Page 57: Before Using The Remote Control
SUPPLIED ACCESSORIES ■ Notes on the lithium battery Before using the remote Please take care when using the lithium battery as it control may explode if mistreated. • Please use a CR2025 lithium battery. When the remote control is shipped, a thin piece of •... -
Page 58: Controls And Functions
CONTROLS AND FUNCTIONS Front panel MCX-C15 MENU FAVORITES Front panel display button Displays information on client settings and songs. Switches the client between the sleep and power on modes. p / s (play/stop) Press and hold for 10 seconds to reset your system. Starts and stops playback of the selected song. -
Page 59: Rear Panel
CONTROLS AND FUNCTIONS Rear panel DC IN GND +12V VIDEO OUT VIDEO OUT jack Connect to the video input on your TV or monitor to view the content of the client’s front panel display. +12V terminal The supplied DC power cable must be connected to this terminal by a qualified technician during installation. -
Page 60: Bottom Panel
CONTROLS AND FUNCTIONS Bottom panel AV OUT AV OUT terminal Connect to the I/O box or MCX-CA15 using the supplied CAT-5 cable (straight). LAN terminal Connect to a network using a commercially available CAT-5 cable (straight). -
Page 61: Remote Control
CONTROLS AND FUNCTIONS Remote control Cursor buttons u / d / j / i / SELECT Moves the on-screen cursor and selects chosen items in the on-screen display. MCX-3 WD01440 PLAY INFO. LIBRARY Displays the Play Info screen on the on-screen display (see page 12). - Page 62 CONTROLS AND FUNCTIONS button Switches the client between the sleep and power on modes. VOL – / VOL + Increases or decreases the volume level of client playback. INPUT Switches the client’s input source when using the AV link function. BOOKMARK Attaches or removes a bookmark from a song (see page 33).
-
Page 63: Front Panel Displays
CONTROLS AND FUNCTIONS Mute icon Front panel displays Indicates that the client is muted. You can access all of the client’s functions and Network connection icon parameters using the front panel display. Indicates that the client is currently connected to the server. - Page 64 CONTROLS AND FUNCTIONS Current action mode icon Indicates the current action being taken by the client. s : Playback is stopped. p : A song is being played back. e : Playback is paused. Repeat playback icon Indicates that the client is in Repeat playback mode (see page 20).
-
Page 65: Turning On The Power
TURNING ON THE POWER Before proceeding, make sure the power to Before using your client for the first time, you must the MCX-1000 server is turned on. upgrade the MusicCAST system and make the appropriate network settings. For details on network settings, refer to “BEFORE USING THE Press on either the remote control... -
Page 66: Basic Functions
BASIC FUNCTIONS Using the remote control Using the front panel controller The remote control transmits a directional infrared beam. Be sure to aim the remote control directly at Moving the controller in the directions indicated on the remote control signal receiver on the front panel the front panel of the client performs the same during operation. -
Page 67: Listening To Songs Stored On The Server
BASIC FUNCTIONS The steps below describe how to access a song Listening to songs stored on directly from the “Artists” library, but can also be the server used to choose songs from the following libraries: Artists To search for songs by artist. Two kinds of files are available for playback from Albums To search for songs by album. - Page 68 BASIC FUNCTIONS Press u / d to choose “Artists” and Press j if you want to return to the List press SELECT. screen. Library When playback is finished, the client begins Artists playback of the next song stored in the selected Albums library.
-
Page 69: Adjusting The Volume
Press VOL + or VOL – to increase or Remote control decrease the volume level. The volume level changes accordingly. Note You can control the volume output level of registered YAMAHA AV amplifiers via an IR flasher using the client’s remote control. For details, see page 43. -
Page 70: Adjusting The Tone
BASIC FUNCTIONS Adjusting the tone Press i to increase the value of the setting, and press j to decrease the You can adjust the nature of the sound output by the value. client. You can change these settings to create sound Press SELECT or MENU to confirm the value with strong deep bass, or to emphasize the treble. -
Page 71: Switching The Time Display Mode
BASIC FUNCTIONS Switching the time display Repeat playback mode mode You can use this function for repeated playback of a single song or all of the songs in a playback group. You can change the time display on the Play Info For a detailed description on playback groups, see screen so that it displays either the time elapsed page 16. -
Page 72: Random Playback Mode
BASIC FUNCTIONS ■ Front panel operation Random playback mode You can use this function for random playback of songs within the selected playback group. To choose a playback group, press p in step 4 or 5 MCX-C15 in “Listening to songs stored on the server” (page 16). -
Page 73: Group Playback Mode
BASIC FUNCTIONS ■ Front panel operation Group playback mode You can use this function to define the range of songs for playback when using the normal playback mode, Repeat playback mode (page 20) and Random playback mode (page 21). MCX-C15 MCX-3 WD01440 LIBRARY MENU... - Page 74 To switch playback to a radio station broadcast GROUP PLAY GROUP RECALL being received on a YAMAHA AV receiver OFF TIMER ON TIMER connected to the server (page 24). Method 3: To switch playback to the audio signal being input...
- Page 75 HANDY FUNCTIONS ■ To assign radio stations preset on Press i to display the Favorites YAMAHA AV receivers registration screen. MCX-3 WD01440 LIBRARY Set "Favorites" Assign to MUTE FAVORITES SELECT Press u / d to choose a FAVORITES BOOKMARK PLAY button (1 through 4) and press SELECT.
- Page 76 SELECT in step 8 above. Press i to display the Favorites • If no YAMAHA AV receiver is connected to the registration screen. server, the message “Receiver unavailable” is displayed briefly in the front panel display.
- Page 77 FAVORITES button you selected here, that assignment is automatically cancelled when you Press i to display the Favorites press SELECT in step 6 above. registration screen. ■ To assign input from an AV-linked YAMAHA AV receiver Set "Favorites" Assign to MCX-3 WD01440 LIBRARY MUTE...
- Page 78 CBL/SAT press SELECT in step 5 above. • You must select a YAMAHA AV receiver in the “Amplifier” menu (page 43) before the receiver’s input can be assigned to a Press i to display the Favorites FAVORITES button.
- Page 79 HANDY FUNCTIONS ■ To clear FAVORITES button Press i to display the Favorites assignments registration screen. MCX-3 WD01440 LIBRARY Set "Favorites" Assign to MUTE FAVORITES SELECT Press u / d to choose a FAVORITES BOOKMARK button (1 through 4) and press SELECT. PLAY MENU INPUT...
-
Page 80: Handy Functions
HANDY FUNCTIONS Song statistics function Press u / d to choose “Clear FAV1”, “Clear FAV2”, “Clear FAV3”, “Clear You can display statistical data about the songs and FAV4” or “Clear All” and press SELECT. albums stored on the server. The appropriate assignment is cleared. The following statistical data is available: Favorites Times played:... -
Page 81: Using Playlists
HANDY FUNCTIONS Press u / d to choose “Song Statistics” Using playlists and press SELECT. You can make up to 1,007 lists (playlists) of your favorite songs from the server (see the MCX-1000 Library Owner’s Manual, page 75). The server classifies Playlist these playlists and divides them into groups. -
Page 82: Recall Play Function
HANDY FUNCTIONS Recall Play function Press u / d to choose a collection of playlists and press SELECT. You can use this function to continue listening to the The playlists registered in the collection are song currently being played back from the client or displayed. - Page 83 HANDY FUNCTIONS Press u / d to choose “Recall Play” and Press u / d to choose “Recall Play” and press SELECT. press SELECT. Top Menu Top Menu Library Library Recall Play Recall Play Press u / d to choose the client from Press u / d to choose “Server”...
-
Page 84: Bookmark Function
HANDY FUNCTIONS ■ To play bookmarked songs Bookmark function MCX-3 WD01440 When you bookmark your favorite songs, they are LIBRARY stored in a temporary list for easy access. The list MUTE can hold up to 999 bookmarked songs and can be FAVORITES copied to create a playlist at any time. - Page 85 HANDY FUNCTIONS ■ To copy the bookmark list to a Press p to create the playlist. playlist The client creates a new playlist in the default You can copy the entire content of your client collection (“Collection 1”) on the server, and bookmark list to a playlist.
- Page 86 HANDY FUNCTIONS ■ To clear all bookmarks Press p to erase the bookmark list. The following screens appear in order. MCX-3 WD01440 LIBRARY Press PLAY to clear, MUTE < to cancel. FAVORITES SELECT BOOKMARK PLAY MENU INPUT INFO. PAUSE RANDOM Press PLAY to clear, STOP REPEAT...
-
Page 87: Off Timer Function
HANDY FUNCTIONS OFF Timer function Press u / d to choose the desired number of minutes before the client You can activate this function so that the client automatically switches to sleep mode. switches off automatically after the specified period You can choose from the following settings: of time. -
Page 88: On Timer Function
HANDY FUNCTIONS ■ To switch the OFF Timer function ON Timer function on and off You can use this function to set the client to MCX-3 WD01440 LIBRARY automatically switch on and begin playback at a specified time. For example, this function is handy if MUTE FAVORITES you want to wake up to music. - Page 89 HANDY FUNCTIONS Press u / d to choose “ON Timer” and Press u / d to choose “Save” and press press SELECT. SELECT. Setup ON Timer 6:00 AM ] OFF Timer ON Timer Save Press SELECT once more. ON Timer The cursor enters the ON Timer setting field.
-
Page 90: Broadcast Function
HANDY FUNCTIONS Broadcast function Notes • Make sure the server is set to ON or LAN standby You can use this function to enjoy the same song mode when using the ON Timer function to start from different locations around your home. playback from a client. - Page 91 HANDY FUNCTIONS ■ To remove clients from Broadcast Press u / d to choose “Recall Play” and playback press SELECT. MCX-3 WD01440 Top Menu LIBRARY Library MUTE Recall Play FAVORITES SELECT Press u / d to choose a MusicCAST BOOKMARK PLAY MENU INPUT...
-
Page 92: Listening To External Components
CA15” in “Setup” - “Amplifier”. For details, see Playback of the song you are currently listening “To register YAMAHA AV receivers” on page 43. to stops, and the client outputs the audio signal from the external component connected to the Notes MCX-CA15. -
Page 93: Listening To Yamaha Av Receiver Radio Station Presets
Press u / d to choose “Library” and You can use your client to enjoy radio stations preset press SELECT. on a YAMAHA AV receiver if one is connected to the server. All stations preset on your YAMAHA AV Top Menu receiver are available for selection. -
Page 94: Using Yamaha Av Link Technology
“MCX-IB15” in the “Amplifier” menu. However, YAMAHA AV receiver using the following selecting “MCX-CA15” or “MCX-IB15” in this procedure. case does not enable you to use YAMAHA AV link technology. • Zone selection is only available with some MCX-3 WD01440 LIBRARY YAMAHA AV receivers. - Page 95 Output Input:CD Amplifier Notes Press u / d to choose the name of the • “MCX-CA15” is set as the default YAMAHA receiver connected to the client and AV amplifier. press SELECT. • When “MCX-IB15” is set in the “Amplifier”...
- Page 96 / a when the input of your connected SELECT INPUT YAMAHA AV receiver is set to TUNER. button b / a BOOKMARK • When a YAMAHA AV receiver is selected in the PLAY MENU INPUT INFO. buttons PAUSE RANDOM “Amplifier”...
-
Page 97: Listening To Components Connected To The Server
LISTENING TO EXTERNAL COMPONENTS Listening to components Press u / d to choose “External Inputs” and press SELECT. connected to the server Library You can use your client to enjoy audio from an Bookmarks external component connected to either the External Inputs OPTICAL IN, COAXIAL IN, or ANALOG IN jack on the server. -
Page 98: System Options
SYSTEM OPTIONS Auto Play function Auto Level Control function You can use this function to automatically resume The server stores songs at the same volume level as playback of the last song the client played before the their original source. This function allows you to client was placed in sleep mode. -
Page 99: Selecting The Output
SYSTEM OPTIONS Press u / d to choose “Auto Level Selecting the output Control” and press SELECT. You can use this function to select the output control Setup method of the client. In most cases, such as when Auto Play using the MCX-CA15, choose “Variable”. -
Page 100: Sleep Mode
SYSTEM OPTIONS Sleep mode Press u / d to choose “Variable” or “Fixed” and press SELECT. If you will not be using your client for an extended AUDIO OUT period, you can place it in sleep mode. Power consumption is reduced in sleep mode, but the client Variable Fixed still consumes a small amount of power to keep the... -
Page 101: Display Settings
DISPLAY SETTINGS Adjusting the display contrast Press i or u to increase the contrast and j or d to decrease it. Depending on the location of your client, you may Contrast want to alter the contrast of the display for easier viewing. -
Page 102: Screen Saver Function
DISPLAY SETTINGS Screen Saver function Press u / d to choose “ON” or “OFF” and press SELECT. The client features an on-screen display Screen Screen Saver Saver function, which when enabled, runs automatically if no action is performed for 2 minutes or longer. -
Page 103: System Settings
SYSTEM SETTINGS Checking system Press u / d to choose “Information” and press SELECT. information Information about the current firmware version is displayed. You can check the system information for your client, such as the firmware version currently being System used, by performing the following procedure. -
Page 104: Resetting To The Factory Presets
SYSTEM SETTINGS Resetting to the factory Press and hold MENU until the Top Menu screen is displayed. presets Press u / d to choose “Setup” and If you want to reset all of your client’s parameters press SELECT. for any reason, do the following. This procedure resets ALL parameters, including the FAVORITES Top Menu buttons, etc. - Page 105 SYSTEM SETTINGS ■ To unlock a client from the server Press u / d to choose the function you want to unlock and press SELECT. Choose “Top Menu” - “System Setup” - The Lock ON/OFF screen appears. “Lock function” on the server. The password entry screen appears.
-
Page 106: Checking Network Settings
CHECKING NETWORK SETTINGS You can check your client’s current network settings Press u / d to choose “Status” and using the following procedure. press SELECT. If they are incorrect (for example, you cannot access the server), see the Install Manual, page 25 for Network details on how to manually configure the network Status... -
Page 107: Troubleshooting
Refer to the chart below when this unit does not function properly. If the problem you are experiencing is not listed below or if the instruction below does not help, stop using this unit and disconnect the power cord, then contact the nearest authorized YAMAHA dealer or service center. Problem... - Page 108 LEVEL. Owner’s radio station on is set too low. Manual, a YAMAHA AV page 29 receiver The parameters for the AV Configure the AV receiver MCX-1000 connected to receiver connected to the parameters correctly.
- Page 109 TROUBLESHOOTING Problem Cause Remedy Refer to page The STATUS The protection circuitry on the Check that the speaker wires are indicator of the MCX-CA15 has been activated not touching each other. MCX-CA15 is due to a short circuit, etc. After checking that all —...
-
Page 110: Quick Menu Reference
QUICK MENU REFERENCE The following chart is a convenient reference guide for finding menus and parameters when you want to perform an operation on the client in a hurry. Artists (page 16) 30min Albums OFF Timer 60min (page 16) (page 36) 90min Genres 120min... -
Page 111: Glossary
GLOSSARY This manual uses a number of terms that, though not specific to the MusicCAST system, are not in general everyday use. In addition, some terms are used in a slightly unusual context. These words are listed alphabetically and in context below, along with an explanation of their meaning. Playback Recording Album... -
Page 112: Network Connections
GLOSSARY Network connections Hardware CAT-5 cable A cable for connecting two components on a Local An abbreviation of Compact Disc. A small plastic Area Network (LAN). disc 12 cm (5”) in diameter encoded with prestored data. Connections The links between the components in your CD-R MusicCAST system which allows them to exchange An abbreviation of Compact Disc Recordable. -
Page 113: Software
The LCD display on the client or the display output to a TV or monitor connected to the server. YAMAHA AV link YAMAHA technology that allows you to control the volume, input selection and tuner preset selection of a YAMAHA AV receiver using the MCX-C15... -
Page 114: Specifications
SPECIFICATIONS AUDIO PERFORMANCE • Frequency response (EIAJ) ......................20 Hz to 20 kHz, ±0.5 dB • Total harmonic distortion + noise (EIAJ) ........................0.008% • Signal to noise ratio (EIAJ) ............................100 dB • Dynamic range (EIAJ)..............................98 dB • Output level (EIAJ) ..............................2.0 Vrms GENERAL •... - Page 115 YAMAHA ELECTRONIQUE FRANCE S.A. RUE AMBROISE CROIZAT BP70 CROISSY-BEAUBOURG 77312 MARNE-LA-VALLEE CEDEX02, FRANCE YAMAHA ELECTRONICS (UK) LTD. YAMAHA HOUSE, 200 RICKMANSWORTH ROAD WATFORD, HERTS WD18 7GQ, ENGLAND YAMAHA SCANDINAVIA A.B. J A WETTERGRENS GATA 1, BOX 30053, 400 43 VÄSTRA FRÖLUNDA, SWEDEN WD28500...
- Page 117 Gracenote CDDB ..........21 Additional controllable Yamaha AV receivers ............18 To retrieve/update album information ....21 Checking the list of controllable Yamaha AV To check the availability of information receivers............18 for an album ..........23 Creating playlists from bookmarks ....24 To create a playlist from MusicCAST server bookmarks ............
-
Page 118: Version Upgrade 2
Version Upgrade 2... -
Page 119: Functions Added In Version Upgrade 2
Edit tuner preset station names displayed on the MusicCAST page 35 names server connected to a controllable Yamaha AV receiver Displaying client names in the The PCM client setting screen shows the list of client names for PCM client setting screen easy selection. -
Page 120: Restricting Access To Functions (Lock Function)
Restricting access to functions (Lock function) The new feature “Lock function” enables only users who know the password to config- ure certain functions and settings of the MusicCAST server. For example, if you lock Lock function the “Delete” function, the MusicCAST server requires a password before allowing a If you lock any of these functions, user to delete library items. -
Page 121: To Enable/Disable Locks For Specific Functions
Restricting access to functions (Lock function) To enable/disable locks for specific functions Follow the procedure below to enable/disable locks for specific MusicCAST server functions. Select “Top Menu” ➞ “System Setup” ➞ “Lock function”. The password entry screen appears. Use u/j/d/i and SELECT to enter the password, and then select Default password “OK”... -
Page 122: To Operate Locked Functions (Password Access)
Restricting access to functions (Lock function) Use u/d to select the function for which you want to enable/disable the lock and press SELECT. To return to the menu selection screen, press BACK. The Lock ON/OFF screen appears. To enable the lock for the selected function, press SELECT to place a check in the checkbox, and then use u/j/d/i to select “OK”... -
Page 123: To Change/Reset The Password
Restricting access to functions (Lock function) To change/reset the password Passwords Follow the procedure below to change/reset the password for the Lock function. Passwords must contain between 5 and 14 alphanumeric Change the password characters. Follow the procedure below to change the password. Please note that the password is case-sensitive. - Page 124 Restricting access to functions (Lock function) Press i. The password entry screen appears. Use u/j/d/i and SELECT to enter the new password, and then Password select “OK” and press SELECT. Passwords must contain between To cancel entering the password, select “Cancel” and press SELECT. 5 and 14 alphanumeric characters.
- Page 125 Restricting access to functions (Lock function) Use u/j/d/i to select “OK” and press SELECT. To cancel changing the password, select “Cancel” and press SELECT. The password for the Lock function is changed to a new one. Reset the password To operate locked functions or change the Lock function settings, you need to enter the password on the password entry screen.
-
Page 126: Editing Library Items On A Computer (Browser Edit Function)
Editing library items on a computer (Browser Edit function) The new feature “Browser Edit function” enables you to display music information (song names, artist names, etc) and playlists stored in the library of your MucicCAST server with a web browser on a computer, and effectively edit them only with input devices (keyboard and mouse). -
Page 127: To Connect The Computer To The Musiccast Server Via A Network
Editing library items on a computer (Browser Edit function) To connect the computer to the MusicCAST server via a network Follow the procedure below to prepare for using the Browser Edit function. Connect the computer to the MusicCAST server Network settings To configure the MusicCAST To log on to the MusicCAST server from the computer, you need to connect them server network settings, refer to... - Page 128 Editing library items on a computer (Browser Edit function) Log on to the MusicCAST server Web browser Follow the procedure below to log on to the MusicCAST server from the computer. You cannot log on to the When using Windows, start the Web browser on your computer, and MusicCAST server from your then type “http://musiccast”...
-
Page 129: To Edit A Name Of A Library Item
Editing library items on a computer (Browser Edit function) To edit a name of a library item Edit title screen Follow the procedure below to edit a name of a library item (song, artist, album, genre, For details on the buttons in the collection, playlist). -
Page 130: To Create A New Playlist
Editing library items on a computer (Browser Edit function) In the text entry field, type the new item name and click “Edit title”. To cancel changing the name, click “Cancel”. Number of characters for item names The maximum number of characters is 127 for each song, album, or playlist name, and 63 for each genre or collection... - Page 131 Editing library items on a computer (Browser Edit function) In the left list, select the collection and click “Select”. The playlists in the selected collection appear in the left list. In the text entry field, type the name for a new playlist and click Number of characters for “Create”.
-
Page 132: To Add An Item To A Playlist
Editing library items on a computer (Browser Edit function) To add an item to a playlist Number of items Follow the procedure below to add an item to a playlist. The maximum number of items Carry out steps 1 to 3 from the “To create a new playlist” procedure you can add to each playlist is 999. -
Page 133: To Delete An Item From A Playlist
Editing library items on a computer (Browser Edit function) In the right list, select the item you want to add and click “Add Link”. To select an item in a lower level, click “Select” to display the lower-level items, and then select the item you want to add and click “Add Link”. The selected item is added to the playlist. -
Page 134: To Move/Copy An Item From A Playlist To Another Playlist
Editing library items on a computer (Browser Edit function) In the left list, select the item you want to delete and click “Delete”. To select an item in a lower level, click “Select” to display the lower-level items, and then select the item you want to delete and click “Delete”. The selected item is deleted from the playlist. - Page 135 Editing library items on a computer (Browser Edit function) Click the selection box and select “PLAYLISTS”. The collections in the library appear in the right list. In the right list, select the collection containing the playlist from which you want to move/copy an item and click “Select”. The playlists in the selected collection appear in the right list.
-
Page 136: To Change The Playback Order Of An Item Within A Playlist
Editing library items on a computer (Browser Edit function) In the right list, select the item you want to move/copy and click “Move” or “Copy”. To select an item in a lower level, click “Select” to display the lower-level items, and then select the item you want to move/copy and click “Move”... - Page 137 Editing library items on a computer (Browser Edit function) In the left list, select the item you want to change the playback order and click “Move up” or “Move down”. The playback order of the selected item is changed. MusicCAST Version Upgrade 2...
-
Page 138: Retrieving Album Information From The Gracenote Cddb
Retrieving album information from the Gracenote CDDB You can retrieve album information (song names, artist names, etc.) for audio CDs from the Gracenote CDDB. This feature was formerly available only when storing CDs, Album information that but the version upgrade enables you to retrieve information on albums already stored cannot be retrieved in your MusicCAST server. - Page 139 Retrieving album information from the Gracenote CDDB Use u/d to select the album for which you want to retrieve the information and press SELECT. If you do not need to check the songs of the selected album, just select the album and follow step 4.
-
Page 140: To Check The Availability Of Information For An Album
Retrieving album information from the Gracenote CDDB To check the availability of information for an album You cannot retrieve information for the album using the Gracenote CDDB if you have deleted or moved any song from it. Follow the procedure below to check whether you can retrieve information for a certain album from the Gracenote CDDB database. -
Page 141: Creating Playlists From Bookmarks
Creating playlists from bookmarks You can create a playlist from a bookmark list of the MusicCAST server or MusicCAST clients and use the playlist for playback on other MusicCAST components. The feature Number of playlists to create playlists from client bookmarks was formerly available only when operating a The maximum number of playlists MusicCAST client (see page 54 of the MCX-A10 Owner’s Manual), but the version you can create in the library is... -
Page 142: To Create A Playlist From Musiccast Client Bookmarks
Creating playlists from bookmarks To create a playlist from MusicCAST client bookmarks Follow the procedure below to create a playlist from a bookmark list in your MusicCAST client with the MusicCAST server operation. Select “Top Menu” ➞ “Client Playback”. The Client Playback screen appears. Use u/d to select the client from which you want to copy a bookmark and press SELECT. - Page 143 Creating playlists from bookmarks Press SUB MENU, and then use u/d to select “Save as playlist” and press SELECT. The collection selection screen appears. Use u/d to select the collection to which you want to add a new Names of new playlists playlist, and then use i to select “save”...
-
Page 144: Setting The Date And Time
Setting the date and time In the “Date/Time” setup menu, you can set the date and time displayed on your MusicCAST server and connected MusicCAST clients. This setup menu has been separated into two menus (auto and manual) to improve ease of use. Also, you can now switch between 12-hour and 24-hour time display formats. -
Page 145: To Set The Date And Time Manually
Setting the date and time Use u/j/d/i and SELECT to configure parameters for “Synchro. interval”, “Time zone”, and “Day light saving”, and then select “OK” Auto setup parameters and press SELECT. In “Synchro. interval”, set the time To cancel changing the settings, select “Cancel” and press SELECT. interval at which you want the MusicCAST server to automatically access the NTP... -
Page 146: To Switch Between 12-Hour And 24-Hour Formats
Setting the date and time To switch between 12-hour and 24-hour formats Follow the procedure below to switch between the 12-hour and 24-hour clock formats. Select “Top Menu” ➞ “System Setup” ➞ “Date/Time” ➞ “Time Display”. The Time Display screen appears. Use u/d to select “24 hours”... -
Page 147: Resetting Specific Data Or Settings
Resetting specific data or settings You can reset song statistics, network settings, or function key assignments stored in your MusicCAST server individually. To reset song statistics To reset “Recently stored album” The MusicCAST server stores three types of song statistics (Time played, Recently You cannot reset the “Recently played songs, Recently stored albums) for the MusicCAST server and two types of stored albums”... - Page 148 Resetting specific data or settings Use j/i to select “OK” and press SELECT. To cancel the reset, select “Cancel” and press SELECT. The selected type of the song statistics for the MusicCAST server is reset. Reset song statistics for the MusicCAST client To reset “Recently stored album”...
- Page 149 Resetting specific data or settings Use u/d to select “Song Statistics” and press SELECT. The Song Statistics selection screen appears. Select the type of song statistics (Times played, Recently played songs) you want to reset. The Song Statistics screen appears. Press SUB MENU, and then use u/d to select “Clear”...
-
Page 150: To Reset Network Settings
Resetting specific data or settings Use j/i to select “OK” and press SELECT. To cancel the reset, select “Cancel” and press SELECT. The selected type of the song statistics for the MusicCAST client is reset. To reset network settings Note Resetting the network settings The MusicCAST server stores network settings such as registered clients or network stops playback on all MusicCAST... -
Page 151: To Reset Function Key Settings
Resetting specific data or settings To reset function key settings The function keys (FUNC 1, FUNC 2, FUNC 3) are located on the remote controller of the MusicCAST server. You can assign a specific function to each key (see page 12 of the "Version Upgrade 1"... -
Page 152: Editing Tuner Preset Names
The maximum number of characters for a tuner preset station name is 30. The settings screen for the Yamaha AV receiver connected to your MusicCAST server appears. Use i to move the cursor to the “Preset” column. The tuner preset selection screen appears. - Page 153 Editing tuner preset names Use u/d to select “Edit title” and press SELECT. The text entry screen appears. Use u/j/d/i and SELECT to enter the new name for the selected Number of characters for preset, and then select “OK” and press SELECT. tuner preset station names To cancel editing, select “Cancel”...
-
Page 154: Version Upgrade 1
Version Upgrade 1... -
Page 155: Functions Added In Version Upgrade 1
Assign the selected MusicCAST server function to each function page 12 key to use as a shortcut key. Additional controllable Yamaha AV The list for the controllers of Yamaha AV receivers that can be page 18 receivers used with the MusicCAST server is updated. -
Page 156: Recall Play
Recall Play What is “Recall Play”? Recall Play The recall play function copies the currently playing song and playback settings from a If the source component is not source MusicCAST server or client to a destination MusicCAST component, then currently playing back a song, starts playback on the destination component. - Page 157 Recall Play Press SELECT. When the Recall Play screen appears on the display, use u/d to select a source component. ecall Play Server Bedroom Kitchen Dining room Press SELECT. Note lay Info Only MusicCAST clients you have Bruce Springsteen registered on the MusicCAST Born To Run server are available for Recall Thunder Road...
- Page 158 Recall Play Press SUB MENU. When the Sub Menu appears on the display, use u/d to select “Recall Play”. Press SELECT. When the Recall Play menu appears on the display, Cancelling Recall Play use u/d to select a source component. selection Press BACK to return to the “Client Playback”...
-
Page 159: Using The Musiccast Server As A Destination Component (Server Operation Only)
Recall Play Using the MusicCAST server as a destination component (Server operation only) Press PLAY INFO. The Play Information screen appears on the display. Press SUB MENU. When the Sub Menu appears on the display, use u/j/d/i to select “RECALL PLAY”. Press SELECT. -
Page 160: Broadcast
Broadcast What is “Broadcast”? Note The Broadcast function distributes the song being played back on the MusicCAST You cannot start Broadcast server to multiple MusicCAST clients simultaneously. While using Broadcast, Broad- from the “Recording”, “Timer cast icons appear on the displays of both the MusicCAST server and target Setup”, or “System Setup”... -
Page 161: Starting Broadcast
Broadcast Starting Broadcast Press BROADCAST on the MusicCAST server remote control. When Starting Broadcast from the message “Broadcast ON?” appears on the display, use u/d to the Play Information screen select a MusicCAST client. You can also start Broadcast by selecting “Broadcast”... -
Page 162: Stopping Broadcast
Broadcast Stopping Broadcast Press BROADCAST on the MusicCAST server remote control. When Stopping Broadcast from the message “Stop Broadcast?” appears on the display, use j to the Play Information select “OK”. screen You can also stop Broadcast by selecting “Broadcast” from the Sub Menu of the Play Information screen, then carrying out step 1 and 2 of procedure at left. - Page 163 Broadcast Press SELECT. When the Client screen appears on the display, use u/d to select “Broadcast”. Press SELECT. When the Client Broadcast screen appears on the display, use u/d to select a MusicCAST client. Press SELECT to check/uncheck the checkbox. The MusicCAST server targets MusicCAST clients with checked selection boxes for Broadcast.
-
Page 164: Removing A Musiccast Client From Broadcast Playback (Musiccast Client Operation Only)
Broadcast Removing a MusicCAST client from Removing a MusicCAST Broadcast playback client from Broadcast playback (MusicCAST client operation only) Display returns to the Play Info screen when you remove a MusicCAST client Press STOP. from Broadcast playback. Broadcast stops on the MusicCAST client you are operating. Adding a MusicCAST client into currently playing Broadcast (MusicCAST client operation only) -
Page 165: Function Keys
Functions Descriptions default settings of the function AV Receiver: VOL – (default of FUNC1) Reduces the volume level of a Yamaha AV keys. You can change the receiver connected to the MusicCAST server function assigned to the function using a cross-type RS-232C cable. -
Page 166: Assigning A Function To A Function Key
Function keys Assigning a function to a function key Press TOP MENU. When the Top Menu screen appears on the display, use u/d to select “System Setup”. Press SELECT. When the System Setup screen appears on the display, use u/d to select “Remote Controller - Function Keys”. Press SELECT. - Page 167 Function keys Press SELECT. When the Function screen appears on the display, use u/d to select a function. Press SELECT. The selected function is assigned to the function key that you selected in step 3. If you select “Favorites”, “Client: Timer ON”, or “Client:Timer OFF”, follow the procedure below before carrying out step 6.
- Page 168 Function keys Assigning a Playback Group to a function key Assigning playback Carry out the following procedure to assign a playback group to a function key if you groups assigned the “Favorites” function to a function key in step 5 on page 14. You can assign one of the Select a playback group from the Library screen and press SUB following groups to a function key...
- Page 169 Function keys Setting target MusicCAST clients for the MusicCAST client Timer ON function. Carry out the following procedure to set target MusicCAST clients to the “Client: Timer ON” function if you assigned this function to a function key in step 5 on page 14. Use u/d to select a MusicCAST client and press SELECT to check/ uncheck the checkbox.
- Page 170 Function keys Setting target MusicCAST clients for the MusicCAST client Timer OFF function. Carry out the following procedure to set target MusicCAST clients to the “Client: Timer OFF” function if you assigned this function to a function key in step 5 on page 14. Use u/d to select a MusicCAST client and press SELECT to check/ uncheck the checkbox.
-
Page 171: Controllable Yamaha Av Receivers
Controllable Yamaha AV receivers Additional controllable Yamaha AV receivers If you connect a controllable Yamaha AV receiver to the MusicCAST server using a cross-type RS-232C cable, you can use the MusicCAST server to operate some AV receiver functions, such as volume control, input configuration, DSP program configu- ration, and radio tuning. - Page 172 ■ For the latest version upgrade information YAMAHA MusicCAST website http://www.yamaha.co.jp/english/product/av/musiccast/index.htm If you do not have Internet access, please contact the store of purchase or your nearest Yamaha dealer. ©2004 All rights reserved. YAMAHA ELECTRONICS CORPORATION, USA 6660 ORANGETHORPE AVE., BUENA PARK, CALIF. 90620, U.S.A.