Advertisement
Available languages
Available languages
Quick Links
Download this manual
See also:
User Manual
29878
I
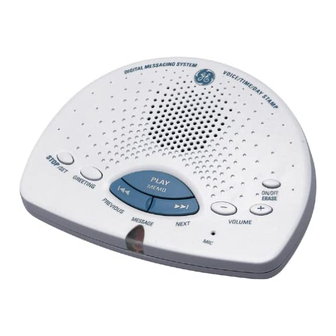
NTRODUCTION
Digital Answerer
Your Digital Answerer is designed to give you flexibility in use
User's Guide
and high quality performance. To get the most from your new
answerer, we suggest that you take a few minutes right now to
read through this instruction manual.
CAUTION: When using telephone equipment, there are
basic safety instructions that should always be followed.
Refer to the IMPORTANT SAFETY INSTRUCTIONS
provided with this product and save them for future
reference.
B
Y
B
EFORE
OU
EGIN
P
C
ARTS
HECKLIST
Make sure your package includes the following items:
Answerer
AC power supply
M
J
R
ODULAR
ACK
EQUIREMENTS
You need an RJ11(CA11A) type modular jack, which
is the most common type of phone jack and might
look like the one pictured here. If you don't have a
We bring good things to life.
modular jack, call your local phone company to find
out how to get one installed.
I
I
I
B
MPORTANT
NFORMATION
NSTALLING THE
ATTERY
NOTICE: The Industry Canada label identifies certified equipment.
This certification means that the equipment meets certain telecom-
munications network protective, operational and safety require-
ments. The Industry Canada does not guarantee the equipment will
operate to the user's satisfaction.
Before installing this equipment, users should ensure that it is
permissible to be connected to the facilities of the local telecommuni-
cations company. The equipment must also be installed using an
Battery compartment door
acceptable method of connection. The customer should be aware that
compliance with the above conditions may not prevent degradation
In the event of a power loss, a 9-volt alkaline battery (not
of service in some situations.
included) enables the answerer to retain messages stored in
Repairs to certified equipment should be made by an authorized
memory. To install the battery:
Canadian maintenance facility designated by the supplier. Any
1. Remove the battery compartment door on the bottom of the
repairs or alterations made by the user to this equipment, or equip-
ment malfunctions, may give the telecommunications company
unit by loosening the screw with a Phillips screwdriver. Lift
cause to request the user to disconnect the equipment.
the door.
Users should ensure for their own protection that the electrical
2. Connect a fresh 9-volt alkaline battery (not included). The
ground connections of the power utility, telephone lines and internal
large and small contacts on the battery clip and the battery
metallic water pipe systems, if present, are connected together. This
will interlock. Once connected, place the battery inside the
precaution may be particularly important in rural areas.
battery compartment.
CAUTION: Users should not attempt to make such connections
themselves, but should contact the appropriate electric inspection
3. Replace the battery compartment door and tighten the
authority, or electrician, as appropriate.
screw.
NOTES: This equipment may not be used on coin service provided
by the telephone company.
NOTE: If the battery is low or not installed, the unit announces
Party lines are subject to telephone company tariffs and, therefore,
"Low Battery " at the end of your messages.
you may not be able to use your own telephone equipment if you are
on a party line. Check with your local telephone company.
IMPORTANT: If you're not going to use the unit for more than
I
I
NTERFERENCE
NFORMATION
30 days, remove the batteries because they can leak and damage
the unit.
If this equipment does cause interference to radio or television
reception (which you can determine by turning the equipment off and
I
NSTALLATION
on), try to correct the interference by one or more of the following
measures.
• Reorient the receiving antenna (that is, the antenna for radio or
CAUTION:
television that is "receiving" the interference.)
• Change the position of the computer with respect to the radio or
• Unplug phone cord from wall before installing or
television equipment that is receiving interference.
charging batteries.
• Move the Telephone Answering System away from the equipment
• Never install telephone wiring during a lightning
that is receiving interference.
storm.
• Plug the Telephone Answering System into a different wall outlet so
• Never touch uninsulated telephone wires or terminals,
that the Telephone Answering System and the equipment receiving
unless the telephone line has been disconnected at
interference are on different branch circuits.
the network interface.
If these measures do not eliminate the interference, please consult
• Use caution when installing or modifying telephone
your dealer or an experienced radio/television technician for addi-
lines.
tional suggestions.
1. Plug the telephone line cord into a modular wall jack.
INDUSTRY CANADA NUMBER IS LOCATED ON THE CABINET
BOTTOM
REN NUMBER IS LOCATED ON THE CABINET BOTTOM
2. Connect the telephone line cord from your telephone into
the jack on the back of the answerer marked PHONE. (You
don't have to connect your telephone in order for the
answerer to record incoming messages.)
Model 29878B
ATLINKS Communications Canada Inc.
(An Alcatel /Thomson Multimedia Joint Venture)
15718080 (Rev. 0 E/F)
© 2001 ATLINKS Communications Canada, Inc.
01-08
Trademark(s) ® Registered
Printed in China
Marque(s) ® déposée(s)
3. Connect the small end of the power supply into the POWER
C
HANGING THE
9V AC jack on the back of the answerer. Plug the other end
into an AC power outlet. The unit announces "please wait"
This function allows you to change the Time/Day, Rings to
and then beeps. The unit pauses while the MESSAGE
Answer, message time and Security Code settings.
indicator flashes and then beeps again when it is ready for
S
T
ETTING THE
setup or to answer calls with the default greeting and
This setting allows you to set the current time and day for the
settings.
Time/Day stamp attached to each message.
Range of Settings
Time
Hour
12 a.m. - 11 p.m.
Minute
0 - 59
Day
Sunday - Monday
Rings
2,3,4,5 toll saver
to Answer
Message time 1,2,3,4, minutes
Security
0 - 9, 0 - 9, 0 - 9
CAUTION: Only use the ATLINKS USA, Inc. 5-2434A
Code
power supply that was packed with this unit. Using other
power supplies may damage the unit.
H
OUR
1. Press and hold the STOP/SET button for two seconds, then
release to access the set up menu. The unit announces,
I
I
M
MPORTANT
NSTRUCTIONS FOR
OVING THE
"Time (the current time and day setting) To set hour, press
A
:
NSWERER
next...press set to continue. "
To move the answerer to a different location in the house,
2. To change the hour, press and release the NEXT or PREVIOUS
follow these instructions:
button and the unit announces an hour, such as "12am, 1am,
2am, " or "12am, 11pm, 10pm. "
1. Disconnect the phone line or any phones you may have
connected to the unit.
3. After choosing the hour, press and release the STOP/SET
button to store the hour. The unit enters the Minute menu.
2. Install a battery, if you have not already done so. This will
ensure that your messages are not lost. See "Installing the
M
INUTES
Battery. "
1. The unit announces, "(the current minutes setting) To set
3. Go to the electrical outlet and unplug the power supply.
minutes, press next...press set to continue. "
4. Move the unit and phone line to the desired location.
2. To change the minutes, press and release the NEXT or
5. Plug the power supply into an electrical outlet.
PREVIOUS button and the unit announces a minute such as
"01, 02, 03" or "59, 58, 57. "
6. The MESSAGES indicator flashes slowly if there is a new
Battery
message.
3. After choosing the minute, press and release the STOP/SET
clip
button to store the minute. The unit enters the Day menu.
7. Connect all necessary phone lines.
Battery
D
S
AY
ETUP
1. The unit announces, "(the current day setting) To set day,
press next...press set to continue. "
2. To change the day, press and release the NEXT or PREVIOUS
button and the unit announces a day, such as "Sunday,
Monday" or "Sunday, Saturday. "
ON/OFF/
PLAY/MEMO
ERASE
3. After choosing a day, press and release the STOP/SET button
button
button
to store the day. The unit enters the Rings to Answer menu.
S
R
ETTING THE
STOP/SET
button
This setting allows you to select the number of rings before
VOLUME
the unit answers a call.
buttons
GREETING
button
1. The unit announces, "Rings to Answer ( the current rings to
MIC
answer setting ) To set rings to answer, press next...press set
PREVIOUS
NEXT
to continue. "
button
button
MESSAGE
2. To change the rings to answer, press and release the NEXT
indicator
or PREVIOUS button and the unit announces a number such
as "2,3,4, " or "2, toll saver, 5. "
R
G
ECORDING THE
REETING
3. After choosing a number, press and release the STOP/SET
Before using your new answerer, you should record a greeting
button to store the rings to answer. The unit confirms the
(the announcement callers hear when your answering system
setting and enters Message Length menu.
answers a call). If you don't record a greeting, callers hear a
default greeting which says, "We are unavailable to take your
I
A
NFORMATION
BOUT
call. Please leave a message. Thank you for calling."
Toll Saver can save you the cost of making a call when you
access your messages from another phone:
When recording the greeting you should be about 6 to 8
inches from the unit. Eliminate as much background noise as
• If you have new messages, the unit answers after the 2nd
possible.
ring.
1. Prepare your greeting.
• If you have no new messages, the unit answers after the 5th
ring.
Sample Greeting: Hi, this is (use your name here). I can't
answer the phone right now, so please leave your name,
You can hang up after the 3rd ring and save the pay telephone
number, and a brief message after the tone, and I'll get back
or long distance charge.
to you. Thanks.
S
ETTING
T
HE
I
NCOMING
2. Hold down the GREETING button. Unit announces "Record
This setting allows you to select the length of the incoming
greeting after tone. " After the tone you have 60 seconds to
message.
record your greeting.
1. The unit announces "Message Time (current message length)
3. Release the GREETING button when you finish. The unit
minutes. To set message time, press next, press set to
beeps, and the greeting plays back automatically.
continue. "
I
A
G
NFORMATION
BOUT THE
REETING
2. To change the message length, press and release the NEXT
or PREVIOUS button and the unit announces a number, such
1. To review the default greeting or review your recorded
greeting, press and quickly release the GREETING button.
as "1,2,3,4. "
The unit plays the current greeting.
3. After choosing a number, press and release the STOP/SET
2. If you want to erase your greeting, press and release the
button to store the message time. The unit enters Security
ERASE button while your recorded greeting is playing. The
Code Menu.
built-in greeting will be restored.
NOTE: Your recording time should not be less than 2 seconds.
Otherwise the unit will return to the default greeting.
S
S
C
ETTING THE
ECURITY
ODE
S
ETTINGS
This setting allows to change the factory default security code
used to access your answerer from a remote location. The
default code is 123.
/D
IME
AY
1. The unit announces, "Security code (the current 3 number
Security Code setting). To set security code, press
next...press set to stop. "
2. If you press and release the STOP/SET button, the unit
Default Settings
announces all the new settings and exit the set up menu.
Time
12 a.m. Sunday
3. If you press and release NEXT or PREVIOUS button, unit
Rings to Answer 4
announces "Security Code (current 3 number). To set
Message time
2
security code, press next, press set to continue" .
Security Code
123
4. To change the first security code number, press and release
the NEXT or PREVIOUS button again. The unit announces all
three numbers, but only the first number will change, such
as "123, 223, " or "123, 023. "
5. After choosing the first number, press and release the STOP/
SET button to store the first number.
6. The unit automatically advances to the second number and
announces "Security Code (current 3 number). To set
security code, press NEXT then press SET to continue. " To
change the second and third numbers, repeat steps 4 and 5.
After the third number is stored, the unit announces all the
stored settings and exits the setup menu.
R
S
EVIEWING THE
ETTINGS
This function allows you to review the current time, rings to
answer, message time and security code.
• Press and release the STOP/SET button to start the review.
The unit announces the current settings.
A
V
DJUSTING THE
OLUME
Use the VOLUME + and - buttons to increase or decrease the
volume. The unit beeps when it is not announcing a setting or
playing a message.
M
I
ESSAGES
NDICATOR
The MESSAGES indicator lets you know the status of your
unit.
STATUS
EXPLANATION/SOLUTION
Message Indicator flashes slowly
There are new messages. Press
PLAY/MEMO to hear your
messages.
Message Indicator flashes rapidly.
Memory is full. Erase some
messages
A
INGS TO
NSWER
Message Indicator is lit and not flashing.
Answerer is on. No action
required, unit is ready to receive
calls.
Message Indicator is off.
Answerer is off. Press ON/OFF/
ERASE button to turn on.
P
M
LAYING
ESSAGES
When the message indicator flashes slowly you have received
new messages. Messages play back in first received-first
played order. If there are new messages, the unit plays new
messages first, followed by old messages. If using remote
access, the unit plays all messages, new and old, in first-
received-first played order.
T
S
OLL
AVER
NOTE: When the answerer is off, it answers calls after 10 rings
but doesn't play the greeting. The answerer doesn't take
messages when it is turned off.
• To playback messages, press and release the PLAY/MEMO
button.
• To stop playback, press and release the STOP/SET button.
• To restart playback of a current message, press and hold the
PREVIOUS button until the message restarts from the
beginning.
M
ESSAGE
T
IME
• To go back to the beginning of a previous message, press
and release the PREVIOUS button within one second.
• To fast forward through a message, press and hold the
NEXT button.
• To skip to the beginning of the next message, press and
release the NEXT button.
• To erase a message while it is playing, press and release the
ON/OFF ERASE button. The answerer announces, "Message
Erased" to confirm the message has been erased.
G
P
C
NOTE:
ENERAL
RODUCT
ARE
• An 'old' message is a message that has been listened to
To keep your answerer working and looking good, follow these
(including the time and day) and not erased.
guidelines:
• A 'new' message is a message that has not been listened to
• Avoid putting it near heating appliances and devices that
completely.
generate electrical noise (for example, motors or fluorescent
lamps).
• At the end of each message the unit announces the time and
• DO NOT expose to direct sunlight or moisture.
day the message was received.
• Avoid dropping answerer and/or other rough treatment.
At the end of messages playback the unit announces "end of
• Clean with a soft cloth.
messages." If no battery is installed or the battery is low, the unit
announces "low battery."
• Never use a strong cleaning agent or abrasive powder
because this will damage the finish.
E
A
M
RASING
LL
ESSAGES
• Retain the original packaging in case you need to ship it at a
When the answerer isn't playing or recording messages, press
later date.
and hold the ERASE button until you hear the "Messages
T
T
ROUBLESHOOTING
IPS
Erased" announcement. Release the button after the
announcement. This feature allows you to erase all old
D
'
,
10
OESN
T ANSWER
OR ANSWERS ON
TH RING
messages but not new messages. If you do not have any
• Make sure answerer is turned on.
messages, the unit will announce, "Zero Messages. "
• Memory is full, erase some messages.
• Check AC power and phone line connections.
NOTE: To erase new messages, play them, then press ERASE
during playback.
I
NCOMING MESSAGES ARE INCOMPLETE
• Was an extension phone picked up?
L
M
EAVING A
EMO
• The caller left a message that is longer than the message
Press and hold the MEMO button. Record your message after
length you chose during setup.
the announcement and the beep are heard. Release the MEMO
• Memory is full.
button when you're finished talking. The unit treats the memo
as a message, and the MESSAGES indicator will flash.
• You accidentally pressed the STOP/SET button when you
were playing back your messages.
S
C
(A
D
F
)
CREENING
ALLS
UTO
ISCONNECT
EATURE
W
'
When a call comes in the unit rings the number of set times,
ON
T RESPOND TO REMOTE COMMANDS
• You must use touch-tone phone.
plays the greeting, and records the incoming call.
• You must enter the correct security code.
You may screen incoming calls by listening as the caller leaves
a message. If you want to talk to that caller, pick up any
• Did the unit hang up? If you take no action for a period of
extension phone.
time, it automatically hangs up.
Auto Disconnect tells the unit to stop playing the greeting or
A
'
NSWERER DOESN
T WORK
recording a message when an extension phone is picked up.
• Unplug power cord from the electrical outlet and plug it back
Sometimes you may pick up the phone and the machine keeps
in to reset the answerer. If that doesn't work, unplug the
playing the greeting. This is normal. If you want to pick up the
power cord from the back of the unit and plug it back in. This
phone while the greeting is playing, wait about two seconds
is a complete reset.
after the system answers before picking up the phone.
C
'
If the greeting continues to play after picking up an extension
AN
T HEAR MESSAGES
• Adjust the volume control.
phone, press and release the STOP/SET button.
R
A
EMOTE
CCESS
U
NIT ANNOUNCES
"L
OW
B
ATTERY
"
• Install a new 9-volt alkaline battery.
You can access your answerer from any touch-tone phone by
entering your 3-digit security code (the default security code is
C
'
AN
T RESTART THE MESSAGE
123, but you can change it.) Be aware that remote functions do
• You must play messages for at least 5 seconds before
not work with rotary or push-button, pulse-dialing phones. You
pressing and holding the PREVIOUS button.
can cut out the wallet-size remote card located at the end of
M
ESSAGES INDICATOR FLASHES RAPIDLY
this instruction book so you will have the touch-tone
• Memory is full. Erase some messages.
commands when you're picking up messages from another
location.
B
ATTERY GOOD BUT MESSAGES WERE LOST
• Was the AC power supply unplugged from the back of unit?
To access your answerer:
1. Call your telephone number.
G
REETING CONTINUES TO PLAY EVEN AFTER AN EXTENSION PHONE IS
2. After you hear the beep that follows the greeting, enter your
PICKED UP
• This is normal operation. Auto disconnect is delayed for 2
3-digit security code. To bypass the greeting, you can enter
your 3-digit security code any time while the greeting is
seconds after the unit answers a call. If you are near the
playing.
unit, press the STOP/SET button to stop the greeting.
3. Unit beeps to confirm you have accessed the remote
T
N
I
ELEPHONE
ETWORK
NFORMATION
functions and begins playing the remote functions menu.
Should your equipment cause trouble on your line which may
4. Select the function you want to use and press that number
harm the telephone network, the telephone company, where
on the phone's keypad you are using.
practicable, may notify you that temporary discontinuance of
5. To end the call, hang up or press the "6" button while the
service may be required. Where prior notice is not practicable
menu is playing.
and the circumstances warrant such action, the telephone
company may temporarily discontinue service immediately.
NOTE: The unit answers on the 10th ring if the unit is turned off
The telephone company may make changes in its
or the memory is full. To access the answerer, enter the 3-digit
communications facilities, equipment, operations or
security code after the beeps. If memory is full, playback your
procedures where such action is required in the operation of
messages and erase some of them to restore memory. If the
its business. If these changes are expected to affect the use or
answerer is off, press 2 to turn it on. If you want to end a call
performance of your telephone equipment, the telephone
while a message is playing, just press and release the "6" button
company will likely give you adequate notice to allow you to
twice on the phone you are using.
maintain uninterrupted service.
Notice must be given to the telephone company upon
NOTE: After the unit plays the remote menu, it will wait 10
termination of your telephone from your line.
seconds for a command. If a command is not entered, the unit
REN N
disconnects. The unit only allows two attempts at accessing the
UMBER
security code. If the second attempt is incorrect, the unit will end
the call.
On the bottom of this equipment is a label indicating, among
other information, the FCC Registration number and Ringer
Equivalence Number (REN) for the equipment. You must, upon
request, provide this information to your telephone company.
The REN is useful in determining the number of devices you
may connect to your telephone line and still have all of these
devices ring when your telephone number is called. In most
(but not all) areas, the sum of the RENs of all devices
connected to one line should not exceed 5. To be certain of the
number of devices you may connect to your line as
determined by the REN, you should contact your local
telephone company.
S
ERVICE
ATLINKS Communications Canada, Inc., warrants to the
purchaser or gift recipient that if any manufacturing defect
becomes apparent in this product within 1 year from the
original date of purchase, it will be replaced free of charge,
including return transportation.
This warranty does not include damage to the product result-
ing from accidents, misuse or leaking batteries.
Should your product not perform properly during the warranty
period, either:
1. Return it to the selling dealer with proof of purchase for
replacement,
OR
2. Remove the batteries (where applicable), and pack product
complete with accessories in the original carton (or equiva-
lent).
— Mail prepaid (with proof of purchase) and insured to:
ATLINKS Communications Canada, Inc.
c/o Thomson multimedia Ltd.
6200 Edwards Boulevard
Mississauga, Ontario
Canada L5T 2V7
The provisions of this written warranty are in addition to and
not a modification of or subtraction from the statutory warran-
ties and other rights and remedies contained in any applicable
legislation, and to the extent that any such provisions purport
to disclaim, exclude or limit any such statutory warranties and
other rights and remedies, such provisions shall be deemed to
be amended to the extent necessary to comply therewith.
If you are unable to find a qualified servicer for out of warranty
service, you may write to:
ATLINKS Communications Canada, Inc.
c/o Thomson multimedia Ltd.
P.O. Box 0944
Indianapolis, Indiana, U.S.A., 46206-0944
Attach your sales receipt to this booklet for future reference.
This information is required if service is needed during the
warranty period.
PURCHASE DATE
_____________________________________________________________________
NAME OF STORE
_____________________________________________________________________
Cut out this remote access card
so that you can take it with you
to help you use the remote
features.
FOLD
To:
Press:
Play messages ......................... 1
Play previous ............................ 7
(during message playback)
Skip to next message ........... 9
(during message playback)
Erase message ...................... 0
(during message playback)
Turn on answerer ..................... 2
Turn off answerer ..................... 3
Record message ...................... 4
(press 6 again when finished)
Record greeting ....................... 5
(press 6 again when finished)
Stop playback ........................... 6
(during message playback)
To set security code ................. 7
Play greeting ............................ 8
Erase message ......................... 0
Advertisement

Related Manuals for GE 29878


Summary of Contents for GE 29878
- Page 1 29878 3. Connect the small end of the power supply into the POWER ETTING THE ECURITY NTRODUCTION NOTE: ENERAL RODUCT ERVICE HANGING THE ETTINGS 9V AC jack on the back of the answerer. Plug the other end This setting allows to change the factory default security code •...
- Page 2 29878 3. Branchez la petite extrémité de l’alimentation dans la prise ’ ÉGLAGE DU CODE DE SÉCURITÉ NTRODUCTION REMARQUE : OINS ET ENTRETIEN ACTEUR D ÉQUIVALENCE DE SONNERIE HANGEMENT DES RÉGLAGES POWER 9V AC à l’arrière du répondeur. Branchez l’autre Répondeur numérique...