
Related Manuals for Honda 08A06-MCA-B00


Summary of Contents for Honda 08A06-MCA-B00
-
Page 1: Operating Instructions
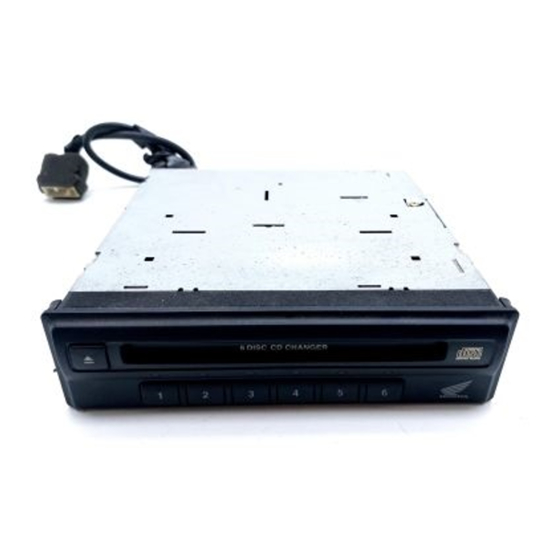
OPERATING INSTRUCTIONS 6 DISC IN-DASH CD CHANGER 6 DISC IN-DASH CD CHANGER P/N: 08A06-MCA-B00... -
Page 2: Table Of Contents
Contents Precautions ............................3 Proper Care of Your CDs ......................... 5 CD Changer Operation ........................7 Installation ............................13 In Case of Difficulty ........................14 Switching the address setting ......................17 Please write the serial number (on the bottom of the unit) in the space below. Keep this booklet as a record of your purchase to help identify the unit if it's stolen. -
Page 3: Precautions
Precautions FOR DRIVING SAFETY VOLUME Do not insert or eject a CD while driving as it is dangerous and For your driving safety, keep may result in an accident. the volume low enough to be aware of road and traffic conditions. - Page 4 Precautions PRECAUTIONS WHEN OPERATING THIS PRODUCT CAUTIONS DURING PLAYBACK • Do not press on the CD loading slot door when it opens or closes. Playing a CD while driving on a very bumpy road may result in • The CD loading slot door opens and closes automatically. Do not skips.
-
Page 5: Proper Care Of Your Cds
Proper Care of Your CDs PROPER HANDLING Handle CDs as shown. Do not drop CDs. Hold CDs so you will not leave fingerprints on the surface. If the surface is scratched, it may cause the pickup to skip signal tracks. Do not put tape, paper, or gummed labels on the CD. - Page 6 Proper Care of Your CDs NEVER ATTEMPT THE FOLLOWING Do not grip or pull out the CD while it is being pulled back into the player by the automatic reloading mechanism. CAUTION FOR NEW CDS When a new CD is inserted into the player, the CD may fail to play after initial loading.
-
Page 7: Cd Changer Operation
CD Changer Operation EXPLANATION OF THE HAND MARKS Press momentarily. Press and hold for at least 3 seconds. 3SEC The CD Changer operates with the same controls used for the audio system. For LOADING THE CD (1 of 2) operation, refer to the audio system section of the Owner’s Manual for your radio. Press one of the buttons (1–6) to select the desired disc number for the CD you want to load. - Page 8 CD Changer Operation You can load a CD under a selected disc number. The system will LOADING THE CD (con’t) automatically playback when the CD is loaded. Insert the CD with the label side up. • When loading is complete, LED will stop flashing and remain lit.
-
Page 9: Selecting A Cd
CD Changer Operation SELECTING A CD Press one of the buttons (1–6) to select a desired CD for play. Flashes orange • Green LED indicates CDs are stored and orange LED indicates currently selected 6 DISC IN-DASH CD CHANGER • While CDs are being changed, the LED flashes orange until CD changing has been completed, then it lights orange. - Page 10 CD Changer Operation EJECTING THE CD (1 of 2) Press one of the buttons (1–6) to select the disc number for the CD you want to eject. Lights green ≠ Flashes orange ≠ Eject Button Lights orange 6 DISC IN-DASH CD CHANGER Disc Number Buttons Disc status LED Then press eject button to eject the...
- Page 11 CD Changer Operation EJECTING THE CD (con’t) Note: If you do not remove the ejected CD from the CD loading slot within about 15 seconds, it is automatically reloaded. If you press the eject button, or press the ejected CD’s disc number button (the Disc status LED that’s flashing green), the CD is immediately Eject Button...
- Page 12 CD Changer Operation This product is equipped with two illumination colors, white and orange. ILLUMINATION You can select the desired illumination color. The illumination color changes each time you press and hold the eject Eject Button button for 3 seconds or longer. 6 DISC IN-DASH CD CHANGER 3SEC...
-
Page 13: Installation
Installation A bracket have been attached to the top of the Changer for protection during SHIPPING BRACKET shipment. A bracket is attached to this unit to protect it from shocks during shipment. Be sure to remove this bracket before installing this unit in your car (before Shipping bracket connecting). -
Page 14: In Case Of Difficulty
If you encounter a problem, please review the items in the at fault. Otherwise, make sure the rest of your system is proper- guide. This guide will help you isolate the problem if the unit is ly connected or consult your authorized HONDA dealer. INITIAL POWER UP SYMPTOM... - Page 15 CD and then switch back to CD. If performing any of these operations does not cancel the E-01 indication, consult your HONDA dealer. High temperature. Will disappear when the temperature - - - H returns to operation range.
- Page 16 In Case of Difficulty SYMPTOMS SYMPTOMS Skips. Skips. Stuck on one track. Stuck on one track. CD ejects during play. CD ejects during play. CAUSE CAUSE Scratches. 1 Pin holes in CD caused during stamping Fingerprint marks or dust. (Unclean sur- process-reflective material missing.
-
Page 17: Switching The Address Setting
Switching the address setting To enable identification of CD Changers when two or address setting. more are connected, assign each one with a different To switch the address setting, turn the ignition switch from OFF to ACC while pressing one of the buttons (1–4). -
Page 20: Specifications
SPECIFICATIONS General CD player Power source ....13.2 V DC (10.8 – 15.2 V allowable) System .......... Compact disc audio system Grounding system ..........Negative type Usable discs ............Compact disc Standby current ............ 2 mA or less Signal format ......Sampling frequency: 44.1 kHz Rated current consumption .........