Philips VideoPlus+ DVDR990 Instructions For Use Manual
Hide thumbs
Also See for VideoPlus+ DVDR990:
- Instructions for use manual (62 pages) ,
- User manual (77 pages) ,
- Quick reference card (2 pages)
Table of Contents
Advertisement
Quick Links
Download this manual
See also:
User Manual
Advertisement
Table of Contents

Related Manuals for Philips VideoPlus+ DVDR990


Summary of Contents for Philips VideoPlus+ DVDR990
- Page 1 Downloaded From Disc-Player.com Philips Manuals...
-
Page 2: General Information
TRUSURROUND, , and symbol S S R R S S Laboratories. Confidential Unpublished Works. trademarks of SRS Labs,Inc. TRUSURROUND ©1992-1997 Dolby Laboratories, Inc. All rights technology is manufactured under license from reserved. SRS Labs, Inc. Downloaded From Disc-Player.com Philips Manuals... -
Page 3: Table Of Contents
User preference menu operation ____________________________20 Status box ______________________________________________20 Tuner info box __________________________________________21 Timer info box __________________________________________21 Warning box ____________________________________________21 Index Picture Screen________________________________________22 User preferences __________________________________________23 Setting user preferences __________________________________23 Picture settings __________________________________________23 Sound settings ___________________________________________23 Downloaded From Disc-Player.com Philips Manuals... - Page 4 Camera Angle ___________________________________________38 Changing the audio language________________________________38 Subtitles ________________________________________________39 Special VCD-Features_______________________________________39 Playback Control (PBC) ___________________________________39 Playing an audio CD ________________________________________39 Pause __________________________________________________40 Search _________________________________________________40 Moving to another track ___________________________________40 Repeat track/disc_________________________________________40 Repeat A-B _____________________________________________40 Scan ___________________________________________________40 Downloaded From Disc-Player.com Philips Manuals...
- Page 5 Changing the index picture _________________________________47 Dividing a title ___________________________________________48 Append recording ________________________________________48 Troubleshooting Troubleshooting checklist ___________________________________49 Diagnosis programme_______________________________________51 Instructions _____________________________________________51 System limitations __________________________________________51 Glossary Appendix Using your DVD recorder remote control with your TV set _______54 Downloaded From Disc-Player.com Philips Manuals...
-
Page 6: Introduction
CD- Recordable format, to produce discs that keep your data for a lifetime. Your Philips DVD recorder is a recorder and player for digital video discs, with a two-way compatibility to the universal DVD-Video standard. This means that:... -
Page 7: Box Contents
DVD recorder in a warm environment for two hours before use, so the moisture can evaporate. l The recorder should not be exposed to dripping or splashing, no objects filled with liquids, such as vases, should be placed on the recorder. Downloaded From Disc-Player.com Philips Manuals... -
Page 8: Installation
TV set. TV set using the audio cable supplied (5). If your TV set is not equipped with a connector, SCART you can connect the DVD recorder with the S-video (Y/C) sockets. Downloaded From Disc-Player.com Philips Manuals... -
Page 9: Connecting To Audio Equipment
If you have a receiver with two-channel analogue stereo without any of the above mentioned sound systems, connect the audio Left and Right output sockets to the corresponding sockets on your receiver, amplifier or stereo system. Use the audio cable supplied (6). Downloaded From Disc-Player.com Philips Manuals... -
Page 10: Connecting To Other Equipment
User Preferences - features), the signal from EXT 2 will not be passed on to the TV set on EXT 1. - EasyLink functionality will not be available to devices connected via the DVD recorder’s EXT 2 connector. SCART Downloaded From Disc-Player.com Philips Manuals... -
Page 11: Power Supply
E a s y L i n k l o a d i n g d a t a f r o m T V - p l e a s e w a i t Downloaded From Disc-Player.com Philips Manuals... -
Page 12: Manual Setting
If not, subtitles will revert to the first subtitle language on the disc. Subtitle language English Español Français Português Italiano Press OK to continue Downloaded From Disc-Player.com Philips Manuals... - Page 13 - XX channels found’ appears on the TV screen. After Auto channel search you can have TV channels stored automatically in the same order as your TV set. See ‘User preferences installation’ - ‘Follow TV’. Downloaded From Disc-Player.com Philips Manuals...
-
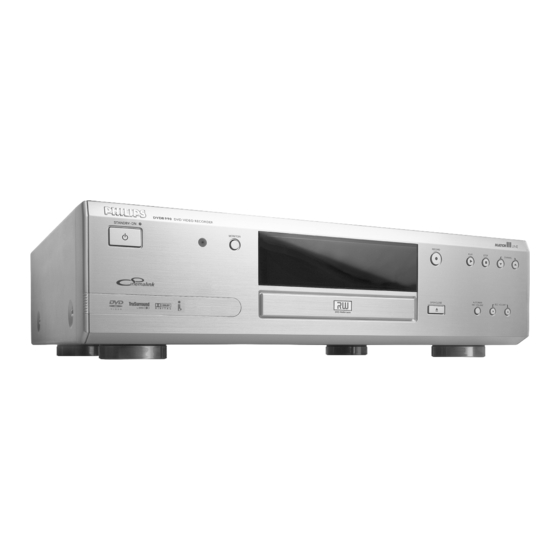
Page 14: Functional Overview
Functional overview Front of recorder Downloaded From Disc-Player.com Philips Manuals... -
Page 15: Rear Of Recorder
SCART OUT OPTICAL - connection to an amplifier, receiver or stereo system with a digital (optical) audio input OUT COAX - connection to an amplifier, receiver or stereo system with a digital (coaxial) audio input Downloaded From Disc-Player.com Philips Manuals... -
Page 16: Display
Display Downloaded From Disc-Player.com Philips Manuals... -
Page 17: Remote Control
Remote control Downloaded From Disc-Player.com Philips Manuals... -
Page 18: Operation
If ‘Child Lock’ is set to ON and the disc inserted is not in the ‘child safe’ list (not authorized), the PIN code must be entered and/or the disc has to be authorized. (see ‘Access Control’) Downloaded From Disc-Player.com Philips Manuals... -
Page 19: The Following Disc Types Cannot Be Used At All, Neither For Recording Nor For Playback
The following disc types cannot be used at Zoom all, neither for recording nor for playback: Temporary Feedback Field DVD-RAM The system menu bar contains a ‘Temporary Feedback DVD-Audio Field’ with information concerning prohibited actions, playback modes, available angles, etc. Downloaded From Disc-Player.com Philips Manuals... -
Page 20: User Preference Menu Operation
The following functions can be operated via the user preference menu. User preference menu icons Picture settings Sound settings Language settings Feature settings Remote control settings Record settings Installation Downloaded From Disc-Player.com Philips Manuals... -
Page 21: Tuner Info Box
Tuner info box and timer info box automatically disappear after a few seconds. Current channel Warning box The warning box will be displayed near the bottom of the screen when appropriate. For instance: ‘Disc locked’.’ No signal Copy-protected signal Downloaded From Disc-Player.com Philips Manuals... -
Page 22: Index Picture Screen
Cue to go to title on next screen Disc Bar - shows an overview of Tuner Info Box all titles on disc - displays the selected channel Timer Info Box - displays the current time or time/date of the next timer programme Downloaded From Disc-Player.com Philips Manuals... -
Page 23: User Preferences
Analogue output Stereo Night mode Surround 3D sound Black level shift (NTSC only) Adapts the colour dynamics to obtain richer contrasts. Select ‘Stereo’, ‘Surround’ or ‘3D Sound’. Factory Select ‘On’ or ‘Off’. setting is Stereo. Downloaded From Disc-Player.com Philips Manuals... -
Page 24: Language Settings
DVD discs containing Parental Level information. Status box Change country - Allows conditional presentation of Autoresume DVD-Video discs containing country information. Low power standby Change code - To change the pin code. See ‘Acces Control’. Downloaded From Disc-Player.com Philips Manuals... -
Page 25: Remote Control Settings
Select ‘Off’ to disable this sound. Factory setting is ‘On’. Remote control used If you want to use the remote control of a Philips DVD T o e x i t p r e s s S Y S T E M M E N U player instead of the standard DVD recorder remote control, select ‘DVD player’. -
Page 26: Installation
‘P01’. l Wait until 'TV02’ appears and repeat the previous two steps for programme number 2 and the rest of the channels you want to store. l To end, press SYSTEM MENU. Downloaded From Disc-Player.com Philips Manuals... - Page 27 S Y S T E M M E N U l Select ‘On’ with t (left cursor) or u (right cursor). l Confirm with OK. ‰ ‘ ’ apperars on the display. DECODER l To end, press SYSTEM MENU. Downloaded From Disc-Player.com Philips Manuals...
-
Page 28: Recording
CH+, CH- (on the remote control) to PAL-60 sources. select the programme number (programme name) from which you wish to record. ‰ When a TV channel transmits a channel name, it will be shown on the display. Downloaded From Disc-Player.com Philips Manuals... -
Page 29: Manual Audio Control
Press 9 STOP to stop recording. If you are recording from a camcorder watch the video output of the DVD recorder on the TV - instead of the camcorder viewer - to determine the right moment to stop. Downloaded From Disc-Player.com Philips Manuals... -
Page 30: Recording With Automatic Switch-Off (Otr One-Touch Recording)
- VPS/PDC on or off; - the recording mode. The DVD recorder stores all the information mentioned above in a timer block. You can programme up to six timer blocks, one month in advance. Downloaded From Disc-Player.com Philips Manuals l Press u (right cursor). -
Page 31: Timer Programming Without The Video Plus+ System
Press u (right cursor). l Use SELECT to select the recording mode. l Press u (right cursor). l Enter the date with v (up cursor) or w (down cursor), or with the digit keys 0-9. Downloaded From Disc-Player.com Philips Manuals... -
Page 32: Programming With 'Nex Tv Iew Link
Memory full protection. If you inserted a write-protected The maximum number of recording programmes is used. (locked) disc, recording will be refused. Solution: l Switch off with B STANDBY/ON. l Delete one of the recording programmes. Downloaded From Disc-Player.com Philips Manuals... -
Page 33: How To Check Or Alter A Timer Block
(left right cursor). l Alter data with w or v (down up cursor) or with the digit keys 0-9. l Confirm with OK. l To end, press TIMER. l Switch off by pressing B STANDBY/ON. Downloaded From Disc-Player.com Philips Manuals... -
Page 34: Playback
To stop play at any time, press 9 STOP. ‰ The currently playing title and chapter number ‰ The default screen will appear. are displayed on the recorder display. The elapsed time is shown also. Downloaded From Disc-Player.com Philips Manuals... -
Page 35: General Features
Press 2 PLAY to exit slow motion mode. l Press v (up cursor) to delete the slow motion menu. You can also select Slow Motion speeds by using the SLOW key on the remote control. Downloaded From Disc-Player.com Philips Manuals... -
Page 36: Still Picture And Step Frame
Press 2 PLAY to exit fast motion mode. l Press v (up cursor) to delete the fast motion menu. To search forward or backward through different speeds, you can also press 5 REVERSE or 6 FORWARD again. Downloaded From Disc-Player.com Philips Manuals... -
Page 37: Scan
When OK is pressed only the zoomed picture will be shown on the screen. l If you wish to zoom at any moment, press a ZOOM and select the required zoom factor as described above. l Press 2 PLAY to exit zoom mode. Downloaded From Disc-Player.com Philips Manuals... -
Page 38: Special Dvd+R(W) Features
If a DVD-Video disc has separate disc and title menus, you can navigate to the disc menu as follows: l Press T/C followed by DISC MENU. ‰ The disc menu is displayed. l To remove the disc menu, press DISC MENU Downloaded From Disc-Player.com Philips Manuals again. -
Page 39: Subtitles
To stop play at any time, press 9 STOP. ‰ The number of tracks and the total playing time will be shown on the screen and the recorder display. Downloaded From Disc-Player.com Philips Manuals... -
Page 40: Pause
To continue play at your chosen track, press SCAN J PREVIOUS twice to step back to the previous again or press 2 PLAY. track. l To go directly to any track, enter the track number using the numerical keys 0-9. Downloaded From Disc-Player.com Philips Manuals... -
Page 41: Playing An Mp3 Disc
To repeat the entire disc, press REPEAT a third time. ‰ Repeat disc appears on the screen. l To exit REPEAT mode, press REPEAT a fourth time. ‰ Repeat off appears on the screen. Downloaded From Disc-Player.com Philips Manuals... -
Page 42: Access Control
Insert the disc. Low power standby ‰ Playback starts automatically. l Press 9 STOP while { is visible. ‰ | will appear and the disc is now banned i.e. it is not Child safe any longer. Downloaded From Disc-Player.com Philips Manuals... -
Page 43: Parental Level (Dvd-Video Only)
If no suitable alternative is found, play will stop and the 4-digit code has to be entered. l Press OK or t (left cursor) to confirm and press Downloaded From Disc-Player.com Philips Manuals SYSTEM MENU again to exit the menu. -
Page 44: Changing The 4-Digit Code
If you forgot your code, press 9 STOP four times while in the access control PIN code box and exit with OK. Access control is now switched off. You can then enter a new code as described above. Downloaded From Disc-Player.com Philips Manuals... -
Page 45: Managing Disc Content
Press u (right cursor) to enter the title settings menu. Cue to go back to the Index Picture l Select ‘Erase this title’. Screen ‰ The message 'This will completely erase this title', 'Press OK to confirm' is shown. Downloaded From Disc-Player.com Philips Manuals... -
Page 46: Disc Settings
In the Disc Info Screen press u (right cursor). ‰ You will now enter the ‘disc settings’ menu. l Select ‘Erase disc’ and press OK. ‰ The message 'This will erase all titles’ is Downloaded From Disc-Player.com Philips Manuals displayed. -
Page 47: Making Your Edits Dvd Compatible
Insert chapter marker Press OK Current chapter Hidden Delete chapter marker Delete all chapter markers New index picture Divide title l Use w or v (down up cursor) to toggle through the Downloaded From Disc-Player.com Philips Manuals menu’s functions. -
Page 48: Inserting Chapter Markers
Select ‘Visible’ or ‘Hidden’ with the u (right cursor) key. l You can toggle between ‘Visible’ and ‘Hidden’ directly from any line in the FSS menu with the SELECT key on the remote control. Downloaded From Disc-Player.com Philips Manuals... -
Page 49: Dividing A Title
For one of the two resulting titles, a new index picture is created. If you want to divide one title into more than two titles, use the above procedure several times. Downloaded From Disc-Player.com Philips Manuals... -
Page 50: Troubleshooting
• Check if the audio format of the selected audio language matches your receiver capabilities. Recorder does not respond to all • Some operations are not permitted by the disc. Refer to the operating commands during playback instructions in the disc inlay. of a DVD-Video disc Downloaded From Disc-Player.com Philips Manuals... - Page 51 Choose ‘Adapt to own disc format’ (See ‘User Preferences - Features). A DVD player shows the Index Picture • Press 9 STOP to exit the Index Picture Screen, then press 2 PLAY. Screen but does not react to the 2 PLAY key Downloaded From Disc-Player.com Philips Manuals...
- Page 52 HQ mode, 10 minutes in SP, 12 minutes in SP+, 15 minutes in LP, 20 minutes in EP or 30 minutes in EP+ mode. For more information about compatibility with DVD players refer to ‘Troubleshooting’ in the instructions for Use. Downloaded From Disc-Player.com Philips Manuals...
-
Page 53: Diagnosis Programme
Picture Screen will may not match with the actual video l Consult your dealer or the Philips Customer Care content on the disc. The last recorded title may be lost. Centre for the nearest Service Repair Shop in your country. -
Page 54: Glossary
On-screen Display. The ‘user interface’ by which you can control the DVD recorder via the TV screen. One-Touch Recording. With this feature you can easily start a recording (by pushing just one button) and select the switch-off time in intervals of 30 minutes. Downloaded From Disc-Player.com Philips Manuals... - Page 55 Video Cassette Recorder VIDEO Plus+ A system by which you can easily program a timer recording by entering a nine-digit PlusCode number found next to the programme description in most TV guides. Video Programming System Downloaded From Disc-Player.com Philips Manuals...
-
Page 56: Appendix
..074, 078, 081, 083, 120, Finlux . . 064, 132, 097, 099, 206 BPL ....309 Downloaded From Disc-Player.com Philips Manuals... - Page 57 Korpel....064 Philips. . 064, 039, 081, 401, 581 Sonoko ... . 036, 064 Koyoda .
- Page 58 08 5985 2250 Germany tel: 49-0-180-535 6767 Switzerland tel: 0844 800 544 Greece tel: 30-0-0800-3122 1280 United Kingdom tel: 44-0-208 665 6350 Ireland tel: 353-1-7640292 Poland tel: 48-22-571 0571 Italy tel: 800-820026 (Toll Free) Downloaded From Disc-Player.com Philips Manuals...
- Page 59 Notes Downloaded From Disc-Player.com Philips Manuals...
- Page 60 Notes Downloaded From Disc-Player.com Philips Manuals...
-
Page 61: Specifications
4 Hz - 20 kHz Audio CD fs 44.1 kHz 4 Hz - 20 kHz REMOTE CONTROL Signal-Noise (1kHz) 105 dB Downloaded From Disc-Player.com Philips Manuals - Universal remote for control of main TV functions Dynamic Range (1kHz) 100 dB Crosstalk (1kHz) 110 dB... - Page 62 • Année 20 The products and services described herein are not necessarily available in all countries Due to continuous product improvements this document is subject to change without notice. Downloaded From Disc-Player.com Philips Manuals ©2002 PHILIPS Printed in Belgium 3104 125 2453.1...