Casio SE-C3500 User Manual
Electronic cash register
Hide thumbs
Also See for SE-C3500:
- Operation manual (15 pages) ,
- User manual (3 pages) ,
- Dealer's manual (74 pages)
Table of Contents
Advertisement
Quick Links
Advertisement
Chapters
Table of Contents

Related Manuals for Casio SE-C3500


Summary of Contents for Casio SE-C3500
- Page 1 User's Manual SE-C3500 Electronic Cash Register (M size drawer)
-
Page 2: Cleaning
Introduction Thank you very much for purchasing this CASIO electronic cash register. START-UP is QUICK and EASY! For the basic settings of your cash register, please see “Quick Start Guide”. Original Carton/Package If for any reason, this product is to be returned to the store where purchased, it must be packed in the original carton/package. - Page 3 To use the cash register safely ....................E-4 To use the cash register’s basic function ................E-9 Getting started ..........................E-10 Getting to know your cash register ....................E-15 How to read the printouts ......................E-23 How to use your cash register ......................E-24 Before opening your store ......................
-
Page 4: To Use The Cash Register Safely
To use the cash register safely • Congratulations upon your selection of this CASIO product. Be sure to read the following safety precau- tions before using it for the first time. After reading this guide, keep it close at hand for easy reference. - Page 5 Continued use of a damaged power cord can cause deterioration of the insula- tion, exposure of internal wiring, and short circuit, which creates the danger of electric shock and fire. • Contact CASIO service representative whenever the power cord or plug requires repair or maintenance. Caution •...
- Page 6 To use the cash register’s basic function Caution Only use the specified batteries. • Do not disassemble, modify or short-circuit them. • Do not put them in fire or water or heat them. • Do not mix new and old batteries or different types of batteries. •...
- Page 7 To use the cash register’s basic function „ When the cash drawer does not open! In case of power failure or the machine is in malfunction, the cash drawer does not open automatically. Even in these cases, you can open the cash drawer by pulling Drawer release lever drawer release lever (see below).
- Page 8 This product is also designed for IT power Please keep all information for future reference. distribution system with phase-to-phase The declaration of conformity may be consulted at http://world.casio.com/ voltage 230 V. Laite on liitettävä suojamaadoituskostkettimilla vaurstettuun pistorasiaan Apparatet må tilkoples jordet stikkontakt Apparaten skall anslutas till jordat nätuttag.
-
Page 9: Table Of Contents
To use the cash register’s basic function Getting started ......................E-10 Loading memory protection batteries ................E-10 Installing paper roll ......................E-11 Setting date, time, and tax table ..................E-13 To set Australian GST ....................... E-14 Getting to know your cash register ................E-15 General guide ........................ -
Page 10: Loading Memory Protection Batteries
To use the cash register’s basic function Getting started This chapter shows how to setup the cash register and get it ready to operate. Loading memory protection batteries Important: These batteries protect information stored in your cash register’s memory when there is a power failure or when you unplug the cash register. -
Page 11: Installing Paper Roll
To use the cash register’s basic function Installing paper roll Caution (in handling the thermal paper) • Never touch the printer head and the platen. • Unpack the thermal paper just before your use. • Avoid heat and direct sunlight. •... - Page 12 To use the cash register’s basic function „ To install journal paper By the same procedure of setting receipt paper, set journal paper on the journal printer. Using key, feed the paper about 20 cm. Remove the paper guide of the take-up reel. Slide the leading end of the paper into the groove on the spindle of the take-up reel and wind it onto the reel two or three turns.
-
Page 13: Setting Date, Time, And Tax Table
To use the cash register’s basic function Setting date, time, and tax table Plug in the power socket into a wall outlet. Be sure to check the rating plate on the side of the cash register to make sure that its voltage matches that of the power supply in your area. -
Page 14: To Set Australian Gst
To use the cash register’s basic function To set Australian GST The following operation programs the cash register Australian GST (the Goods and Service Tax) setting. It is not necessary to program this setting for other countries than Australia. Step Operation Turn the Mode switch to X position. -
Page 15: Getting To Know Your Cash Register
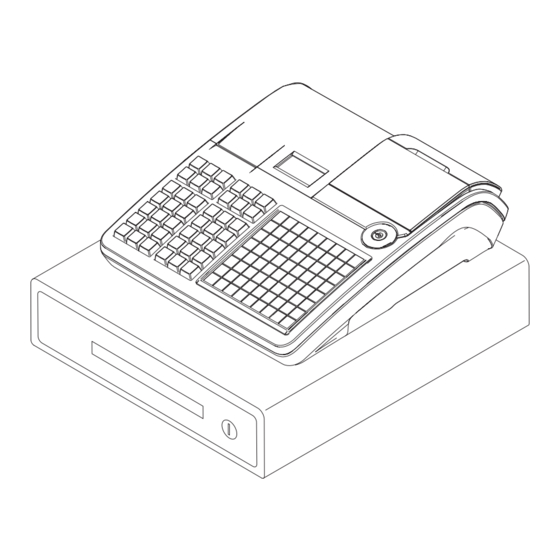
To use the cash register’s basic function Getting to know your cash register General guide Drawer Customer display SD card slot cover Main display Printer cover Mode switch Receipt printer Com port connector cover Journal printer 10 Drawer lock Mode switch Use the mode keys to change the position of the mode switch and select the mode you want to use. -
Page 16: To Adjust The Main Display
To use the cash register’s basic function Mode keys There are two types of mode keys: the program key (marked “PGM”) and the operator key (marked “OP”). The program key can be used to set the mode switch to any position, while the operator key can select the REG and OFF position. -
Page 17: To Set The Menu Sheet
To use the cash register’s basic function To set the menu sheet Pull the sheet cover up and remove the old menu sheet. Put the new menu sheet and replace the sheet cover. E-17... -
Page 18: Display
To use the cash register’s basic function Display „ Main display During a registration CLERK001 000011 1 PLU001 1.00 • 3 DEPT001 6.00 • SUBTOTAL •7.00 6.00 After finalization CLERK001 000011 1 PLU001 1.00 • 3 DEPT001 6.00 • 7.00 •... -
Page 19: Keyboard
To use the cash register’s basic function Keyboard RECEIPT JOURNAL MENU #/ NS HELP FEED FEED SHIFT GUEST/ ERR.CORR SIGN — CLK # POST CANCEL RECEIPT RECEIPT % – ON/OFF ↑ /OLD X/DATE/ ↓ TIME PRICE SUBTOTAL 0 00 CA/AMT TEND Hold this key down to feed receipt paper from the printer. - Page 20 To use the cash register’s basic function Use this key to switch issuing receipts on and off. Use this key following a numeric entry to register money received for non-sale trans- actions. Use this key following a numeric entry to register money paid out from the drawer. Use this key for adding the latest registered total amount to the previous balance to obtain a new balance.
-
Page 21: Allocatable Functions
To use the cash register’s basic function „ Allocatable functions You can allocate the following functions on the keyboard to suit your purpose of register. The keys shown in < > in this manual are function allocated keys. To set these functions on the keyboard, please see page E-111. - Page 22 To use the cash register’s basic function <Non-add> <Sign off> Use this key to print reference numbers (personal Use this key to sign clerk off the register. check number, card number, etc.) <Subtotal> <Non-add / No sale> Use this key to display and print the current subto- Non-add: Use this key to print reference number tal (includes add-on tax) amount.
-
Page 23: How To Read The Printouts
To use the cash register’s basic function How to read the printouts • The journal/receipts are records of all transactions and operations. • The contents printed on receipts and journal are almost identical. • You can choose the journal skip function. If the journal skip function is selected, the cash register will print the total amount of each transaction, and the details of premium, discount and reduction operations only, without printing department and PLU item registrations on the journal. -
Page 24: How To Use Your Cash Register
To use the cash register’s basic function How to use your cash register The following describes the general procedure you should use in order to get the most out of your cash register. Before opening your store • Plugged in? (page E-13) •... -
Page 25: Checking The Time And Date
To use the cash register’s basic function Before opening your store Checking the time and date You can check the time or date on the display whenever there is no registration being made. Step Operation Display Press key to show the date and time on the display. -
Page 26: Registering Items In Departments
To use the cash register’s basic function Registering items in departments The following examples show how you can use the department keys in various types of registrations. Departments are used for categorizing items for example, department 01 for veg- etables, department 02 for fruits, and department 03 for canned foods etc. „... - Page 27 To use the cash register’s basic function „ Repeat registration Sample Operation Unit Price •1.50 Item Quantity Same priced multiple items are sold. Dept. Payment Cash •10.00 Step Operation Printout Enter the unit price. 1 DEPT001 •1.50 Press corresponding department 1 DEPT001 •1.50 key repeatedly for the purchased...
-
Page 28: Split Sales Of Packaged Items
To use the cash register’s basic function „ Split sales of packaged items By using allocated <X/For/Date Time> key, you the register allows you split sales of packaged items. Please see page E-111 for the key allocation. Sample Operation Unit Price 4 for •10.00 Item Quantity... - Page 29 To use the cash register’s basic function „ Department number entry If you allocate <Dept. no./Dept. shift > function to a key, you can register items without using Department key. Sample Operation Unit Price •13.00 Item Quantity Registering an item in Dept. 31 without using Department key.
-
Page 30: Basic Setups And Registrations
To use the cash register’s basic function Basic setups and registrations To program basic settings You can program basic settings in the PGM mode of the Mode switch. Step Display By turning the Mode switch to PGM position, the display indicates the programming top menu. - Page 31 To use the cash register’s basic function Top menu Sub menu What is to be set [Message Setting] 01 Logo 1 Sets logo, commercial, and bottom mes- sages on receipts. 02 Logo 2 See page E-76. 03 Logo 3 04 Logo 4 05 Commercial 1 06 Commercial 2 07 Commercial 3...
-
Page 32: Programming Departments
To use the cash register’s basic function Programming departments This section explains how you can set unit prices, taxable statuses, and item groups. You can program each department linking to a certain group. For ex- ample, department 01 is for packed milk, department 02 is for cheese and both belong to group 03 (dairy goods). -
Page 33: Registering Departments' Preset Data
To use the cash register’s basic function Registering departments’ preset data The following examples explain the operations using preset department data programmed in the previous section. „ Using preset prices Sample Operation Unit Price •2.50 Item Quantity Unit price •2.50 is preset in Dept. 02. Dept. -
Page 34: Programming Plus
To use the cash register’s basic function Programming PLUs Like departments, you can program unit price, taxable status, and linking item group in a PLU (Price Look Up). Using PLUs allow you to register items quickly and accurately. You can use up to 7,000 PLUs. Sample Operation Unit Price •2.50... -
Page 35: Registering Plus' Preset Data
To use the cash register’s basic function Registering PLUs’ preset data The following examples explain the operations using preset PLU data pro- grammed in the previous section. „ Single item sales using PLU Sample Operation Unit Price •2.50 Item Quantity One piece of PLU number 14 (preset unit price •2.50) is sold. - Page 36 To use the cash register’s basic function „ PLU registration with multiplication key Sample Operation Unit Price •2.00 Item Quantity Ten pieces of PLU number 7 item (preset unit price •2.00) are sold. PLU No. Payment Cash •20.00 Step Operation Printout Enter the quantity sold then press key.
- Page 37 To use the cash register’s basic function „ Open PLU Although unit price is preset in a PLU, you can enter price manually if the PLU is programmed as “Open PLU”. To program open PLU, see page E-30. Sample Operation Unit Price •32.80 Item 1...
-
Page 38: Other Registrations
To use the cash register’s basic function Other registrations Discount The following example shows how you can use the key for discount registra- tions. „ Discounts on items and subtotals Sample Operation Dept. 01 •5.00 Item 1 Quantity Taxable 1 (preset) PLU 16 •10.00 (preset) Five percent (preset in... -
Page 39: Reduction
To use the cash register’s basic function Reduction Using the reduction feature, you can subtract a certain amount from an item’s unit price or from a subtotal amount. Sample Operation Dept. 01 •5.00 Quantity Item 1 Taxable 1 (preset) Reduction •0.25 •... -
Page 40: Registering Various Payment Methods
To use the cash register’s basic function Registering various payment methods Other than cash payments, you can register transactions made by checks, charges, credits, or even mixed tendering. „ Check sale Sample Operation Unit Price •11.00 Item Quantity A •11.00 item is sold and customer paid by •20.00 check (check number 1234). -
Page 41: Credit Sale
To use the cash register’s basic function „ Credit sale Sample Operation Dept. 03 •10.00 Item Quantity A purchased item is paid by a credit card. Payment Credit •10.00 Step Operation Printout 10'#o Register the item purchased and press key. 1 DEPT003 •10.00 Press... -
Page 42: Registering Returned Goods
To use the cash register’s basic function Registering returned goods „ Registering returned goods in the REG mode The following example shows how to operate for registering goods returned by customer in the REG mode. Sample Operation Dept. 01 •2.35 Item 1 Quantity Dept. -
Page 43: Registering Returned Goods In The Rf Mode
To use the cash register’s basic function „ Registering returned goods in the RF mode when a customer returns goods after the transaction has been completed, use RF mode for the refund operation. Sample Operation Dept. 03 •4.00 Refunded Item 1 Quantity A customer returned two items. -
Page 44: Registrations Without Transactions
To use the cash register’s basic function Registrations without transactions The followings are the operations other than normal sales transactions. Please do not perform these operations during a sales transaction. „ Registering money received on account Use this operation when you put money in the drawer without any sales transac- tions such case as preparing change. -
Page 45: Corrections
To use the cash register’s basic function Corrections There are three ways to correct erroneous operations that are; • Correcting erroneous item not registered • Correcting erroneous item already registered • Cancelling all the items registered in a transaction „ Correcting erroneously entered item not registered Step Operation Printout... - Page 46 To use the cash register’s basic function „ Correcting items immediately after the registration Step Operation Printout Registering an item. 1 DEPT001 •1.00 2'"" By mistake, Dept. key has been 1 DEPT002 •2.00 pressed twice so cancelling the 1 DEPT002 •2.00 preceding registration by key.
- Page 47 To use the cash register’s basic function „ Voiding an item which has been already registered Step Display During a registration. > Using keys, select the item you have mis- registered. Press key. The selected item is voided. „ Cancelling all items in a transaction Step Display Press...
-
Page 48: Daily Sales Reports
To use the cash register’s basic function Daily sales reports At the end of the business day, you can print categorized and summarized results of the day. Reset report (Z) clears all the sales data whereas the data remains in memory by Read report (X). -
Page 49: Print Out Of Daily Sales Report
To use the cash register’s basic function Print out of daily sales report Date/time Machine No./consecutive No. 20−06−2013 17:00 Report title 0001 000231 Department report title/reset counter −−−−−−−−−−−−−−−−−−−−−−−− Report code DAILY Z Department count/amount −−−−−−−−−−−−−−−−−−−−−−−− Department total count/total amount DEPT 0001 0001015 Fixed total report title/reset counter... - Page 50 To use the cash register’s basic function 26 Taxable 1 amount 27 Tax 1 amount 28 Taxable 2 amount •2,369.69 29 Tax 2 amount •128.86 30 Grand total •2,172.96 31 Function key report title/reset counter •217.33 32 Report code −−−−−−−−−−−−−−−−−−−−−−−− 33 Function key count/amount •00000000125478.96 −−−−−−−−−−−−−−−−−−−−−−−−...
-
Page 51: Advanced Programmings And Registrations
Advanced programmings and registrations Advanced registrations......................E-52 Enabling clerk assignment ......................E-52 Registrations with clerk assignment ....................E-53 Single item cash sales ........................E-54 Other operations ..........................E-56 Character settings ......................... E-72 Using character keyboard......................E-72 Using ten key pad ........................... E-73 Setting characters .......................... E-75 Setting pop messages on receipts .................... -
Page 52: Advanced Registrations
Advanced programmings and registrations Advanced registrations Enabling clerk assignment By assigning a clerk, clerk number or name will be printed on receipts. The fol- lowing operation enables the register to use the clerk assignment. Step Operation Turn the Mode switch to PGM position. The display shows programming top menu. -
Page 53: Registrations With Clerk Assignment
Advanced programmings and registrations Registrations with clerk assignment By signing a clerk on, the clerk name will be printed on receipts and sales re- ports. Step Operation Printout Enter the clerk number and press key. commercial message Perform registration operations. The clerk name is printed on 20−06−2013 11:58 0001... -
Page 54: Single Item Cash Sales
Advanced programmings and registrations Single item cash sales A department key or a PLU programmed as single item sale status finalizes the transaction as soon as it is registered. This feature can be used only in cash sales. To program single item sales status see pages E-97 and E-98. Sample operation 1: Simple single item sale Dept. - Page 55 Advanced programmings and registrations Sample operation 3: Single item sale with another item Dept. 03 •2.00 Item 1 Quantity Preset Normal Dept. 03 is a normal department while dept. 01 is Dept. 01 •1.00 programmed as unit price •1.00 and single item sale status.
-
Page 56: Other Operations
Advanced programmings and registrations Other operations Transactions with coupons „ If <Coupon> function is allocated on a key, you can register items with coupons. To allocate <Coupon> function on a key, please see page E-111. Sample operation Dept. 01 •3.00 Item 1 Quantity Customer paid two •0.50 coupons for... - Page 57 Advanced programmings and registrations „ Transactions with premium If <Premium> function is allocated on a key, you can add premiums on items or on the subtotal. To al- locate <Premium> function on a key, please see page E-111. Sample operation Dept.
-
Page 58: Vat Breakdown Printing
Advanced programmings and registrations „ VAT breakdown printing You can force printing of VAT breakdown at the finalize stage, regardless of whether the cash register is programmed to print or skip printing of the VAT breakdown. Please note that you need to allocate <VAT> function to a key. See page E-111. Sample operation Dept. -
Page 59: Age Verification
Advanced programmings and registrations „ Age verification This function prohibits to register items if the customer is under the preprogrammed age. Please note that you need to allocate <Age verification> function to a key. See page E-111. Sample operation Dept. 01 •1.00 Item 1 Quantity... -
Page 60: Check Tracking System
Advanced programmings and registrations „ Check tracking system Check tracking system holds (temporarily finalize) a check and you can add orders later on. Held check is cleared when the guest check receipt is finalized and printed, when new/old check opera- tion is performed, or when the same check number is assigned. - Page 61 Advanced programmings and registrations „ Adding orders to a held check Sample operation Check number 1234 Dept. 01 •30.00 Item 1 Taking additional orders on the check Quantity number 1234. Dept. 02 •10.00 Item 2 Quantity Step Operation Printout 1234 Input the check number and press <Old check>...
- Page 62 Advanced programmings and registrations „ Closing a held check Step Operation Printout 1234 Input the check number and press <Old check> key. <Old check> 150'F Enter tendered amount and CHECK No.1234 press key to close the •130.00 check. •130.00 CASH •150.00 •20.00 „...
- Page 63 Advanced programmings and registrations „ About Flat PLU If <Flat PLU> keys are allocated on the keyboard, you can use them as the same function as department keys. Instead of using department keys !".., use flat PLU keys ()..and use key instead of <Dept.
- Page 64 Advanced programmings and registrations „ Inputting number of customers If <Customer number> function is allocated on the keyboard, you can print the number of customers. Sample operation Unit price •15.00 Item 1 Dept. Unit price •5.00 Printing number of customers on a Item 2 receipt/journal.
- Page 65 Advanced programmings and registrations „ Abount clerk interrupt function There are two types of clerk interrupt function, PROCEDURE 1 and PROCEDURE 2 illustrated below. In PROCEDURE 1, each clerk has a unique clerk interrupt buffer (memory), and the clerk interrupt func- tion gives each individual clerk the ability to perform an independent registration operations.
- Page 66 Advanced programmings and registrations „ Condiment/preparation PLUs By programming, you can force the register to input condiment PLU or preparation PLU together with main PLU. For the programming, please see pages E-97 and E-98. Sample operation 1 Main PLU PLU0001 •10.00 PLU0011 •0.10...
- Page 67 Advanced programmings and registrations „ Set menu when a set menu is registered, the register stores the sales data of the menu but also stores sales data (amount, quantity) of items in the set in respective PLU memory. Sample operation Set menu PLU0035 •5.00...
- Page 68 Advanced programmings and registrations „ Registrations with <Arrangement> key By using allocated <Arrangement> key, the register performs programmed functions automatically. Sample operation 1 Arrangement 1 PLU0001 •8.00 (preset) Arrangement 1 is programmed as Item 1 Quantity selling one PLU0001 (•8.00 preset) and PLU0002 (•5.00 preset) and paid PLU0002 •5.00 (preset)
- Page 69 Advanced programmings and registrations „ To add a certain amount By using allocated <Addition (plus)> key, you can add a certain amount on a transaction. Sample operation Dept. 01 •1.00 Item 1 Quantity •0.10 • Adding •0.10 to the item 1. Dept.
- Page 70 Advanced programmings and registrations „ To transact in Euro By using key, the register allows you to register items in the local currency and transact in Euro or vice versa. To set the currency rate between Euro and local currency, please see page E-91. Sample Operation 1 Unit price •6.00...
- Page 71 Advanced programmings and registrations Sample Operation 2 Unit price €12.00 Main currency: Euro Item Quantity Sub currency: Local Dept. A €12.00 item is sold and the customer Exchange rate •1.00 = €2.00 paid in local currency. Payment •10.00 Step Operation Printout 12'! Register the item in Euro.
-
Page 72: Character Settings
Advanced programmings and registrations Character settings This chapter explains how you can program department or PLU descriptions, store messages, key de- scriptions, report title, total descriptions (such as gross total, net total etc.) and clerk names. There are two ways to program characters which are using character keyboard and using multi typing of ten key. -
Page 73: Using Ten Key Pad
Advanced programmings and registrations Using ten key pad To set characters by using ten key, you need to press one of the ten key repeatedly until desired charac- ter appears on the display. „ Multi typing keyboard SPACE SIZE SUBTOTAL PQRS WXYZ CA/AMT... - Page 74 Advanced programmings and registrations 2 Double size letter key Assigns the next input character to be double sized. After setting a double sized character, press this key again for normal size. 3 Space key Sets a space. 4 Clear key Clears all the characters.
-
Page 75: Setting Characters
Advanced programmings and registrations Setting characters The following explanation shows how you can set a name in a PLU. You can also set names to departments, function keys ( ), and clerks by the same method. Sample Operation To set “MILK” to PLU0001 by using ten key pad. Step Display Turn the Mode switch to PGM position. -
Page 76: Setting Pop Messages On Receipts
Advanced programmings and registrations Setting pop messages on receipts You can set pop messages printed on receipts. Pop message 1st. line Pop message 2nd. line Pop message 3rd. line New Year Pop message 4th. line Sale 1st Anniversary Pop illustration 10% OFF „... - Page 77 Advanced programmings and registrations „ To set pop illustration Step Display Turn the Mode switch to PGM position and select [POP Set- ting] then press key. Select [All Graphic] and press key. The printer prints preset pop illustrations. From the printout, select an illustration you wish to print on receipts.
-
Page 78: Setting Symbol Characters
Advanced programmings and registrations Setting symbol characters You can change the symbols or titles of sales reports for example, printing “CASH IN DRw” on the sales reports instead of “CAID” for cash amount in drawer. Step Operation >▪▪▪▪▪>F Turn the Mode switch to PGM position and select [System Setting] then press key. - Page 79 Advanced programmings and registrations Sales report symbols Memory No. Program code Contents Default character Memo for your settings Gross total GROSS Net total Cash in drawer CAID Charge in drawer CHID Check in drawer CKID Credit 1 in drawer CRID(1) Credit 2 in drawer CRID(2) Credit 3 in drawer...
-
Page 80: Other Symbols
Advanced programmings and registrations Other symbols Numbers in ( ) are digits to be used. Memory No. Program code Contents Default character main currency symbol (2), @ (2), No.(2), split pricing (2), not used (4), sub currency symbol • @ N o / No. - Page 81 Advanced programmings and registrations Advanced programmings This section explains how you can program detail settings of the register such as setting register’s spe- cific number, whether to reset consecutive number on the receipt after a Reset (Z) report or not, whether to print taxable amounts on receipts or not, etc.
-
Page 82: Programming Detail Settings
Advanced programmings and registrations Programming detail settings To program the detail settings of the register, please follow the operations shown below. Step Operation >▪▪▪▪▪>F Turn the Mode switch to PGM position and select [System Setting] then press key. [System Setting] is the last column on the programming top menu and is not shown on the first screen. - Page 83 Advanced programmings and registrations Set code 04 (Tax and rounding systems) Description Selection Program code Initial value Apply rounding for registration: No rounding = 0, IF1 = 1, IF2 = 2, Danish = 3, Singaporean = 5, Finnish = 6, Australian = 7, South º...
- Page 84 Advanced programmings and registrations Set code 05 (Receipt printing selections) Description Selection Program code Default value Print total line during finalization. Yes = 0 º No = 1 (a+b) D10 (a+b) D10 24- hour system (0) or 12 -hour system (2) b Select 0 or 2 Buffered receipt print (enables key operations during printing) No = 0...
- Page 85 Advanced programmings and registrations Set code 06 (Calculation and operation methods) Description Selection Program code Default value Succeeds the taxable status and commission status of previ- Yes = 0 ous item when +/ - operation is performed. No = 1 º...
- Page 86 Advanced programmings and registrations Set code 08 (Fixed total print control) Description Selection Program code Default value Print gross sales total (GROSS) on fixed total report. Yes = 0 No = 1 Print net sales total (NET) on fixed total report. Yes = 0 º...
- Page 87 Advanced programmings and registrations Example: • On the fixed total report, not printing gross sales total (a = 1), not printing net sales total (b = 2), not printing cash in drawer. (c = 4): D10 = 7 (1 + 2 +4 ). •...
- Page 88 Advanced programmings and registrations Set code 15 (Printing methods of sales reports) Description Selection Program code Default value Department zero skip (Departments of sales amount zero are Yes = 0 not printed on sales reports.) No = 1 º (a+b) D10 (a+b) D10 Clerk zero skip (Zero amounted clerks are not printed on sales Yes = 0...
- Page 89 Advanced programmings and registrations Set code 17 (Date/time printing on journals/receipts) Description Selection Program code Default value Print date on journal. Yes = 0 No = 2 º (a+b) D4 (a+b) D4 Print consecutive number on receipt/journal. Yes = 0 No = 4 Print time on receipt.
- Page 90 Advanced programmings and registrations Set code 21 (Printing methods of messages) Description Selection Program code Default value Print graphic type logo. No = 0 ™ (If “No” is selected, character logo will be printed.) Yes = 2 Print commercial message on guest receipts. No = 0 Yes = 1 º...
- Page 91 Advanced programmings and registrations Set code 27 (Clerk operation selections) Description Selection Program code Default value Allow clerk interruption. No = 0 º Yes = 1 Allow clerk functions. No = 0 º Yes = 4 º º º º Must be “00000000”...
- Page 92 Advanced programmings and registrations Set code 29 (Euro 2) Description Selection Program code Default value ADD mode of sub currency: º 0 to 3 0. = 0, 0.0 = 1, 0.00 = 2, 0.000 = 3 Apply rounding for sub currency. * º...
- Page 93 Advanced programmings and registrations Set code 30 (Thermal printer control) Description Selection Program code Default value Print preset receipt message and graphic. No = 0 Yes = 1 º (a+b) D5 (a+b) D5 Print preset receipt message and graphic:! at the bottom of ! = 0 the receipt, @ at the top of the receipt @ = 2...
-
Page 94: Programming Functions Of Departments And Plus In A Lump
Advanced programmings and registrations Programming functions of departments and PLUs in a lump There are two methods to set functions of departments or PLUs which are programming at once and programming individual functions. Programming department and flat PLU functions in a lump This method programs function of a department at one time. - Page 95 Advanced programmings and registrations Department and PLU lump set code Description Selection Program code Default value Age limitation ºº 00 to 99 00: No limitation D14 D13 D14 D13 Single item sales: º 0 or 3 Normal item = 0, Single item = 3 Must be “0”...
-
Page 96: Programming Plu Functions In A Lump
Advanced programmings and registrations Programming PLU functions in a lump This method programs functions of a PLU at one time. Step Operation >▪▪▪▪▪>F Turn the Mode switch to PGM position and select [System Setting] then press key. Enter and press key to set the register in the programming mode. -
Page 97: Programming Functions Of Departments And Plus Individually
Advanced programmings and registrations Programming functions of departments and PLUs individually Programming functions of departments individually This part explains programming methods of each function of departments indi- vidually. Step Operation >▪▪▪▪▪>F Turn the Mode switch to PGM position and select [System Setting] then press key. - Page 98 Advanced programmings and registrations Set code table Set code Description Selection Program code Normal item /condiment item /preparation item 0,1 or 2 Normal item = 0, Condiment item = 1, Preparation item = 2 D2 must be 0 º Taxable status 1 No = 0 Yes = 1 For singapore...
-
Page 99: Programming Functions Of Plus Individually
Advanced programmings and registrations Programming functions of PLUs individually This part explains programming methods of each function of PLUs individually. Step Operation >▪▪▪▪▪>F Turn the Mode switch to PGM position and select [System Setting] then press key. Enter and press key to set the register in the programming mode. -
Page 100: Programming Functions Of Transaction Keys
Advanced programmings and registrations Programming functions of transaction keys This section explains how you can program functions in each transaction keys such as F, keys. For example, programming key to force entry of tendered amount. Step Operation >▪▪▪▪▪>F Turn the Mode switch to PGM position and select [System Setting] then press key. - Page 101 Advanced programmings and registrations Program code tables Default value of all the program codes are “0”. Program code for F, <Charge> and keys. Description Selection Program code Restrict to 00/55 on last two digits for amount tendered (only for No = 0 in Danish rounding) Yes = 4 Must be “00”.
- Page 102 Advanced programmings and registrations Program code for and ] keys Description Selection Program code Maximum amount. Maximum value (0 ~ 9) e.g.) •10,000; D4 = 1, D3 = 4. D4 D3 Number of zeros (0 ~ 9) Must be “00” ºº...
- Page 103 Advanced programmings and registrations Program code for Description Selection Program code D8 must be 0 º Taxable status 1 No = 0 Yes = 1 For singapore Taxable status 2 No = 0 Taxable Yes = 2 (a+b+c) D7 status Taxable status 3 No = 0 Yes = 4...
- Page 104 Advanced programmings and registrations Program code for <Age verification> key Description Selection Program code Print the registered date. Yes = 0 No = 1 Must be “000000000” (nine zeros). 000000000 º D9 to D1 Program code for <Currency exchange> key. Description Selection Program code...
- Page 105 Advanced programmings and registrations Program code for <Multiplication> <Multiplication for> keys Description Selection Program code Multiplication procedure ! = 0 Quantity × Amount, Amount × Quantity @ = 1 Roundings: Round off = 0, Cut off = 1, Round up = 2 0, 1, or 2 Must be “0000”...
- Page 106 Advanced programmings and registrations Program code for <New balance> key Description Selection Program code Cancel the transaction if no item is registered. No = 0 Yes = 4 Must be “00”. ºº D9 D8 Function after normal (not in check tracking) registration. 0 or 1 Error = 0, Auto cash = 1 (see below) Print breakdown of VAT.
-
Page 107: Programming Further Clerk Functions
Advanced programmings and registrations Programming further clerk functions This section explains how you can set further programming for clerks such as setting clerks’ secret number, setting the register in training mode or setting com- mission rates given to clerks. In the training mode, the register operates normally but the results will not be stored in the memory. - Page 108 Advanced programmings and registrations „ Other clerk settings Step Operation >▪▪▪▪▪>F Turn the Mode switch to PGM position and select [System Setting] then press key. Enter and press key to set the register in the programming mode. 1007o Enter 2 -digit clerk number followed by 07. The “07” is the (Clerk no.) identification code for further program of clerks.
- Page 109 Advanced programmings and registrations „ Programming set menu This program sets the menu number and sub items’ (included in the menu) PLU number. You can set up to 15 items in a set menu. Step Operation >▪▪▪▪▪>F Turn the Mode switch to PGM position and select [System Setting] then press key.
-
Page 110: Programming Auto Operation Of
Advanced programmings and registrations Programming auto operation of <Arrangement> By using allocated <Arrangement> key, programmed operations are performed automatically just by pressing <Arrangement> key. The following explains to set the automatic operations. Step Operation >▪▪▪▪▪>F Turn the Mode switch to PGM position and select [System Setting] then press key. - Page 111 Advanced programmings and registrations „ Key allocation This section explains how you can allocate various functions on the keyboard. Before you allocate functions on the keyboard, please execute daily and periodic reset (Z) report. Allocatable keys RECEIPT JOURNAL FEED FEED SUBTOTAL Step Operation...
- Page 112 Advanced programmings and registrations Function Code Function Code Function Code Cash/amount tendered Non-add Multiplication Charge Non-add/no sale Multiplication / For Check tendered No sale New check Credit Customer number Old check New balance Arrangement New/old check Text recall Currency exchange Add check Age verification Received on account...
-
Page 113: Printing Programmed Data
Advanced programmings and registrations Printing programmed data After programs have been set, you can print the programmed data. To print programmed unit price or percentage (other than PLU) Step Turn the Mode switch to PGM position and select [System Setting] then press key. -
Page 114: To Print Programmed Characters (Except Plus
Advanced programmings and registrations To print programmed characters (except PLUs) Step Turn the Mode switch to PGM position and select [System Setting] then press key. Enter and press key. Press key again. The printer starts to print preset data. Printout 1: Program read symbol 2: Fix total character P02 .... -
Page 115: To Print General Programming (Except Plus
Advanced programmings and registrations To print general programming (except PLUs) Step Turn the Mode switch to PGM position and select [System Setting] then press key. Enter and press key. Press key again. The printer starts to print preset data. Printout 1: Program read symbol 2: Transaction key program P03 .... -
Page 116: To Print Preset Unit Price Of Plu
Advanced programmings and registrations Printout 17: Clerk detail link program 18: Arrangement program/Rec-#/file-#/arrange 0001−30 0001−01 19: Key descriptor/rec-#/file-# 0020−01 20: Scheduler program 21: I/O parameter table 0001−38 000001 REG1 204−000 001−000 002−000 DEPT001 026−051 CASH 013−001 0002−38 0001−62 000000 00000000000000 0000000000 MC#01 0001−91... -
Page 117: To Print Preset Characters Of Plu
Advanced programmings and registrations To print preset characters of PLU Step Printout Turn the Mode switch to PGM position and select [System Setting] then press key. P02 ....Enter and press key to set the register in the programming mode. #0001 −... -
Page 118: To Print Key Allocation Program
Advanced programmings and registrations To print key allocation program Step Printout Turn the Mode switch to PGM position and select [System Setting] then press key. P03....Enter and press key to set the register in the 1------------------------------ programming mode. 0015-02 011-096 Press key. -
Page 119: Printing Various Sales Reports
Advanced programmings and registrations Printing various sales reports You can print categorized sales reports such as PLU sales report, item group sales report, hourly sales report etc. • Please do not perform the reset (Z) report during the business hour as it clears stored sales data from the memory. -
Page 120: Plu Sales Report
Advanced programmings and registrations „ PLU sales report Read symbol/report title Report code PLU name/Quantity 0000014 Sales ratio/PLU amount PLU code PLU0001 Total Quantity 0.53% •17.00 Total amount #0001 PLU0100 4.03% •69.00 #0100 −−−−−−−−−−−−−−−−−−−−−−−− 188.61 •516.10 „ Item group sales report Read symbol/report title Report code GROUP... -
Page 121: Flash Report
Advanced programmings and registrations „ Monthly sales report Read symbol/report title Report code MONTHLY Month 0000020 Gross symbol/Quantity 1..Gross sales amount GROSS 1236.76 Net symbol/No. of customers •12,202.57 Net sales amount Total symbol •12,202.57 Gross symbol/Quantity 31..Gross sales amount GROSS 2132 Daily gross sales average... -
Page 122: Open Check Report
Advanced programmings and registrations „ Open check report Report header/title Report code OPEN CHECK Mode symbol/date/time 0001025 Clerk descriptor/Mc- No./consecutive No. 06−20−2013 11:58 Table No./No. of customer 0001 000004 Check No. TABLE No.123456 Subtotal amount CHECK No.123 Print “BUSY”, if the check is currently opened. •250.00 No. -
Page 123: To Print Individual Department, Plu, And Flat Plu
Advanced programmings and registrations To print individual department, PLU, and Flat PLU Instead of printing sales reports in a lump, you can obtain reports of specific departments, PLUs, or Flat PLUs. Step Printout Turn the Mode switch to X position. INDIVIDUAL Just press department keys or enter PLU numbers. -
Page 124: Periodic Sales Report
Advanced programmings and registrations Periodic sales report Apart from daily report, you can obtain periodic sales report. The register prints total sales data from the last periodic report. Namely, if you do this operation monthly, you can obtain monthly sales reports. The cash register allows you to obtain two kinds of periodic reports so that not only monthly reports, you can also get weekly reports. - Page 125 Advanced programmings and registrations Report title Department report title/reset counter −−−−−−−−−−−−−−−−−−−−−−−− Report code PERIODIC 1Z −−−−−−−−−−−−−−−−−−−−−−−− Department Name/No. of items DEPT 0001 Sales ratio/amount 0001115 Total No. of items Total amount DEPT001 Fixed total report title/reset counter 8.13% •257.53 DEPT002 Report code 10 Gross total •1,362.26...
- Page 126 Advanced programmings and registrations Function key report title/reset counter Report code −−−−−−−−−−−−−−−−−−−−−−−− Function key count/amount TRANS 0001 0001112 Clerk report title/reset counter CASH Report code •1,638.04 Clerk name CHARGE Net total •1,174.85 Clerk name •810.00 •5.00 CORR •39.55 −−−−−−−−−−−−−−−−−−−−−−−− CASHIER 0001 0001117 ....1...
-
Page 127: Using An Sd Card
Advanced programmings and registrations Using an SD card You can store sales data or program data to an SD card or you can restore the data from SD card to your cash register. The following table explains what you can do with an SD card. [Backup→SD] Stores sales data and program data of register to SD card. -
Page 128: To Store Program Data In An Sd Card
Advanced programmings and registrations Step Display Select [YES] and press key. The register starts to format the SD card. Now the SD card is formatted and you can use it for storing cash register data in it. To store program data in an SD card The following operation explains how you can back up all the program data in an SD card. - Page 129 Advanced programmings and registrations Step Display Select [YES] and press key. After for a while, the display indicates “Backup complete”. E-129...
-
Page 130: Before You Consider It As A Problem
Advanced programmings and registrations Before you consider it as a problem Error code table Error code Message Meaning Action E001 wrong mode Mode switch position changed Return the mode switch to its before finalization. original setting and finalize the operation. E003 wrong operator The signed on clerk differs from the... - Page 131 Advanced programmings and registrations Error code Message Meaning Action E050 DETAIL memory full Check tracking detail memory full. Finalize and close the check num- ber currently used. E051 CHK/TBL No. is occupied Attempt to made use <New Check> Finalize and close the check that is to open a new check using a currently under the number that you number that is already used for an...
-
Page 132: When "Ej Full" Sign Appears On The Display
Advanced programmings and registrations When “EJ FULL” sign appears on the display when the register shows this sign, issue electronic journal read report (if necessary) and reset the memory immediately. In case of power failure If the power supply to the cash register is cut by a power failure or any other reason, simply wait for power to be restored. - Page 133 Advanced programmings and registrations About the low battery indicator If this indicator appears when you switch the cash register on, it can mean one of three things: • No memory backup batteries are loaded in the cash regis- ter. • The power of the batteries loaded in the unit is below a certain level.
-
Page 134: Specifications
Advanced programmings and registrations Specifications Entry 10-key system, buffer memory 8 keys (2-key roll over) Department Full key system Main display 26 characters x 10 lines, Dept. name, PLU name, Total, Transaction names, Change Customer display 20 characters x 1 line. Amount 10 digits (zero suppression) Printer Receipt Thermal alpha-numeric system 24 digits, receipt on/off key... - Page 135 E-135...