Table of Contents
Advertisement
Quick Links
Advertisement
Table of Contents

Related Manuals for Yamaha SW1000XG


Summary of Contents for Yamaha SW1000XG
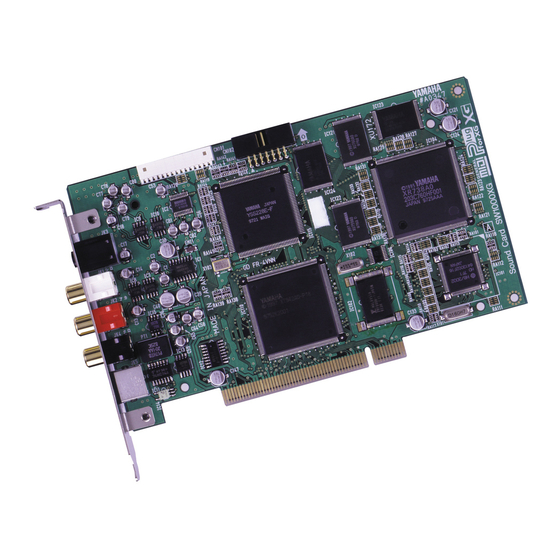
- Page 3 This user guide aims to de-mystify Yamaha’s multi-award winning SW1000XG PCI audio & MIDI production card, no mean feat in itself, and also to clearly show you, the user, how to get the best results with the SW1000XG in ‘your’...
-
Page 4: Table Of Contents
Contents Chapter 1: What is the SW1000XG, and how do I get it all hooked up and working? ….Page 5 Chapter 2: A brief outline of XG, system exclusive data, controllers and what it all means to the SW1000XG…Page 9 Chapter 3: Essential tools and why they are so important. -
Page 5: Chapter 1: What Is The Sw1000Xg, And How Do I Get It All Hooked Up And Working
(such as the universally popular Shure SM58), or to be connected as we have said to the outputs of a mixing desk. You can also plug a guitar straight into the back of the SW1000XG, using a standard guitar cable with a stereo mini-jack adapter at the SW1000XG end. - Page 6 J: Connector CN101 – Unlike ‘Room 101’ from the novel ‘1984’ This connector is no Orwellian nightmare, more like a dream come true for many people, as it in effect means that the SW1000XG will never go out of date CN101 is ‘The PLG interface connector socket’.
- Page 7 DS2416 card as well) process even further your signals without ever going near the analogue domain. The SW1000XG comes with a small ribbon cable that allows you to attach the 2 cards together, don’t lose it, as one day it...
- Page 8 The second thing to try if this fails is to move the SW1000XG to another PCI slot. Sometimes the PCI slot may have a problem with IRQ allocation. The third is to reserve an IRQ for the SW1000XG or PCI slot in question in your system BIOS or via Windows.
-
Page 9: Chapter 2: A Brief Outline Of Xg, System Exclusive Data, Controllers And What It All Means To The Sw1000Xg
1999. The key to the SW1000XG however is in the software used to control it. Without software it is pretty much just a plain and simple soundcard. - Page 10 The XG format has been designed to allow future expansion whenever needed. Now the SW1000XG as you will see conforms to this, and is also at the pinnacle of what XG is about. It takes the concept of scalability to new heights, and as far as expandability goes, it doesn’t get much better.
- Page 11 HEX values from now on for all sysex notation. Yamaha’s value is 43H, and as you will see. This is one of a few sysex numbers that you will see a lot more of. (43H = 43 Hex) The world of sysex is very daunting at first.
- Page 12 F0 43 10 4C 00 00 12 00 F7 – MU NATIVE F0 43 10 4C 00 00 12 01 F7 – Switch back to SW1000XG native (this is not needed as an XG reset will perform the same task)
-
Page 13: Chapter 3: Essential Tools And Why They Are So Important. (Hubi, Midi-Ox, Midi-Yoke, Xgedit)
The shareware version does everything that the full version will do, except save your edits, so you can get a full feel for how it all works, and how much control you can get over the SW1000XG. For the purposes of this guide, we recommend you have a copy of XGEDIT, unless you are exclusively using the bundled XGWorks application, which has the functionality of XGEDIT but embedded within a sequencer engine of its own. - Page 14 MIDI port, and also the FM synth. Now if you add an SW1000XG with its 3 MIDI ports, you get 7, and then if you install Hubis 4 ports you get…11...
- Page 15 Macintosh users will just be laughing at this point, as they have never suffered from any device limits). It is also worth noting at this point that the SW1000XG isn’t games compatible in DOS at all, if you want to play games, getting a game compatible card is a good idea.
- Page 16 It’s so simple, but wickedly effective, and enabled us to write all sorts of mixer maps for the SW1000XG in record time. How? Well it enables anyone to read what data is being sent out by an application like XGEdit, and also allows copy and paste of this data into your software or into a user guide such as this one.
-
Page 17: Chapter 4: Getting Started With The Bundled Copy Of Xgworks
XGWorks is Yamaha’s first attempt at writing a Windows based sequencer program. Most of the key information relating to its use can be found in the PDF file and user manual that accompanies the SW1000XG itself. This chapter aims to clarify a few points, and hopefully get your system all set up and running smoothly. We do recommend that you read your XGWorks manual thoroughly first to familiarise yourself with the software, as with any application package, the user manual can answer many of your first time questions. - Page 18 You will know that all is well and working when you go back to main arrange page, and it looks like this! When you have your MIDI keyboard attached to the MIDI in of the SW1000XG, and you select a track to record that has its port set to SW1000 #1 Synthesizer or SW1000 #2 Synthesizer.
- Page 19 As you can see in the Value 2 field we have the Yamaha 43 10 4C followed by the data bytes and F7 to finish as discussed earlier in the guide. Now it should start to make some sense.
- Page 20 Wave out will be equally split between the left and right channels of SW1000 Wave Out #1. If you record a track on this, and then open it up in the TWE editor that comes with the SW1000XG, you will find that the track is stereo.
- Page 21 Now, using the SW1000XG mixer window, you can adjust the amount of reverb being ‘sent’ to each of the wave parts, by simply adjusting the ‘reverb send’ knob for the wave part you wish to adjust. The same rules apply for the chorus buss, where again you can select your chorus type, and ‘send’...
- Page 22 MIDI or audio part. The fact that your need to drop back to this window rather than add the effect from the SW1000XG mixer windows is a bit tedious compared to for example XGEdit, but it works! Don’t forget though, that for these parameters...
- Page 23 Thus freeing up the effect processors to use on new tracks. It also means that if you run out of polyphony with the SW1000XG, for MIDI work, then you can create a stereo wave mix, totally in the digital domain of all your MIDI parts, and again free up all your synth engine and polyphony for new MIDI tracks.
-
Page 24: Chapter 5: Getting It All To Work In
The SW1000XG is lucky in that so far as VST goes. There are lots of methods of controlling and supporting its many features, and whilst there are limitations to how much some of them can do, hopefully this chapter will explain how to work around most of them and get the best out of the SW1000XG inside VST. - Page 25 (1-12) in the XGEdit analogue mixer. Now, set up a MIDI track, and call it SW1000XG Control. Make sure that the channel status of this track is set to all, and that when you move a slider in XGEDIT, the MIDI input led in Cubase VST (on the transport bar) lights up. If it doesn’t then you need to check all your settings again.
- Page 26 5: Full automation. Due to the fact that XGEdit is sending MIDI sysex data to VST to control the audio levels (and everything else) on the SW1000XG, it means that in the VST event list for the SW1000XG Control track, you will find that you have a complete record of all volume changes, pan settings, effects send levels etc.
- Page 27 This is by far the best way as it creates a correct (in terms of sysex order and data order) 1 bar setup file. Which you can then record all your tracks after starting at bar 2. This is the way that we at Yamaha UK work.
- Page 28 To summarise and make a few important points. The SW1000XG is a little too complex to be supported by a DEV file in VST (a maximum of 12 sliders, and only 16 banks which is way to few to support the SW1000XG), As of VST release 3.7, The VST Studio modules (such as MIDI Arpeggiator and delay) in Cubase will actually filter...
-
Page 29: Chapter 6: Getting It All To Work In
With the SW1000XG in mind, how do we go about setting up Logic to work with it? There are several ways, which we shall examine to getting the best out the SW1000XG with Logic, the first of which involves our old friend XGEdit once more. - Page 30 Setting up Logic for Audio recording with the SW1000XG Quite a simple task as Logic can support multiple wave-out MME based cards like the SW1000XG. Just got to the AV Extension settings in the Preference menu. Then set the record driver to SW1000 #1 WAVE IN and the playback driver to SW1000 # 1WAVE OUT.
- Page 31 Supporting its own effects processor plug ins, along with many third party active movie style plug ins. Again, the use of the SW1000XG will not offload the amount of CPU required by these plug ins. However with the SW1000XG’s effects processors offering so much, you may never need to use a third party plug in again.
- Page 32 SW1000 #1 Synthesizer. This is also the option for MIDI parts 1-16 on synth 1. SW1000 #2 synthesizer is for parts 1-16 (17-32) on the SW1000XG.
- Page 33 4. Again Yamaha hope that Emagic will address this issue in later updates. This does not apply to the effect engine of the SW1000XG, which will happily run at the same time as any third party plug-in effects you may have installed.
-
Page 34: Chapter 7: Getting It All To Work In
This meant that if you were using a remote application such as XGEDIT with Cakewalk, you could record your edits to the SW1000XG, but if the parameter relied on sysex data, you would not be able to hear them whilst recording. - Page 35 We can see from the previous diagram, that the SW1000XG is successfully wave profiled to run at 44.1k/24bit in Cakewalk. You can of course run at 16bit/44.1khz should you wish (this is a preferred option if you wish to make a final CD master of your song).
- Page 36 Cakewalk also offers an option known as ‘StudioWare’ for controlling MIDI devices. These panels (several of which are supplied with the SW1000XG) allow a great deal of control over the soundcard. Caution should be taken in the use of StudioWare, as the amount of sysex data and the order in which the data is sent out can sometimes lead to the MIDI file you are working on, not playing back correctly.
- Page 37 SYX viewer window. For small amounts of sysex this is fine, however as we have now seen, the SW1000XG (along with many other devices from a wide range of manufacturers) can use a lot of sysex data for control of parameters.
- Page 38 The SW1000XG will work as a 24bit audio device inside Cakewalk using ‘unpacked audio mode’. This is due to the mixer section of the card outputting in unpacked 32-bit mode (as does our DS2416 card). The option to use it at 24 bit is up to you, but you may find that on slower machines the 16-bit option is preferred.
-
Page 39: Chapter 8: Getting It All To Work In
Now that we have covered some of the major Windows applications (from our user surveys almost 95% of all SW1000XG users will be using one of the applications we have covered in the previous chapters) it is time for a change of scene. - Page 40 You could however if you have access to one, create your final stereo master with the SW1000XG effects, and then digitally stream it to a DAT or minidisc style of recorder. This is not ideal, as it defeats one of the SW1000XG’s strongest capabilities, that being its ability to create a stereo master internally using the loopback option.
- Page 41 XGWorks editor screens. This can lead to problems though running 2 applications that are trying to grab the SW1000XG wave ports at the same time, and also can be a bit messy on screen. XGEdit is small compact, uses little in the way of system resources.
-
Page 42: Chapter 9: All About Plg
What is PLG? As we discussed at the very start of this guide, the SW1000XG is a truly remarkable card in that not only is it very powerful as a stand-alone product, but it is also very expandable. The 2 interface connectors located along the top of the card for connection to the PLG series of daughterboards and the DS2416 audio card make it practically future proof. - Page 43 SW1000XG. And the bonus here is that the PLG100-DX (along with all of the Yamaha PLG cards) can pass all of its audio via the ultra clean digital out of the SW1000XG card. It can also use the effects processing of the SW1000XG to add even more depth to the sound.
- Page 44 In other words... YOU GET TO BUILD YOUR OWN SYNTH! To get at the cards power, Yamaha provide a free VL Visual Editor package for Windows and Macintosh, and which also exists as a software Plug-in module for Yamaha's XGWorks MIDI/audio sequencer. This allows you to control the huge potential of the VL sound.
- Page 45 3: The SW1000XG cannot work with the PLG150 series cards? Again not true. Some of the early SW1000XG cards will need to be updated with a new heat sink on the regulator for the PLG socket, but Yamaha will perform this free of charge when you buy your PLG150 card, and return it when you fill in the ‘upgrade’...
-
Page 46: Chapter 10: Audio Overview Of The Sw1000Xg
SW1000XG. The SW1000XG has 3 physical RCA style audio output connections. 2 of them (marked L OUT and R OUT in red and white) are for analogue audio output, which means that you can connect the sockets to your hi-fi, mixer or amplifier. - Page 47 CPU power your computer uses. Try doing that with Active Movie or VST effects! We stated earlier that the SW1000XG in reality only has 4 physical outputs, 2 analogue and 1 stereo digital which all carry the same data. This would be limiting if it were not for the fact that as far as Windows or Macintosh audio software is concerned, the SW1000XG actually has a total of 6 discreet stereo outputs.
- Page 48 12 discreet playback ‘busses’ as we shall term them using software like XGEdit or the Mac XGEditor or even XGWorks. If we now go and look at the XGEdit SW1000XG audio mixer window we can see 12 discreet channels which map as follows SW1000#1 WAVE OUT –...
- Page 49 Due to the lack of MME input gain, many people find that the Windows mixer input control is greyed out, and thus think that they cannot control the level of signal getting into the SW1000XG. This as we have shown is not always the case although Yamaha do recommend an external mixer for controlling the level going into the SW1000XG.
-
Page 50: Chapter 11: The Ds2416 Linkup
This also applies to dynamics processors. The DS2416 has 26 of these, which are always available and can be applied to any audio track at will. It does however only have 2 effects busses as opposed to the 6 of the SW1000XG, and don’t forget that the DS2416 has no MIDI functionality at all, and no synthesiser or expansion for PLG cards. - Page 51 AX44 and AX16AT units designed for the DS2416, and also for linking up 2 DS2416 cards together in tandem. So when we open up our computer to fit the DS2416 card along side the SW1000XG it is important that you connect the 2 cards together in the manner shown below, to allow them to communicate, and perform their magic together.
- Page 52 SW1000XG and the DS2416 talking to each other, and the DS2416 is now reliant on the master clock from the SW1000XG. If the LED doesn’t light up, then you may need to open up your computer and check the connection cable, make sure it is securely slotted in.
- Page 53 DS2416 outputs. So all MIDI & audio playback from your SW1000XG is now being passed to a single stereo pair of SUB inputs on the DS2416. You can also have all of the playback channels and other audio devices connected to your DS2416 running at the same time, which is why this set-up is so very cool.
- Page 54 VST (or whatever application you are running) by the SW1000XG, and pass it over to any of the 8 discreet sub input channels of the DS2416. Why would you want to do...
- Page 55 SW1000XG. Please refer to your DS2416 supporting software manual for details. Wordclock when the 2 cards are linked is set to come from the SW1000XG (should you wish to hear it). If you want to set the wordclock back to DS2416 or any other source you will lose sound from the SW. To get around this, a good way to work would be to record your audio and MIDI parts as audio tracks using the individual inputs from the SI connect.
-
Page 56: Chapter 12: Living In The New Age. Asio & Nt
DS2416 and SW1000XG cards, by approximately a factor of 5, lowering them from 557ms to 106ms. The Yamaha ASIO driver was also unique in the fact that it was the first driver in the world to support 2 independent pieces of hardware (being the DS2416 and SW1000XG) at the same time, using just the 1 common driver model. - Page 57 The SW1000XG drivers appear in the ASIO control panel of your software with different names. Instead of being SW1000 #1 wave etc, they now appear as PCI 1&2,3&4 etc. If you have a DS2416 and SW1000XG installed, make sure you have the correct ASIO driver for the combined setup installed (available from our Pro Audio website). In this...
- Page 58 Windows NT system. Yamaha presume everyone running NT, will be aware of the recovery methods which are covered in the NT users manual. As we have said, the Yamaha SW1000XG driver has been tested under NT up to and including (as of time of writing) service pack 5. Please make sure you have a free IRQ to allocate the SW1000XG to, and are running support software that is specifically written for NT such as Logic Audio 4 &...
-
Page 59: Chapter 13: Installing In The Macintosh, And Using The Bundled Xgeditor
Before reading this chapter, please make sure you have read all of the chapters, which cover the specifications, and details of the SW1000XG. It will not harm also to check out some of the PC specific chapters (especially if you use Cubase or Logic on your Mac) as some of the points covered in these sections are just as relevant to the Mac as they are to the PC. - Page 60 Once you have installed the XGEditor software (either from CD or from downloading it from the website) you will find a file inside the editor folder called ‘SW1000XG Setup’ (with an OMS icon), Double click on this and OMS will start.
- Page 61 SW1000XG whilst playing your MIDI keyboard). MIDI out A, should be set to ‘ 1- SW1000XG ‘ and the check box set to the ON position, likewise for MIDI out B ‘ 2 – SW1000XG ‘ MIDI ports B, C and D are in fact used for monitoring MIDI output only, and do not send XG Parameters.
- Page 62 The XGEditor for Mac comes with a comprehensive user guide and addendum section for the SW1000XG so we shall not cover it in too much depth during this chapter; needless to say, it will prove to be an invaluable tool when learning to use the SW1000XG.
- Page 63 Steinberg website. Also you need to be running OMS to allow the SW1000XG to function as a MIDI device. The MOTU FreeMIDI system is not supported by the SW1000XG natively, however MOTU do provide an OMS to FreeMIDI patch. Yamaha cannot guarantee 100% that this will work.
-
Page 64: Chapter 14: Applications Support
Applications support…On the Macintosh. Most of the chapters for the SW1000XG on the PC covering software such as Cubase and Logic along with the previous chapter outlining the functions of Yamaha’s own XGEditor for Macintosh will have given you a flavour of what is possible with the card. - Page 65 To install them, just copy the contents into your VST track mixer folder, and restart VST. You should now be able to select a new set of SW1000XG specific objects within the track mixer. Remember that for audio control, you need to assign an additional (at least) 12 MIDI tracks, and name then SW1000 AUDIO part 1-12, with a track mixer applied to each of them.
- Page 66 Notes and common questions Whilst all of the above solutions support the SW1000XG, it should be noted that in all bar the Sound Diver case, the ordering in the event list of XG Data cannot be guaranteed with snapshots. As many of the above systems (mixermaps and environment pages) send out snapshots of entire maps as a sysex dump onto 1 MIDI event tick, which as we have seen in previous chapters is not good.
-
Page 67: Chapter 15: Hardware Control Options (Control Freak And The Phatboy)
It has a great ‘learn mode’ which when hooked up to XGEDIT via the MIDI out of the SW1000XG, enables anyone to build their own editing parameters and then use the Control Freak to edit the SW1000XG. It is almost like having XGEdit in hardware. Yamaha have provided a set of preset profiles for the SW1000XG which Kenton have kindly now built into the factory ROM. - Page 68 4. With the Control Freak switched on, make sure that you can see the MIDI in LED flashing in Cubase when you move a slider or press a button on the control freak itself. Try to be on one of the SW1000XG control pages (Control Freak preset) whilst doing this.
-
Page 69: Chapter 16: Common Questions And Answers, And Troubleshooting
How do I run the outputs from the SW1000XG into my DS2416 card? Two ways to set this up. The easy way is to make sure that the SW1000XG and the DS2416 are connected internally via the cable supplied, then run XGEdit and your application (i.e. Cubase) using Hubis loopback multiclient MIDI driver. - Page 70 In other words, use XGEdit! I get a blue screen of death on the PC when I try to install my SW1000XG, what is causing this? This was a symptom of early drivers where IRQ steering in some systems could cause this problem. Please get the latest driver from www.xgfactory.com, and you should find that this problem should no longer occur.
- Page 71 Marketing Manager at Yamaha Kemble Music UK, Graham Lee- Macintosh Guru for Yamaha Musicsoft Europe. Yamaha Corporation of Japan XG Division (especially Tak Nakata for his ideas, Richie Hasegawa for his faith in the SW project, Masa and Kaburagi-San for support and Ando-San for building the card in the first place), Ronnie Dee at Steinberg UK, Dave Marshall at Sound Technology and Michael Haydn at Emagic, Mark Balogh &...