Table of Contents
Advertisement
Advertisement
Table of Contents

Related Manuals for AEG 49669GO-MN


Summary of Contents for AEG 49669GO-MN
- Page 1 49669GO-MN EN User manual BE7900061M 90cm Oven...
-
Page 2: Table Of Contents
. we have created it to give you impeccable performance for many years, with innovative technologies that help make life simpler – features you might not find on ordinary appliances . -
Page 3: Important Safety Instructions
IMportANt sAfEty INstrUctIoNs Installation, cleaning and servicing these warnings have been provided in the interest of safety . you Must read them carefully before installing or using the appliance . an authorised person must install this appliance (certificate of compliance to be retained) . the symbols you will see in this booklet have Before using the appliance, ensure that all these meanings:... - Page 4 IMportANt sAfEty INstrUctIoNs WARNING! WARNING! oven child safety During use the appliance becomes hot . care this appliance is not intended for use by should be taken to avoid touching the hot persons (including children) with reduced surfaces inside the oven . physical, sensory or mental capabilities, or lack of experience and knowledge, unless they switch the appliance off before removing the...
-
Page 5: For Your Safety
for yoUr sAfEty If you smell gas Important information for the installer this appliance may only be installed by a lp gas • T urn off gas supply at source. installer registered with the liquefied petroleum Gas • E xtinguish all naked flames. association of southern africa . the appliance must be • D o not operate any electrical appliances. -
Page 6: Description Of Your Appliance
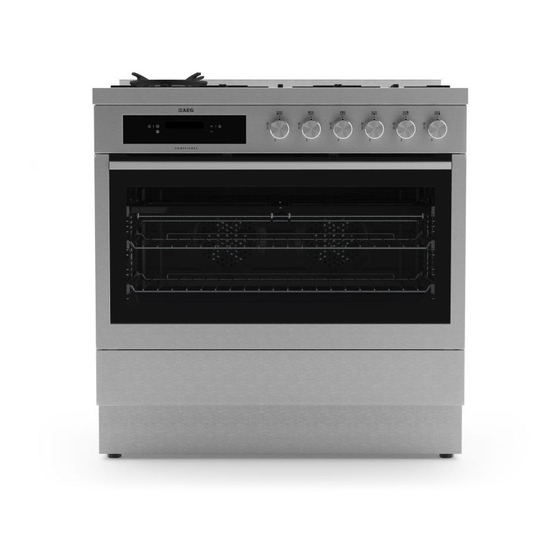
DEscrIptIoN of yoUr ApplIANcE Model 49669Go-MN freestanding gas hob with flame safeguard, programmable touch control electric oven removable wok trivet stainless steel splashback removable cast iron trivet Gas burner control panel Oven door storage compartment stainless steel kick panel control panel... -
Page 7: Be7900061M
Model BE7900061M Built-in programmable touch control electric oven control panel – oven programmable controller programmable controler... -
Page 8: Before Operating Your Appliance For The First Time
BEforE opErAtING yoUr ApplIANcE for tHE fIrst tIME preparing your appliance for the first time setting the time • P lease remove all internal boxes and bags from the oven before operation . the model you have purchased is fitted with a programmable timer . you Must set the time of day • P lease wipe out the oven interior prior to operation before you can operate the appliance . -
Page 9: Installing Your Oven Accessories
INstAllING yoUr oVEN AccEssorIEs prior to installing accessories, remove all packaging and remove plastic film from external panels catalytic liners catalytic liners are coated with a specially formulated enamel coating . this porous coating enables the “self cleaning” process – see cleaning your appliance section for more details . -
Page 10: Installing Burners And Trivets
INstAllING BUrNErs AND trIVEts Installing burners Installing trivets • T he burner crown must be fitted correctly into the • T he rubber feet on the trivets locate into the burner cup or damage will occur during operation . contours of the hob . • T o do this, ensure that the 2 ribs on either side of the • T ake care when placing the trivets as dropping them spark plug hole are positioned into the 2 slots on may damage the hob or trivet . -
Page 11: Getting To Know Your Cooktop
GEttING to kNow yoUr GAs cooktop Using your gas hotplates Model 49669Go-MN NOTE: Gas controls turn anticlockwise from ‘Off’ and have limited movement. lighting burners 1. low heat burner Electronic ignition used for simmering with small cookware items . these hobs are fitted with mains powered electronic 2. -
Page 12: Using Your Oven
UsING yoUr oVEN Understanding your oven functions rapid Heat Base Heat function 1 function 4 heat comes from the elements surrounding the fans as heat comes from the element below the floor of the well as the smaller element above the food . this allows oven . -
Page 13: Fan Grill
UsING yoUr oVEN (coNtINUED) Defrost Maxi Grill function 7 function 10 “Maxi Grill” directs radiant heat from 2 powerful upper the “Defrost” function uses low temperature air that is elements onto the food . you can use the “Maxi Grill” circulated by the fans . - Page 14 UsING yoUr oVEN (coNtINUED) Using your programmable controller to operate the oven Model BE7900061M programmable controler Model 49669Go-MN programmable controler Gas hob burner controls setting the time of day changing the oven temperature after the appliance has been electrically connected the 1. P ress the – or +, to decrease or increase the...
- Page 15 UsING yoUr oVEN (coNtINUED) setting the delayed start cooking time Activating the child-proof lock the “cook time” and “stop time” functions can be when the child lock is engaged, the oven cannot be combined to switch the oven on and off at a specific switched on .
-
Page 16: Cooking Test
cookING tEst Get to know your new oven with this Method: 1 . Butter base and sides of two, 20cm straight-sided ‘simple test cake’ round or square cake pans . then line the base with although we strive for a perfect performing oven, it’s grease proof or baking paper . -
Page 17: Cooking Guide
cookING GUIDE oven shelf location • F or best baking results preheat oven for 30 minutes. • S elect the correct shelf location for food your oven has 6 positions for shelves or grill dish carrier . being cooked . these are numbered from 1 (the lowest shelf position) to 6 (the highest shelf position) . see diagram . • T he grill tray can be used in the oven as a baking dish, except in oven shelf location 1 . -
Page 18: Choosing The Best Oven Settings
cookING GUIDE (coNtINUED) choosing the best oven settings the following table is intended as a guide and experience may show some variation in cooking times necessary to meet individual requirements . we recommend that you preheat your oven for 30 minutes . Modes without oven fan •... -
Page 19: Roasting Meat
cookING GUIDE (coNtINUED) roasting Meat Grilling GUIDE 1 . place the meat in the oven and set the temperature between 180°c and 200°c . It is recommended to WARNING! wrap your meats in an oven roasting bag or foil to NOTE: Always clean the grill / oven dish after every prevent fats and oils from splattering, making it use. -
Page 20: Dealing With Cooking Problems
DEAlING wItH cookING proBlEMs (see also solving problems) problem causes remedies uneven cooking: • I ncorrect shelf position. – select shelf that puts food in the centre • O ven tray too large. of the oven . • T rays not centralised. – Experiment with other trays or dishes . • A ir flow in oven uneven. -
Page 21: Cleaning Your Appliance
clEANING yoUr ApplIANcE Gas Hotplate WARNING! • T he trivets can be removed for cleaning by carefully • A lways make sure that the oven is electrically lifting them from the hob . isolated before cleaning . this can be done by the • Clean by washing with warm soapy water. functional switch nearby . • T he burner caps and crowns are also removable • D o not line the bottom of the oven with foil for cleaning . -
Page 22: Cleaning Your Oven Accessories
clEANING yoUr oVEN AccEssorIEs removing the trays and shelves from cleaning your oven door your appliance the oven door has been designed to allow the two inner door glasses to be removed for cleaning without • S lide the dish and grill tray towards you until they removing the door from the product . reach the front stop . -
Page 23: Changing The Light Globe
clEANING yoUr oVEN AccEssorIEs (coNtINUED) cleaning your oven door changing the light globe • T here are 2 light globes located in the top of the oven cavity towards the front . the light globe WARNING! glass is accessible between the passes of the • D O NOT use the oven without the inner and middle upper element . door glass fitted . -
Page 24: Catalytic Liners
storAGE coMpArtMENt cAtAlytIc lINErs (sElEctED MoDEls) operation the storage compartment is accessible through the pivoting door . unused oven racks and grill dishes can the catalytic liners are coated with a specially be stored here . formulated enamel coating, over a base of regular enamel . -
Page 25: Solving Problems
solVING proBlEMs faults further information If there is a problem with the oven and / or grill, please: when you need information, service or replacement parts or have a warranty enquiry, please contact the • C heck the points listed below before calling for customer care centre: service . -
Page 26: Installing Your Appliance
60mm fit splashback to rear of hob with three screws provided . cabinet requirements Model 49669GO-MN is designed to fit into a 900mm wide gap between standard kitchen cabinets . the appliance integrates with the kitchen cabinets by matching the height, depth and kick panel . the cooker may also be installed at the end of a line of benches or with a free space either side . - Page 27 INstAllAtIoN of tHE ApplIANcE (coNtINUED) freestanding Installation the freestanding type installation uses the appliance as to ensure cooker stability, the anti-tilt brackets must supplied, and can be fitted in between cabinets, with be installed, and the end of chain attached to the cabinets on one side or without adjacent cabinets .
- Page 28 INstAllAtIoN of tHE ApplIANcE (coNtINUED) freestanding installation (continued) Installation of anti-tilt brackets and hook • The anti-tilt brackets must be secured to the floor at rear of cavity with an appropriate fastener according to dimensions in diagram . hole location for hook installation 425mm Measurements are to be adjusted to account for the thickness of any skirting board or tiles coming between the back of the appliance and the wall Hook...
- Page 29 INstAllAtIoN of tHE ApplIANcE (coNtINUED) slot-in Installation slot-in conversion to convert the free standing appliance to a slot in installation the kick panel provided on the appliance is removed and the appliance is mounted on a plinth . this enables a continuous cupboard kick board to be installed, giving a more integrated appearance .
- Page 30 INstAllAtIoN of tHE ApplIANcE (coNtINUED) slot-in installation (continued) • S lide cooker into position to check fitment to anti-tilt bracket . for freestanding installation, Installation of anti-tilt brackets and stops check the height and level of the cooker . adjust • T he brackets are to be secured to the back wall cooker feet as required . with appropriate fasteners .
- Page 31 INstAllAtIoN of tHE ApplIANcE (coNtINUED) Built-in installation cabinet construction for built in oven for the best integration within a kitchen, install this appliance in a cupboard that gives a flush fit with the surrounding cupboard fronts . a recess of 20mm is ideal .
- Page 32 INstAllAtIoN of tHE ApplIANcE (coNtINUED) Underbench installation Vertical cabinet installation your underbench oven looks best when the control the oven can be built into a vertical cabinet in the panel is directly under the benchtop . an upper infill same manner as an underbench . the required cavity panel may be added if the cooktop placed above the dimensions are the same and the product is secured to benchtop is too deep .
-
Page 33: Wiring Requirements
• l ocal regulations, municipal building codes and other statutory regulations . this appliance must be installed by an authorised person, according to all codes and regulations of: supply cord size 49669GO-MN: 1 .5mm • Electrical supply authorities. required BE7600061M: 1 .5mm • Building regulations. Data plate gives information about rating • Local government and council authorities. -
Page 34: Electrical & Gas Connection Locations
ElEctrIcAl & GAs coNNEctIoN locAtIoNs Model 49669Go-MN checking piping size to work out a suitable pipe size for connection use: the information in this table . 168mm Gas connection point to regulator Gas type 49669GO-MN 1013 .3 g/h 47 .5 MJ/h... -
Page 35: Natural Gas Conversion
NAtUrAl GAs coNVErsIoN Model 49669Go-MN this appliance is supplied set up to for lpG usage . a conversion kit is included with the product for natural gas usage . the conversion kit contains 6 injectors and natural gas sticker . -
Page 36: Testing The Operation Of The Gas Cooker
tEstING tHE opErAtIoN of tHE GAs cookEr NOTE: You MUST test the cooker after installation, before you hand it over to the customer. You MUST have a manometer and a connecting tube. checking gas supply 1 . turn on the gas supply and the electricity and try to ignite the gas . -
Page 37: Warranty
Africa for south african 3 year warranty conditions please contact Electrolux customer helpline, 0800 222 825 or download from our website www .aeg .co .za, service & support tab . - Page 38 © 2013 Electrolux home products pty ltd aBN 51 004 762 341 aMaN_90cm_cook_uM_Jul13...