Draytek Vigor2710 Series Quick Start Manual
Adsl2/2+ firewall router
Hide thumbs
Also See for Vigor2710 Series:
- User manual (335 pages) ,
- User manual (232 pages) ,
- User manual (325 pages)
Table of Contents
Advertisement
Quick Links
Download this manual
See also:
User Manual
Advertisement
Table of Contents

Related Manuals for Draytek Vigor2710 Series


Summary of Contents for Draytek Vigor2710 Series
- Page 1 Vigor 2710 Series Quick Start Guide...
- Page 2 Vigor 2710 Series Quick Start Guide...
-
Page 3: Quick Start Guide
Vigor2710 Series ADSL2/2+ Firewall Router Quick Start Guide Version: 3.0 Firmware Version: V3.6.3 Date: 12/12/2012 Vigor 2710 Series Quick Start Guide... -
Page 4: Copyright Information
Web registration is preferred. You can register your Vigor router via Owner http://www.draytek.com. Firmware & Tools Due to the continuous evolution of DrayTek technology, all routers will be Updates regularly upgraded. Please consult the DrayTek web site for more information on newest firmware, tools and documents. -
Page 5: European Community Declarations
No. 26, Fu Shing Road, HuKou Township, HsinChu Industrial Park, Hsin-Chu, Taiwan Product: Vigor2710 Series Router DrayTek Corp. declares that Vigor2710 Series of routers are in compliance with the following essential requirements and other relevant provisions of R&TTE Directive 1999/5/EEC. The product conforms to the requirements of Electro-Magnetic Compatibility (EMC) Directive 2004/108/EC by complying with the requirements set forth in EN55022/Class B and EN55024/Class B. - Page 6 Vigor 2710 Series Quick Start Guide...
-
Page 7: Table Of Contents
1. Introduction......................1 1.1 Panel Explanation ........................2 1.1.1 For Vigor2710 ....................... 2 1.1.2 For Vigor2710n ......................4 1.1.3 For Vigor2710Vn ......................6 1.1.4 For Vigor2710VDn ......................8 1.2 Package Content........................10 2. Installing Your Router..................11 2.1 Hardware Installation.........................11 Stand Installation........................13 2.2 Printer Installation........................ - Page 8 Vigor 2710 Series Quick Start Guide viii...
-
Page 9: Introduction
VoIP call, PSTN call, and Internet call through DECT phone set registered in router. In addition, Vigor2710 series supports USB interface for connecting USB printer to share printer or USB storage device for sharing files. Vigor2710 series provides two-level management to simplify the configuration of network connection. -
Page 10: Panel Explanation
Status Explanation Blinking The router is powered on and running (Activity) normally. The router is powered off. The profile(s) of CSM (Content Security Management) for IM/P2P, URL/Web Content Filter application can be enabled from Firewall >>General Setup. (Such profile must be established under CSM menu). - Page 11 Interface Description Factory Reset Restore the default settings. Usage: Turn on the router (ACT LED is blinking). Press the hole and keep for more than 5 seconds. When you see the ACT LED begins to blink rapidly than usual, release the button. Then the router will restart with the factory default configuration.
-
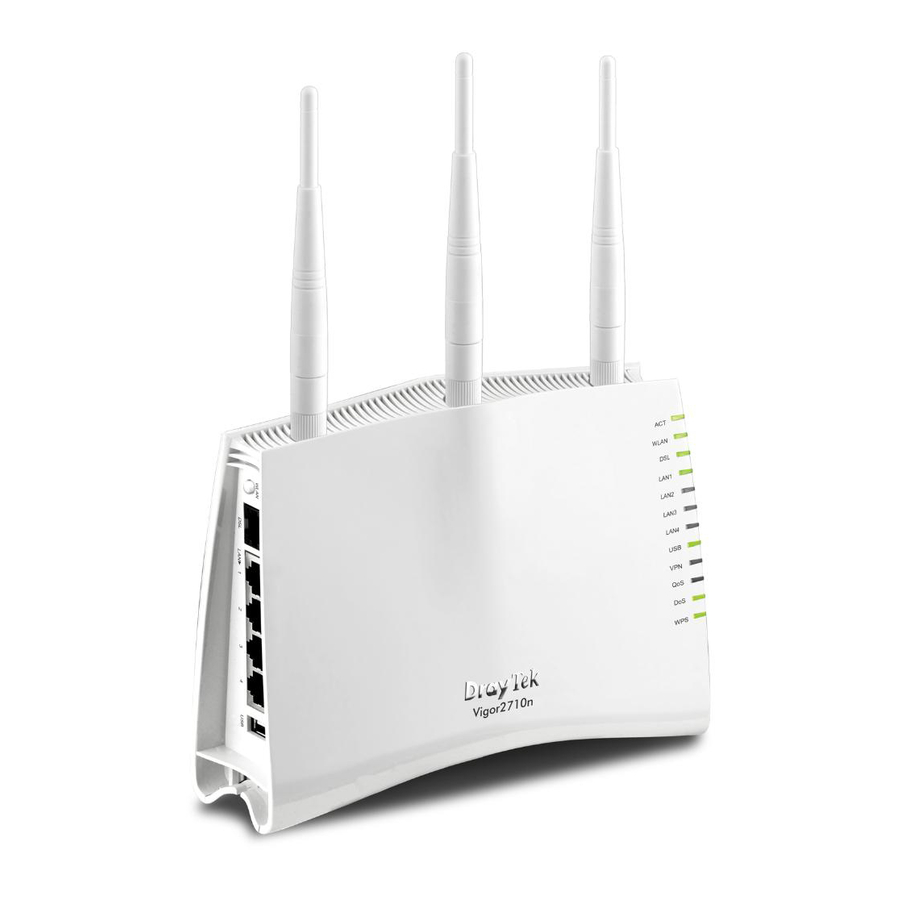
Page 12: For Vigor2710N
Status Explanation Blinking The router is powered on and running (Activity) normally. The router is powered off. WLAN Wireless access point is ready. Blinking It will blink while wireless traffic goes through. The router is ready to access Internet through DSL link. Blinking Slowly: The modem is ready. - Page 13 Interface Description Factory Reset Restore the default settings. Usage: Turn on the router (ACT LED is blinking). Press the hole and keep for more than 5 seconds. When you see the ACT LED begins to blink rapidly than usual, release the button. Then the router will restart with the factory default configuration.
-
Page 14: For Vigor2710Vn
Status Explanation Blinking The router is powered on and running (Activity) normally. The router is powered off. WLAN Wireless access point is ready. Blinking It will blink while wireless traffic goes through. The router is ready to access Internet through DSL link. Blinking Slowly: The modem is ready. - Page 15 Interface Description Line Connector for PSTN life line. Phone2/Phone1 Connector of analog phone for VoIP communication Factory Reset Restore the default settings. Usage: Turn on the router (ACT LED is blinking). Press the hole and keep for more than 5 seconds. When you see the ACT LED begins to blink rapidly than usual, release the button.
-
Page 16: For Vigor2710Vdn
Status Explanation Blinking The router is powered on and (Activity) running normally. The router is powered off. WLAN Wireless access point is ready. Blinking It will blink while wireless traffic goes through. The router is ready to access Internet through DSL link. Blinking Slowly: The modem is ready. - Page 17 Interface Description Press the button once to enable (WLAN LED on) or WLAN disable (WLAN LED off) wireless connection. Connector for accessing the Internet through ADSL2/2+. LAN (1-4) Connectors for local networked devices. Connector for USB storage (Pen Driver/Mobile HD) or printer. Interface Description Line...
-
Page 18: Package Content
Quick Start Guide RJ-45 Cable (Ethernet) Antenna (n models) Stand The type of the cable depends on the country that the router will be installed: RJ-11 to RJ-11 Cable RJ-11 to RJ-45 Cable RJ-45 to RJ-45 Cable (Annex A) (Annex B) (Annex B) The type of the power adapter depends on the country that the router will be installed. -
Page 19: Installing Your Router
This section will guide you to install the router through hardware connection and configure the router’s settings through web browser. Before starting to configure the router, you have to connect your devices correctly. Connect the ADSL interface to the external ADSL splitter with an ADSL line cable for all models. - Page 20 (For the detailed information of LED status, please refer to section 1.1.) Caution: 1. Each of the Phone ports can be connected to an analog phone only. Do not connect the phone ports to the land line jack. Such connection might damage your router. 2.
-
Page 21: Stand Installation
The Vigor2710 series must be placed erectly. Therefore you have to install a stand onto the router to make it standing firmly. Please follow the figures listed below to finish the installation. Vigor 2710 Series Quick Start Guide... -
Page 22: Printer Installation
You can install a printer onto the router for sharing printing. All the PCs connected this router can print documents via the router. The example provided here is made based on Windows XP/2000. For Windows 98/SE/Vista/7, please visit www.draytek.com. Before using it, please follow the steps below to configure settings for connected computers (or wireless clients). - Page 23 Open File->Add a New Computer. A welcome dialog will appear. Please click Next. Click Local printer attached to this computer and click Next. In this dialog, choose Create a new port Type of port and use the drop down list to select Standard TCP/IP Port.
- Page 24 In the following dialog, type 192.168.1.1 (router’s LAN IP) in the field of Printer Name or IP Address and type IP_192.168.1.1 as the port name. Then, click Next. Click Standard and choose Generic Network Card. Then, in the following dialog, click Finish. Vigor 2710 Series Quick Start Guide...
- Page 25 Now, your system will ask you to choose right name of the printer that you installed onto the router. Such step can make correct driver loaded onto your PC. When you finish the selection, click Next. 10. For the final stage, you need to go back to Control Panel-> Printers and edit the property of the new printer you have added.
- Page 26 If you do not know whether your printer is supported or not, please visit www.draytek.com to find out the printer list. Open Support > FAQ/Application Notes; find out the link of Printer Server and click it; then click the What types of printers are compatible with Vigor router? link.
-
Page 27: Configuring Web
To access Internet, please finish basic configuration after completing the hardware installation. Make sure your PC connects to the router correctly. Notice: You may either simply set up your computer to get IP dynamically from the router or set up the IP address of the computer to be the same subnet as the default IP address of Vigor router 192.168.1.1. -
Page 28: Basic Configuration
The Quick Start Wizard is designed for you to easily set up your router for Internet access. You can directly access the Quick Start Wizard via Web Configurator. Open a web browser on your PC and type http://192.168.1.1. A pop-up window will open to ask for username and password. - Page 29 On the next page as shown below, please select the appropriate Internet access type according to the information from your ISP. For example, you should select PPPoE mode if the ISP provides you PPPoE interface. Then click Next for next step. PPPoE/PPPoA: if you click PPPoE or PPPoA as the protocol, please manually enter the Username/Password provided by your ISP.
- Page 30 1483 Bridged IP /1483 Routed IP: if you choose 1483 Bridged IP / 1483 Routed IP as the protocol, you will get the following page. Please type in the IP address information originally provided by your ISP. Then click Next for next step. Now you can see the following screen.
-
Page 31: Wireless Configuration
For the user of Vigor2710, please skip this section. For operating Vigor2710n/Vn/VDn well, it is necessary for you to set the wireless LAN settings for using wireless function. Please read the following paragraphs carefully for configuring the settings for this router. In an Infrastructure Mode of wireless network, Vigor wireless router plays a role as an Access Point (AP) connecting to lots of wireless clients or Stations (STA). - Page 32 There are two methods to do network connection through WPS between AP and Stations: pressing the Start PBC button or using PIN Code. On the side of Vigor 2710 series which served as an AP, press WPS button once on the front panel of the router or click Start PBC on web configuration interface.
- Page 33 Below shows Wireless LAN>>WPS web page: Check Enable WPS to enable WPS setting. Click Start PBC to invoke Push-Button style WPS setup procedure. The router will wait for WPS requests from wireless clients about two minutes. The WPS LED on the router will blink fast when WPS is in progress. It will return to normal condition after two minutes.
-
Page 34: Dect Phone Connection (For Vdn Model Only)
Vigor2710 provides a DECT phone resolution for users to utilize DECT phone for dialing VoIP/PSTN calls. Without the limitation of cable connection, ECT phone can be placed in any place in your house. People do not worry about being wiretapped for the content of the call will be encrypted and secure. - Page 35 When the registration is finished, openVoIP>>SIP Accounts. The Registered DECT phone will be available for you to choose. Choose the one you need. Open VoIP>>Status. Information for the active DECT phone will be shown as follows. Vigor 2710 Series Quick Start Guide...
- Page 36 When registering with DECT phone, you will be asked to type access code. The default setting in Vigor2710VDn is 1234. Please open VoIP>>Phone Settings to modify it if required. The following diagram shows the brief construction of DECT phone (handset) and Vigor router.
-
Page 37: Trouble Shooting
This section will guide you to solve abnormal situations if you cannot access into the Internet after installing the router and finishing the web configuration. Please follow sections below to check your basic installation status stage by stage. Checking if the hardware status is OK or not. Checking if the network connection settings on your computer are OK or not. - Page 38 The example is based on Windows XP. As to the examples for other operation systems, please refer to the similar steps or find support notes in www.draytek.com. Go to Control Panel and then double-click on Network Connections. Right-click on Local Area Connection and click on Properties.
- Page 39 Select Obtain an IP address automatically and Obtain DNS server address automatically. Double click on the current used Mac OS on the desktop. Open the Application folder and get into Network. On the Network screen, select Using DHCP from the drop down list of Configure IPv4.
-
Page 40: Pinging The Router From Your Computer
The default gateway IP address of the router is 192.168.1.1. For some reason, you might need to use “ping” command to check the link status of the router. The most important thing is that the computer will receive a reply from 192.168.1.1. If not, please check the IP address of your computer. -
Page 41: Checking If The Isp Settings Are Ok Or Not
Open Internet Access page and then check whether the ISP settings are set correctly. Click PPPoE/PPPoA/MPoA/Multip-PVCs link to review the settings that you configured previously. Check if the Enable option is selected. Check if Username and Password are entered with correct values that you got from your ISP. -
Page 42: Problems For 3G Network Connection
Modem to disable PIN code and try again. If it still fails, it might be the compliance problem of system. Please open DrayTek Syslog Tool to capture the connection information (WAN Log) and send the page (similar to the following graphic) to the service center of DrayTek. -
Page 43: Backing To Factory Default Setting If Necessary
Sometimes, a wrong connection can be improved by returning to the default settings. Try to reset the router by software or hardware. Warning: After pressing factory default setting, you will loose all settings you did before. Make sure you have recorded all useful settings before you pressing. -
Page 44: Contacting Your Dealer
If the router still cannot work correctly after trying many efforts, please contact your dealer for further help right away. For any questions, please feel free to send e-mail to support@draytek.com. Vigor 2710 Series Quick Start Guide...