Table of Contents
Advertisement
Quick Links
Download this manual
See also:
Installation Manual
Advertisement
Table of Contents

Related Manuals for D-Link AirPremier DWL-G680

Summary of Contents for D-Link AirPremier DWL-G680
- Page 1 ® D-Link AirPremier DWL-G680 High-Speed 802.11g Wireless Notebook Adapter Manual Rev. A2 Building Networks for People...
-
Page 2: Table Of Contents
Contents Package Contents ................3 Introduction ................... 4 Features & Benefits................5 Wireless Basics ................... 6 Getting Started ..................9 Using the Configuration Utility ............. 12 Networking Basics ................26 Troubleshooting .................. 44 Technical Specifications ..............51 Technical Support ................53 Warranty..................... -
Page 3: Package Contents
Package Contents Contents of Package: ® D-Link AirPremier DWL-G680 High-Speed 2.4 GHz/802.11g Wireless Cardbus Adapter Manual and Drivers on CD Quick Installation Guide If any of the above items are missing, please contact your reseller. System Requirements: A laptop or notebook computer with an available 32-bit Cardbus... -
Page 4: Introduction
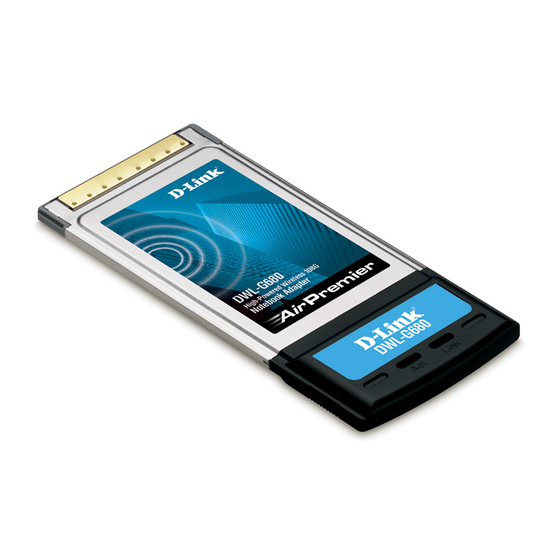
Introduction ® The D-Link AirPremier DWL-G680 Wireless Cardbus Adapter is an 802.11g high- performance, wireless adapter that supports high-powered wireless networking at home, at work or in public places. Unlike most network cards, the DWL-G680 provides data transfers at up to 108 Mbps. -
Page 5: Features & Benefits
Cardbus interface utilized by the DWL-G680 ensures optional performance in transmitting a wireless signal within the loptop computer. Pluy and play when used with other D-Link AirPlus Xtreme G products will automatically connect to network out of the box. Operates in the 2.4GHz frequency range... -
Page 6: Wireless Basics
D-Link wireless products will allow you access to the data you want, when and where you want it. You will be able to enjoy the freedom that wireless networking brings. - Page 7 OFDM works by splitting the radio signal into multiple smaller sub-signals that are then transmitted simultaneously at different frequencies to the receiver. OFDM reduces the amount of crosstalk (interference) in signal transmissions. The D-Link DWL- G680 will automatically sense the best possible connection speed to ensure the greatest speed and range possible.
-
Page 8: Installation Considerations
Wireless Basics (continued) Installation Considerations ® The D-Link AirPremier DWL-G680 lets you access your network using a wireless connection from virtually anywhere within its operating range. Keep in mind, however, that the number, thickness and location of walls, ceilings, or other objects that the wireless signals must pass through, may limit the range. -
Page 9: Getting Started
On the following pages we will show you an example of an Infrastructure Network and an Ad-Hoc Network. An Infrastructure network contains an Access Point or Router. The Infrastructure Network example shown on the following page contains the following D-Link network devices (your existing network may be comprised of other devices): ®... - Page 10 Getting Started (continued) Setting up a Wireless Infrastructure Network DWL-G550 DWL-G680 Please remember that D-Link AirPremier ® wireless devices are pre-configured to connect together, right out of the box, with their default settings. For a typical wireless setup at home (as shown above), please do the following: You will need broadband Internet access (a Cable or DSL-subscriber line into your home or office).
- Page 11 Getting Started (continued) Setting up a Wireless Ad Hoc Network Desktop ® D-Link AirPremier DWL-G550 ® D-Link AirPremier DWL-G680 Install the DWL-G550 into the desktop computer. (See the Quick Installation Guide included with the product for installation instructions.) Install the DWL-G680 Wireless PC Card Adapter into a laptop computer.
-
Page 12: Using The Configuration Utility
Select the Wireless Networks tab. Uncheck the box in the properties window that enables windows configuration. After you have done this, you can then use the D-Link Configuration Utility with XP by clicking on the D-Link Configuration Utility icon. *Configuration Utility icon... - Page 13 Using the Configuration Utility (continued) After clicking on the Configuration Utility icon, the Link Info screen will display the settings for the DWL-G680: Link Info Status: Displays the MAC Address of the Access Point or Router to which the DWL-G680 is associated SSID: The Service Set Identifier is the name assigned to the wireless network.
- Page 14 Using the Configuration Utility (continued) Configuration After you have configured the network through the Site Survey section of the D-Link AirPremier Utility, you can make minor adjustments and check on settings in this Configuration screen. For a complete explanation of the...
- Page 15 Using the Configuration Utility (continued) Key Length: Select the key length and either ASCII or hexadecimal format. IEEE 802.1x: Authentication which is a first line of defense against intrusion. In the Authentication process the Authentication Server* verifies the identity of the client attempting to con- nect to the network.
- Page 16 Using the Configuration Utility (continued) Frequency: Select the Frequency Starting Ad-Hoc Network: Select the Ad-Hoc Network Ad-Hoc Channel: All devices in the Ad-Hoc network must be set to the same channel Profile IP Settings: Advanced You can Enable or Disable the IP Settings portion of your profile here.
- Page 17 Using the Configuration Utility (continued) Available Network: The top section of the window displays the Available Networks. Scroll up and down the list and highlight the network to which you wish to connect. Click on the Connect but- ton. Profile: In the lower half of the screen, you can manage the profiles that you have created for the wireless network at home, at the office and in public places.
- Page 18 Using the Configuration Utility (continued) Site Survey > Add Advanced In this window you can select the type of network connection. Click OK to save the changes. If you clicked on Add, you can configure, in this window, all the Configuration, Add or Properties properties of a profile that you wish to add to the network.
- Page 19 Using the Configuration Utility (continued) Site Survey > Configuration > 802.1x To use 802.1x and to configure its settings, please do the following: IEEE 802.1x - Select Enabled. Click Authentication Config. Advanced Security Settings Select the EAP Type you want to use. Configure the information needed for authenticating.
- Page 20 Using the Configuration Utility (continued) 802.1x > Advanced Security Settings > EAP Types Inner Authentication Information needed EAP Type Protocol for Authenticating Certificate EAP-TLS User Name User Name EAP- Password MSCHAPv2 Domain Name User Name LEAP Password TTLS Identity User Name Password TTLS Identity User Name...
- Page 21 Using the Configuration Utility (continued) 802.1x > Advanced Security Settings > EAP Types (continued) Inner Authentication Information needed EAP Type Protocol for Authenticating TTLS Identity EAP-MD5 User Name Password TTLS Identity EAP-TTLS EAP- User Name Generic Token card Password TTLS Identity User Name EAP-MSCHAPv2 Password...
- Page 22 Using the Configuration Utility (continued) 802.1x > Advanced Security Settings > Definitions of Terms (continued) Domain Name: Each server has a domain name that uniquely identifies it. That domain name is normally contained in the Subject CN field of the server certificate. A server domain name ends with the name of a larger administrative domain, to which the server belongs.
- Page 23 Using the Configuration Utility (continued) Authentication > WPA/WPA2 Select the available network to which you want to connect. Click Configure. Select WPA/WPA2 in the Authentication field. Click Authentication Config After you click Authentication Config, the Advanced Security Settings screen will ap- pear.
- Page 24 Using the Configuration Utility (continued) Authentication > WPA-PSK/WPA2-PSK Select the available network to which you want to connect. Click Configure. WPA-PSK/ WPA2-PSK does not require a RADIUS Server in the network. Select WPA-PSK/ WPA2-PSK in the Authentication field. Click Authentication Config...
- Page 25 Using the Configuration Utility (continued) Authentication > WPA-PSK/WPA2-PSK (continued) Advanced Security Settings Enter the WPA/WPA2 Passphrase. Click OK. The configuration is done.
-
Page 26: Networking Basics
Networking Basics Using the Network Setup Wizard in Windows XP In this section you will learn how to establish a network at home or work, using Microsoft Windows XP. Note: Please refer to websites such as http://www.homenethelp.com http://www.microsoft.com/windows2000 for information about networking computers using Windows 2000. - Page 27 Networking Basics (continued) Please follow all the instructions in this window: Click Next In the following window, select the best description of your computer. If your computer connects to the Internet through a gateway/router, select the second option as shown. Click Next...
- Page 28 Networking Basics (continued) Enter a Computer description and a Computer name (optional.) Click Next Enter a Workgroup name. All computers on your network should have the same Workgroup name. Click Next...
- Page 29 Networking Basics (continued) Please wait while the Network Setup Wizard applies the changes. When the changes are complete, click Next. Please wait while the Network Setup Wizard configures the computer. This may take a few minutes.
- Page 30 Networking Basics (continued) In the window below, select the option that fits your needs. In this example, Create a Network Setup Disk has been selected. You will run this disk on each of the computers on your network. Click Next. Insert a disk into the Floppy Disk Drive, in this case drive A.
- Page 31 Networking Basics (continued) Please read the information under Here how in the screen below. After you complete the Network Setup Wizard you will use the Network Setup Disk to run the Network Setup Wizard once on each of the computers on your network. To continue click Next.
- Page 32 Networking Basics (continued) Please read the information on this screen, then click Finish to complete the Network Setup Wizard. The new settings will take effect when you restart the computer. Click Yes to restart the computer. You have completed configuring this computer. Next, you will need to run the Network Setup Disk on all the other computers on your network.
- Page 33 Networking Basics (continued) Naming Your Computer in Windows Vista below dereetions To name your computer in Windows VISTA, please follow these directions: Click Start (in the lower left corner of the screen). Right-click on Computer. Select Properties.
- Page 34 setting Select the Computer Name window. Computer Description To rename the computer and join a domain, click Change.
- Page 35 Networking Basics (continued) Naming Your Computer In this window, enter the Computer name. Enter the name of the Workgroup. n e t w o r k m u s t h a v e the same Workgroup name. Click OK. Checking the IP Address In Windows XP Right-click on...
- Page 36 Networking Basics (continued) Checking the IP Address in Windows XP This window will appear. Click the Support tab. Click Close. Checking the IP Address In Windows VISTA Right-click on the Wireless Network Connection icon in the task bar. Click on Network and Sharing Center.
- Page 37 Networking Basics (continued) Checking the IP Address In Windows Vista This window will appear. Click the View Status. Click on the Detail. Click Close.
- Page 38 Networking Basics (continued) Assigning a Static IP Address Note: Many broadband routers will automatically assign IP addresses to the computers on the network, using DHCP (Dynamic Host Configuration Protocol) technology. If you are using a DHCP-capable router you will not need to assign static IP addresses.
- Page 39 Networking Basics (continued) Right-click on Local Area Connections. Click on Properties. Click on Internet Protocol (TCP/IP). Click Properties. ® D-Link AirPlus G DWL-G122 Wireless USB Adapter...
- Page 40 Networking Basics (continued) Input your IP address and subnet mask. (The IP addresses on your network must be within the same range. For example, if one computer has an IP address of 192.168.0.2, the other computers should have IP addresses that are sequential, like 192.168.0.3 and 192.168.0.4.
- Page 41 Networking Basics (continued) In Windows VISTA Right Click on Wireless Network Connection icon in the task bar Click Network and Sharing Center Click on View Status . Click on Properties .
- Page 42 Networking Basics (continued) Assigning a Static IP Address Click on Internet Protocol (TCP/IPv4). Click Properties. ® D-Link AirPlus G DWL-G122 Wireless USB Adapter IP address and subnet mask. must be within the same range. For example, if one computer has an IP address of 192.168.0.2,...
- Page 43 Networking Basics (continued) Checking the Wireless Connection by Pinging in Windows XP and 2000* Go to Start > Run > type cmd. A window similar to this one will appear. Type ping xxx.xxx.xxx.xxx, where xxx is the IP Address of the Wireless Router or Access Point.
-
Page 44: Troubleshooting
Troubleshooting This chapter provides solutions to problems that can occur during the installation and operation of the DWL-G680. Read the following descriptions if you are having problems. (The examples below are illustrated in Windows Vista / Windows XP. If you have another operating system, these solutions will still apply although the appearance on your computer screen may differ.) 1. - Page 45 Troubleshooting (continued) Double-click on Network Adapters Right-click on D-Link ® AirPremier DWL-G680 Wireless Cardbus Adapter Select Properties to check that the drivers are installed properly Look under Device Status to check that the device is working properly Click OK...
- Page 46 Troubleshooting (continued) In Windows VISTA Go to Start > Computer > Properties. Click Device Manager.
- Page 47 Troubleshooting (continued) Double-click on Network Adapters. Right-click on D-Link AirPlus ® DWL-G122 Wireless USB Adapter. Select Properties to check that the drivers D-Link AirPlus ® G DWL-G122 Wireless USB Adapter Look under Device Status to check that the device is working...
- Page 48 Troubleshooting (continued) 2. I cannot connect to the Access Point or the Wireless Router. Make sure that the SSID on the DWL-G680 Wireless Cardbus Adapter is exactly the same as the SSID on the Access Point or Wireless Router. Move the DWL-G680 and Access Point or Wireless Router into the same room and then test the wireless connection.
- Page 49 In Infrastructure mode, make sure the same Service Set Identifier (SSID) is specified on the settings for the wireless clients and Access Points. The ® SSID factory default setting for the D-Link AirPremier products is default. (Double-click on the WLAN icon in the taskbar. The Link Info screen will display the SSID setting.)
- Page 50 In Infrastructure mode, make sure the same Service Set Identifier (SSID) is specified on the settings for the wireless clients and Access Points. The ® SSID factory default setting for the D-Link AirPremier products is default. (Double-click on the WLAN icon in the taskbar. The Link Info screen will display the SSID setting.)
-
Page 51: Technical Specifications
Technical Specifications Standards IEEE 802.11g IEEE 802.11b Bus Type: 32-bit Cardbus Data Rates: 108, 54, 48, 36, 24, 18, 12, 11, 9, 6, 5.5, 2 and 1Mbps Security: 802.1x WPA/WPA2 (Wi-Fi Protected Access/Wi-Fi Protected Access ), 64-,128-bit WEP with TKIP, MIC, IV Expansion, Shared Key Authentication Power Consumption: PowerSave mode = 30mA... - Page 52 Technical Specifications Temperature °C °C °F °F Operating: 0 to 55 to 149 Humidity: 10% - 90%, RH, non-condensing Receiver Sensitivity: 802.11b DQPSK DBPSK DSSS 802.11g BPSK QPSK 6QAM OFDM Physical Dimensions: L = 4.68 inches (118mm) W = 2.13 inches (54mm) H = 0.28 inches (7.1mm) Weight: 0.088 lb.
-
Page 53: Technical Support
Technical Support You can find software updates and user documentation on the D-Link website. D-Link provides free technical support for customers within the United States and within Canada for the duration of the warranty period on this product. U.S. and Canadian customers can contact D-Link technical support through our website, or by phone. -
Page 54: Warranty
Hardware will be warranted for the remainder of the original Warranty Period from the date of original retail purchase. If a material defect is incapable of correction, or if D-Link determines in its sole discretion that it is not practical to repair or replace the defective Hardware, the price paid by the original purchaser for the defective Hardware will be refunded by D-Link upon return to D-Link of the defective Hardware. - Page 55 D-Link may reject or return any product that is not packaged and shipped in strict compliance with the foregoing requirements, or for which an RMA number is not visible from the outside of the package. The...
- Page 56 LIABILITY OF D-LINK UNDER THIS WARRANTY IS LIMITED TO THE PURCHASE PRICE OF THE PRODUCT COVERED BY THE WARRANTY. THE FOREGOING EXPRESS WRITTEN WARRANTIES AND REMEDIES ARE EXCLUSIVE AND ARE IN LIEU OF ANY OTHER WARRANTIES OR REMEDIES, EXPRESS, IMPLIED OR STATUTORY.
-
Page 57: Registration
Registration Register your D-Link product online at http://support.dlink.com/register/ (11/08/2007)