Table of Contents
Advertisement
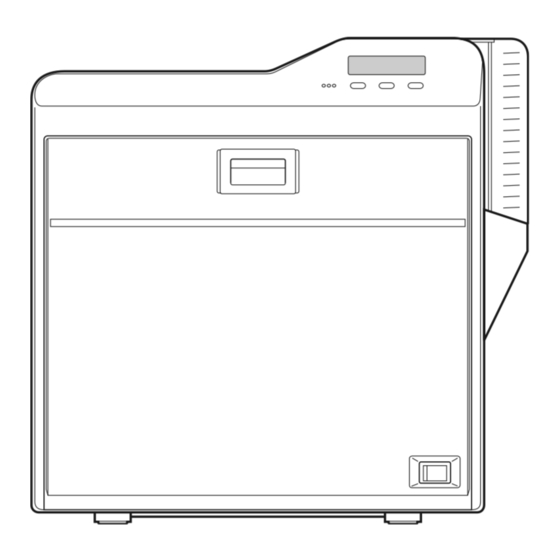
Card Printer
CX-7000 Series
Thank you for purchasing this product.
Please read through this "Electronic Manual"
carefully in advance to ensure proper use of the
product. Also, to make sure that the product is
used safely, please read through the "Safety
Precautions" in the "READ ME FIRST" booklet.
Please store the manuals properly after reading
so that they can be referred to whenever
necessary.
Electronic
Manual
LST1006-002A
Advertisement
Table of Contents

Related Manuals for JVC CX-7000 Series


Summary of Contents for JVC CX-7000 Series
- Page 1 Card Printer CX-7000 Series Thank you for purchasing this product. Please read through this “Electronic Manual” carefully in advance to ensure proper use of the product. Also, to make sure that the product is used safely, please read through the “Safety Precautions”...
-
Page 2: Table Of Contents
Cards ... 46 Ink Ribbon ... 54 Retransfer Film ... 56 Unable to Produce Desired Printing Results ... 57 Printer not Operating as Desired ... 58 Before Sending Printer for Repair ... 58 Setup Installation and Connection ... 59 Printing Media ... 60 Printer and Computer Connection ... -
Page 3: Before Use
Graphical Symbols A number of graphical symbols are used in this manual as well as on the printer. They are intended to ensure the safe use of this product, protect users against safety hazards, as well as prevent damage of property. - Page 4 Before Use Warnings...
- Page 5 Before Use Caution...
- Page 6 Please read through all the following items before using the printer. Printer Installation When the printer is not in use, it is recommended that you turn off the power, and use a cover that is large enough to cover up the entire printer unit.
-
Page 7: Disclaimer
Writes data to a contact IC card. F Magnetic encoder (optional) Writes data to a magnetic stripe card. G Card turn over unit (double-sided printer only) Inverts the card. H Cleaning roller Removes dust or dirt attached to the card. - Page 8 For connecting the power cord. Right A NG card outlet If a card is left inside the printer when the power is turned on or reset, the card will be automatically discharged. Cards in the printer are discharged when an error occurs in the magnetic stripe card or IC card.
- Page 9 For installing the ink ribbon. F Jog dials For removing jammed cards by turning it after it is detached from the printer unit and attached to the shaft. G Retransfer film cassette For installing the retransfer film. H Cassette buttons Press these buttons in order to pull out the ink ribbon cassette or retransfer film cassette.
-
Page 10: Specifications
*The specifications and appearance of this product may be modified for improvement without prior notice. Accessories/Products Sold Separately Accessories Please check to ensure that the printer accessories are in place when unpacking the product package. CD-ROM x 1 Instruction Manual x 1 “READ ME FIRST”(LST1004) x 1... -
Page 11: Options
Device for correcting card bend after printing. Magnetic encoder Device for writing data to a magnetic stripe card. It can only be installed on a double-sided printer. Contact IC encoder Device for writing data to a contact IC card. Non-contact IC encoder... -
Page 12: Operating The Printer
Cautions: If you see an [Initializing..] or [Preheating..] message on the LCD panel of the printer, this means the printer is not ready yet. Printing cannot be performed until a [Ready] massage appears. Printing the card on the side with the magnetic stripe may cause printing errors or damage to the card’s functions. -
Page 13: Operation Panel
Scrolls to the next displayed character on the right. Icon Displays on the Operation Panel USB connection IP address established Printer information can be viewed through the network. However, printing is performed through USB connection. * * * M e nu... - Page 14 Operating the Printer Operation Panel Operation Display Background color Changes according to the printer’s operating status. During startup Bright green Under normal circumstances Sky blue During initialization using K, during test printing using the operation panel, cleaning, downloading and during security lock...
-
Page 15: Setting Mode
If the printer is not reset after changing the temperature setting, temperature is adjusted after the printing operation starts. Speed (Front): -3, -2, -1, 0, 1, 2 For setting the front side retransfer speed. - Page 16 Power Saving: 5, 10, 15, 20, 25, 30, 45, 60, Off (unit: mins) For setting the time for the Power Saving mode. While in the [Ready] mode, if the printer is not operated for a specific time interval, the retransfer heating roller, bend remedy heating roller, and backlight of the operation panel will turn off automatically to save power.
-
Page 17: Sequence Of Setting Modes
Sequence of Setting Modes Settings can be viewed on the printer’s operation panel. Settings can be changed on the status monitor of the computer. "Setting mode" (A page 15) Press I Enters the setting mode. Press J Pressing it each time displays the next setting item. - Page 18 Operating the Printer...
-
Page 19: Factory Settings
Mac Address IPSec Mode IPSec Type Standard Front Wait Factory Settings Factory Settings Factory Settings Counter Total Cnt No.1 Factory Settings Hico Operating the Printer Item Factory Settings PRINTER01 DHCP Setting IP Address 192.168.0.141 Subnet Mask 255.255.255.0 Gateway 192.168.0.1 Effective IP... -
Page 20: Security Lock
Operating the Printer Security Lock The security lock function can be applied to the printer door and card hopper to prevent opening of the printer door as well as removal of cards. The lock can be turned on/off using the status monitor on the computer. - Page 21 If this number is consistent with the registered number, the display returns to [Ready], and the security key number is deleted. If this number is not consistent with the registered number, the display returns to [Delete Sec-Key OK?]. Enter a number again. Operating the Printer...
-
Page 22: Setting Using The Operation Panel
Memo: When detaching the ink ribbon cassette or retransfer film cassette from the printer body, dust may adhere to the ink ribbon or retransfer film. Errors such as discoloring may occur depending on the size of the dust particles. To avoid these problems, it is recommended that you forward by one or two images after installing the cassette. - Page 23 Test Print Prints the printer’s built-in test pattern, or the different settings. The printer unit can be made to run alone when a system error occurs by separating the computer from the printer. Test Pattern Types Test Pattern: Prints standard color pattern on a single side of a card.
- Page 24 The firmware is updated after the power is turned on again. If download fails and printer cannot be started up If download of the printer firmware fails, the printer may not be able to start up when it is rebooted. When this occurs, download the firmware again according the following procedure.
- Page 25 A [Cleaning] message appears. Press J to set to [Setting] Pressing it each time displays the next setting item. Press G A [Display] message appears. Press G A [Mode] message appears. Press J to set to [Counter] Operating the Printer...
- Page 26 Operating the Printer Press F Enters the settings change mode. Press A and select a setting Press B to confirm the setting Pressing B confirms the setting and returns you to the previous screen. Press H to exit the setting mode Pressing it each time displays the setting item on the next higher level.
- Page 27 Press B to confirm the setting Pressing B confirms the setting and returns you to the previous screen. Press H to exit the setting mode Pressing it each time displays the setting item on the next higher level. Operating the Printer...
- Page 28 Press H to exit the setting mode Pressing it each time displays the setting item on the next higher level. Unit Number Setting For setting the printer’s unit number according to the USB environment. Settings No.1 - No.10 Press I A [Cleaning] message appears.
- Page 29 Cautions: Make sure that you set to the transport mode when transporting or moving the printer. Failure to do so will cause the printer to malfunction. Open the printer door Press and hold down the cassette button, and remove the ink ribbon...
-
Page 30: Setting Using The Status Monitor
Operating the Printer Setting Using the Status Monitor "Status Monitor Settings" (A page 107) -
Page 31: Replacement
ISO contact IC cards Set the card with the Contact IC terminal facing upward and toward the rear of the printer, or downward and toward the rear of the printer. For single-sided printers, set the cards with the IC terminal facing down and toward the rear of the printer. -
Page 32: Ink Ribbon
Do not perform any work on the printer door. Do not place heavy objects or apply load on the printer. Doing so may damage it. During replacement, clean the four bobbin holders on the printer. If... -
Page 33: Retransfer Film
Insufficient winding may cause the printer to malfunction. Do not perform any work on the printer door. Do not place heavy objects or apply load on the printer. Doing so may damage it. During replacement, clean the four bobbin holders on the printer. If... - Page 34 B Turn the knob in the direction indicated by the arrow. Insert the cassette all the way in along the guide rail until a “click” sound is heard, followed by closing the printer door Press KNB to reset the printer...
-
Page 35: Maintenance
Start work after ensuring that the power has been turned off. If the printer is used every day, make sure to clean the cleaning roller daily at the end of the operation. Do not perform any work on the printer door. Do not place heavy objects or apply load on the printer. - Page 36 Replace the fan filter with a new one after using it for about one year. For details on its replacement, please consult our authorized dealers. Remove the filter cover located on the side of the printer Remove the fan filter...
- Page 37 If card jam occurs when the cleaning card is inserted, turn off and on the power of the printer. Doing so automatically discharges the card. Do not perform any work on the printer door. Do not place heavy objects or apply load on the printer. Doing so may damage it.
- Page 38 Reverse the adhesive face, and insert the card. After the cleaning card is discharged, turn off the power, install the retransfer film cassette, close the printer door, and install the card hopper To turn on the power again, do so after an interval of at least 10 seconds.
- Page 39 Failure to restore the parts may result in malfunction of the printer. Do not perform any work on the printer door. Do not place heavy objects or apply load on the printer. Doing so may damage it.
- Page 40 Avoid doing so on the floor as dust attached to it may cause printing errors. Do not perform any work on the printer door. Do not place heavy objects or apply load on the printer. Doing so may damage it.
- Page 41 Avoid doing so on the floor as dust attached to it may cause printing errors. Do not perform any work on the printer door. Do not place heavy objects or apply load on the printer. Doing so may damage it.
- Page 42 Wipe the thermal head with care in the horizontal direction. Insert the retransfer film cassette along the guide rail until a “click” sound is heard Insert the ink ribbon cassette along the guide rail until a “click” sound is heard, followed by closing the printer door...
-
Page 43: Servicing Based On Print Output
Servicing Based on Print Output Colors Appear Faded or Dirt is Conspicuous "Clean the cleaning roller." (A page 35) "Clean the fan filter." (A page 36) "Clean the card feed roller/heating roller." (A page 37) "Clean the bobbin holders." (A page 40) Card Jam "Clean the cleaning roller."... -
Page 44: Troubleshooting
"Repair the ink ribbon." (A page 54) Door Open D1 The printer door is open. Close the printer door, and press KNB to reset the printer. Cleaning unit is not installed. Install the cleaning unit, close the printer door, and press KNB to reset the printer. - Page 45 Overcool F6 The operating ambient temperature of the printer is too low. Check the temperature. If the same problem recurs within the range of operating ambient temperature, turn off the power and consult our authorized dealers.
-
Page 46: Cards
Return the unused cards to their original position Install the card hopper cover If the card cannot be removed by hand A Press KNB to reset the printer The card is discharged from the NG card outlet. "Go to step 3" (A page 46) - Page 47 If the card cannot be discharged A Turn off the power B Open the printer door, and check the position of the jammed card C Attach the jog dial to the cleaning roller shaft D Turn the cleaning roller shaft in the clockwise direction, while...
- Page 48 “Home Pos.”. If the printer door is opened when a Jam(TurnOver) error occurs, a [Please Adjust Turn Unit Pos!] message will be displayed. Remove the jammed card, and set the card turn over unit to “Home Pos.”.
- Page 49 Do not turn the card turn over unit forcibly if there is a card inside the unit. Doing so may jam the card and damage the printer. D Turn the cleaning roller shaft in the clockwise direction E Remove the card after it is discharged from the card load slot Cautions: If the card cannot be removed, do not try to do so forcibly.
- Page 50 If the card cannot be discharged A Turn off the power, and detach the card hopper B Open the printer door, and check the position of the jammed card C Attach the jog dial to the card feed roller shaft and cleaning roller shaft...
- Page 51 Press KNB to reset the printer The card is discharged from the card outlet. If the card cannot be discharged A Turn off the power, and open the printer door B Pull out the retransfer film cassette, and check the position of the card...
- Page 52 If a [Please Close Door] message is displayed, the retransfer film is stuck and the retransfer film cassette cannot be removed. In this case, close the printer door before pulling out the retransfer film cassette. Remove the jammed card "If the card is adhered to the retransfer film"...
- Page 53 (supplied) to remove the card. A Turn off the power B Check the position of the card that is left inside the printer C Pick up the card using the tip of the tweezers (supplied) Be careful not to drop the card inside the printer.
-
Page 54: Ink Ribbon
Do not perform any work on the printer door. Do not place heavy objects or apply load on the printer. Doing so may damage it. - Page 55 Remove any slack in the ink ribbon Insert the cassette all the way in along the guide rail until a “click” sound is heard, followed by closing the printer door Press KNB to reset the printer Memo:...
-
Page 56: Retransfer Film
Improper alignment may result in errors, or the print may turn out light. Do not perform any work on the printer door. Do not place heavy objects or apply load on the printer. Doing so may damage it. -
Page 57: Unable To Produce Desired Printing Results
Unable to Fit Retransfer Film Cassette into Printer With the printer door closed, turn on the power to cancel the transport mode. While in the transport mode, the retransfer film cassette cannot be installed to the printer with the retransfer film loaded. -
Page 58: Printer Not Operating As Desired
Is there electricity supply from the outlet? Try connecting another electrical device to the outlet. If the device works normally, then it could be due to malfunctioning of the printer. Please consult our authorized dealers. Printing does not Start or Stops Halfway Is the printer door open? "Close the printer door properly, and reset the printer."... -
Page 59: Setup
Install the printer by allowing a clearance of at least 20 cm between its sides and surrounding walls. Allow a clearance of at least 10 cm between the rear of the printer and the wall. Do not place any object on the printer. -
Page 60: Printing Media
The cassette is heavy when the ink ribbon is loaded. To prevent the cassette from dropping during handling, make sure to hold it with both hands. Do not perform any work on the printer door. Do not place heavy objects or apply load on the printer. Doing so may damage it. - Page 61 Insufficient winding may cause the printer to malfunction. Do not perform any work on the printer door. Do not place heavy objects or apply load on the printer. Doing so may damage it. Open the printer door...
- Page 62 When using new cards, set them after making sure that they are not adhered to each other due to static. Align the cards before setting them in the printer. Otherwise, the card hopper cover may not close properly, and this may damage the printer.
- Page 63 ISO contact IC cards Set the card with the Contact IC terminal facing upward and toward the rear of the printer, or downward and toward the rear of the printer. For single-sided printers, set the cards with the IC terminal facing down and toward the rear of the printer.
-
Page 64: Printer And Computer Connection
Turn off the power of the printer and computer Plug the USB cable into the USB cable connection terminal at the rear of the printer, and "Cable clamp" (A page 8) pass the USB cable through the cable clamp Cautions: As illustrated in the diagram, do not pull the USB cable excessively toward the cable clamp. -
Page 65: Computer Settings
Installing the Printer Driver USB Connection Cautions: Do not turn on the power of the printer until instruction asking you to do so appears on the installer. Do not connect the printer to the USB until instruction asking you to do so appears on the installer. - Page 66 Check the details, followed by clicking [Next] A screen for setting [Printer model] and [Printer name] appears. A Select a [Printer model] according to the unit number of the printer "Unit Number Setting" (A page 28) Select a [Printer model] according to the unit number of the printer.
- Page 67 Enter the shared name when you are sharing a printer. Memo: You can also set the shared name after installation is complete. Click [Next] A port selection screen appears. Select [CX-7000U Port] under [Create a new port]. Click [Next] An install information confirmation screen appears.
- Page 68 List]. When this occurs, end the installation process and reinstall the program. If “No Selection” appears in the [Printer List], select a USB device name that coincides with the printer unit number that is currently being installed from the pull-down list.
- Page 69 Do not connect the printer to the Ethernet (LAN) until instruction asking you to do so appears on the installer. Do not turn on the power of the printer until instruction asking you to do so appears on the installer.
- Page 70 B Enter the [Printer name] C Select the [Make this the default printer.] checkbox if necessary Memo: Doing so enables you to set it as a default printer after installation is complete. Click [Next] A screen for entering the shared name appears.
- Page 71 When connecting using the IPv4 address, select [IPv4], followed by clicking [Find...] to search for the printer. After clicking [IPv4], you can search for the printer by directly entering the IPv4 address in the [Printer List]. When connecting using the IPv6 address, select [IPv6], followed by clicking [Find...] to search for the printer.
- Page 72 Check to ensure that the printer is added. Windows XP (Example) Windows Vista (Example) Windows 2000 (Example) Cautions: To delete a printer, execute “Uninstall printer driver” after restarting Windows. Update of Printer Driver To update Delete the existing printer driver "Uninstalling the Printer Driver"...
- Page 73 A “Welcome to the Add Printer Wizard” screen appears. Click [Next] A printer type selection screen appears. Select [A network printer, or a printer attached to another computer], and click [Next] A “Specify a Printer” screen appears. Select [Browse for a printer], and click [Next] A “Browse for Printer”...
- Page 74 Setup Cautions: When the access authority of the computer is not proper, the printer may not be able to perform printing even if installation of the printer driver is completed. Ensure that the access authority is proper according to the instructions of the network administrator.
- Page 75 USB and Ethernet. Make sure that the status monitor is only installed once on a single computer. To continue using the status monitor after uninstalling the printer driver, update the status monitor accordingly. "Update of Status Monitor" (A page 76) Start up Windows, and set the supplied CD-ROM into the computer A card printer setup screen appears.
- Page 76 [Printer Name] on the [Printer Selection] screen of the status monitor. Do not turn on the power of the printer until instruction asking you to do so appears on the installer. Do not connect the printer to the USB until instruction asking you to do so appears on the installer.
- Page 77 Installation of the USB driver is complete. Windows Vista Start up Windows Connect the computer and printer using the USB cable, and turn on the power of the printer The printer is automatically detected by the computer. A [Found New Hardware] screen appears.
- Page 78 Set the supplied CD-ROM into the computer The “SETUP.exe” automatic execution program in the CD-ROM is not used. Exit this program. Connect the computer and printer using the USB cable, and turn on the power of the printer The printer is automatically detected by the computer.
- Page 79 Clicking [Run SETUP.exe] displays the [User Account Control] screen. Clicking [Allow] displays the card printer setup screen. Select the [Electronic Manual] checkbox on the card printer setup screen A Select the language to use from the [Language] pull-down menu Selecting [Japanese] switches the program to the Japanese version.
-
Page 80: Uninstall
If document printing is currently in progress, wait for all the jobs to complete. Start up Windows Connect the computer and printer using the USB cable, and turn on the power of the printer Cautions: Check to ensure that the printer connected via USB is recognized on the computer. - Page 81 If document printing is currently in progress, wait for all the jobs to complete. Start up Windows Connect the computer and printer using a LAN cable, and turn on the power of the printer Cautions: Do not connect a USB cable to the printer.
- Page 82 Check the details, followed by clicking [Finish] To change a printer, click [Back]. Cautions: In the case where multiple Ethernet (LAN) printer drivers are installed, the uninstaller deletes all of these printer drivers. An uninstallation complete screen appears. Click [Finish] Exits uninstallation.
- Page 83 Status Monitor Uninstalling the Status Monitor Cautions: Do not execute “Uninstall” if there are applications that are currently running. If document printing is currently in progress, wait for all the jobs to complete. Exit the status monitor Select [Uninstall Status Monitor] from [Start menu] Memo: If the [Register for start menu] checkbox is not selected during installation of the status monitor, delete using [Add or Remove...
-
Page 84: Ipsec
D The “Printer Certificate” and “Certification Authority Certificate” are issued by the certification authority. Install these on the PC. E Export the “Printer Certificate” and save it in a file. F Export the “Certification Authority Certificate” and save it in a file. - Page 85 After saving, this file will be downloaded as the “Printer Certificate File” when setting “Certificate Authentication” using the status monitor. ASCII characters that can be used for the password of the printer certificate of the printer are as follows. The maximum length is 255 characters.
- Page 86 Setup Memo: For procedures to set “Certificate Authentication” on the printer, refer to the section of the Status Monitor Settings. "File settings required for certificate authentication" (A page 116) Certification Authority Certificate File Cautions: Operate IPSec (IP Security) on Windows by following the instructions of the network administrator for the location where the printer is installed.
-
Page 87: Printer Driver Settings
6. YMCK+UV: Prints using the YMC ink and Resin K ink. Prints data set in the [UV ink] dialog using the UV ink. Cautions: Print error occurs if an ink that is not mounted to the printer is selected. Setup... - Page 88 Selecting [4.YMC+UV], [5.K+UV] or [6.YMCK+UV] in [Print mode] enables the [UV ink...] button. Enable the printer settings Enables the [Printer settings] dialog settings. Set the item in the [Printer settings] dialog. Unchecked : Prints with the printer settings disabled. Checked : Prints with the printer settings enabled.
- Page 89 [Printing area] Dialog Box Settings related to the printing area using the peel-off ink or areas not to be printed using all YMCKUV inks. About X=87.5 About Y=56.0 Rectangular region Printing area information. X coordinate that indicates the start of the area. (Unit: mm). Y coordinate that indicates the start of the area.
- Page 90 Setup [Color] Dialog Box Settings related to color adjustment. Brightness Brightness level. Contrast Contrast level. Hue level. Gamma Gamma level. [Default] button Restores the settings to the default values. [Look up table] Dialog Box Settings related to the look-up table. Name Registered name of the look-up table file.
- Page 91 [Extraction]-[Text]. Even when the same color is selected, the text in that color will be printed. MAC address position The network (Ethernet) MAC address of the printer is printed at the following specified position using the UV ink. A Upper Right:...
- Page 92 When [Page split] is not set, UV ink data is extracted from the YMC ink data, or the UV ink image file is used. MAC Address Position In the case of UV ink printing, the printer always prints the MAC address. The printing position of the MAC address can be set separately for the front and back sides using the printer driver.
- Page 93 42 pixel The above printing position setting for the MAC address is always effective regardless of the printer unit settings. The above measurements show the relative position from the starting point of the image. As such, the actual printing position on the card may be slightly different from the abovementioned measurements.
- Page 94 Cautions: The optimal retransfer and bend remedy settings vary according to the card type as well as environment in which the printer is used. Adjust the setting according to the actual environment. If the retransfer or bend remedy settings are different from the preset temperature of the printer, it may take a while before printing starts.
- Page 95 JIS Contact IC encoder ISO Magnetic encoder JIS Magnetic encoder Laminator Enable the settings Permits or forbids the [Enable the printer settings] functions in the [Print] tab. Printer settings Unchecked : Forbids the [Enable the printer settings] functions in the [Print] tab.
- Page 96 Setup Example of Printer Setting Single-sided Printing (Landscape) Application software Graphic: colored Text: black Printer Graphic: YMC ink Text: YMC ink + Resin K ink...
- Page 97 Single-sided Printing (Portrait) Application software Graphic: colored Text: black Printer Graphic: YMC ink Text: Resin K ink Setup...
- Page 98 Setup Double-sided Printing (Default) Application software Graphic: colored Text: black Printer Graphic: YMC ink Text: YMC ink + Resin K ink...
- Page 99 Double-sided Printing (Single-side Lamination) Application software Page 1 Graphic: colored Text: colored Page 2 Graphic: black Text: black Printer Front side Graphic: YMC ink Text: YMC ink Back side Graphic: Resin K ink Text: Resin K ink Memo: If page 2 is set as colored, printing is performed using the Resin K ink after dithering is complete.
- Page 100 Setup Single-sided UV Printing Application software Graphic: colored Text: black Clicking [UV Ink...] opens the [UV Ink] dialog box. Printer Graphic: YMC ink Text: YMC ink + Resin K ink UV1.bmp: UV ink MAC address: UV ink...
- Page 101 Page Split Application software Page 1 Graphic: colored Text: colored Page 2 Graphic: black Text: black Printer Graphic: YMC ink + Resin K ink Text: YMC ink + Resin K ink Setup...
- Page 102 Setup Example of Encode Setting Encoding Only (ISO Card) Application software Graphic: colored Text: black Printer Graphic: none Text: none Inline Encoding Non-contact IC encode data: NIC Contact IC encode data: IC ISO track 1 magnetic encode data: ISO...
- Page 103 Encoding and Printing (ISO Card) Application software Graphic: colored Text: black Printer Graphic: YMC ink Text: YMC ink + Resin K ink Inline Encoding Non-contact IC encode data: NIC ISO track 1 magnetic encode data: ISO Setup...
- Page 104 Setup Encoding and Printing (JIS Card) Application software Graphic: colored Text: black Printer Graphic: YMC ink Text: YMC ink + Resin K ink Inline Encoding Non-contact IC encode data: NIC JIS2 magnetic encode data: JIS...
- Page 105 Card Turn Over Illustration Turns over the card after loading Turns over the card after IC encoding Turns over the card after MG encoding Magnetic Contact IC Non-contact IC Eject Print Load encode encode encode Double-sided Logical configuration of printer...
-
Page 106: Port Monitor Settings
Port Name Name of the port. You can enter a name up to 24 characters. Printer List List of connected printers. The selected printer is used for printing the card. Cautions: The setting is incorrect if the following message appears. -
Page 107: Status Monitor Settings
The status monitor is software for displaying the printer status as well as specifying various printer settings. Cautions: The printer driver needs to be installed on the computer. You can install the printer driver using the CD-ROM supplied with the printer. - Page 108 Minimizes the status monitor to an icon. The icon is displayed in the taskbar. [Printer Status] Tab Displays the printer’s status. Information on the screen is automatically updated at regular intervals. Printer Status Ready mode. The printer is ready to start printing.
- Page 109 You can switch to the relevant printer when multiple printers are connected to a single computer. If the printer is not found or if you want to change the search criteria, refer to "Searching a printer" (A page 114) in the “[Printer Select] Tab”.
- Page 110 Display Contrast For setting the contrast of the printer’s operation panel display. Display Mode For setting the information to be displayed on the printer’s operation panel. Display Counter This is used for setting the type of counter to be displayed on the printer’s operation panel.
- Page 111 The different colors serve as a rough guide. The optimal value varies according to the card type as well as the environment in which the printer is used. Adjust the setting according to the actual environment. It may take a while for printing to start when the retransfer temperature is changed.
- Page 112 (for approximately 10 minutes) until the bendy remedy heating roller’s temperature has gone down. This is not a malfunction. Wait for the printer to switch to the Ready mode. When the [Disable] button is selected, the speed is automatically set to the maximum value of [+2].
- Page 113 Consult our authorized dealers on how to install the IC encoder. Version Displays the firmware version of the printer and laminator. If a laminator is not connected, [????????] will appear. Counter Displays the counter value of the printer.
- Page 114 B Click [Scan Printer] to display the registration confirmation dialog box. C Click [OK] to register the printer for the entered IP address to the pull-down menu. Registering printers for the IPv6 address A Select [IPv6], and enter the IPv6 address in the pull-down menu.
- Page 115 When only USB connection is used, there is no need to specify the security settings. USB connection does not support encrypted communication. It is not possible to specify the security settings for the printer unit without using a USB connection. For details on downloaded files to be used for the security settings, refer to "IPSec".
- Page 116 IPSec setting for the printer is complete after closing the screen. Sync Time clicking the [Sync Time] button sends out the current time of the PC to the printer. You can specify this setting via USB or network connection. Other Network Setting...
- Page 117 Test Print Test print uses the printer’s self-diagnosis function without making use of the printer driver. You can use it to verify whether the printer is functioning correctly. Select [Single Side] or [Both Sides], and click [Print] Test print starts.
-
Page 118: Inline Encoding
Inline encoding can be performed by enabling the settings in the [Encode] tab of the printer driver settings. "[Encode] Tab" (A page 94) Encoding data can be sent to the printer through the printer driver using the special character strings (prefixes) described below. This function is called “inline encoding”. - Page 119 Character Code List ASCII character code list Below is the list of usable ASCII character codes. Specify the text string to encode using the usable half-width characters for each of the unit codes. b4 b3 b2 b1 " & < >...
-
Page 120: List Of Error Codes
Actions (Reference Page No.) Replenish the cards. (A page 31) Install the card hopper. (A page 63) Close the door, and press K N B to reset the printer.(A page Install the cleaning unit. (A page 35) Wait until preheating is complete. - Page 121 Please consult our authorized dealers. Please consult our authorized dealers. Ensure that the printer driver’s ink setting matches the installed ink ribbon. (A page 87) Please consult our authorized dealers. Check the card specifications.
- Page 122 Please consult our authorized dealers. Check the card specifications. Please consult our authorized dealers. Check the card specifications. Please consult our authorized dealers. Ensure that the printer driver’s ink setting matches the installed ink ribbon. (A page 87) Check the printer connection.
-
Page 123: Frequently Asked Questions
MAC address. If the “Number of retransfer film panels” in the UV ink settings is set to “1 panel”, the printer will not print the image that is inside the MAC address printing area (top right or bottom left corner). - Page 124 LST1006-002A...