Table of Contents
Advertisement
Quick Links
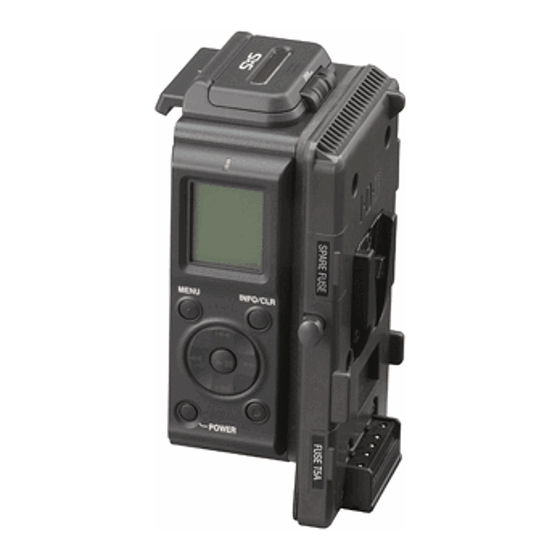
Memory Recorder
KA-MR100G
Thank you for purchasing this JVC product. Before
beginning to operate this unit, please read the
instructions carefully to ensure the best possible
performance.
For Customer Use:
Enter below the Serial No. which is located on the
body. Remain this information for future reference.
Model No. : KA-MR100G
Serial No. :
INSTRUCTIONS
LST0838-001A
Advertisement
Table of Contents

Related Manuals for JVC KA-MR100G


Summary of Contents for JVC KA-MR100G
- Page 1 Memory Recorder KA-MR100G Thank you for purchasing this JVC product. Before beginning to operate this unit, please read the instructions carefully to ensure the best possible performance. For Customer Use: Enter below the Serial No. which is located on the body.
-
Page 2: Getting Started
Getting Started FOR USA These are general IMPORTANT SAFEGUARDS and certain items may not apply to all appliances. Read all of these instructions. Save these instructions for later use. All warnings on the product and in the operating instructions should be adhered to. Unplug this appliance system from the wall outlet before cleaning. -
Page 3: Safety Precautions
Operation of this equipment in a residential area is likely to cause harmful interference in which case the user will be required to correct the interference at his own expense. CAUTION: CHANGES OR MODIFICAT IONS NOT APPROVED BY JVC COULD VOID USER’S AUTHORITY TO OPERATE THE EQUIPMENT. NOTE: The rating plate (serial number plate) is on this unit. - Page 4 (Business users) If you wish to dispose of this product, please visit our web page http://www.jvc.eu to obtain information about the take- back of the product. [Other Countries outside the European Union] If you wish to dispose of this product, please do so in...
-
Page 5: Table Of Contents
For reference purposes. : Indicates the page numbers or items to refer to. Contents of this manual ● JVC holds the copyright to this manual. Any part or all of this manual may not be reproduced without prior consent from the company. -
Page 6: Precautions
SxS memory card is used. The recovery feature does not guarantee successful recovery of the damaged files. JVC shall not be liable for any damage or loss of the recorded video clips. (We strongly recommend that you create a backup for important video clips.) -
Page 7: Name And Function Of Parts
Name and Function of Parts Access lamp Displays the status of the SxS memory card. Light off : SxS memory card is not inserted Green light : Data in the card is not being accessed Red light : Data is currently being accessed (e.g., recording, playback or formatting in progress) ●... -
Page 8: Lcd Panel Displays
Getting Started LCD Panel Displays During Recording or Stop Mode Displays the status screen. Modes SxS memory card is not inserted oSTOP Stop RREC Recording WSTBY Standby (pause) Remaining capacity Displays the remaining time (minutes) of the SxS memory card. Date Shows the date of the built-in clock. -
Page 9: Setup
For details, please refer to AConnecting IEEE1394B (A Page 7) Note: ● The KA-MR100G adapter (sold separately) is required to attach the memory recorder to a camcorder. Memo ● Two different types of battery adapters, manufactured by... -
Page 10: Connecting Ieee1394
Setup Connecting IEEE1394 There are 2 ways to connect the IEEE1394. Connecting via IEEE1394 Cable ● Connect the IEEE1394 cable to the KA-UM100G adapter and the IEEE1394 terminal of the camcorder. ● Set the [INT/EXT] switch to AEXTB. KA-UM100G adapter IEEE1394 cable Memo ●... -
Page 11: Inserting/Removing The Sxs Memory Card
Inserting/Removing the SxS Memory Card Note: ● This product does not support the USB interface ExpressCard. Use a recommended SxS memory card. (ASpecificationsB A Page 16) ● Do not insert the SxS memory card in the reverse direction. The card slot is designed such that the card cannot be inserted in the reverse direction. -
Page 12: Operation
Operation Recording Video Images of the Camcorder Using the Memory Recorder To record video images of the camcorder using the memory recorder, operate using the REC trigger button on the camcorder. Each time a recording is started and stopped, a clip is created in the SxS memory card. -
Page 13: Playing Video Images Recorded In The Memory Recorder
Playing Video Images Recorded in the Memory Recorder To play back video images recorded by the memory recorder, select a clip from the clip selection screen on the LCD panel of the memory recorder. The selected video clip is played back on the LCD monitor and viewfinder of the camcorder. -
Page 14: Menu
Menu Setting the Menu Screen [MENU] button [PREV]button [REV] button Procedures for Setting Values 1 Press the [MENU] button Menu screen Setting item Current setting value 2 Move the cursor ( ) to the item to be set by pressing the [NEXT] or [PREV] button 3 Press the [PLAY/STILL] or [FWD] button Current selected setting item Cursor... -
Page 15: Menu Screen Configurations And Functions
Menu Screen Configurations and Functions Values indicated in parentheses in the table below are default settings. Setting Item Setting Values SYSTEM RESOLUTION (720), 1080 FRAME/RATE RESOLUTION: When 720 is set (60p), 30p, 50p, 25p, 24p RESOLUTION: When 1080 is set (60i), 50i CONTRAST MAX, +4, +3, +2, +1, (0), -1, -2,... - Page 16 Menu Setting Item Setting Values TC SET2 (00:00:00:00) _ 23:59:59:29 TC PRESET (00:00:00:00) _ 23:59:59:24 (00:00:00:00) _ FF FF FF FF UB PRESET CLIP NAME PREFIX (Last three digit of the serial number + K) NUMBER RESET CLOCK1 UTC-12:00 _ TIME ZONE (UTC-05:00) _ UTC+14:00 DATE...
-
Page 17: Others
Others Warning Messages When warning messages appear on the LCD panel, take the following actions. WRITE Warning Messages PROTECT! Message Description CLOCK Appears when the clock is not set. SETUP Action: Set the clock when the [CLOCK1] MENU setting screen appears. WRITE Appears when the write-protect switch of PROTECT! -
Page 18: Troubleshooting
Others Troubleshooting Symptom Power does not turn Power is supplied from the DC INPUT terminal of the camcorder. Only the power of the camcorder is turned AOnB. Remaining battery level is insufficient. Unable to record or The IEEE1394 cable is not connected. play clip The [INT/EXT] switch setting of the KA-UM100G adapter is inappropriate. -
Page 19: Specifications
<SxS memory card> products SBP-8 (8 GB), SBP-16 (16 GB) and SBP-32 (32 GB) <IEEE1394 cable> CFS-6R016R09-07 etc. Please consult your authorized dealers. KA-UM100G adapter (sold separately) Weight: 0.145 kg ● Power, temperature, humidity and environment conforming to KA-MR100G. 1, Rubber sheet... -
Page 20: Utc Time Difference Chart By Region
UTC Time Difference Chart by Region Setting Values Time Zone UTC+14:00 UTC+13:30 UTC+13:00 UTC+12:30 UTC+12:00 New Zealand UTC+11:30 Norfolk Island UTC+11:00 Solomon Islands UTC+10:30 Lord Howe Is. UTC+10:00 Guam UTC+09:30 Darwin UTC+09:00 Tokyo UTC+08:30 UTC+08:00 Beijing UTC+07:30 UTC+07:00 Bangkok UTC+06:30 Rangoon UTC+06:00 Dhaka...