Table of Contents
Advertisement
Quick Links
Advertisement
Table of Contents
Troubleshooting

Related Manuals for Baumatic BFLW75


Summary of Contents for Baumatic BFLW75
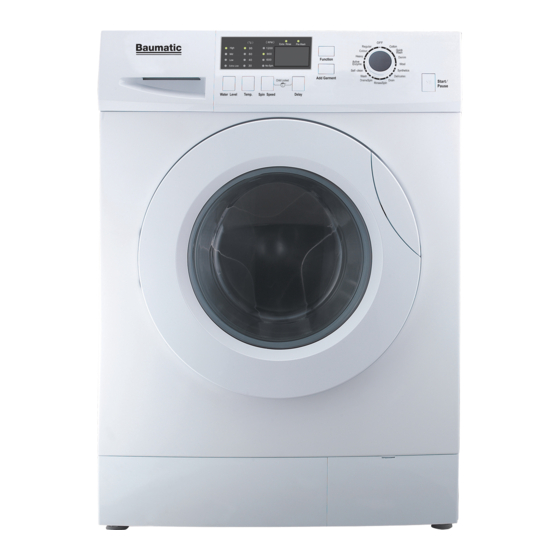
- Page 1 BFLW75 60 cm 7.5 kg Freestanding Washing Machine...
-
Page 2: Washing Machine
USER MANUAL FOR YOUR BAUMATIC BFLW75 60 cm 7.5 kg Freestanding washing machine NOTE : This User Instruction Manual contains important information, including safety & installation points, which will enable you to get the most out of your appliance. Please keep it in a safe place so that it is easily available for future reference;... -
Page 4: Table Of Contents
Contents Environmental note Important safety information 6 – 8 Specifications Description of the appliance 10 - 13 Control panel LED display Detergent drawer Preparing the wash cycle 14 - 18 Preparing your garments for washing A selection of wash care symbols Detergents and conditioners 15 - 16 Wash program table... -
Page 5: Environmental Note
Environmental note o The packaging materials that Baumatic uses are environmentally friendly and can be recycled. o Please discard all packaging material with due regard for the environment. -
Page 6: Important Safety Information
Important safety information Your safety is of the utmost importance to Baumatic. Please make sure that you read this instruction booklet before attempting to install or use the appliance. unsure information contained in this booklet, please contact the Retailer where you purchased your unit. - Page 7 Baumatic cannot be held responsible for any damage that may result. Avoid leaving bleach containing chlorine in the drum for...
- Page 8 Child Safety o Your washing machine should only be used by adults. You should not allow children in the area of the machine unsupervised. You should not let them touch the controls or play with the appliance. o This washing machine is not intended for use by persons (including children) with reduced physical sensory or mental capabilities, or lack of experience and knowledge, unless they have been given supervision or instruction concerning the use of...
-
Page 9: Specifications
Specifications o 15 wash programs o 7.5 kg wash load o 1200 rpm maximum spin speed o LED display o Electronic control operation o Delay start o Digital countdown indicator o Spin speed regulation o Temperature regulation o Wash phase indicator o Door locked indicator o Electronic aqua stop o Stainless steel drum... -
Page 10: Description Of The Appliance
Description of the appliance Accessories... -
Page 11: Control Panel
Control panel 1) Washing program selection dial. Use this dial to select the required washing program. 2) Start / pause button. Press this button to start or pause a washing cycle. 3) Water level selection button. Press this button to select the required water level according to the amount of laundry from the following options: High... -
Page 12: Led Display
9) Add Garment button. If you want to add a garment to the wash load during the cycle you can press this button to pause the wash cycle. The door will unlock and you can add the desired garments. Press the Start/Pause button to resume the wash cycle. (please refer to page 22) 10) LED display. -
Page 13: Detergent Drawer
Detergent drawer Main wash section This compartment should have detergent placed in it (you should also put a water softening agent in this section, if you use one). The detergent will be added to the drum at the start of the main wash program. -
Page 14: Preparing The Wash Cycle
Preparing the wash cycle Preparing your garments for washing o Your washing should be sorted out, according to the fabric type and the wash care symbol that is printed on the garment’s wash care label (see separate section on wash care symbols). o Your washing should also be sorted out according to the degree of soiling. -
Page 15: A Selection Of Wash Care Symbols
A selection of wash care symbols Washing Normal Normal Do not Wool Do not Bleachable temp temp temp bleach! seal wash! in cold 60°C 40°C 95°C water cleaning Hand Benzine All but TRI Do not Delicate Delicate wash only clean! temp temp solvents... - Page 16 Liquid detergent If you are using liquid detergent then all instructions on the detergent packaging should be followed. Low temperatures o The enzymes in biological washing detergents work best at low temperatures to provide excellent cleaning and stain removal results, but not as low as 20°C. o Liquid or gel detergents are particularly suitable for low temperature washing as they dissolve easier and quicker than powders or tablets.
-
Page 17: Wash Program Table
Wash program table Detergent Box Extra Pre- Wash Default Fabric Pre- Main Rinse Wash Cycle temp* Spin load Operation suggestions Wash Wash Time (°C) Speed capacity (hr:min) (kg) (RPM) Quick 1000- Option 0:28 Lightly soiled Option wash 1200 cotton load Cotton 1000- Option... -
Page 18: Wash Program Guidance
** Conditioner [Symbol] *** Energy test program according to AS/NZS 2040.1 & AS/NZS 2040.2: Cotton 60°C. This program is suitable for cleaning normally soiled cotton laundry and is the most efficient program. o Detergent and softener only need to be added when required. o The operation time of the appliance will change according to the water temperature, water level, amount of clothes, inlet water pressure and drain state. -
Page 19: Selecting A Wash Program
Selecting a wash program Setting a wash program o Use the washing program selection dial (1) to select the required program. o You can set the water level (3), temperature (4) and spin speed (5) by pressing the relevant buttons on the control panel. o If you wish to add an additional function such as a pre-wash or an extra rinse to the cycle, press the function button (8). -
Page 20: Setting A Single Wash
o The delay start time on the display informs you in how many hours the wash program will begin. 1) Use the program selection dial (1) to select the desired cycle. 2) You can adjust the water level (3), temperature (4) and spin speed (5) by pressing the appropriate buttons. -
Page 21: High Temperature Self-Clean
High temperature self-clean o The self-clean cycle is specially designed to clean the drum and internal components automatically improves machine hygiene. By selecting this program it applies a 95°C high temperature wash to ensure the machine does not accumulate any residues that remain after completing several wash cycles over a period of time. -
Page 22: Child Lock
Child lock Your appliance has a child lock option, if this is set, it will mean that nobody can alter the operation of the wash program once it has started. o When the appliance is in use, press and hold the child lock buttons (5) &... -
Page 23: Maintenance And Cleaning
Maintenance and cleaning In daily use o Once a wash cycle has completed, you should pull out the detergent drawer slightly, so it can dry out. o Leave the porthole door ajar for a short while after a wash cycle has completed. -
Page 24: Detergent Drawer
Detergent drawer Occasionally the detergent drawer should be cleaned, to remove any detergent residue that has built up. o Press the detergent drawer limit part and pull out the drawer at the same time to remove from the machine. o Detergent can also accumulate inside the detergent drawer recess, so you should also clean this out using warm soapy water and a soft cloth. -
Page 25: Emergency Drainage
Emergency drainage IMPORTANT: Switch off your washing machine and disconnect the plug from your mains supply. 1) Open the filter cover panel and place a container close to collect any water spillage. 2) Turn the emergency drain hole cap clockwise. 3) Pull out the emergency drainage pipe 4) Remove the bung from the end of the drainage pipe... -
Page 26: Cleaning The Drain Pump Filter
Cleaning the drain pump filter IMPORTANT: Switch off your washing machine and disconnect the plug from your mains supply. You should clean out the filter approximately every ten washes. If the drain pump filter is not cleaned regularly, then your appliance may find it difficult to pump out water efficiently. -
Page 27: Cleaning The Water Inlet Filter
Cleaning the water inlet filter o Clean the filter when the water is slow to fill or error code E10 is displayed o Always pull the power plug out before cleaning. 1) Unscrew the inlet water pipe. 2) Clean with a tooth brush. Winter storage o You should install your appliance in a location where it will not be subjected to freezing temperatures. -
Page 28: Removing Stains
Removing stains Garments that are covered in stains, grease or are heavily soiled may need to be pre-washed or soaked before being placed inside of the washing machine. o Soaking helps to remove protein-type stains, like milk or grass. o Pre-washing helps to loosen soil before the main wash. Stain removal rules o Use warm water for soaking or pre-washing stained laundry. - Page 29 Chocolate Leave your clothes in cold water and rub with soap or and cocoa detergent, wash it in the highest temperature that the material type can endure. If there is still a stain of oil left, wipe with oxygenated water (in proportion of 3%). Tomato Remove the dried pieces without ruining the material, then paste...
-
Page 30: Poor Wash Results - Troubleshooting
Poor wash results My garments are looking grey and there are limescale deposits present in the drum of my washing machine. o There is not enough detergent being added. o The incorrect detergent is being used. o Stains are not being pre-treated. o The correct wash program or wash temperature was not selected. -
Page 31: Installation
Installation IMPORTANT: THIS INSTALLATION MUST COMPLETED BY A SUITABLY QUALIFIED PERSON. BAUMATIC ONLY SANCTION INSTALLATION GIVEN THIS INSTRUCTION MANUAL. SHOULD KEEP THE TRANSIT PACKAGING, IN CASE YOU NEED TO TRANSPORT THE MACHINE IN THE FUTURE. Removing the transit bolts IMPORTANT: Before installing or operating the washing machine, YOU MUST remove the transit bolts that hold the drum in position whilst the appliance is being transported. -
Page 32: Locating Your Washing Machine
Locating your washing machine o Before commencing installation, check the location where you intend to install the appliance. You should make sure that you have everything in place that is necessary for the correct installation. o Do not place or store your washing machine in a location where the ambient temperature could fall below 0°C, otherwise the water in it could freeze up. -
Page 33: Connecting To The Mains Water Supply
Connecting to the mains water supply IMPORTANT: The washing machine should never be connected to the water mains using an existing inlet hose, YOU MUST utilise the inlet hose that is provided with the appliance. Your appliance should only be connected to a cold water supply. 1) Take out the attached inlet hose. -
Page 34: Connecting To The Water Outlet
Connecting to the water outlet 1) Please use an elbow to bend the drain hose at a proper angle and fix securely. 2) The correct position of the drain hose is one which will prevent water leaking onto the floor or other surfaces. -
Page 35: Levelling The Appliance
Levelling the appliance o Place the washing machine on a solid and level floor surface. DO NOT PLACE THE WASHING MACHINE ON A CARPET OR A SUSPENDED FLOOR. o If the floor is obviously uneven, the appliance needs to be adjusted to prevent the drum from inclining or the machine from moving while in use. -
Page 36: Before First Use Maintenance Wash
Broken or damaged power leads must only be replaced by a suitably qualified person. A power lead of a similar type must be used in replacement. IMPORTANT: We do not recommend that this appliance is connected to an extension lead. Before first use maintenance wash o When your washing machine has been correctly installed, we recommend that you perform a high temperature self-clean cycle,... -
Page 37: General Troubleshooting
If a fault code reappears after following the above advice and clearing the fault code. You should turn washing machine off. Disconnect the appliance from your mains supply. Then arrange authorised technician attend appliance. should contact Customer Care Department. TECHNICIAN ATTENDS DURING WARRANTY PERIOD AND FINDS THAT A FAULT... - Page 38 The washing machine fills o Make sure the end of the drainage pipe is higher and empties at the same than the water level in the machine. time. Check if the drainage pipe have been sealed. If they have been, there will be poor ventilation which causes siphoning.
- Page 39 Or any installation other than the one specified by Baumatic Ltd. has been completed. Please refer to the conditions of the warranty that appear on the warranty card that you receive with the appliance.
-
Page 43: Contact Details
Service Telephone 1800 444 357 Website www.thinkappliances.com Applico Ltd. Private bag 92900 Onehunga, Auckland, New Zealand 1061 Website www.applico.nz United Kingdom Baumatic Ltd., Baumatic Buildings, 6 Bennet Road, Reading, Berkshire RG2 0QX United Kingdom Sales Telephone (0118) 933 6900 Website: www.baumatic.co.uk...