Buffalo TeraStation 5000 User Manual
Hide thumbs
Also See for TeraStation 5000:
- User manual (229 pages) ,
- Specifications (2 pages) ,
- Specifications (2 pages)
Table of Contents
Advertisement
Quick Links
Download this manual
See also:
User Manual
Advertisement
Table of Contents

Related Manuals for Buffalo TeraStation 5000


Summary of Contents for Buffalo TeraStation 5000
- Page 1 TeraStation 5000 User Manual www.buffalotech.com 35020018-05 2014-05...
-
Page 2: Table Of Contents
Contents Chapter 1 Installation ..........10 Diagrams ..................10 Installation ..................12 Turning the TeraStation On and Off..........15 Changing the Administrator Password ........16 Recovery Drive ................18 For Initializing Settings ................18 For Resetting Password ................18 Chapter 2 Configuration ..........20 Opening Settings ................ - Page 3 Chapter 4 Managing Your Storage ......36 RAID Arrays ..................36 Working with RAID Arrays ............37 Using JBOD ....................37 Changing RAID Mode ................38 Configuring a Hot Spare ................39 RMM (RAID Mode Manager) ..............40 RAID Scanning..................42 Adding an External Hard Drive ............ 43 Dismounting Drives ..............
- Page 4 Hard Drive Replacement Examples ............64 Chapter 5 Backup ............69 Back Up from the TeraStation ............69 Preparing a Backup Destination .............69 Configuring a Backup Job ...............70 Replication ..................73 Failover ..................75 Ethernet Cable Connection Methods .............76 Configuring Failover ................77 Backing Up Your Mac with Time Machine ........
- Page 5 Playing Files .....................92 Connected DLNA-compatible Devices ...........92 Streaming to DLNA-compatible Devices ..........93 Disabling Playback from Specific Devices ..........93 iTunes Server ................. 94 Squeezebox Server ............... 96 Chapter 9 Surveillance Server ........98 Getting Started ................98 Installing Client Tools ................98 Connecting Devices to the Network ............99 Enabling Surveillance Cameras ..............99 Enabling the Free License ..............101...
- Page 6 Surveillance Video Manager ..............115 Network Activity ..................116 Mini Vault Stats ..................116 Activating Additional Licenses ..........117 When the TeraStation is Connected to the Internet ......117 TeraStation Not Connected to the Internet .........118 Troubleshooting ................121 Chapter 10 Advanced Features ........ 123 Antivirus Software ..............
- Page 7 Setting Up a Printer with Windows XP ..........135 TeraSearch ................... 136 Offline Files .................. 137 DFS ....................139 Accessing from an NFS Client ............. 140 Encrypting Data Transmission ........... 142 Encrypting Settings Data ..............142 Encrypting FTP Transfer Data ...............142 SSL Keys ....................142 Web Server ...................
- Page 8 Beep Alerts .................. 154 LCD and LEDs ................155 Jumbo Frames ................155 Changing the IP Address ............156 Chapter 11 Utilities ............ 158 NAS Navigator2 for Windows ............. 158 Mount as Network Drive................160 Changing the IP Address ...............161 NAS Navigator2 for Mac ............. 161 Mount as Network Drive................162 Changing the IP Address ...............163 iSCSI Connection Tool ..............
- Page 9 Chapter 13 Regulatory Compliance Information ..172 United States ..................172 Europe .....................172 台灣........................... 174 中国......................174...
-
Page 10: Chapter 1 Installation
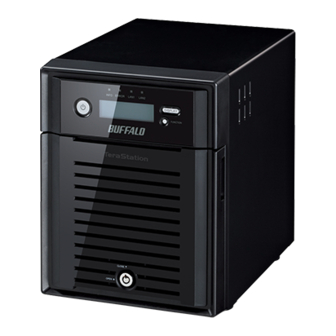
Chapter 1 Installation Diagrams TS5800D TS5600D TS5400D... - Page 11 TS5200D TS5400R Power Button To power on, connect the power cable and wait for 10 seconds, then press the power button. To power off, press the power button twice. Info LED If there is a status message, the amber info LED will light up. Check the LCD panel to see the status message. Error LED If there is an error, the red error LED will light up.
-
Page 12: Installation
Compatible Buffalo USB 3.0 hard drives can be connected. USB hubs are not supported. USB 2.0 Port Compatible Buffalo USB hard drives, USB flash drives, digital cameras, and USB UPS connection can be connected. USB hubs are not supported. LAN Port 1 Use an Ethernet cable to connect this port to your network. - Page 13 Follow the steps on the screen to connect the TeraStation’s Ethernet and power cables and turn it on. Note: Use LAN port 1 for initial setup. After setup, you may connect a second cable to LAN port 2. If you use LAN port 2, configure the IP address at Network - IP Address in Settings.
- Page 14 Clocks for the network devices may run at slightly different speeds. If these devices get out of sync it may cause network problems. • Buffalo is not responsible for any losses and damages incurred from using the ntp.jst.mfeed.ad.jp service or...
-
Page 15: Turning The Terastation On And Off
service outages. • If the TeraStation cannot automatically obtain the time from an NTP server, check its DNS settings. If the NTP server is specified by a hostname instead of an IP address, make sure that a DNS server address is configured in Network - IP Address. -
Page 16: Changing The Administrator Password
Enter the username and password, then click OK. Note: The default username and password are “admin” and “password”. Settings will open. Click at the top-right of Settings and choose either Restart or Shut Down. When all the LEDs on the front of the TeraStation turn off, the shutdown process is complete. Changing the Administrator Password After initial setup, follow this procedure to change your password. - Page 17 Click Easy Admin. Click Change Password. If this screen is displayed, enter the current password and click OK. The default password is “password”. Enter the new password (twice).
-
Page 18: Recovery Drive
Click OK. You have changed the admin password. Recovery Drive To initialize all of the TeraStation’s settings, or just restore the admin password to its factory default value, create the recovery drives as described below. For Initializing Settings A system initialization drive can reset all settings to their default values. Notes: •... - Page 19 Note: All data on the USB flash drive will be erased! In Settings, navigate to Management - Restore/Erase - USB Options. Select Create a USB drive for resetting the admin password. Select the USB memory device from “Target USB drive” list, then click Execute. Enter the 4 digit confirmation number and click OK.
-
Page 20: Chapter 2 Configuration
Chapter 2 Configuration Configure and administer your TeraStation using the Settings interface, accessible from a browser window. Open the interface using the procedure below or type the TeraStation’s IP address in the URL field of your browser. Within Settings, the Easy Admin page gives you quick access to commonly used settings. Note: Internet Explorer 9, Firefox 18, Google Chrome 24, Safari 5, and later are supported. -
Page 21: Opening Easy Admin
Notes: • If the time-out period is set to “10 minutes”, you will be logged out of Settings after 10 minutes of inactivity. • Click Secure Connection to log in with an encrypted connection. Settings will open. Notes: • Username/Password Combinations: Username Password Settings Available... - Page 22 Click Easy Admin. The Easy Admin screen will open. Notes: • If you click any buttons , you will need to enter a username and password.
-
Page 23: Chapter 3 Access Restrictions
Chapter 3 Access Restrictions You may restrict access to specific shared folders, including external USB drives. Notes: • Access restrictions can be set separately for each shared folder, but not for folders within the shared folders. • Configure access restrictions through Settings. Configuring access restrictions through Windows is not sup- ported and may cause unexpected behavior. -
Page 24: Recycle Bin
Notes: • Names may contain up to 27 alphanumeric characters, hyphens (-), and underscores (_). Do not use a symbol as the first character in a name. • The description may contain up to 75 alphanumeric characters, hyphens (-), underscores (_), and spaces. Do not use a symbol or space as the first character. -
Page 25: Adding Users
Accounts Your TeraStation username and password should be the same as your Windows username and password. If they are different, you may not be able to access folders on the TeraStation with access restrictions configured. Read-only Shares By default, new shares are set with read & write access, but you may change the attribute to Read Only in Attribute. Read-only shares and HFS+ formatted USB hard drives will have “Read-only”... -
Page 26: Adding Groups
• The description may contain up to 75 alphanumeric characters, hyphens (-), underscores (_), and spaces. Do not use a symbol or space as the first character. • When setting users with access privileges, a maximum of 300 users, including “admin” and “guest”, can be registered in the TeraStation. -
Page 27: Access Restrictions
Notes: • Group names may contain up to 20 alphanumeric characters, hyphens (-), underscores (_), and periods (.). Do not use a symbol other than an underscore (_) as the first character. • Group descriptions may contain up to 75 alphanumeric characters, hyphens (-), underscores (_), and spaces. Do not use a symbol or space as the first character. - Page 28 Click Edit. Enable “Access Restrictions”. Select the level of access for the user or group you added. : Read and write access allowed Read access allowed : Access prohibited Click OK. Notes: • The example above shows access restriction by user. To restrict access by group, click the Local Groups tab and select group permissions.
-
Page 29: Active Directory
• Configure hidden and read-only file attributes in Settings. Configuring them from within Windows is not supported and may cause unexpected behavior. • Folder and workgroup names whose names contain non-Roman characters may not be displayed correctly. • If shared folders are accessed from a Macintosh, information files for the Macintosh may be generated automatically. - Page 30 Click Yes. Enter the desired settings, then click OK. Choose Folder Setup. Click a shared folder that you want to set access restrictions for. Click Edit. Enable “Access Restrictions”. Select the level of access for the user or group. : Read and write access allowed : Read access allowed : Access prohibited Click OK.
-
Page 31: Nt Domains
• The TeraStation supports a domain environment with a maximum of 1000 users and 1000 groups. 10,000 us- ers and 10,000 groups can be downloaded from the domain controller but are not supported. • To use the TeraStation as a member server in an Active Directory domain, the TeraStation should be logged in to the domain and accessed from a computer that is not a member of the domain with a valid domain ac- count. - Page 32 Click to the right of “Folder Setup”. Click a shared folder for which you want to set access restrictions. Click Edit. Enable “Access Restrictions”. Select the level of access for “Domain Users” or “Domain Groups” you added. : Read and write access allowed : Read access allowed : Access prohibited Click OK.
-
Page 33: Delegating Authority To An External Smb Server
• If FTP is enabled, local and domain access restrictions from the NT domain network do not work. Use user access restrictions instead. • Don’t disable the SMB protocol while an NT domain server is used for access restrictions. If you do, you will need to enable SMB again and reconfigure the NT domain settings from scratch. - Page 34 A shared folder for authentication will be created on the TeraStation. Users registered to the specified authentication server are automatically registered as users on the TeraStation when they open the shared folder for authentication. You can also register users directly. Connect to the authentication folder via SMB, not FTP or AFP.
- Page 35 matically, select that user and click Delete External User. • When connecting through AFP or FTP, always use an IP address. Using a server name may cause problems with authentication. • To specify a server from another subnet, enter its IP address. •...
-
Page 36: Chapter 4 Managing Your Storage
Chapter 4 Managing Your Storage RAID Arrays TeraStations support many types of RAID. The type of RAID arrays available for use depends on how many drives are installed in your TeraStation. TeraStation Default RAID Mode TS5800D TS5600D RAID 5 TS5400D TS5400R TS5200D RAID 1... -
Page 37: Working With Raid Arrays
same time, your data is lost. RAID 51 RAID 51 arrays are available for TeraStations with 6 or more hard drives. In this mode, two RAID 5 arrays are combined into a RAID 1 array. The total usable space for 6 drives in a RAID 51 array is 2 x the capacity of the smallest drive. -
Page 38: Changing Raid Mode
Select the array to delete. Click Delete RAID Array. Once JBOD is configured, create shared folders on each drive to use them. Changing RAID Mode To change the RAID mode, first put the drives in JBOD. Select RAID. Click the array to delete. Note: If the “RAID Mode”... -
Page 39: Configuring A Hot Spare
Note: Normally, after a RAID array is created, it is “resynced”, which optimizes the array, making it more stable. The resyncing process takes about 1 hour per terabyte of space in the array. File transfers will be slower during this period, but the array will remain fully usable. “RAID I17 ARRAYx Resyncing” will be shown on the LCD display during the resync. -
Page 40: Rmm (Raid Mode Manager)
Click Set as a hot spare. Step through the wizard. When the “Confirm Operation” screen opens, enter the confirmation number and click OK. Notes: • To turn the hot spare back into a normal disk, choose Set as a normal disk. •... - Page 41 Set the RAID mode to “RAID 1”. Check “Add a disk to RAID array with RMM. Your data will be preserved. ” . Select the drive on which you do not want to erase data. Select the drive to add to the RAID array. Click Create RAID Array.
-
Page 42: Raid Scanning
Select the drive to add to the RAID array. Click Create RAID Array. The “Confirm Operation” screen will open. Enter the confirmation number, then click OK. Changing the RAID Mode while Adding a Drive Select the drive you want to add to the RAID array and choose the mode for the array. Enter the “Confirm Operation” number and click OK. -
Page 43: Adding An External Hard Drive
• Digital cameras • USB-connected UPSs • USB printers Buffalo external USB drives are recommended. These devices are not supported: • DUB and DIU series drives • Hubs, mice, and keyboards Connect only one device to each USB port of the TeraStation. Some external drives with automatic power-on don’t turn on automatically when connected to the TeraStation. -
Page 44: Dismounting Drives
Dismounting Drives If the TeraStation is powered on, dismount drives (internal and external) before unplugging them. You may dismount external drives with the function button, or any drive from Settings. If the TeraStation is off, then all drives are already dismounted and may be unplugged safely. Note: Do not dismount internal drives while a RAID array is rebuilding or RMM is being configured. -
Page 45: Checking Drives
Note: To remount the drive, unplug it and then plug it back in. Checking Drives A disk check tests the data on a drive in the TeraStation or connected via USB for integrity. Errors are fixed automatically. With large drives, a disk check may run for many hours. Shared folders cannot be accessed during a disk check. -
Page 46: Formatting Drives
The S.M.A.R.T. information for the drive will be displayed. Different information may be displayed depending on the brand of drives in your TeraStation. Critical attributes are displayed in bold. Attributes with current value less than or equal to the threshold value may be significant. If an attribute reports a failure, or has had one in the past, it will be displayed in the status column. -
Page 47: Encrypting Drives
Select a format type, then click Format. The “Confirm Operation” screen will open. Enter the displayed number, then click OK. Depending on the size of your drive, the format may take several minutes or several hours to complete. “Formatting” will be displayed on the LCD display until the format is complete. Notes: •... -
Page 48: Media Cartridges
Media Cartridges If configured as a media cartridge, an internal drive can be used as a removable storage device in the same way as an external drive. Media cartridges can be unplugged and connected to a different TeraStation with all data intact. To configure a drive as a media cartridge, check “Media Cartridge”... -
Page 49: Disk Quotas
The “Confirm Operation” screen will open. Enter the displayed number, then click OK. All data on the TeraStation will be permanently erased. Note: If LVM is enabled when running a complete format, the process may fail. Disable LVM and try again. Disk Quotas Notes: •... -
Page 50: Quotas For Groups
Note: If you change the primary group, restart the TeraStation to apply the quota settings. Click Close. Quotas for Groups Follow the procedure below to limit the space for shared folders that each group can use. In Settings, click to the right of “Groups”. Select the group whose space will be limited. - Page 51 Select the drive or array where the volume will be located and click Enable LVM on Volume. The “Confirm Operation” screen will open. Enter the displayed number, then click OK. Click OK. Click Edit under “NAS Volume”. Click Create Volume. Configure the desired settings, then click OK.
- Page 52 Click OK. Click Close. Click Close. Navigate to File Sharing - Folder Setup. Click Create Folder. Configure the settings. Select the volume that you created and click OK.
-
Page 53: Using The Terastation As An Iscsi Device
Using the TeraStation as an iSCSI Device Introduction iSCSI is a protocol for carrying SCSI commands over IP networks. Unlike traditional SAN protocols such as fibre channel, which requires special-purpose cabling, iSCSI can be run over long distances using existing network infrastructure. - Page 54 Click Close. Connect the new volume. The process for this will depend on your iSCSI software. Procedure using Buffalo’s iSCSI Connection Tool Install the iSCSI Connection Tool on your computer from the CD supplied with the TeraStation, or download it...
- Page 55 Click Start - All Programs - BUFFALO - iSCSI Connection Tool - iSCSI Connection Tool. For Windows 8.1 and Windows 8, click the iSCSI Connection Tool. Click Register iSCSI Device, select the volume to connect, and click Connect. Notes: • If you will use the TeraStation regularly, check “Connect on Start Up” before connecting.
-
Page 56: Using The Iscsi Connection Tool
Create multiple LVM volumes, then create multiple iSCSI volumes. You can create up to 32 volumes. Download and install the iSCSI Connection Tool from www.buffalotech.com. Launch the tool at Start - All Programs - BUFFALO - iSCSI Connection Tool - iSCSI Connection Tool. For Windows 8.1 and Windows 8, click the iSCSI Connection Tool. - Page 57 Note: If access restrictions are configured, enter your username and password. Select the volume to be connected and click Connect. The connected volume is added as a local drive in Computer (or My Computer). Repeat these steps on each computer to connect multiple volumes. Note: If using Windows XP or Windows 2000, use LVM to create volumes that are 2 TB or smaller.
- Page 58 To disconnect the TeraStation, disconnect the volume and remove the registration as shown below. Click Start - All Programs - BUFFALO - iSCSI Connection Tool - iSCSI Connection Tool. For Windows 8.1 and Windows 8, click the iSCSI Connection Tool.
-
Page 59: Creating And Expanding Volumes
Creating and Expanding Volumes Creating an iSCSI Volume Up to 32 iSCSI volumes are supported. Each individual iSCSI volume can be connected to different computers (a single iSCSI volume cannot be connected to multiple computers). Notes: • When an iSCSI volume is deleted, all data contained in the iSCSI volume is erased. Before changing settings, back up any important data. -
Page 60: Disconnecting Volumes
Click OK. Click Close. Disconnecting Volumes From Settings, you may temporarily disconnect iSCSI volumes from any initiators and clients. Navigate to Drives - iSCSI. Select the iSCSI volume to disconnect and click Disable Connection. To reconnect the volume, click Enable Connection. Similarly, you may connect or disconnect a volume from the editing page by enabling or disabling Volume Connection. -
Page 61: Setting Access Restrictions
Setting Access Restrictions A username and password can be set following the procedure below for the entire TeraStation iSCSI volume or for each volume. When the access restrictions are set, the system asks for entry of a username and password when the TeraStation is connected by the iSCSI Connection Tool. - Page 62 • If using the iSCSI Initiator from Windows 8.1, Windows 8, Windows 7, Windows Vista, or Windows Server 2008, configure the CHAP login information to allow searching for or connecting to targets. Click Close. Setting Access Restrictions for Individual Volumes In Settings, click Drives.
-
Page 63: Hard Drive Replacement
If you remove the drive without properly dismounting it, data may be lost or the TeraStation may malfunction. • Use a Buffalo OP-HDS series drive of the same size or larger for the replacement drive. If a larger drive is used, the extra space will not be usable in a RAID array. -
Page 64: Hard Drive Replacement Examples
Hard Drive Replacement Examples Drive Replacement (using JBOD or a redundant RAID mode such as RAID 1, 5, or 6 with auto-shutdown disabled) This section describes replacing a drive with the TeraStation Open the front cover with the included key. The failed drive’s status LED will be glowing red. - Page 65 Insert the new drive in the empty slot. Slide the drive in with the locking mechanism open. Swing the lock back down until it clicks into place.
- Page 66 When the replacement hard drive is recognized, the status LED will flash red and the message “Press FuncSW I31 New Disk x ready” will be displayed on the LCD panel. Hold down the function button on the front of the TeraStation for 3 seconds until it beeps. For RAID 1, 5, or 6: The TeraStation will start rebuilding the RAID array automatically.
- Page 67 start rebuilding the RAID array automatically. It takes about 5 minutes before the message “RAID I18 ARRAYx Rebuilding” is displayed. For RAID 51 or RAID 61: The TeraStation will start rebuilding the RAID array automatically. After a few minutes, the message “RAID I18 ARRAY x Rebuilding”...
- Page 68 The failed drive’s status LED will be glowing red. Push its unlock button and swing the lock mechanism out. Pull out the drive cartridge and remove it from the TeraStation. Insert the new drive in the empty slot. Slide the drive in with the locking mechanism open. Swing the lock back down until it clicks into place.
-
Page 69: Chapter 5 Backup
Chapter 5 Backup Back Up from the TeraStation You can back up TeraStation folders to: • A different folder on the TeraStation • Another LinkStation on the network • Another TeraStation on the network You can also configure backup jobs from Easy Admin. Preparing a Backup Destination First, configure a folder as a backup destination. -
Page 70: Configuring A Backup Job
Click Add, enter the IP address of the target LinkStation or TeraStation, and click Close. If your setup meets the requirements below, you don’t have to configure these settings: • The source and target TeraStations are on the same network. •... - Page 71 Click Create New Job. Note: Up to 8 backup jobs can be configured. Select backup settings such as date and time to run. The following types of backup jobs may be selected: Type Files included All files in the source will be backed up to the destination. You can specify how many backup versions to keep from 1–400, or select “Unlimited”...
- Page 72 Type Files included The first backup job runs like a normal backup. As each additional backup Overwrite (differential) job runs, files are added to and deleted from the backup folder. The backup destination folder is always the same size as the backup source folder. Each time a backup is executed, management information is stored, and only files that have changed are copied or deleted.
-
Page 73: Replication
Notes: • Backup targets may include “(LAN1)” or “(LAN2)”, indicating which LAN port will be used for the backup job. • If you will use the same folder for both Amazon S3 remote replication and as a backup target folder, create a new subfolder under “\wbfs\amazons3”. - Page 74 Click Add. Click Browse under “Replication Source”. Select the shared folder that will be the replication source, then click OK. Click Browse under “Replication Target”. Select the shared folder that will be the replication target, then click OK.
-
Page 75: Failover
Note: Replication targets may include “(LAN1)” or “(LAN2)”, indicating which LAN port will be used for the replication task. Click OK. Click Yes. Notes: • A maximum of 64 shared folders can be configured for replication. • Shared folders with a backup password set cannot be selected as replication targets. •... -
Page 76: Ethernet Cable Connection Methods
Notes: • Use identical model and capacity TeraStations for the main TeraStation and backup TeraStation. If the capac- ity of the main TeraStation is larger than that of the backup TeraStation, a “Replication I33 ReplicateFailure” error will occur. • All drive bays of a TeraStation should be occupied if it will be used for failover. Failover will not work if a drive is missing from any bay. -
Page 77: Configuring Failover
• Select LAN port 2 for the backup target and for the backup LAN port. • This is fault-tolerant if network disconnections occur. The main and backup TeraStations should be the same model and capacity. Use fixed IP addresses for both TeraStations. -
Page 78: Backing Up Your Mac With Time Machine
main TeraStation’s settings and click OK. • Ethernet frame size settings for main and failover TeraStations should be 1500 bytes. To change the Ethernet frame size, navigate to Network - IP Address, click the LAN port and Edit, and change the Ethernet frame size to “1500”... - Page 79 Click Edit. Select AFP (Mac) from LAN Protocol Support and click OK. Click OK. Click Close. Click Backup. Click the icon to the right of “Time Machine”. Click Edit. Click Browse. Select the shared folder that you set in the previous step, then click OK. Click OK.
- Page 80 Click Time Machine. Click Choose Backup Disk. Select the TeraStation, then click Use for Backup. Enter a username and password with the rights to access the shared folder of the TeraStation, then click Connect. Note: If access restrictions are not configured on the target share, log in with the administrator account. The default username and password for the administrator account are “admin”...
-
Page 81: Copying From A Usb Device
Copying from a USB Device Use Direct Copy to copy from a USB device directly to the TeraStation. Note: To use Direct Copy, connect only one USB device at a time. These devices are supported: • USB mass storage devices •... -
Page 82: Amazon S3
When the copy operation is finished, the access LED of the USB device will stop flashing. Hold down the function button for 6 seconds to dismount the device. The blue LED will go out and the and the device may be removed safely. - Page 83 Click Close. Move the Amazon S3 switch to the position to enable Amazon S3. Notes: • Enter the path from the “Target Folder” field in a browser window to access the files saved to Amazon S3. • To use after the network was temporarily disconnected, click Remount. •...
-
Page 84: Chapter 6 Remote Access
Chapter 6 Remote Access WebAccess WebAccess is a software program for accessing the files in the shared folder of your TeraStation from your computer, smartphone, or tablet through the Internet. Notes: • Be careful when configuring WebAccess. Certain settings can make the files in the shared folder available to anyone on the Internet, without any access restrictions. - Page 85 • You may use the default BuffaloNAS.com registration, or disable to use a different DNS server. • Choose a “BuffaloNAS.com name” and “BuffaloNAS.com key” for your WebAccess account. Names and keys may use 3 to 20 alphanumeric characters, underscores (_), and hyphens (-). •...
-
Page 86: Webaccess Remote
Use Inherited Allow Allow All Groups WebAccess Public Mode Folder Anonymous and Users Permissions Folder Setup Read Read Read Read Read Read Folder Attribute & & & Only Only Only Write Write Write Not logged in User with read & write access User with read-only access WebAccess Account... -
Page 87: Ftp
Note: The selected folder is used internally by “WebAccess Remote”. Files are not added to this folder and the amount of used space does not increase. You may choose to enter a BuffaloNAS.com name or an external DNS/IP address. If “Use external DNS/IP address”... - Page 88 click OK. Accessing the TeraStation with an FTP client: • To access the TeraStation via FTP, configure your FTP client software with the following settings: Hostname: IP address of the TeraStation Username: The TeraStation’s username Password: The TeraStation’s password Port: 21 •...
-
Page 89: Chapter 7 Bittorrent
Chapter 7 BitTorrent BitTorrent is a protocol for distributing large amounts of data efficiently. The information in this chapter is for users who are familiar with BitTorrent. Note: Use compatibility mode to use the download manager with Windows 8.1 and Windows 8. Configuration In Settings, click Applications. - Page 90 Move the BitTorrent switch to the position to enable BitTorrent. Click the icon to the right of “BitTorrent”. Click Open Download Manager. The default username is “admin” and the default password is blank (no password). The download manager will open.
-
Page 91: Chapter 8 Multimedia
Chapter 8 Multimedia DLNA DLNA is a set of guidelines for sharing digital media. The TeraStation includes a DLNA server compliant with the DLNA guidelines. The movies, photos, and music saved on this product can be played back on DLNA-compliant TVs, stereo equipment, game consoles, and other devices within the network. -
Page 92: Playing Files
Select an interval for DLNA server database updates and click OK. Playing Files To play back content from a DLNA-compatible device: Connect the DLNA-compatible device to the same network as the TeraStation and turn it on. Select the TeraStation in the software of the DLNA-compatible device. Select the content to be played back. -
Page 93: Streaming To Dlna-Compatible Devices
A list of the MAC addresses, IP addresses, and device names of the DLNA-compatible devices connected to the same network as the TeraStation is displayed. If your device is not listed, click Refresh Database. Streaming to DLNA-compatible Devices When new movies, photos, and music files are added to the TeraStation’s DLNA folder, the database must be updated before the new file can be streamed. -
Page 94: Itunes Server
In Settings, click Services. Click the icon to the right of “DLNA Server”. Click DLNA Client Access Permissions. Uncheck the devices you do not want to allow to play media and click OK. Supported File Types The TeraStation supports DLNA streaming of files with the extensions below. Types File Extensions .avi, .divx, .asf, .mpg, .mpe, .m1v, .vob, .mts, .m2ts, .m2t, .mpeg, .mpeg2, .vdr, .spts, .tp, .ts, .3gp,... - Page 95 Click the icon to the right of “iTunes Server”. Click Edit. Click Browse. Select the shared folder that you want to make available to iTunes, then click OK. Click OK, then OK again. Move the iTunes server switch to the position.
-
Page 96: Squeezebox Server
Squeezebox Server Squeezebox is a network music player by Logitech that can play back music stored on your network using your wired or wireless LAN without a computer. Squeezebox supports mp3, flac, ogg, he-aac v2 and wma. Configuration In Settings, click Services. Move the Squeezebox server switch to the position to enable Squeezebox server. - Page 97 Enter port number (9001 is recommended), then click OK. Click OK. Click Open Squeezebox. The Squeezebox’s settings will open.
-
Page 98: Chapter 9 Surveillance Server
Chapter 9 Surveillance Server The TeraStation supports streaming video from RTSP (Real Time Streaming Protocol) network cameras. Getting Started The following items are required: • TeraStation with surveillance camera support • Supported network camera • Ethernet cable • Ethernet hub •... -
Page 99: Connecting Devices To The Network
Windows 7 64-bit or the Application folder in Mac OS). • If surveillance cameras or client tools installed under C:\Program Files (x86)\BUFFALO\SurveillanceServer\Bin) are blocked due to the OS firewall, refer to the OS help for instructions about how to disable the firewall. - Page 100 Click the icon to the right of “Surveillance Cameras”. Click Edit. From “LAN Port”, select the LAN port connected to the same network as the network camera and computer where the client tools are installed. Click Browse. Choose a folder for recorded video, then click OK. Note: Use a folder with at least 100 GB of available space.
-
Page 101: Enabling The Free License
Connect the TeraStation to the Internet. Click Start- BUFFALO - BUFFALO Surveillance Server - Vault Admin. For Windows 8.1 and Windows 8, click the Vault Admin. Select the TeraStation where you want to add the license, right-click it, and click Properties. -
Page 102: Registering Recording Policies
The free license is now enabled. Registering Recording Policies Register the network camera that is used. Click Start - BUFFALO - BUFFALO Surveillance Server - Camera Policies. For Windows 8.1 and Windows 8, click the Camera Policies. Click the icon. - Page 103 Select the detected network camera, then click OK. Note: Network cameras that are already in use are indicated by an asterisk (*) and they are gray. Enter the username and password, then click Next.
- Page 104 Note: Clicking Test Camera runs an operational check of the network camera. Enter the description, then click Next. Select the recording schedule, then click Next. Select the TeraStation where the video will be recorded, then click Next. Check the registration information, and if it is correct, click Next.
-
Page 105: Checking Recording
Wait at least 15 minutes after registering the recording policy before performing this procedure. To check that recording is working correctly, follow the procedure below. Click Start - BUFFALO - BUFFALO Surveillance Server - Surveillance Video Manager. For Windows 8.1 and Windows 8, click the Surveillance Video Manager. -
Page 106: Email Error Notification
Viewing Saved Video Follow the procedure below to view recorded data saved in the TeraStation. Click Start - BUFFALO - BUFFALO Surveillance Server - Surveillance Video Manager. For Windows 8.1 and Windows 8, click the Surveillance Video Manager. Click Search. -
Page 107: Export Recorded Data As A Mov Video File
Export Recorded Data as a MOV Video File To export recorded data saved to the TeraStation as a MOV format video file: Click Start - BUFFALO - BUFFALO Surveillance Server - Surveillance Video Manager. For Windows 8, click the Surveillance Video Manager. - Page 108 Select the section to export and click Export. This will register the video to the export queue. Open the Export screen, register the export information from “Export Job Configuration”, and click “Start Export”. The video is exported in MOV format. This completes exporting video in the MOV format.
-
Page 109: Viewing Video Real-Time
Follow the procedure below to move (migrate) the recorded video data to another TeraStation. Note: A separate Surveillance Server License Pack must be purchased to do this. Click Start - BUFFALO - BUFFALO Surveillance Server - Data Service Policies. For Windows 8.1 and Windows 8, click the Data Service Policies. -
Page 110: Backing Up Recorded Video To Another Terastation
Follow this procedure to back up recorded video data to another TeraStation. Note: A separate Surveillance Camera License Pack must be purchased to do this. Click Start - BUFFALO - BUFFALO Surveillance Server - Data Service Policies. For Windows 8.1 and Windows 8, click the Data Service Policies. -
Page 111: Automatically Delete Old Data When Space Is Low
To disable this setting, remove the “Remove Old Video” policy from “Data Service Policies”. Click Start - BUFFALO - BUFFALO Surveillance Server - Data Service Policies. For Windows 8.1 and Windows 8, click the Data Service Policies. -
Page 112: Changing Where Recorded Video Is Saved
Changing Where Recorded Video Is Saved Follow this procedure to change the TeraStation to which video is saved. Click Start - BUFFALO - BUFFALO Surveillance Server - Camera Policies. For Windows 8.1 and Windows 8, click the Camera Policies. Click the icon on the tool bar and open the “Camera Configuration”... -
Page 113: Client Utilities
Client Utilities Camera Policies Camera Policies is a software program that registers the network cameras and starts video recording. Click to start a wizard to register network cameras and schedule recording. Click to start the camera configuration screen where network cameras are registered. Click to start a new registration screen for an additional network camera. -
Page 114: Data Service Policies
Note: To view the current video, the network camera must be registered in Camera Policies. • The layout of the camera view (numbers of rows and columns) and registered network cameras are displayed in the panel on the right side of the screen. •... -
Page 115: Vault Admin
Vault Admin Vault Admin is a software program for managing surveillance camera resources. Operations are performed from the tool bar located in the top section of the screen. The icons and their functions are shown below. Icon Description Starts “Mini Vault Status” for enabling the display of basic monitoring information. Sets the security status. -
Page 116: Network Activity
Export Window Network Activity Network Activity is a software program that displays the TeraStations on which surveillance cameras are operating on the network, in real time and in graphical form. All clients and TeraStations located on the network are indicated by and labels. -
Page 117: Activating Additional Licenses
Use this procedure to activate an additional license. When the TeraStation is Connected to the Internet Click Start - BUFFALO - BUFFALO Surveillance Server - Vault Admin. For Windows 8.1 and Windows 8, click the Vault Admin. -
Page 118: Terastation Not Connected To The Internet
If the TeraStation is being used in an environment where Internet access is not available, a separate computer with access to the Internet is required to activate the additional license. Click Start - BUFFALO - BUFFALO Surveillance Server - Vault Admin. For Windows 8.1 and Windows 8, click the Vault Admin. - Page 119 Copy the license file to a computer connected to the same network as the TeraStation. In the computer connected to the same network as the TeraStation, click Start - BUFFALO - BUFFALO Surveillance Server - Vault Admin. For Windows 8.1 and Windows 8, click the Vault Admin.
- Page 120 Open the License tab, then click +. Select “Import license file”, then click Browse. Select the license file that was saved before, then click OK. Check that the license pack was added to “Installed Licenses”.
-
Page 121: Troubleshooting
This completes authentication of an additional license. Troubleshooting Issue Possible Cause Possible Solution Enable Surveillance Camera in Surveillance Camera is not enabled. Settings. A LAN cable between the TeraStation and network camera Check that the LAN cables are is disconnected, or the power is inserted correctly. - Page 122 • QuickTime is a trademark of Apple Inc., registered in the U.S. and other countries. • VLC media player is a trademark of Video LAN org. • See www.buffalotech.com for supported cameras. • Refer to the “Buffalo Surveillance Server Administrator’s Guide” for information about client tools.
-
Page 123: Chapter 10 Advanced Features
Chapter 10 Advanced Features Antivirus Software Trend Micro NAS Security can protect your network and data from software viruses, malware, and spyware. To use Trend Micro NAS software, purchase an OP-TSVC license pack (sold separately). If your TeraStation includes activated antivirus software, no license registration is necessary. -
Page 124: Activating Virus Scanning
To check the status of the current license, open the Trend Micro NAS Security settings page and navigate to Administration - Product License on the left-side menu. Activating Virus Scanning Follow the procedure below to activate virus scanning. In Settings, click Applications. Move the antivirus switch to the position. -
Page 125: Connecting Through A Proxy Server
Note: The Trend Micro NAS Security settings page is compatible with IE 6.0 SP2 or later (Windows) and Firefox 1.5 or later (Windows or Mac). Connecting through a Proxy Server If you must pass through a proxy server to connect to the Internet in your network environment, follow this procedure to set the IP address of the proxy server and other settings. -
Page 126: Excluding A Specific Folder From Antivirus Scanning
Check “Enable Scheduled Update”. Select a time for updates to begin, an interval for updates, and an amount of time for updates to continue. Select the components to update. Click Save. The antivirus software is now configured to update automatically at the scheduled time. Updates will not be downloaded if the TeraStation is turned off, in standby mode, or disconnected from the Internet. -
Page 127: Checking The Log
Real-time Scan The virus scan runs in the background, scanning every file that you read or write. This is the default type of scanning. Your TeraStation may run slower if real-time scanning is enabled. Scheduled Scan A scheduled scan is executed at specific regular intervals, such as every Tuesday at 3 am. Manual Scan A manual scan runs once when initiated. -
Page 128: Online Help
Click the log item that you want to check. Click Display Log. This completes the procedure for checking the log. Online Help For more information on the antivirus software, refer to the online help. Follow the procedure below to access the online help. -
Page 129: Sleep Mode
• Change to RAID configuration • RAID error • Fan error • Hard drive read error • Hard drive replacement • Quota exceeded In Settings, click Management. Move the email notification switch to the position to enable email notification. Click to the right of “Email Notification”. - Page 130 Click to the right of “Sleep Timer”. Click Edit. Specify the timer interval, wake-up time, and time to go into sleep mode, then click OK. Notes: • Up to three timers can be set. • The time to enter sleep mode can be set from 0:00 am to 3:45 of the next day. The time to wake from sleep mode can be set from 0:00 to 23:45.
-
Page 131: Wake-On-Lan
• On the local network, Wake-on-LAN packets may be sent to port 2304 on either of the TeraStation’s LAN ports. If the TeraStation is connected to a Buffalo wireless router configured for remote access, then it may be turned on from outside the local network (from the WAN side). To use this feature, connect the router to only... -
Page 132: Ups (Uninterruptible Power Supply)
UPS (Uninterruptible Power Supply) If a UPS (sold separately) is attached, the TeraStation can be automatically shut down for protecting data in the event of a power outage. Plug the power cable of the UPS to a wall socket. Connect the AC cable of the TeraStation to the UPS. Connect the UPS and TeraStation using a USB cable or serial cable. -
Page 133: Port Trunking
Port Trunking Two Ethernet cables can be used to establish two separate communication routes providing LAN port redundancy and improving communication reliability. The use of two Ethernet cables enables access to the TeraStation even if one of the cables is disconnected. The port trunking modes that can be set in the TeraStation are shown below. -
Page 134: Connecting A Printer
Connect the second LAN port to the switch or hub. Reboot the TeraStation before use. Connecting a Printer You can connect a printer to the USB port on the TeraStation. Notes: • Only one USB printer can be connected to the TeraStation. •... -
Page 135: Setting Up A Printer With Windows Xp
Select your printer, then click OK. Register the printer. Setting Up a Printer with Windows XP In Settings, click Services. Move the print server switch to the position to enable the print server. Refer to the manual supplied with the printer. Click Start - Control Panel. -
Page 136: Terasearch
TeraSearch TeraSearch lets you search for character strings contained in files (text files, Word files, etc.) stored on the TeraStation. Follow the steps below to enable it. Open Folder Setup. Click the shared folder to be indexed. Click Edit. Check “Include this folder in the search index”, then click OK. Click OK. -
Page 137: Offline Files
http://(IP address of your TeraStation):3000/ Note: You can identify your IP address from NAS Navigator2. Enter your TeraStation’s username and password, then click Login. Enter a keyword in the “Search Text” field. Check “Advanced Search” to enable searches by specifying the filename, owner, date updated, and file size. - Page 138 Note: Offline files cannot be enabled if “Use Fast User Switching” is enabled. To change the setting, open “User Accounts” in Control Panel and select “Change the way users log on or off”. Right-click the icon of the shared folder on the TeraStation for which you have set the offline feature, then click Make Available Offline.
-
Page 139: Dfs
DFS (Distributed File System) is a set of client and server services that allows Windows users to organize many distributed SMB file shares into a distributed file system. Follow the steps below to enable DFS on the TeraStation. Note: Don’t disable the SMB protocol while DFS is enabled. If you do, you will need to enable SMB again and reconfigure DFS from scratch. -
Page 140: Accessing From An Nfs Client
DFS. Accessing from an NFS Client Note: (US purchasers only) Buffalo’s customer support will help configure the NFS settings on your TeraStation, and will support VMware and Windows clients but will not provide support for configuring your Linux or other UNIX clients. - Page 141 Enter the IP address and hostname of the NFS client, then click OK. Note: To delete a client, check the hostname and click Delete Client. Click Close. Enter the mount command to access the shared folder from the NFS client. The mount command depends on your operating system.
-
Page 142: Encrypting Data Transmission
In SSL, this key contains the server certificate, and depending on your computer environment, a check may be performed to determine the trustworthiness of the certificate. The server certificate included in the TeraStation in the default settings was created by Buffalo, and in some cases the message “There is a problem with this website’s... -
Page 143: Web Server
security certificate” may be displayed in your browser or other software. Disregard this message and continue. server.key (SSL Key) This file is used as a pair with server.crt (server certificate). This is required for decrypting the data that was encrypted by the server certificate, and this is normally not revealed. Updating SSL Key To update a server certificate and a private key for SSL, follow this procedure. -
Page 144: Mysql Server
Choose a shared folder for the web server , then click OK. Choose an external port, then click OK. MySQL Server The TeraStation can be used as a MySQL server. A MySQL database may be installed and linked with the web server. The TeraStation uses version 5.0.70 of MySQL server and version 3.2.2 of PhpMyAdmin. -
Page 145: Snmp
SNMP If SNMP is enabled, you can browse your TeraStation from SNMP-compatible network management software. The specific MIB (management information base) file for Buffalo is available from the Buffalo website (buffalotech.com). In Settings, click Network. Move the SNMP switch to the position to enable SNMP. -
Page 146: Saving Settings
Make a note of the hard drive configuration (number of hard drives, RAID, LVM, etc.) of the TeraStation where the settings were saved. Make sure that any TeraStation that you apply these settings to has exactly the same hard drive configuration before you apply the settings. -
Page 147: Applying Settings
Select “Save current configuration to a USB drive”, then click Execute. Troubleshooting: If the settings are not saved to the USB memory device successfully, you may receive the error message “The specified operation cannot be executed. ” . Verify: • The device is connected to a USB 2.0 port, not a USB 3.0 port. -
Page 148: Creating An Initialization Drive
Click Initialize TeraStation. The “Confirm Operation” screen will open. Enter the displayed number, then click OK. The TeraStation will be restored to its factory default settings. Creating an Initialization Drive A system initialization drive will restore the settings on your TeraStation to their factory defaults. You can initialize them without logging in to Settings. -
Page 149: Resetting The Administrator Password
Set the boot mode switch to “HDD” position. Press the power button to start the TeraStation. Resetting the Administrator Password Creating a Password Reset Drive A password initialization drive can reset the administrator password to its default value (“password”). This could be very useful if you forget your admin password. -
Page 150: Logs
Logs Follow this procedure to check the TeraStation’s logs. In Settings, click Management. Click to the right of “Logs”. Click Edit. Select a log to view. The file operation log stores file operations performed on the internal hard drives. File operations on USB drives are not logged. -
Page 151: Updating The Firmware
Click OK. Under the selected shared folder, a folder named “system_log” will now contain the logs. Updating the Firmware If a new firmware is available, a message is displayed when the TeraStation boots. You can update the firmware by the following ways: Notes: •... -
Page 152: Name, Date, Time, And Language
Select “Update the firmware automatically” and click OK. Alternately, you may choose to schedule updates for a specific time of day. Name, Date, Time, and Language Configure the TeraStation’s hostname, date, time, and language as follows. Note: If the TeraStation is being used as an iSCSI hard drive, to change the settings, navigate to Drives - iSCSI in Settings and set the icon to In Settings, click Management. - Page 153 Click the Time tab. Click Use Local Date/Time to use your computer’s time settings for the TeraStation. By default, the TeraStation adjusts its clock automatically by using a default NTP server. This NTP server belongs to Internet Multi Feed Inc. For more information, visit www.jst.mfeed.ad.jp. To use a different NTP server, select Name/Time/Language from Management.
-
Page 154: Beep Alerts
Note: This tab changes the language used by the TeraStation for email notifications, DLNA, and other functions. To change the language displayed in Settings, go to Advanced Settings or Easy Admin and click Language in the menu bar. Choose your desired language from the drop-down menu. Beep Alerts You can set the TeraStation to beep when certain errors occur. -
Page 155: Lcd And Leds
LCD and LEDs You may configure the LEDs and LCD on the front of the TeraStation. In Settings, click Management. Click to the right of “Notifications”. Click Edit. Click Front Panel Display Settings. Configure your settings, then click OK. Jumbo Frames If your other network devices support it, you may be able to increase network performance with jumbo frames. -
Page 156: Changing The Ip Address
Note: Make sure the TeraStation’s Ethernet frame size is smaller than the hub or router’s. Larger frame sizes may not transfer the data to the TeraStation correctly. Changing the IP Address Normally, the TeraStation’s IP address is set automatically from a DHCP server on your network. If you prefer, you can set it manually. - Page 157 Click the LAN port where the IP address will be changed. Disable “DHCP” and enter the desired network address settings, then click OK. Notes: • Do not set the same address for LAN port 1 and LAN port 2. This may cause unstable network communica- tion.
-
Page 158: Chapter 11 Utilities
Chapter 11 Utilities NAS Navigator2 for Windows NAS Navigator2 is a utility program that makes it easy to display Settings, change the TeraStation’s IP address, or check its hard drive. If you installed the TeraStation with the TeraNavigator CD, NAS Navigator2 was installed automatically. - Page 159 Name Description Icons: Displays icon. View Details: Displays hostname, product name, workgroup, IP address, subnet mask, and default gateway. View Selects the sort order from following to display when multiple TeraStations are found: Sort by Hostname, product name, workgroup, IP address, subnet mask, default gateway Browse Opens the TeraStation’s shared folder.
-
Page 160: Mount As Network Drive
Name Description Configuration Click Settings to open the configuration interface. Check Use DHCP to assign an IP address from the DHCP server automatically. If there is no DHCP server in the network, you cannot use this function. IP Address Check Renew IP address to obtain an IP address from the DHCP server. You can manually enter an IP address, subnet mask, and default gateway. -
Page 161: Changing The Ip Address
Changing the IP Address Double-click the icon on the desktop. NAS Navigator2 will start. Right-click on your TeraStation’s icon and choose Properties - IP Address. Uncheck “Use DHCP” and enter the desired settings, then click OK. Note: The following IP addresses are reserved and should not be used. If you configure one of them by accident, initialize all settings with the init button on the TeraStation. -
Page 162: Mount As Network Drive
• Workgroup • IP address • Subnet mask • Default gateway • MAC address • Firmware version Double-click it to open a share on the TeraStation. Name Description Open Opens the default shared folder for a selected TeraStation. Refresh Searches for NAS devices on the network again. I’m here Causes your TeraStation to beep. -
Page 163: Changing The Ip Address
The iSCSI Connection Tool is a Windows utility that lets you use the TeraStation as an iSCSI drive. To launch it,click Start - All Programs - BUFFALO - iSCSI Connection Tool - iSCSI Connection Tool. For Windows 8.1 and Windows 8, click the iSCSI Connection Tool. -
Page 164: Menu
If a TeraStation is selected, clicking Register iSCSI Device will register all the volumes in the TeraStation to the computer for enabling connection to individual volumes. Target If a volume is already registered, click Unregister iSCSI Device to unregister all volumes, disconnecting them from the TeraStation. Model Displays TeraStation’s model name. -
Page 165: Installation
Installation Insert the TeraNavigator CD into your computer. TeraNavigator will launch. Click Options - Additional Software Installation. Select “NovaBackup” and click Install. Click Install again. Check “Backup Client” and click Install on the NovaBackup installation wizard. Select the installation language and click Next twice. Check on “I accept the terms in the License Agreement”, then click Next. -
Page 166: Chapter 12 Appendix
Displays the date and time set in the TeraStation. 2012/1/1 11:11 Errors LCD Message Description Corrective Action Contact Buffalo technical support for BOOT FAIL Hard drive not found. assistance. SYSTEM Error E04 Contact Buffalo technical support for The firmware is corrupted. -
Page 167: Status
An error occurred in the fan speed. duster, or other tool to remove them. If the Fan Failure error is displayed again, contact Buffalo technical support for assistance. Do not place objects in the area around the SYSTEM Error E12 A rise in the system temperature may TeraStation. - Page 168 If the error is displayed TeraStation and the backup TeraStation ReplicateFailure again, contact Buffalo technical support for failed during failover configuration. assistance. Once the virus is removed from the quarantine folder, the message is no Virus alert I34 longer displayed.
-
Page 169: Default Settings
The TeraStation was started from the USB Recovery I43 recovery device, but the system cannot be recovered from this USB recovery Unsupported HW device. Recovery from the USB recovery device Recovery I44 Make sure that Disk 1 is present and fully was initiated, but the drive 1 was not inserted in its slot. -
Page 170: Specifications
UPS Port (D-SUB 9 pin (Male)) x 1 UPS Port Note: Compatible UPS are manufactured by Omron or APC. If a hard drive in the TeraStation malfunctions, replace it with a Buffalo OP- Internal Hard Drive HDS series drive of the same capacity, available from www.buffalotech.com. -
Page 171: Models
TS5800D: max ~170 W TS5600D: max ~120 W Power Consumption TS5400D: max ~86 W TS5400R: max ~140 W TS5200D: max ~47 W TS5800D: 300 x 215 x 230 mm; 11.8” x 8.5” x 9.1” (excluding protruding parts)/ ~ 12 kg (26.5 lb.) TS5600D: 170 x 260 x 230 mm;... -
Page 172: Chapter 13 Regulatory Compliance Information
Chapter 13 Regulatory Compliance Information United States FCC Statement This equipment has been tested and found to comply with the limits for a Class B digital device, pursuant to Part 15 of the FCC Rules. These limits are designed to provide reasonable protection against harmful interference in a residential installation. - Page 173 user may be required to take adequate measures. Only use the cables and accessories that are included in the package. Don’t use other accessories or cables unless specifically instructed to in the documentation. Español Este es un producto de Clase A. En una situación domestica, este producto puede producir interferencias de radio, en ese caso el usuario deberá...
- Page 174 fall begäras att vidta lämpliga åtgärder. Använd bara kablar och tillbehör som ingår i förpackningen. Använd inte andra tillbehör eller kablar om du inte får uttryckliga instruktioner om det i dokumentationen. Türk Bu, A Sınıfı bir üründür. Evde kullanım sırasında bu ürün radyo girisimine yol açabilir ve bu durumda kullanıcının gerekli önlemleri alması...