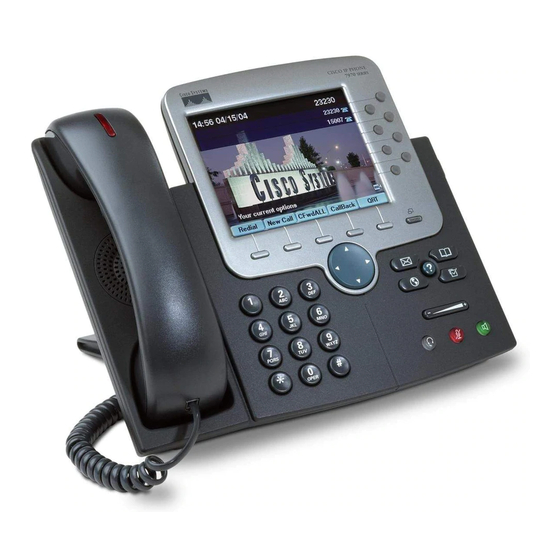
Cisco 7970 Setting Up
Chapter 3
Hide thumbs
Also See for 7970:
- Phone manual (92 pages) ,
- Quick reference (2 pages) ,
- Phone manual (45 pages)
Table of Contents
Advertisement
Quick Links
Note
Before You Begin
OL-4314-01
Setting Up the Cisco IP Phone
This chapter includes the following topics, which help you install the
Cisco IP Phone 7970 on an IP telephony network:
Before You Begin, page 3-1
•
Installing the Cisco IP Phone, page 3-8
•
Adjusting the Placement of the Cisco IP Phone, page 3-11
•
•
Verifying the Phone Startup Process, page 3-13
Configuring Startup Network Settings, page 3-14
•
Before you install a Cisco IP phone, you must make some critical decisions about
how to configure the phone in your network. You can then safely install the phone
and verify its functionality. For more information, see
Install the Cisco IP Phone on Your Network."
Before installing the Cisco IP Phone, review the requirements in these sections:
Network Requirements, page 3-2
•
Cisco CallManager Configuration, page 3-2
•
Network and Access Ports, page 3-3
•
Handset, page 3-3
•
Cisco IP Phone 7970 Administration Guide for Cisco CallManager 3.3
C H A P T E R
Chapter 2, "Preparing to
3
3-1
Advertisement
Table of Contents

Summary of Contents for Cisco 7970
-
Page 1: Before You Begin
Verifying the Phone Startup Process, page 3-13 Configuring Startup Network Settings, page 3-14 • Before you install a Cisco IP phone, you must make some critical decisions about Note how to configure the phone in your network. You can then safely install the phone and verify its functionality. -
Page 2: Network Requirements
Safety and Performance, page 3-6 • Network Requirements For the Cisco IP Phone 7970 to successfully operate as a Cisco IP Phone endpoint in your network, your network must meet the following requirements: Working Voice over IP (VoIP) Network •... -
Page 3: Network And Access Ports
Network and Access Ports The back of the Cisco IP Phone 7970 has a network port, labeled 10/100 SW, and an access port, labeled 10/100 PC. Each port supports 10/100 Mbps half- or full-duplex connections to external devices. You can use either Category 3 or 5 cabling for 10-Mbps connections, but you must use Category 5 for 100 Mbps connections. -
Page 4: External Speakers And Microphone
Headset You can use a headset with the Cisco IP Phone 7970. To connect a headset, plug it into the Headset port on the back of the phone. Press the Headset button on your phone to place and answer calls using the headset. -
Page 5: External Speakers
3-1) have a sticker plug over them. You must remove this sticker before using these external devices. Additionally, the Cisco IP Phone 7970 has end-user configurable settings for controlling the sound output to these external devices (Settings > User Preferences > Audio Preferences). When the phone is using in-line power, the sound settings for external devices are disabled. -
Page 6: Safety And Performance
Using External Devices with Your Cisco IP Phone, page 3-8 • Safety Review the following warnings before installing the Cisco IP Phone 7970. To see translations of these warnings, refer to the Regulatory Compliance and Safety Information for the Cisco IP Phone 7900 Series document that accompanied this device. - Page 7 (TNV) circuits. LAN ports contain SELV circuits, and WAN ports contain TNV circuits. Some LAN and WAN ports both use RJ-45 connectors. Use caution when connecting cables. Only use the proper Cisco approved external power supply. Reference the Caution installation manual provided with the phone.
-
Page 8: Installing The Cisco Ip Phone
In European Union countries, use only external speakers, microphones, and headsets that are fully compliant with the EMC Directive [89/336/EC]. Installing the Cisco IP Phone You must connect the Cisco IP Phone to the network and to a power source before using it. See Figure 3-1 for a graphical overview of the procedures that follow. - Page 9 Access Ports” section on from another network device, if you do not connect one page 3-3 for guidelines. such as a desktop computer, to now. the 10/100 PC port. Cisco IP Phone 7970 Administration Guide for Cisco CallManager 3.3 OL-4314-01...
- Page 10 Chapter 3 Setting Up the Cisco IP Phone Installing the Cisco IP Phone Figure 3-1 Cisco IP Phone 7970 Rear Cable Connections RS232 10/100 SW 10/100 PC DC48V Cisco IP Phone 7970 Administration Guide for Cisco CallManager 3.3 3-10 OL-4314-01...
-
Page 11: Adjusting The Placement Of The Cisco Ip Phone
60 degrees. You can also mount these phones to the wall using the footstand or using the optional locking accessory. Adjusting Cisco IP Phone Placement on the Desktop Adjust the footstand on the Cisco IP Phone to the height that provides optimum viewing of the LCD screen. Procedure Push in the footstand adjustment knob. -
Page 12: Mounting The Phone To The Wall
Adjusting the Placement of the Cisco IP Phone Mounting the Phone to the Wall You can mount the Cisco IP Phone on the wall using the footstand as a mounting bracket or you can use special brackets available in a Cisco IP Phone wall mount kit. -
Page 13: Verifying The Phone Startup Process
Adjustment plate—Raises and lowers phone vertically Verifying the Phone Startup Process After the Cisco IP Phone has power connected to it, the phone begins its startup process by cycling through a variety of steps and messages. Then the main LCD... -
Page 14: Configuring Startup Network Settings
9-2. Configuring Startup Network Settings If you are not using DHCP in your network, you must configure these network settings on the Cisco IP Phone after installing the phone on the network: IP address • IP subnet mask •...


