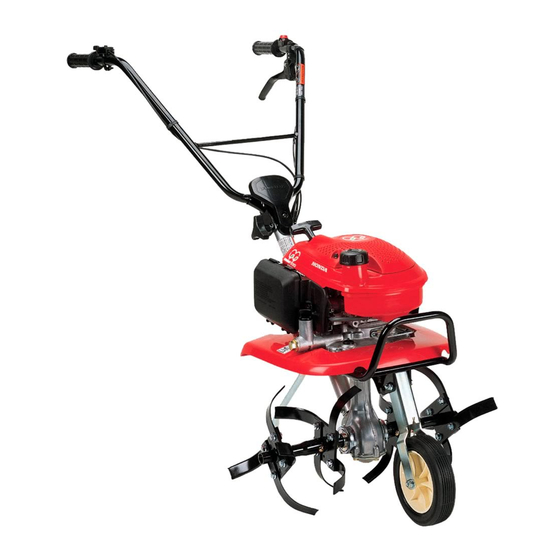
Honda F220 Owner's Manual
Honda tiller owner's manual
Hide thumbs
Also See for F220:
- Owner's manual (202 pages) ,
- Owner's manual (54 pages) ,
- Owner's manual (60 pages)
Table of Contents
Advertisement
Advertisement
Table of Contents

Related Manuals for Honda F220


Summary of Contents for Honda F220
- Page 2 Keep this owner’s manual handy, This owner’s manual is considered a permanent part of the tiller and should remain with the tiller if resold. The information and specifications included in this publication were in effect at the time of approval for printing.
- Page 3 We want to help you get the best results from your new tiller and to operate it safely. This manual contains all the information on how to do that; please read it carefully.
- Page 4 INTRODUCTION A FEW WORDS ABOUT SAFETY Your safety and the safety of others are very important. And using this tiller safely is an important responsibility. To help you make informed decisions about safety, we have provided operating procedures and other information on labels and in this manual.
-
Page 5: Table Of Contents
Handlebar Height Adjuster Main Clutch Lever Drag Bar Front Wheel BEFORE OPERATION ARE YOU READY TO GET STARTED? IS YOUR TILLER READY TO GO? Check the Engine Check the Tiller OPERATION SAFE OPERATING PRECAUTIONS STARTING THE ENGINE OPERATING THE CONTROLS FOR TILLING... - Page 6 CONTENTS SERVICING YOUR HONDA PUMP (continued) CLUTCH CABLE ADJUSTMENT THROTTLE CABLE SPARK ARRESTER SERVICE STORAGE STORAGE PREPARATION Cleaning Fuel ... 39 Engine Oil STORAGE PRECAUTIONS REMOVAL FROM STORAGE TRANSPORTING TAKING CARE OF UNEXPECTED PROBLEMS ENGINE PROBLEMS Engine Will Not Start Engine Lacks Power TILLING PROBLEMS Poor Tilling Quality...
-
Page 7: Tiller Safety
Exhaust contains poisonous carbon monoxide, a colorless, odorless gas. Breathing exhaust can cause loss of consciousness and may lead to death. If you run the tiller in a confined or even partially enclosed area, the air you breathe could contain dangerous amounts of exhaust gas. To exhaust gas from building up, provide adequate ventilation. - Page 8 Gasoline is extremely flammable, and gasoliqe vapor can explode. Allow the engine to cool if the tiller has been in operation. Refuel only outdoors in a well- ventilated area with the engine OFF. Do not overfill the fuel tank. Never smoke near gasoline, and keep other flames and sparks away.
- Page 9 Sturdy shoes with aggressive soles provide better traction. Turn Engine Off When Not Operating the Tiller If you need to leave the tiller for any reason, even just to inspect the area ahead, always turn the engine off. Slope Operation When tilling on slopes, keep the fuel tank less than half full to minimize fuel spillage.
-
Page 10: Safety Label Locations
TILLER SAFETY SAFETY LABEL LOCATONS These labels warn you of potential hazards that can cause serious injury. Read them carefully. If a label comes Honda servicing dealer for a replacement. CONTACT WITH ROTATING KEEP HANDS, FEET, AND CLOTHING AWAY WHILE ENGINE I S RUNNING. -
Page 11: Controls
CONTROLS COMPONENT & CONTROL LOCATIONS LEVER THROTTLE HANDLEBAR HEIGHT ADJUSTER AIR CLEANER DRAIN BOLT SPARK PLUG CAP MUFFLER ROTOR RECOIL STARTER GRIP CHOKE LEVER TRANSMISSION OIL LEVEL CHECK BOLT TRANSMISSION OIL FILLER CAP CLUTCH FUEL VALVE LEVER... -
Page 12: Controls
CONTROLS CONTROLS Fuel Valve The fuel valve opens and closes the connection between the fuel tank and the carburetor. The fuel valve must be in the ON position for the engine to run. After stopping the engine, turn the fuel valve to the OFF position. Choke Lever The choke lever opens and closes the choke valve in the carburetor. -
Page 13: Recoil Starter
Recoil Starter Pulling the starter grip operates the recoil starter to crank the engine for starting. Throttle Lever The throttle lever controls engine speed. Moving the throttle lever in the di- rections shown makes the engine run faster or slower. Tine speed is controlled by adjusting the throttle lever. -
Page 14: Main Clutch Lever
Front Wheel The front wheel is used to help move the tiller from one place to another. Lift the tiller by the handlebars to roll the tiller on the front wheel. Return the wheel to the raised position before tilling. Always stop the engine before lowering or raising the wheel. -
Page 15: Before Operation
For your safety, and to maximize the service life of your equipment, it is very important to take a few moments before you operate the tiller to check its condition. Be sure to take care of any problem you find, or have your servicing dealer correct it, before you operate the tiller. -
Page 16: Check The Engine
BEFORE OPERATION Do not place flammable objects close to the engine. Before beginning your preoperation checks, be sure the tiller is on a level surface and the engine switch is in the Check the Engine Check the oil level (see page 27). -
Page 17: Operation
Before operating the tiller for the first time, please review both the TIL SAFETY chapter and the chapter titled BEFORE OPERATION. For your safety, avoid starting or operating the tiller in an enclosed area such as a garage. Your tiller's exhaust contains poisonous carbon monoxide gas which can collect rapidly in an enclosed area and cause illness or death. -
Page 18: Starting The Engine
OPERATION STARTING THE ENGINE Refer to Safe Operating Precautions on Page 15. Tines are sharp and spin fast. Spinning tines can cut you severely and can amputate body parts. Wear protective footwear. Keep your hands and feet away from the tines while the engine is running. - Page 19 3. Turn the engine switch to the ON position 4. Move the throttle lever away from the SLOW position, about 1/3 of the way toward the position. 5. Pull the starter grip lightly until you feel resistance, then pull briskly. Do not allow the starter grip to snap back against the engine.
- Page 20 OPERATION 6. If the choke lever the CLOSED position to start the engine, gradually move it OPEN position as the engine warms up. moved to CHOKE LEVER...
-
Page 21: Operating The Controls For Tilling
If the tines dig in but the machine will not move forward, move the handlebars from side-to-side. When turning, push down on the handlebars to bring the tiller’s weight to the rear; this will make turning easier. Handlebar Stop the engine before adjusting the handlebar height. - Page 22 OPERATION Tiling Depth Adjustment The drag bar is used to control the tilling depth, which can be adjusted by removing the pin and retainer and sliding the drag bar up and down as necessary. During operation, if the machine jerks forward while tilling, press down on the handlebars.
-
Page 23: Stopping The Engine
STOPPING THE ENGINE To stop the engine in an emergency, simply turn the engine switch to the OFF position. Under normal conditions, use the following procedure. 1. Release the main clutch lever to the DISENGAGED position. DISENGAGED 2. Move the throttle lever to the slowest position. -
Page 24: Servicing Your Honda Tiller
Good maintenance is essential for safe, economical, It will also help reduce air pollution. To help you properly care for your tiller, the following pages include a maintenanceschedule, routine inspection procedures, procedures using basic hand tools. Other service tasks that are more difficult, or require special tools, are best handled by professionals and are normally performed by a Honda technician or other qualified mechanic. -
Page 25: Maintenance Safety
MAINTENANCE SAFETY Some of the most important safety precautions follow. However, we cannot warn you of every conceivable hazard that can arise in performing maintenance. Only you can decide whether or not you should perform a given task. Failure to properly follow maintenance instructions and precautions can cause you to be seriously hurt or killed. -
Page 26: Maintenance Schedule
SERVICING YOUR HONDA TILLER MAINTENANCE SCHEDULE Emission related items. Service more frequently when used in dusty areas. (2) Log hours of operation to determine proper maintenance intervals. (3) These items should be serviced by your servicing dealer, unless you have the proper tools and are mechanically proficient. -
Page 27: Refueling
RECOMMENDATIONS Use unleaded gasoline with a pump octane rating of 86 or higher. This engine is certified to operate on unleaded gasoline. Unleaded gasoline produces fewer engine and spark plug deposits and extends exhaust system life. SERVICING YOUR HONDA TILLER... - Page 28 SERVICING YOUR HONDA TILLER Never use stale or contaminated gasoline or an oiVgasoline mixture. Avoid getting dirt or water in the fuel tank. Occasionally you may hear light “spark knock or “pinging” (metallic rapping noise) while operating under heavy loads. This is no cause for concern.
-
Page 29: Engine Oil Level Check
ENGINE OIL LEVEL CHECK Check the engine oil level with the tiller on a level surface and the engine stopped. Remove the oil filler cap. Checkthe oil level with the level gauge looking into the filler neck. 2. If the oil level is low, fill to the upper limit of the level gauge with the recommended oil (see page 29). -
Page 30: Engine Oil Change
Do not discard it in bin or dump it on the ground. 3. With the tiller in a level position, fill to the upper limit of the level gauge with the recommended oil (see page 29). -
Page 31: Engine Oil Recommendations
The SAE oil viscosity and service classification are in the API label on the oil container. Honda recommends that you use API SERVICE category SJ oil. SERVICING YOUR HONDA TILLER SAE VISCOSITY GRADES AMBIENTTEMPERATURE within the... -
Page 32: Transmission Oil Level Check
SERVICING YOUR HONDATILLER TRANSMISSION OIL LEVEL CHECK Check the transmission oil level with the tiller on a level surface and the engine stopped. 1. Remove the transmission oil level check bolt. The oil should be level with the lower edge of the oil filler hole. -
Page 33: Air Filter Inspection
AIR FILTER INSPECTION Operating the engine without an air filter, or with a damaged air filter, w dirt enter the engine, causing rapid engine wear. This type of damage covered by the Distributor’s Limited Warranty. LATCH TABS SERVICING YOUR HONDATILLER HOOKS AIR FILTER AIR CLEANER... -
Page 34: Air Filter Cleaning
AIR FILTER CREANING A dirty air filter will restrict air flow to the carburetor, performance. If you operate the generator in very dusty areas, clean the air filter more frequently than specified in the Maintenance Schedule. 1. Tap the air filter element several times on a hard surface to remove dirt, or blow compressed air [not exceeding the air filter from the air cleaner housing side. -
Page 35: Spark Plug Service
5. Install the sparkplug carefully, by hand, to avoid cross-threading. 6. After the spark plug seats, tighten with a 13/16 - inch spark plug wrench to compress the washer. SERVICING YOUR HONDA'TILLER U14FSR-UB (DENSO) SPARK WRENCH 0.024 (0.60 PULG 0.028 in... - Page 36 SERVICING YOUR HONDA TILLER If reinstalling a used spark plug, tighten 1/8 - seats. If installing a new spark plug, tighten 112 t u n after the spark plug seats. A loose spark plug can overheat and damage the engine.
-
Page 37: Clutch Cable Adjustment
Measure the free play at the lever tip. Free play:0.39 - 0.59 in I f the free play is incorrect, turn the adjusting nut in or out as required. 0.39 (10.0 SERVICING YOUR HONDA TILLER (1 0.0 - 15.0 mm) ’ ’ 0.59 in 15.0 mm) -
Page 38: Spark Arrester Service
SERVICING YOUR HONDATILLER SPARK ARRESTER SERVICE Your engine is not factory-equipped with a spark arrester. In some areas, it illegal to operate an engine without a spark arrester. Check local laws and regulations. A spark arrester is available from Honda servicing dealers. The spark arrester must be serviced every 100 hours to keep it functioning as designed. -
Page 39: Storage
Tiller If using agarden hose or pressure washing equipment to clean the tiller, be careful to avoid getting water on the belts. Spraying water on hot tine shaft bearings can cause them to from cooling too quickly. - Page 40 5. Stop the engine and allow it to cool. 6. After the tiller is clean and dry, touch up any damaged paint and coat other areas with a light film of oil. Lubricate the throttle cable core with a silicone...
-
Page 41: Fuel
Gasoline will oxidize and deteriorate in storage. Old gasoline will cause hard starting, and it leaves gum deposits that clog the fuel system. If the gasoline in your tiller deteriorates during storage, you may need to have the carburetor and other fuel system components serviced or replaced. - Page 42 STORAGE Draining the Fuel Tank and Carburetor 1. Place an approved gasoline container below the carburetor, and use a funnel to avoid spilling fuel. Gasoline is highly flammable and explosive. You can be burned or seriously injured. Never use gasoline to clean engine Use a nonflammable solvent.
-
Page 43: Engine Oil
Engine Oil 1. Change the engine oil (page 28). 2. Remove the spark plug (page 33). 3. Pour a tablespoon (5 4. Pull the starter rope several times to distribute the oil in the cylinder. 5. Reinstall the spark plug. 6. -
Page 44: Storage Precautions
STORAGE PRECAUTIONS If your tiller will be stored with gasoline in the fuel tank and carburetor, it is important to reduce the hazard of gasolinevapor ignition. Select awellventilated storage area away from any appliance that operates with a flame, such as a furnace, water heater, or producing electric motor, or where power tools are operated. -
Page 45: Transporting
Position the tiller so it sits flat on the bed of the transport vehicle. Tie the tiller down with rope or straps. Keep the tie-down rope or straps away from the controls, adjustment levers, cables, and the carburetor. -
Page 46: Taking Care Of Unexpected Problems
Honda servicing dealer or refer Possible Cause Choke OPEN. Engine switch OFF. fuel. Bad fuel; tiller stored with- out treating or draining gasoline, or refueled with bad gasoline. Alert to stop engine. (flooded engine). Fuel filter clogged, carbu- retor malfunction, ignition malfunction,valvesstuck, etc. -
Page 47: Engine Lacks Power
Honda servicing dealer, or refer to the shop manual. Possible Cause Correction Air filter clogged. Clean or replace air filter Bad fuel; tiller stored without treating or drain- ing gasoline, or refueled with bad gasoline. Fuel filter clogged, carburetor malfunction, ignition malfunction, valves struck, etc. -
Page 48: Tilling Problems
Check drag bar depth setting. Check tines. Possible Cause Engine speed is too slow to till well. Tiller is moving fast for soil conditions. Drag bar adjustment set to high. Tines dull, worn, or dam- Wrong tines installed. Tines installed incorrectly. -
Page 49: Technical & Consumer Information
TECHNICAL & CONSUMER INFORMATION TECHNICAL INFORMATION Serial Number Locations Record the engine and frame serial numbers in the spaces below. You will need this serial number when ordering parts, and when making technical or warranty inquires. (see page 55.) Engine serial number: Frame serial number: FRAME SERIAL NUMBER ENGINE SERIAL NUMBER... -
Page 50: Carburetor Modification For High Altitude Operation
High altitude performance can be improved by a specific modifications to the carburetor. If you always operate your tiller at altitudes above 5,000 feet (1,500 meters) have your servicing dealer perform this carburetor modification. -
Page 51: Oxygenated Fuels
Oxygenated Fuels Some conventional gasolines are being blended with alcohol or an ether compound. These gasolines are collectively referred to as oxygenated fuels. To meet clean air standards, some areas of the United States and Canada use oxygenated fuels to help reduce emissions. If you use an oxygenated fuel, be sure it is unleaded and meets the minimum octane rating requirement. -
Page 52: Emission Control System Information
Emission Control System Information Source of Emissions The combustion process produces carbon monoxide, oxides of nitrogen, and hydrocarbons. Control of hydrocarbons and oxides of nitrogen is very impor- tant because, under certain conditions, they react to form photochemical smog when subjected to sunlight. Carbon monoxide does not react in the same way, but it is toxic. - Page 53 TECHNICAL & CONSUMER INFORMATION Problems That May Affect Emissions If you are aware of any of the following symptoms, have your engine inspected and repaired by your authorized Honda servicing dealer. Hard starting or stalling after starting. Rough idle. Misfiring or backfiring under load. Afterburning (backfiring).
-
Page 54: Air Index
Descriptive Term Applicable to Emissions Durability Period Moderate 50 hours (0 Intermediate The Air Index Information hang tag must remain on the tiller until it is sold. Remove the hang tag before operating the tiller. hours (greater than hours hours (greater than... -
Page 55: Specifications
0.95 US qt (0.94, 0.79 Imp qt) SPECIFICATION 0.024 - 0.028 (0.60 0.70 0.10 cold IN: 0.06 EX: 0.09 0.13 mm cold other adjustments needed. F220 ZOGA GXV57 (DENSO) (0.301) US qt MAINTENANCE Refer to page: See your authorized Honda dealer... -
Page 56: Consumer Information
CONSUMER INFORMATION Honda Publications These publications will give you additional information for maintaining and repairing your tiller. You may order them from your Honda tiller dealer. Shop Manual This manual covers complete maintenance and overhaul procedures. It is intended to be used by a skilled technician. -
Page 57: Warranty Service Information
When you write or call, please give us this information: Model and serial numbers (see page 47) Name of the dealer who sold the tiller to you Name and address of the dealer who services your tiller Date of purchase... -
Page 59: Quick Reference Information
DENSO: U14FSR -UB 0.024 0.028 in (0.60 2,200 150 rpm Check engine oil level. Check air filter. Tiller outside Each lever function Bolt and nut torque Cables and wires Engine operation Transmission oil Change engine oil Refer to maintenance schedule (page 24) pump octane 0.70 mm)