Honda WT20X Owner's Manual
Trash pump
Hide thumbs
Also See for WT20X:
- Owner's manual (242 pages) ,
- Owner's manual (34 pages) ,
- Owner's manual (64 pages)
Table of Contents
Advertisement
Advertisement
Table of Contents

Related Manuals for Honda WT20X


Summary of Contents for Honda WT20X
- Page 3 Thank you for purchasing a Honda trash pump. This manual covers the operation and maintenance of WT20X, WT30X and WT40X trash pumps. All information in this publication is based on the latest product information at the time of printing. The illustrations in this manual are based on the WT30X pump.’...
-
Page 4: Table Of Contents
CONTENTS PUMP SAFETY ..... ..*..........COMPONENT IDENTIFICATION ,..........PREPARATION ..............PRE-OPERATION CHECK . -
Page 5: Pump Safety
1. PUMP SAFETY ..:.:.:~:~ $$g**> ;g:m$2x ~$+3~:...:. +,.;>;; Honda pumps are designed to give safe and dependable service iffy operated according instructio&. Read un&&nd this Owner’s ~~~~~~ Manual before operating the pump. Failure to do so could result in per- ~ $$+g sonal injury or equipment damage. - Page 6 Read these labels before you operate the pump. -WARNING- G iASOLINE WARNING LABEL PUMP CAUTION LABEL...
-
Page 7: Component Identification
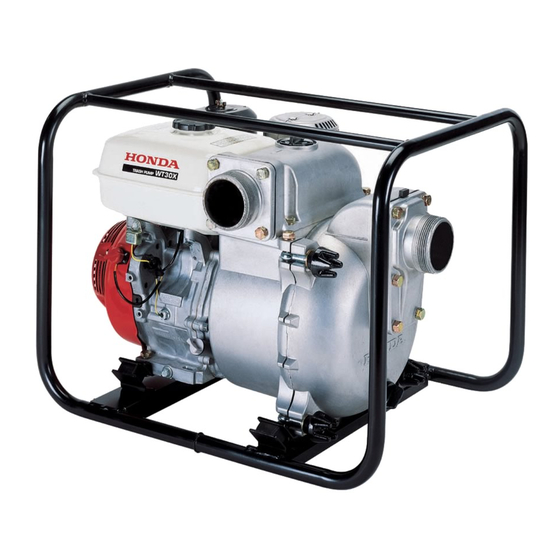
2. COMPONENT IDENTIFICATION FUEL FILLER PRIMING WATER FILLER CAP AIR CLEANER THROTTLE LEVER CHOKE LEVER FUEL VALVE CASE DRAIN PLUG STARTER GRIP OIL FILLER-CAP/DIPSTICK ENGINE SWITCH PRIMING WATER FILLER CAP SUCTION PORT STRAINER COVER DRAIN PLUG... -
Page 8: Preparation
3. PREPARATION 1. Connect the suction hose. Use commercially available hose, hose connector, and hose bands. The suction hose must be .of reinforced, noncollapsible construction. Suction hose length should not be longer than necessary, as pump performance best when the pump is not far above the water level. Self-priming time is also proportional to hose length. -
Page 9: Pre-Operation Check
4. PRE-OPERATION CHECK 1. Check the engine oil level. CAUTION: Engine oil is a major factor affecting engine performance and service life. Nondetergent oils and 2-stroke oils are not recommended because they have inadequate lubricating characteristics. Check the oil level with the pump on a level surface and the engine stopped. - Page 10 2. Check the fuel level. Your engigs ifi designed to use any gasoline that has a pump octane number (---- of 86 or higher, or that has a research octane number of 91 or hlg -A er. Gasoline pumps at service station normally display the pump octane number.
- Page 11 Gasoline is extremely flammable and is explosive under certain condi- tions. Refuel in a well-ventilated area with the engine stopped. Do not smoke or allow flames or sparks in the area where the engine is refueled where gasoline is stored. Do not overfill the fuel tank (there should be no fuel in the filler neck).
- Page 12 3. Check the air cleaner element. Remove the wing nut and air cleaner cover. Check the air cleaner elements to be sure they are clean and in good condition. Clean or replace the elements if necessary (p. 17). WTBOX Type WTSOX Type ‘I??@ ELEMENTS...
-
Page 13: Staring The Engine
5. STARTING THE ENGINE 1. Turn the fuel valve ON. 2. Close the choke lever. NOTE: Do not use the choke if the engine is warm or the ambient temperature is high. FUEL VALVE CHOKE LEVER 3. Turn the engine switch to the ON position. - Page 14 4. Move the throttle lever slightly to the left. THROTiLE LEVER 5. Pull the starter grip lightly until resistance is felt, then pull. it briskly. CAUTION: Do not allow starter grip to snap back against engine. Return it gently to prevent damage to the starter.
-
Page 15: Operation
6. OPERATION 1. As the engine warms up, gradually open the choke. CHOKE LEVER 2. Set the throttle at the desired speed. THROTTLE LEVER... - Page 16 Oil Alert System The Oil Alert system is designed to prevent engine damage caused by an in- sufficient amount of oil in the crankcase. Before the oil level in the crankcase can fall below a safe limit, the Oil Alert system will automatically shut down the engine (the engine switch will remain in the ON position).
-
Page 17: Stopping The Engine
7. STOPPING THE ENGINE 1. Move the throttle lever fully to the right. 2. Turn the engine switch to the OFF position. THROTTLE LEVER . . . : ‘. ENGINE SWITCH 3. Turn the fuel valve OFF. FUEL VALVE NOTE: To stop the engine in an emergency, turn the engine switch to the OFF position. -
Page 18: High Altitude Operation
High altitude operation At high altitude, the standard carburetor air-fuel mixture will be excessively rich. Performance will decrease, and fuel consumption will increase. High altitude performance can be improved by installing a smaller diameter main fuel jet in the carburetor and readjusting the pilot screw. -
Page 19: Maintenance
8. MAINTENANCE The purpose of the maintenance and adjustment schedule is to keep the pump in the best operating condition. Inspect or service as scheduled in the table below. Shut off the engine before performing any maintenance. If the engine must be run, make sure the area is well ventilated. The exhaust con- tains poisonous carbon... - Page 20 1. Remove the oil filler cap and the drain plug, then ‘drain the oil. 2. Reinstall the drain plug and tighten securely. 3. Refill with the recommended oil (see page 5) to the specified level. OIL CAPACITY: WT20X...0.6 I (0.63 US qt, 0.53 Imp qt) WT30X...l.l P (1.16 US qt. 0.97 Imp qt) WT40X...l.l...
- Page 21 2. Air cleaner service A dirty air cleaner will restrict air flow to the carburetor. To prevent car- buretor malfunction, service the air cleaner regularly. Service more fre- quently when operating the pump in extremely dusty areas. raml Never use gasoline or low flash point solvents for cleaning air cleaner element.
- Page 22 3. Spark plug service Recommended spark plug: WTZOX*WTSOX WT40X BPRGES-1 1 (NGK) BPRGES (NGK) WZOEPR-U (ND) WZOEPR-Ul 1 (ND) To ensure proper engine operation, the spark plug must be properly gapped and free of deposits. 1. Remove the spark plug. The muffler becomes very hot during operation and remains hot...
- Page 23 4. Check that the spark plug washer is in good condition, and thread the spark plug in by hand to prevent cross-threading. 5. After the spark plug is seated, tighten with a spark plug wrench to com- press the washer. NOTE: If installing a new spark plug, tighten l/2 turn after the spark plug...
- Page 24 4. Servicing the pump casing After each use, clean the inside of the pump casing using the following procedure: Removal 1. Remove the drain plugs from the pump casing and pump cover to drain the water inside. 2. Loosen the pump cover knob and open the pump cover holder. 3.
- Page 25 1. Remove the eight 5 mm screws @ from the muffler protector remove the muffler protector. 2. Remove the 4 mm screw @ from the spark arrester 0, and remove the spark arrester from the muffler 0. and WT4OX WT30X uses two 4 mm screws WT20X...
- Page 26 3. Use a brush to remove carbon deposits from the spark arrester screen. CAUTION: The spark arrester must be serviced every 100 hours to main- tain its efficiency. SPARK ARRESTER SCREEN NOTE: The spark arrester must be free of breaks and holes. Replace, if necessary.
-
Page 27: Transporting/Storage
9. TRANSPORTING/STORAGE To avoid severe burns or fire hazards, let the engine cool before transporting the pump or storing it indoors. When transporting the pump, turn the fuel valve to the OFF position, and keep the pump level to prevent fuel spillage. - Page 28 4. Change the engine oil. 5. Remove the spark plug, and pour about a tablespoon of clean engine oil into the cylinder. Crank the engine several revolutions to distribute oil, then reinstall the spark plug. 6. Pull the starter rope slowly until resistance is felt.
-
Page 29: Troubleshooting
10. TROUBLESHOOTING When the engine will not start: 1. Is the engine switch 2. Does the oil alert lamp flash when the starter is operated? 3. Is the fuel valve ON? 4. Is there fuel in the fuel tank? 5. Is gasoline reaching the carburetor? To check, loosen the drain screw with the fuel valve on. - Page 30 When the pump does not pump water: 1. Is the pump fully primed? 2. Is the strainer clogged? 3. Are the hose bands installed securely? 4. Are the hoses damaged? 5. Is the suction head too high? 6. If the pump still does not operate, take the pump to an authorized Honda trash pump dealer.
-
Page 31: Specifications
11. SPECIFICATIONS WT40X WTPOX WTBOX Model Power equipment description code Dimensions and Weight Length x Width x 435 x 405 x 484 x 510 715x485x560mm Height (24.4 x 17.1 x 15.9 (27.2 x 19.0 x 83.5 (28.1 x 19.1 x 20.0 58 kg (127.8 68 kg (149.9 Dry weight... -
Page 32: Warranty
12. WARRANTY SERVICE Owner Satisfaction Your satisfaction and goodwill are important to your dealer and to us. All Honda warranty details are explained in the Distributor’s Limited Warranty. Normally, any problems concerning the product will be handled by your dealer’s service department. If you have a warranty problem that has not been handled... - Page 33 When you write or call, please provide the following information: • Model and serial numbers • Name of the dealer who sold the Honda power equipment to you • Name and address of the dealer who services your equipment •...
- Page 34 MEMO...
- Page 35 MEMO...