Honda WT20X Owner's Manual
Hide thumbs
Also See for WT20X:
- Owner's manual (194 pages) ,
- Owner's manual (64 pages) ,
- Owner's manual (68 pages)
Table of Contents
Advertisement
Quick Links
See also:
Owner's Manual
Advertisement
Table of Contents

Related Manuals for Honda WT20X


Summary of Contents for Honda WT20X
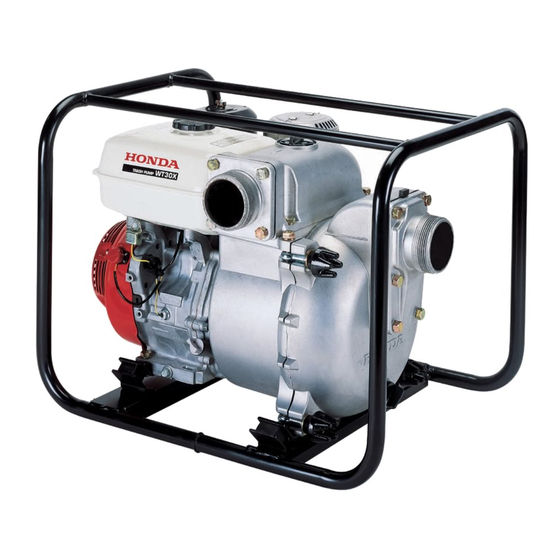
- Page 1 WATER PUMP WT20X WT30X WT40X OWNER'S MANUAL MANUEL DE L'UTILISATEUR BEDIENUNGSANLEITUNG MANUAL DE EXPLICACIONES...
- Page 2 All information in this publication is based on the latest product information available at the time of approval for printing. Honda Motor Co., Ltd. reserves the right to make changes at any time without notice and without incurring any obligation.
-
Page 3: Table Of Contents
CE mark and noise label locations ..........COMPONENT IDENTIFICATION ............PREPARATION ..................PRE-OPERATION CHECK ..............STARTING THE ENGINE ..............Carburetor Modification for High Altitude Operation ....OPERATION ..................STOPPING THE ENGINE ..............MAINTENANCE ................. TRANSPORTING/STORAGE ............TROUBLESHOOTING ............... SPECIFICATIONS ................MAJOR Honda DISTRIBUTOR ADDRESSES ........ -
Page 4: Safety Instruction
SAFETY INSTRUCTION To ensure safe operation Honda water pump is designed to give safe and dependable service if operated according to in- structions. Read and understand the Owner’s Manual be- fore operating the water pump. Failure to do so could result in personal injury or equipment dam- age. - Page 5 To ensure safe operation Gasoline is extremely flammable and is explosive under certain conditions. Refuel in a well-ventilated area with the engine stopped. Do not smoke or allow flames or sparks in the refueling area or where gasoline is stored. Do not overfill the tank.
-
Page 6: Safety Label Locations
These labels warn you of potential hazards that can cause serious inju- ry. Read the labels and safety notes and precautions described in this manual carefully. If a label comes off or becomes hard to read, contact your Honda deal- er for a replacement. READ... -
Page 7: Ce Mark And Noise Label Locations
CE mark and noise label locations [DE type only] CE MARK Manufacturer and address Year of manufacture Machine mass (standard specification) Description code WT20X WT30X,WT40X NOISE LABEL [Example: WT30X]... -
Page 8: Component Identification
COMPONENT IDENTIFICATION MUFFLER DISCHARGE PORT AIR CLEANER THROTTLE LEVER CHOKE LEVER FUEL VALVE STARTER GRIP WRENCH OIL FILLER CAP/DIPSTICK OIL DRAIN PLUG... - Page 9 FUEL TANK CAP PRIMING WATER FILLER CAP SUCTION PORT ENGINE SWITCH PUMP DRAIN PLUG PUMP COVER KNOB...
-
Page 10: Preparation
PREPARATION Connect the suction hose. Use commercially available hose, hose connector, and hose bands. The suction hose must be of reinforced, noncollapsible construction. Suction hose length should not be longer than necessary, as pump performance is best when the pump is not far above the water level. Self-priming time is also proportional to hose length. - Page 11 Check the priming water. The pump chamber should be primed with full of water before operating. Priming water capacity: WT20X: 14.0 (3.70 US gal , 3.08 Imp gal) WT30X, WT40X: 15.0 (3.96 US gal , 3.30 Imp gal) Never attempt to operate the pump without priming water, or the pump will overheat.
-
Page 12: Pre-Operation Check
PRE-OPERATION CHECK Check the engine oil level. Engine oil is a major factor affecting engine performance and service life. Nondetergent oils and 2-stroke oils are not recommended because they have inadequate lubricating characteristics. Check the oil level with the pump on a level surface and the engine stopped. - Page 13 Check the fuel level. Use automotive unleaded gasoline with a Research Octane Number of 91 or higher (a Pump Octane Number of 86 or higher). Never use stale or contaminated gasoline or an oil/gasoline mixture. Avoid getting dirt or water in the fuel tank. Gasoline is extremely flammable and is explosive under certain conditions.
- Page 14 Gasolines containing alcohol If you decide to use a gasoline containing alcohol (gasohol), be sure it’s octane rating is at least as high as that recommended by Honda. There are two types of ‘‘gasohol’’: one containing ethanol, and the other containing methanol.
- Page 15 Check the air cleaner element. Remove the wing nut and air cleaner cover. Check the air cleaner elements to be sure they are clean and in good condition. Clean or replace the elements if necessary (see page WING NUT AIR CLEANER COVER ELEMENT Never run the engine without the air cleaner.
-
Page 16: Starting The Engine
STARTING THE ENGINE Turn the fuel valve ON. FUEL VALVE Close the choke lever. Do not use the choke if the engine is warm or the ambient temperature is high. CHOKE LEVER CLOSE Turn the engine switch to the ON position. ENGINE SWITCH... - Page 17 Move the throttle lever slightly to the left. THROTTLE LEVER HIGH Pull the starter grip lightly until you feel resistance, then pull briskly in the direction of the arrow as shown below. Do not allow the starter grip to snap back against the engine. Return it gently to prevent damage to the starter.
- Page 18 Let the engine warm up for several minutes. If the choke lever has been moved to the CLOSE position, move it gradually to the OPEN position as the engine warm up. CHOKE LEVER OPEN CLOSE...
-
Page 19: Carburetor Modification For High Altitude Operation
High altitude performance can be improved by specific modifications to the carburetor. If you always operate your water pump at altitudes above 1,500 meters (5,000 feet), have your authorized Honda servicing dealer perform this carburetor modification. This engine, when operated at high altitude with the carburetor modifications for high altitude use, will meet each emission standard throughout its useful life. -
Page 20: Operation
OPERATION Start the engine according to the procedures described in page Set the throttle at the desired speed. THROTTLE LEVER HIGH Oil Alert System (where equipped) The Oil Alert System is designed to prevent engine damage caused by an insufficient amount of oil in the crankcase. Before the oil level in the crankcase can fall below a safe limit, the Oil Alert System will auto- matically stop the engine (the engine switch will remain in the ON position). -
Page 21: Stopping The Engine
STOPPING THE ENGINE To stop the engine in an emergency, turn the engine switch to the OFF position. To stop the engine in normal circumstances: Move the throttle lever fully to the right. THROTTLE LEVER Turn the engine switch to the OFF position. ENGINE SWITCH... - Page 22 Turn the fuel valve OFF. FUEL VALVE After use, remove the pump drain plug (see page ), and drain the pump chamber. Remove the priming water filler cap, and flush the pump chamber with clean, fresh water. Allow the water to drain from the pump chamber, then reinstall the filler cap and drain plug.
-
Page 23: Maintenance
Use genuine Honda parts or their equivalent for maintenance or repair. Replacement parts which are not of equivalent quality may damage the water pump. -
Page 24: Maintenance Schedule
Service more frequently when used in dusty areas. These items should be serviced by your servicing dealer, unless you have the proper tools and are mechanically proficient. Refer to Honda shop manual for service procedures. For commercial use, log hours of operation to determine proper maintenance intervals. - Page 25 Install the drain plug securely using a new sealing washer. Refill with the recommended oil (see page ) to the specified level. OIL CAPACITY: WT20X… 0.6 (0.6 US qt , 0.5 Imp qt) WT30X… 1.1 (1.2 US qt , 1.0 Imp qt) WT40X…...
- Page 26 Air cleaner service A dirty air cleaner will restrict air flow to the carburetor. To prevent carburetor malfunction, service the air cleaner regularly. Service more frequently when operating the pump in extremely dusty areas. Do not use gasoline or low flash point solvents for cleaning. They are flammable and explosive under certain conditions.
- Page 27 Spark plug service Recommended spark plug: BPR6ES (NGK) W20EPR-U (DENSO) To ensure proper engine operation, the spark plug must be properly gapped and free of deposits. The muffler becomes very hot during operation and remains hot for a while after stopping the engine. Be careful not to touch the muffler while it is hot.
- Page 28 Measure the plug gap with a feeler gauge. Correct as necessary by bending the side electrode. The gap should be: 0.70 0.80 mm (0.028 0.031 in) SIDE ELECTRODE 0.70 0.80 mm (0.028 0.031 in) SEALING WASHER Check that the sealing washer is in good condition, and thread the spark plug in by hand to prevent cross-threading.
- Page 29 Servicing the pump casing After each use, clean the inside of the pump casing using the following procedure: Remove the pump drain plug from the pump cover using the wrench to drain the water inside. WRENCH PUMP DRAIN PLUG Loosen the pump cover knobs using the wrench.
- Page 30 Install the O-ring on the pump cover, taking care not to damage the O-ring. Install the pump cover on the pump casing, and tighten the knobs handtight. Then, set the wrench to the knobs and finish tightening the knob securely. After tightening the pump cover knob, check the pump cover and pump casing to ensure that there is no water leakage.
- Page 31 Spark arrester maintenance (applicable types) The muffler becomes very hot during operation and remains hot for a while after stopping the engine. Be careful not to touch the muffler while it is hot. Allow it to cool before proceeding. The spark arrester must be serviced every 100 hours to maintain its efficiency.
- Page 32 WT20X Remove the four 5 mm screws from the muffler protector and remove the muffler protector. Remove the 4 mm screw from the spark arrester, and remove the spark arrester from the muffler. 5 mm SCREWS MUFFLER PROTECTOR 4 mm SCREW...
- Page 33 Use a brush to remove carbon deposits from the spark arrester screen. Be careful to avoid damaging the screen. SPARK ARRESTER SCREEN The spark arrester must be free of breaks and holes. Replace it if necessary. Install the spark arrester and the muffler protector in the reverse order of disassembly.
-
Page 34: Transporting/Storage
TRANSPORTING/STORAGE To avoid severe burns or fire hazards, let the engine cool before transporting the pump or storing it indoors. When transporting the pump, turn the fuel valve to the OFF position, and keep the pump level to prevent fuel spillage. Spilled fuel or fuel vapor may ignite. - Page 35 Change the engine oil. Remove the spark plug, and pour about a tablespoon of clean engine oil into the cylinder. Crank the engine several revolutions to distribute the oil, then reinstall the spark plug. Pull the starter grip until you feel resistance. Continue pulling until the notch on the starter pulley aligns with the hole on the recoil starter (see illustration below).
-
Page 36: Troubleshooting
Remove and inspect the spark plug. Clean, readjust gap and dry the spark plug. Replace it if necessary. If the engine still does not start, take the water pump to an authorized Honda dealer. When the pump cannot pump the water; Is the pump fully primed? -
Page 37: Specifications
SPECIFICATIONS Model WT20X Power products WAAJ description code Dimensions and Weight Length 620 mm (24.4 in) Width 460 mm (18.1 in) Height 465 mm (18.3 in) Dry mass [weight] 47 kg (104 lbs) Engine Model GX160 K1 Engine type 4-stroke, over head valve,1cylinder Displacement 163 cm (9.9 cu-in) - Page 38 Model WT30X Power products WABJ description code Dimensions and Weight Length 660 mm (26.0 in) Width 495 mm (19.5 in) Height 515 mm (20.3 in) Dry mass [weight] 60 kg (132 lbs) Engine Model GX240 K1 Engine type 4-stroke, over head valve,1cylinder Displacement 242 cm (14.8 cu-in) [Bore...
- Page 39 Model WT40X Power products WACJ description code Dimensions and Weight Length 735 mm (28.9 in) Width 535 mm (21.1 in) Height 565 mm (22.2 in) Dry mass [weight] 78 kg (172 lbs) Engine Model GX340 K1 Engine type 4-stroke, over head valve,1cylinder Displacement 337 cm (20.6 cu-in) [Bore...
- Page 40 Noise WT20X WT30X WT40X Model 92 dB 97 dB 96 dB Sound pressure level ) Tested by prEN12639 Guaranteed sound power level (L 106 dB 110 dB 110 dB Tested by 2000/14/EC Tune-up ITEM SPECIFICATION MAINTENANCE Sparkplug gap 0.70 0.80 m m Refer to page 27 (0.028 0.031 in)
-
Page 41: Major Honda Distributor Addresses
Fax: 223-66-4130 Austria Honda Power Equipment Sweden A.B. Ostmästargränd 8 Tel: 08-602-24-60 Stockholm-Årsta Fax: 08-722-36-27 Sweden Honda Produtos De Força, Portugal, S.A. Lugar da Abrunheira Tel:351-1-9150374 S. Pedro de Penaferrim Fax:351-1-9111021 2710 Sintra, Portugal Berema A/S Berghagan 5, Langhus Tel: 64-86-05-00... - Page 42 Honda Canada Inc. 715 Milner Avenue Tel: 1-888-946-6329 Toronto ON Fax: 1-887-939-0909 M1B 2K8 Canada For Australian NAME OF FIRM (COMPANY) ADDRESS TEL: FAX: Honda Australia Mototcycle and Power 1954-1956 Hume Highway Tel: 03-9270-1111 Equipment Pty. Ltd Campbellfield Victoria 3061 Fax: 03-9270-1133...
- Page 43 K2 WT40X K3 WT20X WT30X Honda Motor Co., Ltd. 2004 36YG0604 1000.2007.07 N HC 00X36-YG0-6040 Printed in Japan...