Table of Contents
Advertisement
Quick Links
MO0403-B
Module No. 2172
GETTING ACQUAINTED
Congratulations upon your selection of this CASIO watch. To get the most out
of your purchase, be sure to carefully read this manual and keep it on hand
for later reference when necessary.
About this manual
6 30
20 00
1
0 5
5
0
Snorkeling/Scuba Diving Precautions
• Make sure that you have received proper diving training before using
this watch underwater.
• Always use the "buddy system" when diving. Never dive alone.
• Note that this watch is NOT a diving computer, and is not capable of
making decompression calculations.
• The depth meter function built into this watch should only be used as
a "back-up" to your standard depth gauge.
• Note that this watch cannot be used in helium atmospheres.
• Though the function of this watch is not affected by magnetism, long
use near a source of magnetism can case the watch itself to become
magnetized. A magnetized watch can interfere with the precision of
readings produced by an underwater compass. To avoid such
problems, keep the watch away from your compass when taking
readings.
Before Diving
• Before beginning each dive, check to make sure that the BATT (and/
or RECOVER) message (which indicates that battery power is weak)
and/or ERR message (which indicates sensor malfunction) are not on
the display. If either message is on the display, contact an authorized
CASIO Dealer/Distributor or authorized CASIO Service Point to have
the battery replaced or to have the watch repaired.
• Make sure that the current time setting of the watch is correct.
• Check the glass, case, and band for cracks or chips.
• Make sure that the band is fastened securely around your wrist.
While Diving
• Check to make sure that the timer and depth gauge are operating
properly.
• Warning indicators flashing on the display indicate the possibility of
a data error. For details, see "Warning Indicators".
• Take care when diving near rocks or coral to avoid scratching or
damaging the watch.
After Diving
• To avoid corrosion, rinse your watch thoroughly with fresh water to
remove salt water, dirt, etc. When possible, soak the watch in fresh
water overnight to make sure that all salt is removed.
• When using a metal band, occasionally clean the gaps in the band
using a soft toothbrush and soapy water. Failure to keep a metal
band clean can result in corrosion of the watch, soiling of clothing, or
irritation of sensitive skin.
CASIO COMPUTER CO., LTD. assumes no responsibility for any
loss, or any claims by third parties that may arise through the use of
this watch.
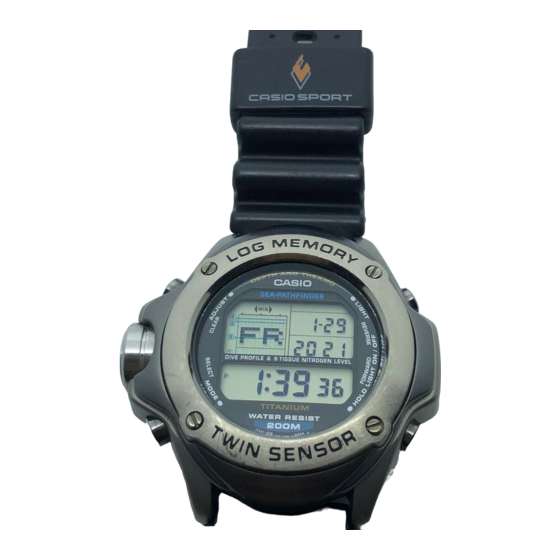
• Button operations are indicated using the
letters shown in the illustration.
• Each section of this manual provides you
with the information you need to perform
operations in each mode. Further details
and technical information can be found in
the "REFERENCE" section.
GENERAL GUIDE
For information on how to read the display, refer to the separate instructions
on each function.
Timekeeping Mode
Time/Date
6 30
Press D.
20 00
1
0 5
5
0
L
Hold down C
for two seconds.
Diving Mode
0 00
10 58
0 0
2
4
Alarm Mode
10 58
1
2 0
TIMEKEEPING
Month – Day
Use the Timekeeping Mode to set the current
time and date, and to view the current time.
Year
Day of week
You also can adjust the display contrast while
in the Timekeeping Mode.
6 30
To reset the seconds count to zero
20 00
1. In the Timekeeping Mode, hold down A
1
0 5
5
0
until the seconds digits start to flash, which
indicates the setting screen.
2. Press D to reset the seconds count to
• Pressing D while the seconds count is in
Hour : Minutes
the range of 30 to 59 resets the seconds to
AM indicator
Seconds
00
of 00 to 29, the minutes count is
unchanged.
3. Press A twice to exit the setting screen.
To set the time and date
1. In the Timekeeping Mode, hold down A
until the seconds digits start to flash, which
indicates the setting screen.
6 30
• While the seconds digits are flashing, press
20 00
D to set the seconds count to
1
0 5
5
0
2. Press C to move the flashing in the
sequence shown below to select other
settings.
Seconds
DST
Hour
°C/°F
M/F
• See "Daylight Saving Time (DST)" for details on the DST setting and
"Adjusting Display Contrast" for information about contrast.
3. Use C to move the flashing to the hour, minutes, year, month, and day,
and make the settings you want for each.
• While the hour, minutes, year, month, or day setting is flashing, use D (+)
and B (–) to change it.
• When the 12/24-hour setting is selected, press D to toggle between
12-hour (
1CL
) and 24-hour (
CZL
2172-1
Temperature
6 30
3 00
1
0 5
5
0
L
Press C.
Recall Mode
0
50
10 58
11 58
8 2
x
3
Dive Profile Mode
0
50
10 58
11 58
8 2
x
3
and adds 1 to the minutes. In the range
00
.
12/24-Hour
Minutes
Year
format
Contrast
Day
Month
) timekeeping.
00
.
Advertisement
Table of Contents

Related Manuals for Casio 2172


Summary of Contents for Casio 2172
-
Page 1: Getting Acquainted
GETTING ACQUAINTED GENERAL GUIDE Congratulations upon your selection of this CASIO watch. To get the most out For information on how to read the display, refer to the separate instructions of your purchase, be sure to carefully read this manual and keep it on hand on each function. -
Page 2: Adjusting Display Contrast
2172-2 • See “DIVING FUNCTIONS” for information about the temperature display 4. Press A twice to exit the setting screen. • The day of the week is automatically displayed in accordance with the date in the Diving Mode. • You can select either Celsius (°C) or Fahrenheit (°F) as the unit of (year, month, and day) settings. -
Page 3: Surface Interval
2172-3 Valid Dive Surface Interval Whenever you surface after a valid dive, the Surface interval Surface watch’s surface timer starts to count the On the Surface (hours : minutes) amount of time you spend on the surface. The Depth =... -
Page 4: Dive Profile
2172-4 To delete log data Date Screen Maximum Depth Screen Dive Profile Data Screen Holding down A for about two seconds in the Recall Mode or Dive Profile Dive end time Mode deletes all the log data and dive profile data for the currently displayed... - Page 5 2172-5 Figure 1: Tissue Nitrogen Uptake Graph Figure 3: Nitrogen Uptake Nitrogen level Tissue Nitrogen Pressure Saturation Value 5-minute 10-minute compartment compartment 20-minute compartment 40-minute compartment Saturation 60-minute compartment half value 80-minute compartment 120-minute compartment 240-minute compartment 320-minute compartment Time...
-
Page 6: Nitrox Diving
2172-6 As can be expected according to the nitrogen uptake characteristics Display Examples illustrated in Figure 1, the left side of the graph climbs steeply when Example 1: Relatively Deep Dive submersing, with the upward slope flattening out as you move to the right. -
Page 7: Important Points To Remember
30 meters (99 feet). your authorized CASIO dealer or distributor as soon as possible to • Calculation is impossible whenever the dive time exceeds 12 hours. arrange for servicing by an authorized CASIO Service Point listed on the Warranty Card. -
Page 8: Backlight
Battery replacement should be performed by an authorized CASIO Service Point only. When replacing battery, the Authorized CASIO Service Point will also perform a full overhaul, replacing the sealing material that is vital to the water resistance of your watch. -
Page 9: Auto Return Features
2172-9 • Note that Invalid Dives made during the surface interval do not affect the REFERENCE surface interval. • You can use this watch while skin diving without affecting dive data or This section contains more detailed and technical information about watch surface interval timing. - Page 10 When replacing the battery, your warning indicator appears along with the problem data. authorized CASIO Service Point will also perform a full overhaul, Abnormal data can be caused by any of the following. replacing the sealing material that is vital to the water resistance of your •...
-
Page 11: Calibrating The Temperature Sensor
(See “Low Battery Warning”) calibrate the sensor. ❑ Did you drop the watch or subject it to strong impact? If so, contact an authorized CASIO Dealer/Distributor as soon as possible Important! to arrange for repair by an authorized CASIO Service Point.