Advertisement
Quick Links
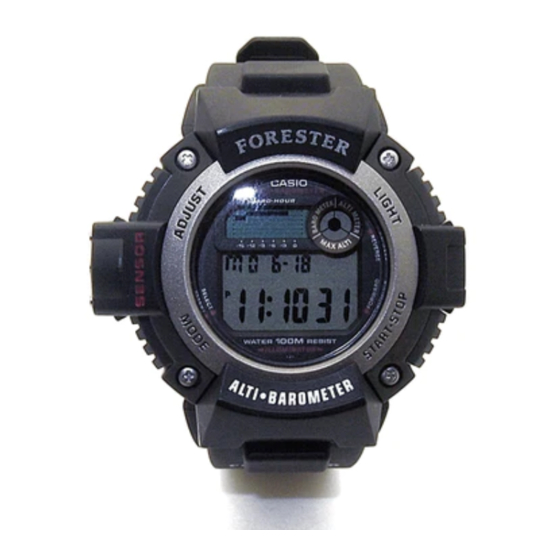
Module No. 2147
• Press C C C C C to change from mode to mode.
• After you perform an operation in any mode, pressing C C C C C returns to the Timekeeping Mode.
• While in the Timekeeping Mode, Barometer Mode and Alarm Mode, press B B B B B to illuminate the display for about 1.5 seconds.
Timekeeping Mode
Sensor
TIMEKEEPING FUNCTION
While in the Timekeeping Mode, press D D D D D to switch be-
Day of week
tween the 12-hour and 24-hour formats.
Barometric
• When 12-hour format is selected, the indicator P ap-
pressure graph
pears on the display to indicate "p.m." times. There is
Month – Day
no indicator for "a.m." times. Selecting the 24-hour for-
mat causes the 24 to appear on the display.
To set the time and date
1. Hold down A A A A A while in the Timekeeping Mode until the
2. Press C C C C C to change the selection in the following se-
Seconds
Minutes
Hour
PM indicator
3. While the seconds digits are selected (flashing), press D D D D D to reset the seconds to
"00". If you press D D D D D while the seconds count is in the range of 30 to 59, the sec-
onds are reset to "00" and 1 is added to the minutes. If the seconds count is in the
range of 00 to 29, the minutes count is unchanged.
4. While any other digits (besides seconds) are selected (flashing), press D D D D D to in-
crease the number or B B B B B to decrease it. Holding down either button changes the
current selection at high speed.
5. After you make your settings, press A A A A A to return to the Timekeeping Mode.
• The day of the week is automatically set in accordance with the date.
• The date can be set within the range of January 1, 2000 to December 31, 2039.
• If you do not operate any button for a few minutes while a selection is flashing, the
flashing stops and the watch goes back to the Timekeeping Mode automatically.
ABOUT THE BACKLIGHT
About the Auto Light Switch Function
When the auto light switch function is turned on, the backlight automatically turns on
for two seconds under the conditions described below. Avoid wearing the watch on
the inside of your wrist. Doing so causes the auto light switch to operate when not
needed, which shortens battery life.
Moving the watch to a position that is parallel to the ground and then tilting it
towards you approximately 40 degrees causes the backlight to illuminate.
• The backlight may not illuminate if the face of the watch is more than 15 degrees off
parallel to the left or right. Make sure that the back of your hand is parallel to the
ground.
Parallel to ground
• Static electricity or magnetic force can interfere with proper operation of the auto
backlight function. If the auto backlight does not illuminate, try moving the watch
back to the starting position (parallel with the ground) and then tilt it back toward
you again. If this does not work, drop your arm all the way down so it hangs at your
side, and then bring it back up again.
• Under certain conditions the backlight may not light until about one second or less
after turn the face of the watch towards you. This does not necessarily indicate
malfunction of the backlight.
Barometer Mode
seconds digits start to flash on the display. The sec-
onds flash because they are selected .
quence.
Seconds
Hour
Day
Month
Parallel to ground
More than 15 degrees
More than 15 degrees
too high
too low
GENERAL GUIDE
To switch the auto light switch function on and off
In the Timekeeping Mode, hold down B B B B B for one or two seconds to turn the auto light
switch function on and off.
• The auto light switch indicator is shown on the display in all modes while the auto
light switch function is on.
• In order to protect against running down the battery, the auto light switch function is
automatically turned off approximately six hours after you turn it on. Repeat the
Minutes
above procedure to turn the auto light switch function back on if you want.
• While in the Timekeeping Mode, Barometer Mode and Alarm Mode, press B B B B B to
Year
illuminate the display for about 1.5 seconds, regardless of the auto light switch's
on/off setting.
Caution
• The backlight of this watch employs an electro-luminescent (EL) light, which loses
its illuminating power after very long term use.
• Frequent use of the backlight shortens the battery life.
• The watch emits an audible sound whenever the display is illuminated. This is be-
cause the EL light vibrates slightly when lit. It does not indicate malfunction of the
watch.
Warning!
• Never try to read your watch when mountain climbing or hiking in areas that
are dark or in areas with poor footing. Doing so is dangerous and can result
in serious personal injury.
• Never try to read your watch when running on a roadside or in any other
location where there might be vehicular or pedestrian traffic. Doing so is dan-
gerous and can result in serious personal injury.
• Never try to read your watch when riding on a bicycle or when operating a
motorcycle or any other motor vehicle. Doing so is dangerous and can result
in a traffic accident and serious personal injury.
• When you are wearing the watch, make sure that its auto light switch function
is turned off before riding on a bicycle or operating a motorcycle or any other
motor vehicle.
Sudden and unintended operation of the auto light switch can create a dis-
traction, which can result in a traffic accident and serious personal injury.
This watch uses a pressure sensor to measure barometric pressure. The readout
40 °
from the pressure sensor can also be switched between hPa(mb) and inHg. The
barometer can be calibrated to correct for measurement error.
Important!
The barometer that is built into this watch measures changes in barometric pressure,
which you can then apply to your own weather predictions. It is not intended for use
as a precision instrument in official weather prediction or reporting applications.
How to interpret barometric readings
• Barometric pressure indicates changes in barometric conditions, and you can pre-
dict weather with reasonable accuracy by monitoring these changes. Rising baro-
metric pressure indicates good weather, while falling pressure indicates deteriorat-
ing weather conditions.
• The barometric pressure you see in the newspaper and on TV weather reports are
measurements that are corrected to 0 m sea level values.
Example barometer applications
• Measurement of barometric changes while hiking to predict coming weather.
• Measurement of barometric differences at different altitudes while mountain climb-
ing.
• Prediction of weather for golf or other outdoor activities.
Switching between hPa(mb) and inHga
Altimeter Mode
Stopwatch Mode
Auto light switch indicator
Hold down B B B B B .
ON
BAROMETER FUNCTIONS
1. Use C C C C C to enter the Barometer Mode.
Mode indicator
2. Hold down A A A A A for about two seconds. In about 6 sec-
onds, the barometric pressure value should start flash-
ing on the display.
3. Press C C C C C to select either "hPa(mb)" and "inHg".
4. After you select "hPa(mb)" or "inHg", press A A A A A to return
to the Barometer Mode.
2147-1
Alarm Mode
OFF
Advertisement

Related Manuals for Casio 2147


Summary of Contents for Casio 2147
- Page 1 Module No. 2147 2147-1 GENERAL GUIDE • Press C C C C C to change from mode to mode. • After you perform an operation in any mode, pressing C C C C C returns to the Timekeeping Mode. • While in the Timekeeping Mode, Barometer Mode and Alarm Mode, press B B B B B to illuminate the display for about 1.5 seconds.
- Page 2 2147-2 To calibrate the barometer Barometric Pressure Monitor Function 1. Enter the Barometer Mode and confirm that the normal The Barometric Pressure Monitor Function automatically takes barometric readings Barometer Mode display (showing the current time) is every three hours (starting from midnight). The measured values are shown on a shown.
- Page 3 Whenever there is a sensor malfunction, be sure to take the watch to an au- thorized CASIO distributor or Service Center as soon as possible. If the ap- pearance of the “BATT.” message is caused by extremely low temperature, the message should clear from the display when normal temperature returns.
- Page 4 2147-4 THINGS TO KNOW ABOUT ALTITUDES Relationships between altitude, barometric pressure, and temperature Generally, barometric pressure and temperature decrease as altitude increases. This watch bases its altitude measurements on International Standard Atmosphere (ISA) values stipulated by the International Civil Aviation Organization (ICAO), which de- fine relationships between altitude, barometric pressure, and temperature.