Table of Contents
Advertisement
Quick Links
Advertisement
Table of Contents

Related Manuals for AEG Voxtel Smart 3


Summary of Contents for AEG Voxtel Smart 3
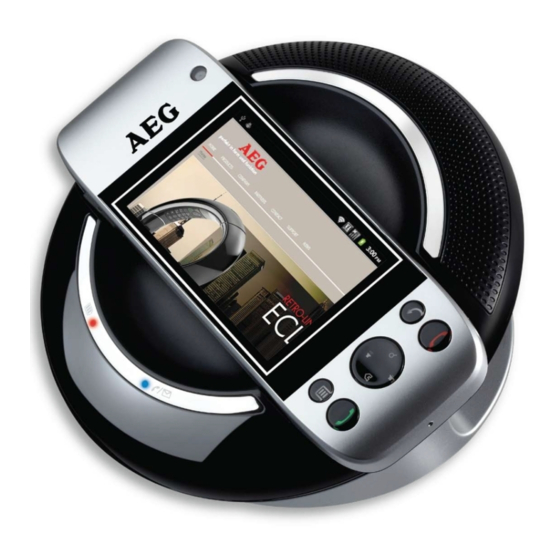
- Page 1 USER GUIDE CORDLESS TELEPHONE Voxtel Smart 3...
- Page 2 WELCOME 1 WELCOME Thank you for purchasing our product! You can use the Smart 3 to: • Make and receive calls • Receive telephone messages and record memos using the digital answer machine • Send and receive Emails via wireless connection •...
- Page 3 IMPORTANT 2 IMPORTANT Your Smart 3 is not designed for making emergency calls in the event of power failure. Alternative arrangements should be made for access to Emergency services during such events. (You are advised to keep a basic phone that does not require mains power for operation.) Use only the power adaptor, battery pack and telephone line cord provided in the box.
-
Page 4: What's In The Box
WHAT'S IN THE BOX? 3 WHAT'S IN THE BOX? The product pack includes: Li-ion battery • 1 x Handset • 1 x Battery cover • 1 x Li-ion Rechargeable Battery Pack • 1 x Base station • 1 x Stand for Base station •... -
Page 5: Overview Of Smart 3
OVERVIEW OF SMART 3 4 OVERVIEW OF SMART 3 Base station Charge LED - RED Turns on when the handset is put into the base cradle for charging. In Use / Message LED - Turns on when the handset is in use or blinks when a BLUE new message is received. -
Page 6: Handset
OVERVIEW OF SMART 3 Handset MENU key • Press once to access the menu options PHONE ON key • Press once to access the Dialler. • Press once to make or answer a call. Microphone FUNCTION buttons < HOME key Press to return to the home screen. -
Page 7: Status Icons
OVERVIEW OF SMART 3 • On the homescreen: Press to increase/decrease VOLUME UP/DOWN keys ringtone volume; press and hold to increase/ decrease ringtone volume quickly • When a call is in progress: Press to increase/ decrease volume during a call •... -
Page 8: Notifications Panel
OVERVIEW OF SMART 3 Battery is charging SD card is inserted Wireless connection is on, and the signal strength DECT signal strength Alarm Clock is set Earphone is connected Speaker is on Silent mode is activated Missed call Call in progress Call on hold Call is muted Digital Answer Machine is on... -
Page 9: Using The Touchscreen
Using the onscreen keyboard Your Voxtel Smart 3 features a Qwerty keyboard, which has the same key arrangement as that of a standard computer keyboard. The onscreen keyboard lets you enter text, such as contact information, email messages, etc. -
Page 10: Switch Between Input Modes
4.6.6 Accept or Reject Dictionary Suggestions Depending on the application you are using, the Voxtel Smart 3 uses a dictionary to suggest corrections or complete the word you are typing. • To accept the suggested word, simply tap on the suggested entry. -
Page 11: Table Of Contents
Screen Rotation.................8 5.19 Recalibrate the touch screen.............8 5.20 Set Date and Time ................8 5.21 Applications on your Voxtel Smart 3 ..........10 Set up your Voxtel Smart 3 with Welcome Wizard..... 11 Wi-Fi settings...................11 Date & time settings ................12 Display.....................12 Sound settings.................13... - Page 12 Personalising your Voxtel Smart 3 ..........14 Display Settings................14 Sound Settings ................16 DECT Settings ................19 Handset Settings ................19 Base Settings ..................20 Voicemail..................21 Listen to Voicemail ................21 10 Using the Phone Functions............22 10.1 Call another handset registered to the same base station (Intercom).
- Page 13 12.10 Delete a Contact from Contacts list..........34 12.11 Link Picture to a Contact ..............34 13 Internet Function ................36 13.1 Register your Voxtel Smart 3 to a Wi-Fi Network......36 13.2 Set Number of Wi-Fi Network Channels .........37 13.3 Select Wi-Fi Sleep Policy ..............37 13.4...
- Page 14 Camera options..................55 20.5 View photos..................55 20.6 Record video ...................55 20.7 Video options.................... 56 20.8 Play videos ..................56 21 Music ....................57 21.1 Listen to Music on your Voxtel Smart 3 ...........57 21.2 Open Music application ..............57 21.3 Music Library ...................57...
- Page 15 21.4 Search for a song ................58 21.5 Party Shuffle all songs..............58 21.6 Turn party shuffle off ...............58 21.7 Create playlists................58 21.8 Set song as ringtone ...............60 21.9 Set sound effects................60 21.10 Delete current song .................60 21.11 Set current song as ringtone ............60 22 Gallery ....................
- Page 16 27.2 Open file as ..................69 27.3 Select all files in a directory.............69 27.4 Create a new folder .................69 27.5 Rename a file ..................70 27.6 Copy a file to another location............70 27.7 Move a file to another location ............70 27.8 Delete a file ..................70 27.9 Compress a file ................70 27.10 View file details................71...
-
Page 17: Getting Started
Always switch off and disconnect the power adapter before cleaning the Voxtel Smart 3. Handset range The Voxtel Smart 3 has a range of up to 300 metres for telephone calls, when there is a clear line of sight between the base and handset. Any obstruction between the base and handset will reduce the range significantly. -
Page 18: Battery Low Warning
GETTING STARTED Battery low warning If the following appears on the display, you will need to charge the handset. 5.4.1 Battery performance Note that a new battery will not reach full capacity until it has been discharged and charged in normal use for several days. To keep your battery in the best condition, leave the handset off the base for a few hours at a time. -
Page 19: Connecting The Power Cable And Telephone Line Cord
GETTING STARTED Connecting the power cable and telephone line cord 1 Plug one end of the power cable and telephone line cord to the power jack and phone jack respectively on the bottom of the base station. 2 Plug the other end into a power and telephone wall socket. 5.6.1 If you have a Broadband line If you connect your telephone to a line with a broadband connection, you will need to... -
Page 20: Base Station
Note If the Red Charging LED did not light up, you need to re-align the Voxtel Smart 3 to get a good charging contact with the base station. If your Voxtel Smart 3 battery is totally flat, it may take a while before you can power up the phone. -
Page 21: Inserting And Mounting A Memory Card
GETTING STARTED IMPORTANT! Use only the rechargeable battery that is provided with your Voxtel Smart 3. 5.10 Inserting and mounting a memory card The Voxtel Smart 3 supports micro SD cards, of up to 32GB.. You can store music, pictures, files and applications on a memory card and access them on your Voxtel Smart 3. -
Page 22: Switching On Your Voxtel Smart 3
(Program Launcher) at the bottom of the screen to view all installed applications. Note If your Voxtel Smart 3 battery is totally flat, it may take a while to charge before you can power up the phone. 5.13 Switching off your Voxtel Smart 3... -
Page 23: Wake Up The Phone
PIN or password to unlock it. See “Lock the screen of your Voxtel Smart 3” below. - The last screen you were viewing opens. 5.17 Lock the screen of your Voxtel Smart 3 1 You can lock the screen of your phone such that onscreen functions will not be accessed accidentally. -
Page 24: Screen Rotation
Settings > Display > G-Sensor Calibration, and follow the onscreen instructions. 5.20 Set Date and Time Note If you remove the battery of your Voxtel Smart 3, you may need to set the date and time again. 5.20.1 Set Date 1 Press and tap Settings >... -
Page 25: Set Time
GETTING STARTED 5.20.2 Set Time 1 Press and tap Settings > Date & time. 2 Tap Set time and then tap + or - on each time field to change Hours and Minutes. 3 Tap AM/PM to select AM (morning) or PM (afternoon). - This option is not available if 24-hour format is activated (see “Set Time Format”... -
Page 26: Applications On Your Voxtel Smart 3
Send and receive email using your existing email accounts over Page 43 a Wi-Fi network. Gallery A library of all the pictures or images on your Voxtel Smart 3. Page 61 Music Listen to music stored on your phone or SD card. -
Page 27: Set Up Your Voxtel Smart 3 With Welcome Wizard
Set up your Voxtel Smart 3 with Welcome Wizard 6 Set up your Voxtel Smart 3 with Welcome Wizard When you first power up the phone or after doing a factory data reset, the Welcome Wizard will help you set up and personalise your phone, such as language, date, time, Wi- Fi setting, etc. -
Page 28: Date & Time Settings
Set up your Voxtel Smart 3 with Welcome Wizard Date & time settings 1 Tap Date & time. 2 Tap Set date. 3 Tap + or - to set Month, Day and Year. 4 Tap Set to confirm. 6.2.1 Set time zone 1 Tap Select time zone. -
Page 29: Sound Settings
Set up your Voxtel Smart 3 with Welcome Wizard Sound settings 6.4.1 Phone ringtone 1 Tap Phone ringtone. 2 Scroll through the list and tap to select a ringtone. - The ringtone is played. 3 Tap OK to confirm. 6.4.2 Volume 1 Tap Volume. -
Page 30: Personalising Your Voxtel Smart 3
Personalising your Voxtel Smart 3 7 Personalising your Voxtel Smart 3 Display Settings 7.1.1 Change Wallpaper 1 From the home screen, press 2 Tap Wallpaper. 3 Tap to select Gallery, Live wallpapers or Wallpapers. - If you select Live wallpapers or Wallpapers, simply tap to select a wallpaper from the list and tap Set wallpaper. - Page 31 Personalising your Voxtel Smart 3 7.1.4 Add apps to your home screen 1 Tap (Program Launcher) to open the launcher and view all your applications. 2 Tap and hold an application icon until it turns bigger. - The application icon will be placed on the home screen.
-
Page 32: Sound Settings
4 Tap OK to confirm. 7.2.4 Set Intercom ringtone This option enables you to set the incoming intercom ringtone on your Voxtel Smart 3. 1 From the home screen, press 2 Tap Settings > Sound > Intercom ringtone. 3 Tap to select a ringtone from the list. - Page 33 Personalising your Voxtel Smart 3 7.2.5 Set Paging ringtone This option enables you to set the incoming paging ringtone on your Voxtel Smart 3. 1 From the home screen, press 2 Tap Settings > Sound > Paging ringtone. 3 Tap to select a ringtone from the list.
- Page 34 Personalising your Voxtel Smart 3 7.2.9 Enable or Disable screen lock sounds This option lets you enable or disable the playing of sounds when locking or unlocking the screen. 1 From the home screen, press 2 Tap Settings > Sound > Screen lock sounds.
-
Page 35: Dect Settings
7 Enter the PIN code of the base station and tap Register. - If successful, “Success” is displayed. Note If the PIN for the base station is set as "0000" (default), the Voxtel Smart 3 will register to the base station without prompting for the PIN. 8.1.2... -
Page 36: Base Settings
7 Enter the PIN code of the base station and tap Register. - If successful, “Success” is displayed. Note If the PIN of the base station is set as "0000" (default), the Voxtel Smart 3 will register to the base station without prompting for the PIN. Base Settings Base settings allows you to view and modify the settings on Voxtel Smart 3 base. -
Page 37: Voicemail
9 Voicemail If you have access to a voicemail service on your telephone line, you can program its number into the Voxtel Smart 3 to make it easier to call when you want to listen to any messages. 1571 is the most common UK voicemail number, but otherwise contact your telephone service provider to check which number their service uses. -
Page 38: Using The Phone Functions
10.2 Make an external call Placing an external call using the Voxtel Smart 3 is similar to dialling with a mobile phone. 1 From the home screen, press 2 Tap Phone tab to access the dial pad. -
Page 39: Make An External Call From Call Log
The Contacts list is like a phonebook that stores the name, telephone numbers and other information of your contacts on the Voxtel Smart 3. The person you want to call must have the telephone number stored in the Contacts list. (See "Add an entry to Contacts list" on... -
Page 40: Answer A Call In Earpiece Mode
When the phone rings, press to accept the call and listen through the earpiece of the Voxtel Smart 3. 10.8 Answer a Call in Speakerphone mode 1 When the Voxtel Smart 3 rings, press to accept the call. 2 Press , then tap Speaker. -
Page 41: Caller Id Directory Matching
Using the Phone Functions 10.14 Caller ID Directory Matching If you have subscribed to Caller ID and the caller's number matches the telephone number you have stored in your Contacts list, it will display the name of the Contact as well as the telephone number when it is received and when you review the Call Log. -
Page 42: Using The Answer Machine
Using the Answer Machine 11 Using the Answer Machine Your Voxtel Smart 3 comes with a Digital Answer Machine that is switched on by default to enable callers to leave you a message when you are not available to answer the call. -
Page 43: Important
11.4 Set Remote Pin You can set a remote pin code for your Voxtel Smart 3 to improve the security of your personal messages. Once enabled, users will need to enter the pin code to access recorded messages on the Digital Answer Machine. -
Page 44: Delete Recorded Messages
1 Tap > Answering Machine. 2 Tap 3 Record the memo you wish to leave for other users of the Voxtel Smart 3 when prompted. 4 When you are done with the recording, tap - The Digital Answer Machine will playback your memo once to confirm that all... -
Page 45: Outgoing Message Setting
Using the Answer Machine 11.8 Outgoing Message Setting External callers are greeted with an outgoing message when the call is answered by the Digital Answer Machine. The Digital Answer Machine has pre-recorded default messages for this purpose. You can also record a personalised outgoing message. 11.8.1 Select OGM Option You can set the Digital Answer Machine to greet unanswered calls with either an Answer &... -
Page 46: Remote Operation
Using the Answer Machine 3 Choose to play the personalised message for Answer & Record or Answer Only. 4 While the message is playing, tap Delete OGM to delete the personalised outgoing message and return it to the default OGM. Note The default outgoing messages cannot be deleted. -
Page 47: Contacts List
Contacts List 12 Contacts List The Contacts list is like a Phonebook that stores the name, telephone numbers and other information of your contacts. 12.1 Open Contacts list From the home screen, press and tap Contacts tab. 12.2 Search for a contact in Contacts list 1 From the home screen, press and tap Contacts. -
Page 48: Assign Ringtone To A Contact
Contacts List 6 Tap More to add more information about the contact, such as IM, Notes, Website, Internet call. 7 Tap Done when finished. - The new contact will be stored in your Contacts list. 12.4 Assign Ringtone to a Contact 1 From the home screen, press and tap Contacts tab. -
Page 49: Enable Forwarding Of Calls To Voicemail
Contacts List 12.6 Enable forwarding of calls to voicemail 1 From the home screen, press and tap Contacts tab. 2 Tap to select the contact from the contacts list. 3 Press and tap Options > Incoming calls. - Calls from the contact will be forwarded directly to the Digital Answer Machine. 4 To cancel forwarding, tap Options >... -
Page 50: Delete A Contact From Contacts List
Contacts List 12.10 Delete a Contact from Contacts list 1 From the home screen, press and tap Contacts tab. 2 Tap to select the contact from the contacts list. 3 Press and tap Delete contact. 4 Tap OK to confirm. 12.11 Link Picture to a Contact You can link a picture to your contact so that you can see the picture of the contact when you search for the contact from the Contacts list or when the contact calls you. -
Page 51: Call A Contact From Contacts List
Contacts List - To resize the picture, tap and hold the edge of the box, and drag inward or outward. - To move the crop box to another area on the picture, tap and hold inside the box, then drag it to the desired position. 6 Tap Save to link the picture to the contact. -
Page 52: Internet Function
- The screen displays a list of available Wi-Fi networks. 4 Tap the Wi-Fi network that you want the Voxtel Smart 3 to be connected to. If you cannot find your favourite Wi-Fi network name, press and then tap Scan. -
Page 53: Set Number Of Wi-Fi Network Channels
4 Tap Advanced > Regulatory domain. 5 Select from 11 channels, 13 channels or 14 channels. 13.3 Select Wi-Fi Sleep Policy You can specify when to put the Wi-Fi connection to sleep, but the Voxtel Smart 3 cannot switch to mobile data. Press 2 Select Settings >... -
Page 54: Check Voxtel Smart 3 Mac Address
For secured Wi-Fi networks with MAC address filtering, you will need to include the MAC address of your Voxtel Smart 3 into the filter list before a connection can be established. To check the MAC address of your Voxtel Smart 3: Press 2 Select Settings >... -
Page 55: Using The Web Browser
SEE PAGE 36 ON HOW TO JOIN A WI-FI NETWORK. You can use the Browser to surf the web. The Browser is fully optimised and comes with advanced features that let you enjoy Internet browsing on your Voxtel Smart 3. By default, the home page is www.google.com 14.1 Open Browser... -
Page 56: Zoom In And Out Of A Webpage
Using the Web Browser 14.6 Zoom in and out of a webpage When viewing a webpage, double tap on the screen to zoom in and out, or launch the zoom control by sliding your finger across the screen in one direction and tap + to zoom in and - to zoom out. -
Page 57: Downloading Web Applications
Using the Web Browser 14.9.2 Email links 1 Tap on the link. - The Email application will launch automatically. 2 Enter the subject using the onscreen keyboard, tap Next. 3 Enter the message and then tap Send to send the email, Save as draft or Discard (for more information on how to use the email application, see page 43). -
Page 58: Customise Browser Options
Using the Web Browser 14.12 Customise Browser Options You can customise the Browser to suit your browsing preferences by setting the display, privacy, and security options. In the Browser window, press , and then tap More > Settings to modify the browser settings according to your preference. -
Page 59: Email
Email 15 Email YOU MUST JOIN A WI-FI NETWORK THAT IS CONNECTED TO THE INTERNET BEFORE YOU CAN SETUP, SEND AND RECEIVE EMAILS. SEE PAGE 36 ON HOW TO JOIN A WI-FI NETWORK. IT IS IMPORTANT TO SET THE CORRECT DATE AND TIME INFORMATION BEFORE YOU SET UP YOUR FIRST EMAIL ACCOUNT AND START TO ACCESS YOUR EMAILS. -
Page 60: Set Up Another Email Account
Email 6 Enter the Account name (optional) and tap Done. 7 Enter Your name (optional) to be displayed on outgoing messages, and then tap Done. - The email application will start to load your messages. It might take a few minutes for the messages to load completely. -
Page 61: Compose And Send Email Messages
Email 15.6 Compose and send email messages You can send an email message to anyone who has an email address. You can send the message to one person or to a group of people. 1 Tap > Email. 2 Tap to select an email account from the Accounts window. 3 Press and tap Compose. -
Page 62: Open An Attached File
Tap the attachment. It downloads to the Voxtel Smart 3 and then opens. If the format of an attached file is not supported by the Voxtel Smart 3, you can see the name of the file but you can't open it. -
Page 63: Forward An Email Message
Email 15.12 Forward an email message 1 Tap > Email. 2 In the Accounts window, tap on the folder icon next to the email account you want to access. - The available folders are displayed. 3 Tap to select the folder you want to check. - The messages are displayed. -
Page 64: Tunein Radio
TuneIn Radio 16 TuneIn Radio YOU MUST JOIN A WI-FI NETWORK THAT IS CONNECTED TO THE INTERNET BEFORE YOU CAN LISTEN TO RADIO BROADCASTS FROM THE INTERNET. SEE PAGE 36 ON HOW TO JOIN A WI-FI NETWORK. TuneIn Radio is an audio service transmitted via the Internet. With this application, you can listen live to your favorite radio stations and programs as well as find new ones by genre, language or location. -
Page 65: Search Station By Name
TuneIn Radio 16.3 Search Station by Name 1 Tap and tap TuneIn Radio. - The screen displays a list of options for you to search for a radio station by genre, location, language etc. > 2 Press 3 Enter the station name and tap Done. - The screen displays the search results. -
Page 66: Rssfeed
RssFeed 17 RssFeed YOU MUST JOIN A WI-FI NETWORK THAT IS CONNECTED TO THE INTERNET BEFORE YOU CAN RECEIVE AND READ RSSFEED. SEE PAGE 36 ON HOW TO JOIN A WI-FI NETWORK. RSS Feed is a web feed used to publish frequently updated works such as blog entries, news headlines and audio. -
Page 67: Stock
Stock 18 Stock YOU MUST JOIN A WI-FI NETWORK THAT IS CONNECTED TO THE INTERNET BEFORE YOU CAN CHECK STOCK PRICES. SEE PAGE 36 ON HOW TO JOIN A WI-FI NETWORK. The Stock reader shows updated quotes for the stocks in your portfolio list. Quotes are updated every time you open the Stock reader while connected to the Internet. -
Page 68: Get More Information About A Stock
Stock 18.5 Get more information about a stock 1 In the Stock window, tap to select Get Quote. 2 Tap on the Search input box to launch the onscreen keyboard. 3 Enter the name of the stock you wish to check and tap Search. - A list of query results appears. -
Page 69: Weather
Weather 19 Weather YOU MUST JOIN A WI-FI NETWORK THAT IS CONNECTED TO THE INTERNET BEFORE YOU CAN CHECK WEATHER. SEE PAGE 36 ON HOW TO JOIN A WI-FI NETWORK. The Weather application lets you view the current weather as well as the weather forecast for the next four days of the week. -
Page 70: Take Photos And Record Videos
Take photos and record videos 20 Take photos and record videos Note To get clear photographs, wipe the lens clean with a soft, dry cloth before you take photo. 20.1 Open Camera > Camera. 20.2 Switch between camera and camcorder mode Drag slider to camera or camcorder icon to switch mode. -
Page 71: Camera Options
Take photos and record videos 20.4 Camera options Shows thumbnail of last photo Drag up to switch to camcorder Tap to take photo Drag slider to select zoom factor from 1x to 4x Tap to select white balance: Auto, Incandescent, Daylight, Fluorescent, Cloudy Select Incandescent or Fluorescent for indoor lighting or Daylight or Cloudy for outdoor lighting. -
Page 72: Video Options
Take photos and record videos - Tap Delete to delete the video. - Tap Share to send the video via email - Tap More for other video options. Press to return to viewfinder. 20.7 Video options Tap to select video quality: High, Low, MMS, YouTube Select Low if sending the video via MMS, High if storing the video on an SD card. -
Page 73: Music
The Music application lets you play digital audio files stored in a memory card. You must copy your audio files to a memory card and insert it into the Voxtel Smart 3 before you launch the music application. See "Inserting and mounting a memory card" on page 5. -
Page 74: Search For A Song
Party shuffle off. 21.7 Create playlists You can use playlists to organise your music files. You can create as many playlists as you want on your Voxtel Smart 3. 1 In the playback window, press 2 Tap Add to playlist. - Page 75 Music 21.7.3 Add songs to a playlist 1 From the main music library, tap to select a category from which you wish to add songs to a playlist. Go to Songs category to show all the available songs. 2 Tap and hold the song you wish to add to playlist. - A pop-up options menu appears.
-
Page 76: Set Song As Ringtone
Music 21.8 Set song as ringtone You can use songs as your phone ringtone. 1 From the main music library, tap to select a category from which you wish to use song as ringtone. Go to Songs category to show all the available songs. 2 Tap and hold the song you wish to use as ringtone. -
Page 77: Gallery
Gallery 22 Gallery The Gallery application lets you view photos and videos on the phone. It presents the pictures and videos on your SD card, including those you have taken with the Camera and those you have downloaded from the web or other locations. 22.1 Open Gallery >... -
Page 78: Clock
Clock 23 Clock 23.1 Open Clock > Clock. 23.2 Set an alarm 1 Tap > Clock. 2 Tap 3 Tap Add alarm. 4 Tap + or - or the hour and minute fields to set the alarm time. 5 Tap to select AM or PM. Note This option is not available if Use 24-hour format is activated. -
Page 79: Deactivate An Alarm Setting
Clock 23.4 Deactivate an alarm setting 1 Tap > Clock. 2 Tap - A list of alarm settings is displayed. 3 Tap on the alarm icon to deactivate an alarm setting. - The alarm icon is not underlined in green. 23.5 Activate alarm in silent mode You can set your alarm clock to sound an alarm even when the phone is in silent mode. -
Page 80: Calendar
Calendar 24 Calendar You can use the Calendar to create and manage events, meetings, and appointments. 24.1 Open Calendar > Calendar. Note The last Calendar view opens by default. 24.2 View Agenda for the day In any Calendar view, press and tap Agenda. -
Page 81: View, Dismiss, Or Snooze A Reminder
Calendar 4 If it is a special occasion such as a birthday or a whole-day event, tap From to set date, and then select All day check box. 5 Enter Event location and description. 6 If you have more than one calendar, tap the down arrow on the right of L-Calendar to select the Calendar where you want to save the event. -
Page 82: Performing Calculations
Performing Calculations 25 Performing Calculations You can use the Calculator to perform simple and advanced arithmetical calculations. 25.1 Open Calculator > Calculator. 25.2 Perform Calculations • Tap on the numbers and mathematical operators to perform simple calculations. • Press and tap Advanced panel to access advanced operators such as sin, cos, tan, log etc. -
Page 83: Downloading And Reading Ebooks
Downloading and Reading eBooks 26 Downloading and Reading eBooks Aldiko is an e-book reader application for Android devices. You can browse, shop, download, read and organise eBooks right from the application. The e-book reader supports Adobe DRMed ePub and PDF as well as non-encrypted ePub and PDF formats. -
Page 84: Buy Books
1 Tap to select your desired category. 2 Tap to select a book and tap Download. - Your Voxtel Smart 3 begins to download the book in the background. Once the download is complete, it will appear as New content in your Aldiko library. -
Page 85: Es File Explorer
ES File Explorer. 27.1 Open ES File Explorer > ES File Explorer. to browse the files and folders in your Voxtel Smart 3 or memory card. to go to the root directory. to search for files or folders. -
Page 86: Rename A File
ES FILE EXPLORER 27.5 Rename a file 1 Tap and hold the file you wish to rename. - A pop-up menu appears. 2 Tap Rename. 3 Enter the new file name and tap OK. 27.6 Copy a file to another location 1 Tap and hold the file you wish to copy. -
Page 87: View File Details
ES FILE EXPLORER 27.10 View file details 1 Tap and hold the file you wish to view details. - A pop-up menu appears. 2 Tap Properties. 3 Tap OK to close the information box. 27.11 Modify View Settings in ES File Explorer 1 In ES File Explorer window, press and tap Settings. -
Page 88: Install Apps
Install apps 28 Install apps You can install Apps (usually in .apk format) into your Voxtel Smart 3 with a Micro-SD Card. 1 Copy the Apps files into a Micro-SD card 2 Insert the Micro-SD card into the card slot of the handset 3 Run ES File Explorer. -
Page 89: Connect Your Handset To A Computer
Connect your handset to a computer 29 Connect your handset to a computer You can transfer you pictures, videos, music, ringtones and application from your computer to either the Micro-SD card or Internal Phone Memory. WARNING When connecting your phone to a computer and mounting its SD card, you must follow your computer’s instructions for connecting and disconnecting USB devices to avoid damaging or corrupting the files on your SD card. -
Page 90: Es Task Manager
ES Task Manager 30 ES Task Manager This Android program helps you free memory, kill task, close all the running applications, and speed up your Voxtel Smart 3. 30.1 Open ES Task Manager 1 Tap > ES Task Manager. - A list of current tasks is displayed. -
Page 91: Settings
Settings 31 Settings From the home screen, press and then tap Settings. You can modify the different settings of your Voxtel Smart 3. Wireless & Configure your phone's wireless connections, such as Wi-Fi. networks Call settings Set up voicemail. Dect Settings View and configure base station and handset settings. -
Page 92: Help
• See page 5 on how to insert a memory card. My Voxtel Smart 3 shows a low-battery warning • The Voxtel Smart 3 is low on power and needs to be charged before you can use it. • See page 4 on how to charge your Voxtel Smart 3. - Page 93 • Release the Page button and press it again immediately. • The Talk/Message LED light should light up once more. • Register your Voxtel Smart 3 to the base station. See page 19 on how to register your Voxtel Smart 3 to the base station.
-
Page 94: Guarantee And Service
HELP If the handset disconnects from the base during a phone call • Check that the power adapter is connected properly into the electrical outlet. • You may have moved out of range of the base. Move closer to the base. 32.1 Guarantee and Service The phone is guaranteed for 24 months from the date of purchase shown on your sales receipt. -
Page 95: Technical Specifications
HELP 32.2 Technical Specifications DECT frequency band 1880 MHz - 1900 MHz Channels Operating Temperature 5ºC to 45ºC Storage -20ºC to 60ºC Temperature Power Adaptor Input : 200-240VAC 50Hz 0.3A Output 1 : 5.8VDC 600mA Output 2 : 5.8VDC 1000mA Handset Battery 3.7V 910mAh Li-ion Rechargeable Battery Pack Screen Size... -
Page 96: Ce Declaration
HELP 32.3 CE Declaration This product is in compliance with the essential requirements and other relevant provisions of the R&TTE directive 1999/5/EC. The Declaration of conformity can be found on: www.aegtelephones.eu... - Page 97 © 2012 Binatone Electronics International Limited All rights reserved Subject to avaibility. Rights of modification reserved. AEG is a registered trademark used under license from AB Electrolux (publ) www.aegtelephones.eu...