Sanyo PDG-DXL2000 Owner's Manual
Multimedia projector
Hide thumbs
Also See for PDG-DXL2000:
- Service manual (98 pages) ,
- Specifications (73 pages) ,
- Network manual (60 pages)
Chapters
Table of Contents

Related Manuals for Sanyo PDG-DXL2000


Summary of Contents for Sanyo PDG-DXL2000
- Page 1 Multimedia Projector 3D Ready PDG-DXL2000 MODEL • DLP Link and IR format compatible ® Network Supported Refer to the Owner's Manual below for details about network function. • Network Set-up and Operation Owner’s Manual...
- Page 2 © SANYO Electric Co., Ltd. 2010 Trademarks • DLP is a registered trademark of Texas Instruments. BrilliantColor and DynamicBlack are trademarks of Texas Instruments. • HDMI, the HDMI logo and High-Definition Multimedia Interface are the trademarks or registered trademarks of HDMI Licensing, LLC.
-
Page 3: Features And Design
Features and Design This Multimedia Projector is designed with the most advanced technology for portability, durability, and ease of use. Large Screen in Limited Space Digital Zoom (for Computer) Short focus lens allows you to project large images The digital zoom function allows you to focus on from short distance. -
Page 4: Table Of Contents
Table of Contents Features and Design ....3 Image Mode Selection Image Adjustment Table of Contents ..... .4 Screen Size Adjustment To the Owner. -
Page 5: To The Owner
To the Owner Before installing and operating this projector, read this Safety Precaution manual thoroughly. This projector provides many convenient features and WARNING: THIS APPARATUS MUST BE EARTHED. functions. Operating the projector properly enables TO REDUCE THE RISK OF FIRE OR you to manage those features and maintains it in good ELECTRIC SHOCK, DO NOT EXPOSE THIS condition for many years to come. -
Page 6: Safety Instructions
Safety Instructions All the safety and operating instructions should be read Do not install the projector near the ventilation duct of before the product is operated. air-conditioning equipment. Read all of the instructions given here and retain them This projector should be operated only from the type for later use. -
Page 7: Air Circulation
Safety Instructions Air Circulation Filter Maintenance The projector uses a lamp which generates significant Openings in the cabinet are provided for ventilation. heat. The cooling fans and air vents are provided to To ensure reliable operation of the product and to dissipate the heat by drawing air into the housing and protect it from overheating, these openings must not the filter is located in the intake vents to prevent dust... -
Page 8: Installing The Projector In Proper Position
Safety Instructions Installing the Projector in Proper Position Install the projector properly. Improper installation may reduce the lamp life and cause fire hazard. Do not roll the projector more than 10 degrees from side to side. 10˚ 10˚ Do not roll the projector more than 5 degrees from side to side when front or rear is downward. -
Page 9: Compliance
Model Number : PDG-DXL2000 Trade Name : Sanyo Responsible party : SANYO NORTH AMERICA CORPORATION Address : 21605 Plummer Street, Chatsworth, California 91311 Telephone No. : (818)998-7322 AC Power Cord Requirement The AC Power Cord supplied with this projector meets the requirement for use in the country you purchased it. -
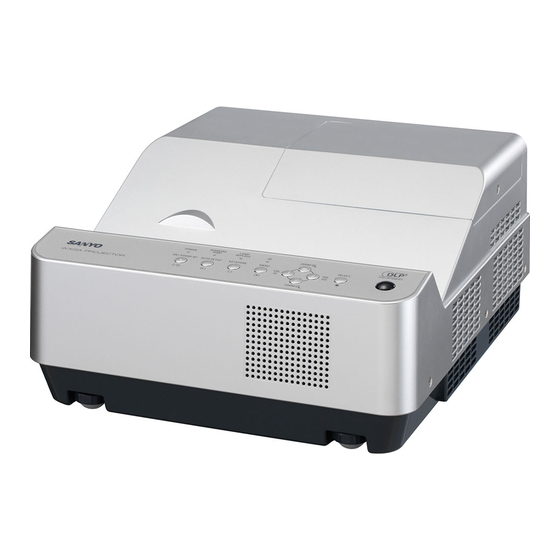
Page 10: Part Names And Functions
Part Names and Functions Front Top Controls and Indicators Infrared Remote Receiver CAUTION The infrared remote receiver sticks out of the cabinet surface. If the infrared remote receiver is put on the wall or floor directly, the infrared remote receiver may damage. Lamp Cover (Lamp and Air Filter) Adjustable feet Speaker... -
Page 11: Side Terminal
Part Names and Functions Side Terminal S-VIDEO IN 3D SYNC OUT Connect the S-VIDEO output signal from video Connect a 3D sync. signal cable for an IR wireless equipment to this jack (p.17). emitter to this jack (p.48) VIDEO IN LAN Connection Terminal Connect the composite video output signal to this Connect the LAN cable (refer to the owner’s... -
Page 12: Top Controls And Indicators
Part Names and Functions Top Controls and Indicators ON/STAND-BY button POWER indicator – Turn red when the projector is in the stand-by Turn the projector on or off (pp.20-22). mode. AUTO SETUP button – Turn green while the projector is under operation (pp.20, 74). -
Page 13: Remote Control
Part Names and Functions Remote Control ON/STAND-BY button S-VIDEO button Turn the projector on or off. (pp.20- Select the S-VIDEO input source. (p.41) Point buttons – Select an item or adjust the value in the On-Screen Menu. AUTO SET button (p.23) Execute the setting of Auto setup –... -
Page 14: Remote Control Battery Installation
Part Names and Functions Remote Control Battery Installation Open the battery Install new batteries Replace the compartment lid. into the compartment. compartment lid. Two AAA size batteries For correct polarity (+ and –), be sure battery terminals are in contact with pins in compartment. -
Page 15: Installation
Installation Positioning the Projector For projector positioning, see the figures below. The projector should be set perpendicularly to the plane of the screen. Note: • This projector is not equipped with an optical zoom. To adjust the screen size, change the throw distance. -
Page 16: Connecting To A Computer
Installation Connecting to a Computer Cables used for connection • VGA cables (Mini D-sub 15 pin) * • Audio cables • HDMI-DVI cable (*One cable is supplied; other cables are not supplied with the projector.) External Audio Equipment Monitor Output Monitor Audio Audio... -
Page 17: Connecting To Video Equipment
Installation Connecting to Video Equipment Cables used for connection • Video and Audio cable (RCA x 3) • S-video cable • Audio cable (Cables are not supplied with the projector. ) External Audio Equipment Video and Audio Output Audio Input S-video Output (Video) Video and audio... -
Page 18: Connecting To Component Video Equipment
Installation Connecting to Component Video Equipment Monitor Output Signal Table Cables used for connection • Audio cables Input Terminal Monitor Out Cable RGB (PC analog) • Scart-VGA cable COMPUTER 1/ D-sub15 Y, Pb/Cb, Pr/Cr • Component cable COMPONENT RGB (SCART) •... -
Page 19: Connecting The Ac Power Cord
Installation Connecting the AC Power Cord This projector uses nominal input voltages of 100–240 V AC and it automatically selects the correct input voltage. It is designed to work with single-phase power systems having a grounded neutral conductor. To reduce the risk of electrical shock, do not plug into any other type of power system. -
Page 20: Basic Operation
Basic Operation Turning On the Projector Complete peripheral connections (with a computer, VCR, etc.) before turning on the projector. Connect the projector’s AC power cord into an AC outlet. The POWER indicator lights red. Press the ON/STAND-BY button on the remote control or on the top control. - Page 21 Basic Operation Enter a PIN code PIN Code Input Dialog Box Use the Point buttons to enter a number. Press the Point button to fix the number and move the red frame pointer to the next box. The number changes to . If you fixed an incorrect number, use the Point button to move the pointer to the number you want to correct, and then...
-
Page 22: Turning Off The Projector
Basic Operation Turning Off the Projector Press the ON/STAND-BY button on the remote control or on the top control, and Power off? appears on the screen. Press the ON/STAND-BY button again to turn off the projector. The POWER indicator starts to blink red, and the cooling fans keep running. -
Page 23: How To Operate The On-Screen Menu
Basic Operation How to Operate the On-Screen Menu The projector can be adjusted or set via the On-Screen Remote Control Menu. The menu has a hierarchical structure, with a main POINT buttons menu that is divided into submenus, which are further (arrowhead) divided into other submenus. -
Page 24: Menu Bar
Basic Operation Menu Bar For detailed functions of each menu, see “Menu Tree” on pages 72-73. Main Menu Sub-Menu Input Used to select an input source from Computer 1, Computer 2, HDMI, Video or S-video. (pp.30-31, 41-42) PC adjust Select Auto PC adj., Fine sync, Total dots, Horizontal, Vertical, Current mode and Clamp to adjust the parameters to match with the PC input signal format. -
Page 25: Zoom And Image Position Adjustment
Basic Operation Zoom and Image Position Adjustment Press the ZOOM +/- buttons on the top control to adjust the Top Control screen size. Screen size can be adjusted 84% to 100% from its maximum screen size. It is not available when On-Screen menu is displayed. Zoom adjustment can be memorized. -
Page 26: Auto Setup Function
Basic Operation Auto Setup Function Auto setup function is provided to automatically execute the setting of Auto setup (includes Input search and Auto Remote Control PC adj. functions) in the Setting Menu by just pressing the AUTO SET button on the remote control. Refer to page 51 for the setting of the Auto setup function. -
Page 27: Sound Adjustment
Basic Operation Sound Adjustment Direct Operation Remote Control Voume Press the VOLUME+/– buttons on the remote control or on VOLUME + button the top control to adjust the volume. The volume dialog box MUTE button appears on the screen for a few seconds. VOLUME - button Mute Press the MUTE button on the remote control to select On... -
Page 28: Remote Control Operation
Basic Operation Remote Control Operation Using the remote control for some frequently used operations is advisable. Just pressing one of the buttons enables you to make the desired operation quickly without calling up the On-Screen Menu. Remote Control COMPUTER 1, COMPUTER 2, HDMI buttons COMPUTER 1/2 buttons VIDEO, S-VIDEO, COMPONENT buttons... - Page 29 Basic Operation Remote Control 3D button Select 3D mode from 3D Off, 3D(Sync 1), 3D(Sync 2) and SCREEN button 3D VISION. (p.48-49) P-TIMER button NO SHOW button 3D Off 3D(Sync 1) 3D button 3D VISION 3D(Sync 2) IMAGE button * The 3D indicator on the control panel emits blue at 3D (Sync 1), 3D(Sync 2) and 3D VISION.
-
Page 30: Computer Input
Computer Input Input Source Selection (Computer 1: RGB) Direct Operation Remote Control Choose Computer 1(RGB) by pressing the COMPUTER 1 button on the remote control. Before using these buttons, correct input source should be COMPUTER 1 button selected through Menu operation as described below. Computer 1(RGB) Computer 1(Scart) Input Menu... -
Page 31: Input Source Selection (Computer 2: Rgb)
Computer Input Input Source Selection (Computer 2: RGB) Direct Operation Remote Control Choose Computer 2 (RGB) by press the COMPUTER 2 button on the remote control. COMPUTER 2 button Computer 2 (RGB) Note: COMPUTER 2 can not be selected when using the COMPUTER IN 2/ MONITOR OUT terminal as MONITOR OUT. -
Page 32: Computer System Selection
Computer Input Computer System Selection This projector automatically tunes to various types of computers with its Multi-scan system and Auto PC adjustment. If a computer is selected as a signal source, this projector automatically detects the signal format and tunes to project a proper image without any additional settings. (Signal formats provided in this projector are shown on pages 75-76.) One of the following messages may appear when: When the projector can not recognize the... -
Page 33: Auto Pc Adjustment
Computer Input Auto PC adjustment Auto PC adjustment function is provided to automatically adjust Fine sync, Total dots, Horizontal , Vertical and Clamp position to conform to your computer. Menu Operation Auto PC adj. PC adjust Menu Press the MENU button to display the On-Screen Menu. -
Page 34: Manual Pc Adjustment
Computer Input Manual PC adjustment Some computers employ special signal formats which may not be tuned by Multi-scan system of this projector. Manual PC adjustment enables you to precisely adjust several parameters to match those signal formats. The projector has five independent memory areas to store those parameters manually adjusted. It allows you to recall the setting for a specific computer. - Page 35 Computer Input Reset Mode free Menu To reset the adjusted data, select Reset and press the SELECT button. A confirmation box appears and then select Yes. All adjustments will return to their previous figures. Mode free To clear the stored data, select Mode free and then press the Point or the SELECT button.
-
Page 36: Image Mode Selection
Computer Input Image Mode Selection Remote Control Direct Operation IMAGE button Select the desired image mode among Dynamic, Standard, Dynamic Real, Cinema, Image 1, Image 2, Image 3, and Image 4 by pressing the IMAGE button on the remote control. Standard Real Cinema... -
Page 37: Image Adjustment
Computer Input Image Adjustment Press the MENU button to display the On-Screen Image adjust Menu Menu. Use the Point buttons to select Image adjust and then press the Point or the SELECT button. Use the Point buttons select the desired item and then press the SELECT button to display the adjustment dialog box. -
Page 38: Screen Size Adjustment
Computer Input Screen Size Adjustment This projector has the picture screen resize function, which enables you to customize the image size. Press the MENU button to display the On-Screen Screen Menu Menu. Use the Point buttons to select Screen and then press the Point or the SELECT button. - Page 39 Computer Input Custom adj. Menu Custom adj. Adjust the screen scale and position manually with this function. Press the Point button at Custom adj. and the Custom adjustment menu is displayed on the screen, you can use the Point buttons to choose the item you want to adjust. Scale H/V ..
- Page 40 Computer Input Keystone Keystone This function is used to adjust keystone distortion of the projected image. Use the Point buttons to choose the item you want to adjust. Keystone To correct keystone distortion, press the SELECT button. Keystone appears on the screen. Use the Point buttons to correct keystone distortion (p.26).
-
Page 41: Video Input
Video Input Input Source Selection (Video, S-video) Direct Operation Remote Control Choose Video or S-video by pressing the VIDEO button or VIDEO button the S-VIDEO button on the remote control. Video S-VIDEO button S-video Input Menu Menu Operation Press the MENU button to display the On-Screen Menu. -
Page 42: Input Source Selection (Component, Scart, Hdmi)
Video Input Input Source Selection (Component, Scart, HDMI) Remote Control Direct Operation Choose Computer 1(Component) or Computer 1(Scart) COMPUTER 1 button Computer 1 (RGB) by pressing the the COMPONENT or COMPUTER 1 button on the remote control; choose HDMI by pressing the HDMI button on the remote control. -
Page 43: Image Mode Selection
Video Input Image Mode Selection Remote Control Direct Operation IMAGE button Select the desired image mode among Dynamic, Standard, Dynamic Real, Cinema, Image 1, Image 2, Image 3, and Image 4 by pressing the IMAGE button on the remote control. Standard Real Cinema... -
Page 44: Image Adjustment
Video Input Image Adjustment Press the MENU button to display the On-Screen Image adjust Menu Menu. Use the Point buttons to select the Image adjust and then press the Point or the SELECT button. Use the Point buttons select the desired item and then press the SELECT button to display the adjustment dialog box. - Page 45 Video Input Sharpness Press the Point button to decrease the sharpness of the image; press the Point button to increase the sharpness of the image (from 0 to 15). Gamma Use the Point buttons to adjust the gamma value to obtain a better balance of contrast (Default, 1.8, 2.0, 2.2, 2.4, or 2.6).
-
Page 46: Screen Size Adjustment
Video Input Screen Size Adjustment This projector has the picture screen resize function, which enables you to customize the image size. Press the MENU button to display the On-Screen Screen Menu Menu. Use the Point buttons to select Screen and then press the Point or the SELECT button. - Page 47 Video Input Keystone Keystone This function is used to adjust keystone distortion of the projected image. Use the Point buttons to choose the item you want to adjust. Keystone To correct keystone distortion, press the SELECT button. Keystone appears on the screen. Use the Point buttons to correct keystone distortion (p.26).
-
Page 48: 3D Display
3D Display For Viewing 3D Contents To view 3D images, you need to prepare at least the 3D active shutter glasses, 3D content and 3D reproducing equipment. For example, as for computer, when transmitting 3D signals from a computer to the projector, you also need to install the graphic card which has the capability to sequentially output the 3D frames at 120Hz and software in the computer. - Page 49 3D Display CAUTION FOR PROPERLY VIEWING 3D PICTURES - The optimum 3D viewing distance from the screen - There are differences in 3D visual perception is about 3 m or more and your eyes should be level between individuals. with the screen. - If you get double vision or don’t get the 3D effect, - Viewing 3D images for an extended period of time or discontinue using the projector.
-
Page 50: Setting
Setting Setting This projector has a Setting Menu that allows you to set up Setting Menu the other various functions described below. Press the MENU button to display the On-Screen Menu. Press the Point buttons to select the Setting and press the Point or the SELECT button to access the submenu items. - Page 51 Setting Auto setup Auto setup This function enables Input search and Auto PC adjustment by pressing the AUTO SET button on the remote control. Settings for those functions can be altered as follows: Input search This function detects the input signal automatically. When a signal is found, the search will stop.
-
Page 52: 3D Setting
Setting 3D setting 3D setting This function is used to set the 3D display function. (pp.48- 49) Press the Point buttons to switch between each option. 3D.....Select among Off, On and NVIDIA 3D VISION mode. * When selecting NVIDIA 3D VISION mode, the other menus 3D sync, 3D->2D, 3D phase setting are not necessary. - Page 53 Setting Background Select the background screen for when no input signal is detected. Press the Point buttons to switch between each option. Blue . . . Project a blue background. User . . . Project an image captured in the Logo setting. Black .
- Page 54 Setting Capture This function enables you to capture an image being Capture projected to use it for a starting-up display or interval of presentations. Select Capture and press the SELECT button. A confirmation box appears and select Yes to capture the projected image.
- Page 55 Setting Enter a Logo PIN code Enter a Logo PIN code Use the Point buttons to enter a number. Press the Point button to fix the number and move the red frame pointer to the next box. The number changes to . If you fixed an incorrect number, use the Point button to move the pointer to the number you want to correct, and...
- Page 56 Setting HDMI setup HDMI setup This function is only used for HDMI input source. Image Select Normal or Enhanced to match the video range setting of your HDMI Digital RGB equipment. Sound HDMI ..... When using the HDMI cable, select HDMI. Both video and audio* are transferred and you need not to connect any additional cables for audio.
- Page 57 Setting Power management For reducing power consumption as well as maintaining Power management the lamp life, the Power management function turns off the projection lamp when the projector is not operated for a certain period. Select one of the following options: Timer left before Lamp is off.
- Page 58 Setting Closed caption Closed caption Closed Caption is a function that displays the audio portion of a TV program as text on the screen. If the input signal contains Closed captions, you can turn on the feature and switch the channels. Press the Point buttons to select Off, CC1, CC2, CC3 or CC4.
-
Page 59: Key Lock And Pin Code Lock
Setting Security (Key lock and PIN code lock) Key lock This function allows you to use the Key lock and the PIN code lock function to set the security for the projector operation. Key lock This function locks the top control and remote control buttons to prevent operation by unauthorized persons. - Page 60 Setting Enter a PIN code Use the Point buttons to enter a number. Press the Enter a PIN code Point button to fix the number and move the red frame pointer to the next box. The number changes to . If you fixed an incorrect number, use the Point button to move the pointer to the number you want to correct, and then...
- Page 61 Setting This function provides the following options in the cooling fans’ operation when the projector is turned off (p.22). L 1 ..Normal operation L 2 ..Slower, lower-sound and longish-time than the normal operation (L1). Fan control Choose the running speed of cooling fans from the following Note: options according to the ground elevation under which you •...
- Page 62 Setting Filter counter This function is used to set a frequency for the filter Filter counter replacement. Use the Point buttons to select Filter counter and then press the Point or the SELECT button to access the submenu items. Filter counter..Show the total accumulated time of the filter use timer setting.
-
Page 63: Information
Information Input Source Information Display The Information Menu is used for checking the status of the image signal being projected and the operation of the projector. Direct Operation Remote Control The information menu changes each time you press the INFO. button on the remote control as follows. page 1/2 page 2/2 hide... -
Page 64: Maintenance And Cleaning
Maintenance and Cleaning WARNING TEMP. indicator The WARNING TEMP. indicator shows the state of the function which protects the projector. Check the state of the WARNING TEMP. indicator and the POWER indicator to take proper maintenance. The projector is shut down and the WARNIN TEMP. indicator is blinking red. -
Page 65: Replacing The Filter
Maintenance and Cleaning Replacing the Filter Filter prevents dust from accumulating on the optical elements inside the projector. Should the Filter become clogged with dust particles, it will reduce cooling fans’ effectiveness and may result in internal heat buildup and adversely affect the life of the projector. If a “Filter warning” icon appears on the screen, replace the Filter immediately. -
Page 66: Cleaning The Projection Window
Maintenance and Cleaning Cleaning the Projection Window CAUTION This projector is equipped with a projection window. - Do not rub the projection window with a hard fiber cloth or hit it with a something hard to prevent the projection window from scratching. - Do not use a chemical cleaner (liquid and solid) to avoid deteriorating the projection window. -
Page 67: Lamp Replacement
ORDER REPLACEMENT LAMP Replacement lamp can be ordered through your dealer. When ordering a projection lamp, give the following information to the dealer. Model No. of your projector : PDG-DXL2000 Replacement Lamp Type No. : POA-LMP143 (Service Parts No. 610 351 3744) -
Page 68: Resetting The Lamp Counter
Maintenance and Cleaning Resetting the Lamp Counter Be sure to reset the Lamp counter after the lamp is replaced. When the Lamp counter is reset, the LAMP REPLACE indicator stops lighting and the Lamp replacement icon disappears. Press the MENU button to display the On-Screen Menu. -
Page 69: Appendix
Appendix Troubleshooting Before calling your dealer or service center for assistance, check the items below once again. – Make sure you have properly connected the projector to peripheral equipment as described on pages 16-18. – Make sure all equipment is connected to AC outlet and the power is turned on. –... - Page 70 Appendix Problem Solutions Pages Image is out of focus. Adjust focus of the projector. Provide proper distance between the projector and the projection screen. Check the projection window to see if it needs cleaning. Moving the projector from a cool to warm place may result in moisture condensation on the projection lens.
- Page 71 Appendix Problem Solutions Pages No sound Check the audio cable connection from audio input source. Adjust the audio source. Press the Volume + button. Press the Mute button. When the AUDIO OUT is plugged-in, the projector's built-in speaker is not available. Is the image projected? You will hear the sound only when the image is projected.
-
Page 72: Menu Tree
Appendix Menu Tree Computer Input/HDMI Input/Video Input Input Input Computer 1 Component RGB (Scart) Computer 2 COMPUTER 2 can not be selected HDMI when using the COMPUTER IN 2/ MONITOR OUT terminal as MONITOR OUT output. Video S-video Sound Sound Volume 0-63 Mute... - Page 73 Appendix Computer Input/HDMI Input/Video Input Video Input System 1080p Image select Dynamic 1080i Standard 720p Real 575p Cinema 480p Image 1 575i Image 2 480i Image 3 Image 4 System SECAM NTSC NTSC 4.43 Setting Language 24 languages provided. PAL-M Menu position PAL-N Auto setup...
-
Page 74: Indicators And Projector Condition
Appendix Indicators and Projector Condition Check the indicators for projector condition. Indicators WARNING LAMP Projector Condition POWER TEMP. REPLACE Red/Green Yellow Blue The projector is off. (The AC power cord is unplugged.) The projector is in stand-by mode. Press the ON/ STAND-BY button to turn on the projector. -
Page 75: Compatible Computer Specifications
Appendix Compatible Computer Specifications Basically this projector can accept the signal from all computers with the V-, H- Frequency mentioned below and less than 150 MHz of Dot Clock. When selecting these modes, PC adjustment can be limited. ON-SCREEN RESOLUTION H-FREQ. V-FREQ. - Page 76 Appendix When the input signal is digital from HDMI terminal, refer to the chart below. ON-SCREEN RESOLUTION H-FREQ. V-FREQ. ON-SCREEN RESOLUTION H-FREQ. V-FREQ. DISPLAY [kHz] [Hz] DISPLAY DISPLAY [kHz] [Hz] DISPLAY D-VGA 640x480 31.469 59.940 D-SXGA+ 2 1400x1050 65.120 59.900 720x480 i 15.734 59.940...
-
Page 77: Technical Specifications
Appendix Technical Specifications Mechanical Information Projector Type Multi-media Projector Dimensions (W x H x D) 12.6" x 6.7" x 15.2" (321.0 mm x 170.0 mm x 385.0 mm) (Not including protrusions) Net Weight 13.7 lbs (6.2 kg) DLP Chip Projection System 0.55"... -
Page 78: Optional Parts
Appendix Optional Parts The parts listed below are optionally available. When ordering those parts, specify the item name and Model No. to the sales dealer. Model No. SCART-VGA Cable : POA-CA-SCART COMPONENT-VGA Cable : POA-CA-COMPVGA VGA Cable (10 m) : KA-MC-DB10 Ceiling Hanger : POA-CHS-PS02 (for low ceiling) : POA-CHL-PL02 (for high ceiling) -
Page 79: Configurations Of Terminals
Appendix Configurations of Terminals COMPUTER IN 1 /COMPONENT IN LAN TERMINAL (RJ-45) (Mini D-sub 15 pin) Red(R/Cr) Input TX– Green(G/Y) Input Blue (B/Cb) Input - - - ----- - - - Ground (Horiz.sync.) 8 7 6 5 4 3 2 1 RX–... -
Page 80: Pin Code Number Memo
Appendix PIN Code Number Memo Write down the PIN code number in the column below and keep it with this manual securely. If you forgot or lost the number and unable to operate the projector, contact the service center. PIN Code Lock No. Factory default set No: 1 2 3 4* Logo PIN Code Lock No. -
Page 81: Dimensions
Appendix Dimensions Unit: inch(mm) Screw Holes for Ceiling Mount Screw: M4 Depth: 0.63(16.0) 4.95 (125.8) 4.51 (114.5) 4.10 (104.2) 4.25 (107.9) 0.39 (10.0) 5.30 (134.6) 3.05 (77.5) 6.69 (170.0) 7.01 (178.0) 12.64 (321.0) Screw Holes for Ceiling Mount Screw: M4 Depth: 0.63 (16.0) - Page 82 KV8AC...
- Page 83 Owner’s Manual Network Set-up and Operation Wired Setting Projector Set-up and Operation This is the manual for the Network function. Read this manual thoroughly to operate the Network function. First, read the owner's manual of the projector to understand the basic operation of the projector and the safety instructions.
-
Page 84: Federal Communications Commission Notice
If such changes or modifications should be made, you could be required to stop operation of the equipment. Model Numbers : PDG-DXL2000 Trade Name : Sanyo Responsible party : SANYO NORTH AMERICA CORPORATION Address : 21605 Plummer Street, Chatsworth, California 91311 Telephone No. : (818)998-7322... - Page 85 Safety instructions CAUTION IN USING THE PROJECTOR VIA NETWORKS When you find a problem with the projector, remove the power cable immediately and inspect the unit. Using the projector with failure may cause fire or other accidents. If you remotely use the projector via networks, carry out a safety check regularly and take particular care to its environment.
- Page 86 Table of contents Compliance ..................................2 Safety instructions ................................3 Table of contents ................................4 Chapter 1 Preparation ....................5 Features....................................6 Required operating environment for computers ..................7 Network specifications of the projector......................7 Flow of installation................................9 Chapter 2 Setup Procedures.................. 11 Connecting to the LAN line............................ 12 Network configuration...............................
-
Page 87: Chapter 1 Preparation
Chapter 1 Preparation Describes features and operating environment of this projector. -
Page 88: Features
Chapter 1 Preparation Features Web Management function ( p.31) With this func tion, you can monitor projector functions such as power status, lamp s t at us , inp u t m o d e, si gnal condition, lamp-use time, etc. through the network by using the web browser installed on Turn ON PJ2... -
Page 89: Required Operating Environment For Computers
Features Required operating environment for computers When operating the projector via networks, computers should meet the operating envi- ronment below. Windows 2000, Windows XP (32bit version), Windows Vista (32bit version), Windows 7 (32bit version) Operating System Mac OS X v 10.4 or 10.5 Windows: Pentium III 900MHz or more Recommended CPU Macintosh : 800 MHz PowerPC G4 or faster,or 1.8 GHz Intel Core... - Page 90 Chapter 1 Preparation Cabling Between the Projector and a Hub or computer Use an appropriate cable when connecting the projector and a hub or computer. Connection Ethernet cable type Max. cable length Projector - Hub STP straight-through category 5 * cable 100m (328feet) Projector - Computer...
-
Page 91: Flow Of Installation
Flow of installation Flow of installation To use the projector via the networks, follow the setup procedures below. STEP 1 Connect the LAN and set the configuration. Decide depending on the LAN environment. “2. Setup Procedures” (pp.11–16). Detailed LAN configurations need to be done with a browser later. First, complete the Wired LAN connection between computers and projec- tors, then start browser configurations. - Page 92 Chapter 1 Preparation...
-
Page 93: Chapter 2 Setup Procedures
Chapter 2 Setup Procedures Describes how to configure the network. -
Page 94: Connecting To The Lan Line
Chapter 2 Setup Procedures Setting procedures and contents differ depending on the LAN installation location. When installing, consult your system administrator to set up the LAN appropriately. Connecting to the LAN line Connect the LAN cable to the LAN connection terminal of the projector. ACT Lamp (Orange) Blink orange when the LAN Connection... - Page 95 Network configuration 3. Select "Network setting" in the Network menu and press SELECT button, and then the LAN setting screen will appear and selected LAN settings will be displayed. Adjust each item to the setting environment. Consult your system administrator about the detailed settings.
-
Page 96: Network Pin Code
Chapter 2 Setup Procedures Network PIN code The Network PIN code is to restrict the access to the projector through the network. After setting the Network PIN code, you need to enter it to operate the projector via the networks. 1. -
Page 97: Network Factory Default
Network factory default Network factory default 1. Select “Network factory default” in the Network menu and press SELECT button. 2. A confirmation box appears and select "Yes" and then press SELECT button. 3. Another confirmation box appears and select "Yes" and then press SELECT button. 4. -
Page 98: Wired Lan Factory Default Settings
Chapter 2 Setup Procedures Wired LAN factory default settings SELECTED LAN Parameter LAN 1 LAN 2 LAN 3 DHCP IP ADDRESS 169.254.100.100 192.168.100.100 192.168.100.100 SUBNET MASK 255.255.0.0 255.255.255.0 255.255.255.0 GATEWAY ADDRESS 255.255.255.255 255.255.255.255 255.255.255.255 DNS ADDRESS 255.255.255.255 255.255.255.255 255.255.255.255... -
Page 99: Chapter 3 Basic Setting And Operation
Chapter 3 Basic Setting and Operation Describes basic operations and settings for controlling the projec- tor by using the web browser. It is required that computer and projector is connected to the network and the network address is properly configured. -
Page 100: Login The Setting Page Of The Projector
Chapter 3 Basic Setting and Operation Login the setting page of the projector [1] Enter the IP address Launch the web browser installed in your computer, enter the IP address into the "Address" on the browser and then press "Enter" key. Enter the address that you configured in item "Network configuration"... -
Page 101: Display Of Main Setting Page
Login the setting page of the projector [3] Display of main setting page The following main setting page will be displayed according to your display mode selection. Perform various kinds of settings through this page. Click on the menus to dis- play the control and setting pages. -
Page 102: How To Use The Setting Page
Chapter 3 Basic Setting and Operation How to use the setting page To control and set up the projector, use the setting menus on the web browser. The basic operation and procedures commonly used on this manual are described below. Example of the setting page The setting menu appears when clicking the sub menu tab. - Page 103 How to use the setting page Radio button setting Select an item by selecting a radio button. Check box setting Select items by ticking on check boxes.
-
Page 104: Initial Setting
Chapter 3 Basic Setting and Operation Initial setting After installing the projector, perform the following basic initial setting. Click Initial Setting on the main menu to display the initial setting page. * The serial number in the figure is used for an example. Item Description Language....Switches display language on the setting page. -
Page 105: Network Pin Code Setting
Initial setting Network PIN code setting This is to set the Network PIN code to restrict the access from an unauthorized person through the network. Enter a 4-digit number as the Network PIN code onto the text box and click Set button. The projector begins restarting and it takes about 10 seconds. -
Page 106: Network Configuration
Chapter 3 Basic Setting and Operation Network configuration Click Network on the main menu. The following setting page is displayed. The IP Address, Subnet Mask, Default Gateway, DNS (Domain Name Server) and projector name are set up on this menu. The IP address and Subnet Mask have been configured already in chapter "Installation". -
Page 107: E-Mail Setting
E-mail setting E-mail setting This projector has an E-mail function which can send an alert message to users or an administrator if it detects an abnormality on the projector or run out of the life span of the lamp. Click E-mail Setting on the main menu and follow the below steps. - Page 108 Chapter 3 Basic Setting and Operation Setting SMTP server and administrator address Enter the server name or IP address of the SMTP server* , the port number of the SMTP server and administrator address and click Set button. The administrator address is set to "Reply-To"...
- Page 109 E-mail setting Setting POP server When "POP before SMTP" is selected at "Auth" of "SMTP Authentication setting", enter "POP server* " and "POP server port" and click Set button. *2 The POP server is a server for receiving e-mail. Please contact your network administrator to have this POP server address. Error message for sending alert mail Error message for missing SMTP server When the projector has an abnormality, an...
-
Page 110: Examples: Type And Contents Of Alert Mail
Chapter 3 Basic Setting and Operation Examples: Type and contents of alert mail When the projector has an abnormality, the following alert messages are sent to the regis- tered E-mail address according to your selected condition. Administrator or user can take an efficient action quickly by receiving this message. -
Page 111: Snmp Setting
SNMP setting SNMP setting This projector provides a SNMP (Simple Network Management Protocol) agent function. The SNMP consists of a manager and agents. The group which communicates information each other with SNMP is called "Community". There are two access modes in a community, Refer (read only) and Set (read- write). - Page 112 Chapter 3 Basic Setting and Operation Trap check/delete Check and delete the trap address Checking the registered trap address and deleting the address. To delete the address, tick check box in front of the IP address and click Delete button. Up to 10 trap addresses can be registered.
-
Page 113: Chapter 4 Controlling The Projector
Chapter 4 Controlling the Projector Describes controlling and setting of the projector by using the web browser. -
Page 114: Power Control And Status Check
Chapter 4 Controlling the Projector Power control and status check Click Power & Status on the main menu. The control page will be dis- played. By clicking ON or Standby button on the page, the power of the projector can be con- trolled. - Page 115 Power control and status check About projector condition Status Description Normal............... Projector is operating normally. Power management in operation... Power management is operating Lamp failure........... Lamp failure is occurring Abnormal temperature ......The temperature of the projector became too high Standby after Abnormal Temp..
-
Page 116: Control
Chapter 4 Controlling the Projector Control Click Control on the main menu. The setting method differs depending on the contents of the page. Click on the page number to change pages and select desired setting items. Please see the owner's manual of the projector to have the further information of each control item. -
Page 117: System
Control System This function is to select the system of signal input to the projector. The available system mode are listed on the pull-down menu but- ton according to the input signal. Select a system and then click Set button. * When the input signal is any of Video, S-video, Scart, Component or HDMI, it only dis- plays the current system of signal input but no suggested system. -
Page 118: Sound
Chapter 4 Controlling the Projector Sound This function is to adjust the sound of the projector. The values in the text box represent the current control value or status. Item Description Volume ....Adjusts the sound volume from the speaker. (0 ~ 63) Mute......Suppresses the sound. -
Page 119: Image Adjustment
Control Image adjustment This function is to adjust the projected picture image and save the image mode. To store the adjusted value, click Store button, and to load the adjusted value, click Load button. Item Description Contrast ......Adjusts picture con- trast (0~ 63) Brightness ...... -
Page 120: Pc Adjustment
Chapter 4 Controlling the Projector PC adjustment Click PC Adj. on the main menu. This function is to adjust the signal from the computer connected to the projector to obtain the proper picture image on the screen. Item Description Current mode..Displays a current mode like VGA, SVGA, XGA. SXGA, UXGA, WXGA, etc. or Mode1 - Mode10 which are the customized mode created by using the "Mode Store"... -
Page 121: Setting Up The Projector
Setting up the projector Setting up the projector Click Setting on the main menu. This function is to set up the projector. Select the sub menu [Screen setting] or [Setting] and then set up each set- ting. Screen setting This function is to adjust the screen mode of the projector. -
Page 122: Setting 1
Chapter 4 Controlling the Projector Continue from the previous page. Item Description Ceiling.....Sets the image top/bottom and left/ right reversed. (ON, OFF) Rear......Sets the image left/right reversed. (ON, OFF) Colorboard ..Sets the similar color of the wall or the school blackboard. {OFF, Red, Yellow, Blue, Green, Blackboard(Green)} Reset......Resets the Screen settings. -
Page 123: Setting 2
Setting up the projector Setting 2 Item Description Terminal....Sets the COMPUTER IN 2/MONITOR OUT terminal. (Computer2, Monitor out) Power management ..Sets into the selected power manage- ment mode (Ready, Shutdown, OFF) if the input signal is interrupted and no control key is pressed for the specified period of time. -
Page 124: Information
Chapter 4 Controlling the Projector Information This page is to display the basic information of the projector status. Click Information on the main menu. Click this button to update the information. Information Items Description Input..........Displays selected input and source. System ........Displays selected signal system. Signal..........Input signal status (Yes, No) Screen ........Displays screen mode. - Page 125 Information Indication of the lamp status Icon display/background Status Lamp on (Normal) White/Blue Lamp on (Lamp is being used over a specified use time, replace lamp White/Red immediately) Lamp off (Normal) Gray/Blue Lamp off (Lamp is being used over a specified use time, replace lamp Gray/Red immediately) Lamp failure (Lamp failure, check lamp condition)
- Page 126 Chapter 4 Controlling the Projector...
-
Page 127: Chapter 5 Appendix
Chapter 5 Appendix Connection examples Use of telnet Web browser setting Q & A... -
Page 128: Examples Of Connection
Chapter 5 Appendix Examples of connection Peer-To-Peer connection Connecting the projector (PJ01) to the control computer (PC05) directly. * STP crossover cable Computer Name: PC05 Projector Name: PJ01 IP Address : 192.168.0.5 IP Address : 192.168.0.2 Subnet Mask : 255.255.255.0 Subnet Mask : 255.255.255.0 Default Gateway :... - Page 129 Examples of connection The gateway (Router) installed in the network Connecting the projector (PJ01) to the control computer (PC05) via the gateway. Entrance hall Computer Name : PC205 IP Address : 192.168.200.5 Subnet Mask : 255.255.255.0 Default Gateway : 192.168.200.1 : 192.168.201.1 Projector Name: PJ01 IP Address...
-
Page 130: Use Of Telnet
Chapter 5 Appendix Use of telnet You can control the projector by using the telnet application installed on your computer. Normally, the telnet application is available on your computer. * The telnet 10000 port is used to control the projector. Control (For example, in case of using the telnet (For example, in case of using the telnet... - Page 131 Use of telnet 3. When communication is established correctly, the word "PASSWORD:" appears on the window. Type the login password (Network PIN code ) for the projector and then press "Enter" key on the keyboard. If you do not set up the Network PIN code, just press "Enter" key.
-
Page 132: Web Browser Setting
Chapter 5 Appendix Web browser setting This projector is designed to be set up and controlled from an Internet web browser. Depending on the preference settings of the web browser, some control functions may not be available. Please make sure that the following functions are set up properly in the web browser. -
Page 133: Examples: Os/Browsers
Web browser setting Examples: OS/Browsers Windows XP Professional Internet Explorer v.6.0 ActiveScript setting Select Internet Options from Tools menu on the web browser and then select Security tab and click Customize Level… button. On the security setting window, scroll down and find the Scripting item, make sure that "Enable"... -
Page 134: Proxy Setting
Chapter 5 Appendix Proxy setting Select Internet Options from Tools menu on the web browser and then select Connection tab and click LAN Settings button. Properly set up your web browser's the proxy server settings according to the local area network environment to which the pro- jector is connected. - Page 135 Web browser setting Netscape Navigator v.7.1 JavaScript Setting Select Preference from Edit menu on the web browser a n d t h e n s e l e c t t h e i t e m Advanced/Scripts & Plugins in the Category column.
- Page 136 Chapter 5 Appendix MAC OS X v 10.4 Safari v.3.2.1 JavaScript enable setting Selec t Preferences... from Safari on the web browser and then select S e c u r i t y t a b a n d c h e c k E n a b l e JavaScript.
-
Page 137: Q&A
Q&A Q&A Installation/Access Why doesn’t the setting page appear in my web browser? Following causes are possible. Please check them. 1. The projector does not connect to the network. Check LED indicators status ( p.12). - Check the connection of LAN cable if the LINK Lamp does not light green. - Check the network configuration of the projector if the ACT Lamp does not blink orange. - Page 138 Chapter 5 Appendix We use the DHCP/BOOTP server to assign the IP address. Is it possible to use the projector in this network environment? Possible. This projector supports the DHCP/BOOTP server. To use this projector in this network environment, set it up so that the DHCP/BOOTP server does not assign the IP address configured to this projector for another device on the network.
- Page 139 Q&A Operation Why can't be turned on/off with web browser? Please make sure the settings of the projector are correct to use the projector. Please set the Standby mode of the projector's Setting menu to "Network". Refer to "4. Controlling the Projector" "Power control and status check"...
- Page 140 Chapter 5 Appendix Others What are the rules for IP address assignment? If the network is constructed with TCP/IP protocol, a unique IP address is required for each piece of network equipment. The following are basic rules of the assign- ment.
- Page 141 Q&A Can I update the firmware of the projector. It is possible to update the firmware through the network. It is required to have a special tool for the updating. For further information please consult your local deal- er. The version number of the firmware is indicated on the lower part of the "Initial setting"...
- Page 142 NETWORK OWNER'S MANUAL SO-KV8AC SANYO Electric Co., Ltd.