Table of Contents
Advertisement
Quick Links
OPERATING INSTRUCTIONS
CE
Please read this instructions manual carefully before using this product and save this manual
for future use.
Model No.
Getting Started
Read Me First ......................................................... 3
Precautions............................................................. 5
Names and Functions of Parts ............................... 8
First-time Operation .............................................. 11
Operation
Starting Up/Shutting Down ................................... 13
LCD (Touchscreen) ............................................... 15
Keyboard .............................................................. 18
Program Buttons ................................................... 20
Battery Power ....................................................... 21
SD/Multi Media Cards ........................................... 22
Connecting to Your Computer ............................... 23
Pocket Internet Explorer ....................................... 25
Customizing the Computer ................................... 26
Troubleshooting
Dealing with Problems .......................................... 28
Appendix
For Effective Use .................................................. 31
Specifications ....................................................... 32
LIMITED USE LICENSE AGREEMENT ............... 34
LIMITED WARRANTY .......................................... 36
Handheld Computer
CF-P1
Contents
®
Series
Advertisement
Table of Contents

Related Manuals for Panasonic CF-P1Series


Summary of Contents for Panasonic CF-P1Series
-
Page 1: Table Of Contents
® Handheld Computer OPERATING INSTRUCTIONS CF-P1 Series Model No. Contents Getting Started Read Me First ............3 Precautions............. 5 Names and Functions of Parts ....... 8 First-time Operation ..........11 Operation Starting Up/Shutting Down ........13 LCD (Touchscreen) ..........15 Keyboard .............. - Page 2 * For the Model No., insert the 12 digit number (for example, CF-P1S3BZZ3M) located on the bot- tom of the computer. Introduction Thank you for purchasing the Panasonic Handheld Computer. Read the operating instruc- tions thoroughly for proper operation of your new computer. Illustrations and Terminology in this Manual NOTE: NOTE provides a useful fact or helpful information.
-
Page 3: Read Me First
Connect the equipment into an outlet on a circuit different from that to which the receiver is connected. Consult the Panasonic Service Center or an experienced radio/TV technician for help. Warning To assure continued compliance, use only shielded interface cables when connecting to a computer or peripheral. -
Page 4: Lithium Battery
Read Me First For Canada This Class B digital apparatus complies with Canadian ICES-003. Cet appareil numérique de la classe B est conforme à la norme NMB-003 du Canada. Lithium Battery Lithium Battery! This computer contains a lithium battery to enable the date, time, and other data to be stored. The battery should only be exchanged by authorized service personnel. -
Page 5: Precautions
Precautions The CF-P1 was developed based on thorough research into real-world portable computing environments. Exhaustive pursuit of usability and reliability under harsh conditions led to innovations such as the magnesium alloy exterior and flexible internal connections. The CF-P1's outstanding engineering has been tested using the stiff MIL-STD- 810E (for vibration and shock) and IP (for dust and water) based procedures. -
Page 6: Battery Pack
Precautions Peripherals Incorrectly using peripheral devices may lead to a decrease in performance, an increase in temperature and/or damage your computer. Battery Pack Do Not Use With Any Other Care should be exercised with regard to Device the following in order to avoid the possi- The battery pack is rechargeable bility of over-heating, fire, or damage. - Page 7 NOTE The battery pack may become warm during recharging or normal use. This is com- pletely normal. Recharging will not commence outside of the allowable temperature range (5 °C to 40 °C {41°F to 104°F}). Once the allowable range requirement is satisfied, charging begins automatically.
-
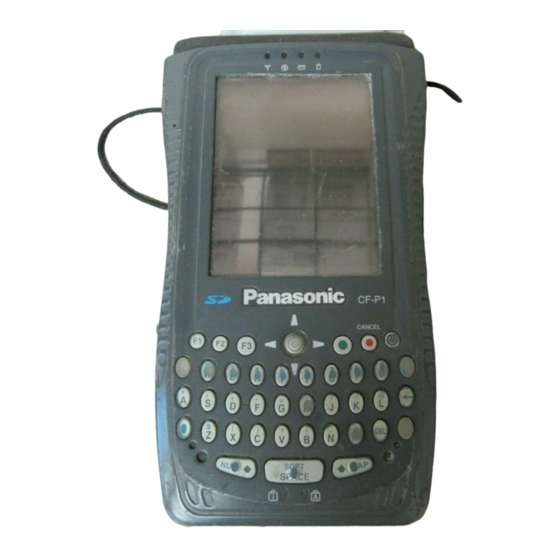
Page 8: Names And Functions Of Parts
Names and Functions of Parts The illustrations shown may differ from the actual physical appearances. LED Indicators *Not available on all models. Within Communications Range: Green Some models have built-in Out of Communications Range: OFF cards (e.g., scanner and RF RF Module Power module). -
Page 9: Attaching The Strap
Speaker To adjust the volume, tap [Start] - [Settings] - [Con- trol Panel] in order, and then double-tap [Volume & Sounds]. pages 11 and 21) Battery Pack Headphone Jack Use this connector to connect headphones or am- plifier-equipped speakers. Audio output from the internal speaker is disabled when headphones or external speakers are connected. - Page 10 Names and Functions of Parts Connecting/Removing the Cradle Connecting the Cradle Connect the cradle after removing the AC adaptor from the computer and closing the cover of the DC-IN jack. DC-IN Jack Cover The AC adaptor is connected to the position shown by the arrow in the figure.
-
Page 11: First-Time Operation
First-time Operation Install the battery pack. Battery Pack Cover (1) Turn your computer over. (2) Slide the latch and remove the battery pack cover. If it is difficult to slide the latch, press position (A) and then slide the latch. NOTE If the attached strap makes it difficult to remove the Latch... - Page 12 First-time Operation CAUTION After the cover is closed, press down firmly on the cover and con- firm that the cover is locked. Handling the AC adaptor Do not twist or pull the AC power cord forcefully. Doing so may damage the connections.
-
Page 13: Starting Up/Shutting Down
Starting Up/Shutting Down Starting Up (from the second time) Lightly press the power switch once (within 0.5 sec.). An application or file that was previously displayed ap- pears on your screen. Power Switch Power Switch The operation of the computer differs depending on the length of time that the power switch is pressed, as follows. - Page 14 Starting Up/Shutting Down [Start] Menu and Taskbar The taskbar is displayed at the bottom of the screen. All windows [Start] Button can be mini- By tapping the but- mized. ton, the [Start] menu is displayed. Icons are displayed Task Tray for programs that are System information is displayed.
-
Page 15: Lcd (Touchscreen)
LCD (Touchscreen) Using the Stylus Use the stylus to perform operations on the touchscreen. The stylus is located in the stylus holder at the upper right of the device, and can be held like a pen or pencil. The following operations are possible on the touchscreen. Tapping You can select an item on the screen by tapping it with the stylus. -
Page 16: Calibrating The Screen
LCD (Touchscreen) Handling the Touchscreen Use the stylus included with the computer. Do not use an implement other than the stylus that comes with the computer. Do not place any object on the surface or press down forcefully with sharp-pointed ob- jects (e.g., nails), or hard objects that can leave marks (e.g., pencils and ball point pens). - Page 17 LCD Backlight ON/OFF If the power switch is pressed for 0.5 - 1.0 sec. after the computer is turned on, the LCD backlight goes on or off. Setting the Timeout Function of the LCD Backlight The LCD backlight can be set to switch off automatically (e.g., for conserve power) by setting the timeout function.
-
Page 18: Keyboard
Keyboard Cancel Key Alphabet Keys Backspace Key " Mode Key Enter Key Delete Key (Shift) Key SOFT SPACE CAP (Shift) Key SPACE/SOFT Key Mode Key The keyboard operation mode can be changed by a key press made in combination with the NUM key or CAP key (see NUM... - Page 19 Delete Key This key works the same as the Delete key of a computer. CAP (Shift) Key Each time the Mode key + CAP key are pressed, the mode changes from the caps lock mode to the standard (non-caps) input mode, and vice versa. In the caps lock mode (caps lock indicator goes on), capital letters can be inputted continuously.
-
Page 20: Program Buttons
Program Buttons Program Buttons The F1, F2, F3, and option buttons are called Option Button program buttons. If either of the program buttons is pressed after Windows has started up, the program assigned for that button is started up. NOTE Programs are not assigned to the program buttons at the time of purchase. -
Page 21: Battery Power
Battery Power Remaining Battery Tap [Start] - [Settings] - [Control Panel] in order, and then double-tap [Power]. Tap the [Battery] tab. The remaining battery charge is displayed. When the Remaining Battery Charge Becomes Low Plug in the AC adaptor, and fully charge your battery. Use a spare battery if you have one. -
Page 22: Sd/Multi Media Cards
SD/Multi Media Card An SD/Multi Media card can be used for the following purposes. The exchange of data with various devices equipped with an SD/Multi Media card slot, audio storage, and so on. NOTE Software (e.g., drivers) required to exchange data with these devices. (Refer to the instructions manual provided with each SD compatible peripheral device.) Use as a memory card (e.g., use as a storage unit on which files can be written). -
Page 23: Connecting To Your Computer
Connecting to Your Computer The following methods can be used to connect the CF-P1 with a computer. The use of a Serial Autosync Cable or USB Autosync Cable. The use of the infrared communication port. Use an RS-232C Cable or a USB Adaptor Cable to connect CF-P1 with a peripheral. Using a Cable CAUTION For data to be exchanged between the CF-P1 and a computer, separate application soft-... - Page 24 Connecting to Your Computer Using the Infrared Communication Port By using the infrared communication port, data can be exchanged without a physical con- nection (e.g., using a cable or the cradle) between the CF-P1 and a computer. Have the infrared port of the CF-P1 face the infrared communication port of a computer. We recommend a port to port distance of 30 cm {11.8"} or less.
-
Page 25: Pocket Internet Explorer
Pocket Internet Explorer You can view Web pages by using Pocket Internet Explorer. To do this, you will first need to connect to an Internet through an Internet service provider (ISP) or network. Getting Connected (1)Tap [Start] - [Programs] - [Communication] - [Remote Networking] in order, and then double-tap [Make New Connection]. -
Page 26: Customizing The Computer
Customizing the Computer If you want information on the various individual settings of the computer, tap [Start] - [Settings] - [Control Panel] and then double-tap the item (icon) you want to check. (For more details about each item, you can also refer to the help file by tapping [Start] - [Help] - [Settings] or tapping [?] at the top of each Properties window.) Backlight LCD brightness adjustment, LCD backlight timeout function setting,... - Page 27 Password Password enable/disable setting If a password is set, it has to be inputted in order to open the Password properties. Power Current battery charge status, automatic power off time setting Regional Settings Display methods of the region, number system, currency, time, and date RF Serial RF module* setting * Not available on all models.
-
Page 28: Dealing With Problems
Dealing with Problems Resetting Your Computer When the computer fails to respond to an operation, reset your computer. There are two methods for resetting the computer. Performing a Reset This selection saves all stored records and entries and then restarts the Reset Switch computer. -
Page 29: Application Software
[Start] - [Settings] - [Control Panel]. If you continue to experience problems, the internal bat- tery maintaining the clock may need to be replaced. Contact Panasonic Technical Support. This computer will not correctly recognize the date and time starting from the year 2100 A.D. - Page 30 Dealing with Problems Display It is hard to view the LCD. The LCD backlight may have automatically turned off due to the power-saving function. Turn on the LCD backlight by holding down the power switch for 0.5 - 1.0 sec. Adjust the backlight brightness.
-
Page 31: For Effective Use
For Effective Use Maintenance Avoid using water when cleaning the panel. Ingredients included in water may leave residue and reduce readability of the screen. <When cleaning dust/dirt> Avoid rubbing off dust/dirt with cloth since it may leave scratch on the screen. Sweep dust/dirt with fine brush, then wipe it with “dry”... -
Page 32: Specifications
Specifications Model No. CF-P1S3BZZ3M Intel ® StrongARM SA-1110 Microprocessor 206 MHz Instruction Cache Memory: 16 KB Data Cache Memory: 8 KB Memory (RAM/ROM) 32 MB / 32 MB (Flash) Video Memory 256 KB LCD Type 3.5 type (Reflective color TFT) Displayed Colors 65536 colors (240 x 320 dots) Keyboard... - Page 33 In use Temperature -20 °C to 50 °C {-4 °F to 122 °F} Humidity 30% to 80% RH (No condensation) Environment Not in use Temperature -25 °C to 60 °C {-13 °F to 140 °F} Humidity 30% to 90% RH (No condensation) Physical Dimensions 98 mm x 41 mm x 173 mm {3.9 "...
-
Page 34: Limited Use License Agreement
LIMITED USE LICENSE AGREEMENT ® THE SOFTWARE PROGRAM(S) (“PROGRAMS”) FURNISHED WITH THIS PANASONIC PRODUCT (“PRODUCT”) ARE LICENSED ONLY TO THE END-USER (“YOU”), AND MAY BE USED BY YOU ONLY IN ACCORDANCE WITH THE LICENSE TERMS DESCRIBED BELOW. YOUR USE OF THE PROGRAMS SHALL BE CONCLUSIVELY DEEMED TO CONSTITUTE YOUR ACCEPTANCE OF THE TERMS OF THIS LICENSE. - Page 35 Contrat de licence d’usage limité ® Le(s) logiciel(s) (les “Logiciels”) fournis avec ce produit Panasonic (le “Produit”) sont exclusivement concédés en licence à l’utilisateur ultime (“vous”), et ils ne peuvent être utilisés que conformément aux clauses contractuelles ci-dessous. En utilisant les logiciels, vous vous engagez de manière définitive à...
-
Page 36: Limited Warranty
God. In addition, Panasonic shall have no obligation for any defects in the disk(s) or other media if you have modified, or attempted to modify any Program. - Page 37 No Coverage – This limited warranty does not apply if the disk(s) or other media has been used in other than a Panasonic product, or in environmental conditions other than those specified by PCI or the manufacturer, or if subjected to misuse, neglect, mishandling, modification or attempted modification of the program, or if damaged by accident or act of God.
- Page 38 Memo...
- Page 39 Trademarks ® ® Microsoft and Windows are registered trademarks of Microsoft Corporation of the United States and/or other countries. ® Intel is a registered trademark of Intel Corporation. ® Panasonic is a registered trademark of Matsushita Electric Industrial Co., Ltd.
- Page 40 Panasonic Computer Solution Company Panasonic Canada Inc. 50 Meadowlands Parkway, Panazip 2F-5, 5770 Ambler Drive Mississauga, Secaucus, NJ 07094 Ontario L4W 2T3 © 2001 Matsushita Electric Industrial Co., LTD. All Rights Reserved. SS0901-0 Printed in Japan DFQX5273ZA...