Table of Contents
Advertisement
OPERATING INSTRUCTIONS
Please read this instructions manual carefully before using this product and save this manual
for future use.
Model No.
Getting Started
Read Me First ..........................................................3
Precautions............................................................. 6
What's in the Box? ................................................. 9
Names and Functions of Parts ............................. 10
First-time Operation .............................................. 13
Operation
Starting Up/Shutting Down ................................... 16
LCD (Touchscreen) .............................................. 20
Backlight Setting ................................................... 22
Entering Information ............................................. 23
Program Buttons .................................................. 28
Battery Power ....................................................... 29
SD Memory Card/MultiMedia Card ....................... 31
Panasonic Backup ................................................ 32
Pocket Internet Explorer ....................................... 35
Connecting to Your Computer .............................. 36
Customizing the Computer ................................... 40
Troubleshooting
Dealing with Problems .......................................... 43
Appendix
For Effective Use .................................................. 47
Specifications ....................................................... 48
LIMITED USE LICENSE AGREEMENT ............... 50
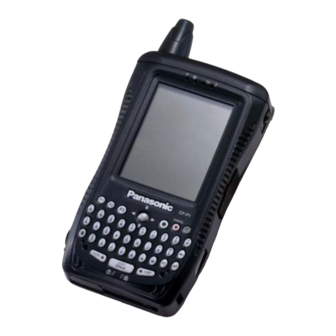
Handheld Computer
Contents
®
Series
Advertisement
Table of Contents

Related Manuals for Panasonic Toughbook CF-P1P3CDG6M


Summary of Contents for Panasonic Toughbook CF-P1P3CDG6M
-
Page 1: Table Of Contents
Backlight Setting ... 22 Entering Information ... 23 Program Buttons ... 28 Battery Power ... 29 SD Memory Card/MultiMedia Card ... 31 Panasonic Backup ... 32 Pocket Internet Explorer ... 35 Connecting to Your Computer ... 36 Customizing the Computer ... 40 Troubleshooting Dealing with Problems ... -
Page 2: Cf-P1
* For the Model No., insert the 12 digit number (for example, CF-P1P3CDZ6M) located on the back of the computer. Introduction Thank you for purchasing the Panasonic Handheld Computer. Read the operating instruc- tions thoroughly for proper operation of your new computer. Illustrations and Terminology in this Manual... -
Page 3: Read Me First
Connect the equipment into an outlet on a circuit different from that to which the receiver is connected. Consult the Panasonic Service Center or an experienced radio/TV technician for help. Warning To assure continued compliance, use only shielded interface cables when connecting to a computer or peripheral. - Page 4 If you lose the fuse cover the plug must not be used until a replacement cover is obtained. A replacement fuse cover can be purchased from your local Panasonic Dealer. IF THE FITTED MOULDED PLUG IS UNSUITABLE FOR THE SOCKET OUTLET IN YOUR HOME THEN THE FUSE SHOULD BE REMOVED AND THE PLUG CUT OFF AND DIS- POSED OF SAFELY.
-
Page 5: Lithium Battery
This equipment is produced to BS800/1983. For Europe Declaration of Conformity (DoC) “Hereby, we and Panasonic Service Europe GmbH (PSE), declares that this Personal Computer is in compliance with the essential requirements and other relevant provisions of EU Council Directives.”... -
Page 6: Precautions
Precautions The CF-P1 was developed based on thorough research into real-world portable computing environments. Exhaustive pursuit of usability and reliability under harsh conditions led to innovations such as the magnesium alloy exterior and flexible internal connections. The CF-P1's outstanding engineering has been tested using the stiff MIL-STD- 810F (for vibration and shock) and IP (for dust and water) based procedures. -
Page 7: Battery Pack
Handling (continued) Always carry your computer with you when traveling. Never check it in with luggage. For use of the computer inside an aircraft, we recommend asking the airlines regarding their policy on this issue. It is a good idea to make backup copies on SD memory cards/MultiMedia Cards and carry them with you. - Page 8 To do this, set [Charging mode:] - [Settings] - [System] tab - [Panasonic Settings] - [Charging Mode] tab* Temperature]. In the high temperature mode, the full charge capacity of battery becomes approximately 70 %.
-
Page 9: What's In The Box
What’s in the Box? Make sure the parts shown in the figure have been supplied. If any of these items is missing or is not working properly, contact Panasonic Technical Support. Make sure the provided stylus has been stored to the computer ( AC Adaptor ... -
Page 10: Names And Functions Of Parts
Receiver SD Memory Card/ MultiMedia Card Slot Power Switch Infrared Communication Port Internal Microphone For detailed settings, tap tings] - [System] tab - [Panasonic Set- tings]. ( LED Indicators Keyboard (QWERTY key type) page 24) Caps Available on specific models. - Page 11 Strap Attachments page 9) Cursor Control Using the cursor control, the following operations can be performed. “Push” Operation: Executes a selected item from a menu, or a selected icon. For example, after an item within a menu is selected, the cursor control can be pushed to execute this selected item.
- Page 12 Names and Functions of Parts Headset and 3.5 DIA plug adaptor Only the CF-VHSP11W (sold separately) can connect to CF-P1’s headset jack. CF-VHSP11W includes A and B. When using a 3.5 DIA plug, B is required. This adaptor can be connected to stereo headphones. A.
-
Page 13: First-Time Operation
First-time Operation Install the battery pack. (1) Power off your computer and turn it over. (2) Press position (A) to depress the battery pack cover and then slide the latch, and remove the battery pack cover. NOTE If the attached strap makes it difficult to remove the battery pack cover, unbuckle the strap and then re- move the cover. - Page 14 First-time Operation NOTE When the backup battery or main battery becomes low, some alert messages and icons will be displayed. ( CAUTION Do not remove the main battery before the backup battery is fully charged. Other- wise, data in RAM will be lost. Take care to ensure that the remaining power in the main battery and the backup battery never discharges completely.
- Page 15 Turn your computer on (1) Using the provided stylus, push the center of the reset switch straight in for 1 second. If the DC-IN Jack's cover makes it difficult to push the reset switch, push the cover in a little as you push the switch.
-
Page 16: Starting Up/Shutting Down
Starting Up/Shutting Down Starting Up (from the second time) Lightly press the power switch once. A program or file that was previously displayed appears on your screen. Power Switch Lightly press the power switch (for less than 0.5 seconds). To turn the backlights on/off: Press the power switch until the LCD backlight and keyboard backlight go on/off and release the switch. - Page 17 The Navigation Bar and Command Bar The navigation bar is located at the top of the screen. It displays the active program and current time, and allows you to switch to programs and close screens. Use the command bar at the bottom of the screen to perform tasks in programs. The command bar includes menu names, buttons, and the input panel button.
-
Page 18: Today Screen
Starting Up/Shutting Down Today Screen You’ll see the Today screen when you turn on the computer for the first time each day (or after 4 hours of inactivity* screen, you can see at a glance important information for the day. To change the setting, tap Tap to switch to a program. - Page 19 Pop-up Menus With pop-up menus, you can quickly choose an action for an item. For example, you can use the pop-up menu in the contact list to quickly delete a contact, make a copy of a contact, or send an e-mail message to a contact. The actions in the pop-up menus vary from program to program.
-
Page 20: Lcd (Touchscreen)
LCD (Touchscreen) Using the Stylus Use the stylus provided to perform operations on the touchscreen. The stylus is located in the stylus holder at the upper right of the computer, and can be held like a pen or pencil. The following operations are possible on the touchscreen. -
Page 21: Aligning The Screen
Handling the Touchscreen Use the provided stylus with CF-P1. Do not use an implement other than the stylus that comes with the computer. Do not place any object on the surface or press down forcefully with sharp-pointed objects (e.g., nails), or hard objects that can leave marks (e.g., pencils and ball point pens). Do not operate the computer when such things as dust are on the LCD. -
Page 22: Backlight Setting
Backlight Setting Adjust the LCD Brightness Screen brightness can be adjusted in accordance with the usage conditions. - [Settings] - [System] tab - [Backlight]. Tap the [Brightness] tab and adjust the brightness with the slider. Tap [ok]. LCD Backlight ON/OFF Press the power switch until the LCD backlight goes on/off after the computer is turned on and release the switch. -
Page 23: Entering Information
Entering Information You can use the following options to enter information: Use the keyboard to input the number, character* Use the input panel to input typed text, either by using the soft keyboard or other input method. Write directly on the screen.* Draw pictures on the screen.* Speak into the internal microphone to record a message.* ®... - Page 24 Entering Information Using the QWERTY Keypad Type Keyboard Alphabet Keys ESC Key Mode Key Mode Key A symbol or number on the key top is input by pressing the Mode key (the numeric key lock indicator goes on) followed by the corresponding alphabet key. Each Mode key press works for the input of only one symbol or number.
- Page 25 CAP Key This key is used for inputting capital letters. Each time the Mode key + (non-caps) input mode to the caps lock mode, and vice versa. In the caps lock mode (caps lock indicator goes on), capital letters can be inputted continuously. (When both the numeric key lock indicator and caps lock indicator are on, priority is given to the symbol/number input mode.) Inputting non-capital characters in the caps lock mode:...
- Page 26 Entering Information Using the Numeric Keypad Type Keyboard Press a key to input the number shown on the key top. The keys can also be used as function keys. (See "PF key" below.) PF Key indicator PF Key Minus Key CLR (Clear) Key Period Key PF Key:...
- Page 27 Assigning of Programs Customize the keys to open your most used programs. - [Settings] - [System] tab - [Panasonic Settings] - [Buttons] tab. Choose each setting. The following functions are assigned to the keys at the time of purchase: PF+6 - Volume up, PF+7- Volume down The assignment of those keys can be changed.
-
Page 28: Program Buttons
Setting to Resume with a Program Button You can resume the computer with one of the F1, F2, F3 and F4 buttons. - [Settings] - [System] tab - [Panasonic Settings] - [Wakeup]* To display the hidden tab, tap the Add a check mark to resume when the program button is pressed. -
Page 29: Battery Power
- [Charging mode] tab, and set [Charging mode] to [High Temperature]. A level corresponding to a 100% charge for high temperature is approximately equivalent to an 70% charge level for normal temperature mode. - [Settings] - [System] tab - [Panasonic... -
Page 30: Replacing The Battery Pack
Battery Power Replacing the Battery Pack When the charge provided by your battery pack is supplied for only a short period of time, even after full charging according to the instructions, it may be time to replace your battery pack. The battery pack is a consumable item and therefore requires replacement (CF-VZSU28W). Remove the battery pack (1) Turn off your computer and wait for 30 seconds. -
Page 31: Sd Memory Card/Multimedia Card
SD Memory Card/MultiMedia Card An SD memory card/MultiMedia Card can be used for the following purposes. The exchange of data with various devices equipped with an SD memory card/MultiMedia Card slot, audio storage, and so on. NOTE Software (e.g., drivers) required to exchange data with these devices. (Refer to the instructions manual provided with each SD compatible peripheral device.) Use as a memory card (e.g., use as a storage unit on which files can be written). -
Page 32: Panasonic Backup
MultiMedia Card, CF memory card or ROM option area, or restore data backed up on those storage area to the CF-P1 RAM. CAUTION If a mail in [Inbox] is backed up using Panasonic Backup, it cannot be accessed after restoring. When using [Inbox], do not use Panasonic Backup. Use Microsoft ®... - Page 33 Auto Backup - [Programs] - [Panasonic Backup]. Tap [Tools] on the command bar and select [Auto Backup Settings]. Tap [File] tab. (1) Tap to choose the storage area for Auto Backup. (2) Change the settings in [Settings]. If the ROM option area is chosen, some settings cannot be changed.
- Page 34 Panasonic Backup Auto Restore Full reset CF-P1( [Panasonic Backup] screen will be displayed. Select a file for restore, and tap [OK]. If a password has been set, a message will be displayed. Enter the password and press [OK]. Restore will start.
-
Page 35: Pocket Internet Explorer
Pocket Internet Explorer You can connect to Internet service provider (ISP), and use the connection to send and re- ceive e-mail messages and view Web or WAP pages. Getting Connected The settings will vary for different network environments. Ask your system administrator or the person in charge of the network and make settings using the followings. -
Page 36: Connecting To Your Computer
To ensure that synchronization functions properly, install Microsoft before connecting CF-P1 and the host computer for the first time. If a mail in [Inbox] is backed up using Panasonic Backup, it cannot be accessed after restoring. When using [Inbox], do not use Panasonic Backup. Use Microsoft ®... - Page 37 At [Set up a Partnership], select the partnership and select [Next]. NOTE To change the synchronization settings, tap, in order, [Options...]. Be sure to disconnect the cable when changing the synchronization set- tings. Disconnect and connect the cable again if communications do not start. For information about the Microsoft Help.
- Page 38 Connecting to Your Computer When Connecting the CF-P1 Directly with a Computer CAUTION To ensure that synchronization functions properly, install Microsoft before connecting CF-P1 and the host computer for the first time. Turn off the CF-P1, the connected computer, and all connected peripherals before connecting or disconnecting the cable.
- Page 39 When Connecting the CF-P1 with a Computer via the Cradle Removing Using the Infrared Communication Port By using the infrared communication port, data can be exchanged with- out a physical connection (e.g., using a cable or the cradle) between the CF-P1 and a host computer.
-
Page 40: Customizing The Computer
Customizing the Computer If you want information on the various individual settings of the computer, tap tings] and then tap the item (icon) you want to check. (For details, tap - [Help] - [Settings].) Personal Buttons Program buttons and the cursor control settings. Input Input panel (soft keyboard or letter recognizer, etc.) settings. - Page 41 To set to not light up LED indicators [Use LED to indicate RF module status]. Available on specific models. Panasonic Settings [Version] tab: Display of ROM release version, the size of ROM option area, UUID and available devices Available on specific models.
- Page 42 Customizing the Computer Power Current battery charge status, the wireless signals on/off settings and automatic power off time setting. Regional Settings Display methods of the region, number system, currency, time, and date. Remove Programs Remove programs in storage memory. Screen Touchscreen alignment ( Connections Beam...
-
Page 43: Dealing With Problems
(3) Align the touchscreen ( (4) At [complete], tap the screen to begin using CF-P1. If the [Panasonic Backup] screen is displayed, follow the on-screen instructions. (5) Set the time and date. - [Settings] - [System] tab - [Clock] to set the time and date, and tap [ok]. - Page 44 - [Settings] - [System] tab. If you continue to experience problems, the backup battery maintaining the clock may need to be replaced. Contact Panasonic Technical Support. This computer will not correctly recognize the date and time starting from the year 2085 A.D.
- Page 45 Application Software The computer locks up dur- ing the execution of an ap- plication, or the execution speed becomes noticeably slower. Display It is hard to view the LCD. The cursor cannot be con- trolled. The cursor does not prop- erly correspond to a stylus tap.
-
Page 46: Connecting Peripherals
When the program display of a start menu is changed after assigning a program, if you press a button, that pro- gram may not start. In that case, tap [System] tab - [Panasonic Settings] - [Buttons] tab, and re-assign the program. Characters can be input using the input panel. -
Page 47: For Effective Use
For Effective Use Maintenance Avoid using water when cleaning the panel. Ingredients included in water may leave residue and reduce readability of the screen. <When cleaning dust/dirt> <When cleaning oily surface> Areas excluding the LCD Wipe these areas with a soft cloth, after applying water or detergent diluted with water to the soft cloth and firmly wringing out excess water. -
Page 48: Specifications
Specifications Model No. Memory (RAM/ROM) Video Memory LCD Type Displayed Colors Keyboard Pointing Device CF Card Slot Slots SD Memory Card Slot Interface Communica- tion Port Headset Jack Speaker Microphone/Receiver Sound Battery Battery Pack Sub-Battery AC Adaptor* Input Output Operating System Environment In this manual, “front light”... - Page 49 ® ® Microsoft ActiveSync 3.7 System Requirements ® ® Microsoft Windows XP, Microsoft ® Windows NT Workstation 4.0 with SP6 or later, or Microsoft ® ® Microsoft Outlook 98 or later required for synchronization to the desktop or portable computer of e-mail, calendar, contacts, tasks, and notes.
-
Page 50: Limited Use License Agreement
LIMITED USE LICENSE AGREEMENT THE SOFTWARE PROGRAM(S) (“PROGRAMS”) FURNISHED WITH THIS PANASONIC (“PRODUCT”) ARE LICENSED ONLY TO THE END-USER (“YOU”), AND MAY BE USED BY YOU ONLY IN ACCORDANCE WITH THE LICENSE TERMS DESCRIBED BELOW. YOUR USE OF THE PRO- GRAMS SHALL BE CONCLUSIVELY DEEMED TO CONSTITUTE YOUR ACCEPTANCE OF THE TERMS OF THIS LICENSE. - Page 51 Mobile is a trademark of Microsoft Corporation of the United States and/or other countries. ® ® Intel and Pentium are registered trademarks of Intel Corporation. ® Panasonic is a registered trademark of Matsushita Electric Industrial Co., Ltd. ® ® ® , Outlook and ActiveSync...
- Page 52 Panasonic Computer Solution Company, 50 Meadowlands Parkway, Panazip 2F-5, Secaucus, NJ 07094 PANASONIC U.K.LTD (PUK) WILLOUGHBY ROAD,BRACKNELL,BERKSHIRE, RG12 4FP © 2004 Matsushita Electric Industrial Co., Ltd. All Rights Reserved. Printed in Japan Panasonic Canada Inc. 5770 Ambler Drive Mississauga, Ontario L4W 2T3...