
Related Manuals for Aastra DECT 142 (OMM SIP)


Summary of Contents for Aastra DECT 142 (OMM SIP)
- Page 1 Aastra DECT 142 (OMM SIP) User Manual VoIPon www.voipon.co.uk sales@voipon.co.uk Tel: +44 (0)1245 808195 Fax: +44 (0)1245 808299...
- Page 2 Aastra will not accept liability for any damages and/or long distance charges, which result from unauthorized and/or unlawful use. While every effort has been made to ensure accuracy, Aastra will not be liable for technical or editor- ial errors or omissions contained within this documentation. The information contained in this doc- umentation is subject to change without notice.
-
Page 3: Table Of Contents
Table of Contents Using Your Telephone .......................1 Important Safety Information ……………………………………………………………1 Communications Regulation Information ………………………………………………1 Power Supply / Power Failure / Rechargeable Batteries……………………………………2 Safety Precautions ……………………………………………………………………2 Overview and Basic Information …………………………………………………………3 General Information ……………………………………………………………………3 DECT and GAP …………………………………………………………………………4 Memory Card …………………………………………………………………………4 Headset Connector ……………………………………………………………………4 Overview...........................5 The Keys on the Handset …………………………………………………………………6... - Page 4 Table of Contents Pound Key # …………………………………………………………………………18 Star Key * ……………………………………………………………………………18 Number Keys …………………………………………………………………………18 Softkey: Menu ………………………………………………………………………19 Automatic Menu Closure…………………………………………………………………20 Menu Control ..........................21 Example: Main Menu ……………………………………………………………………21 Example: Telephone Book / Editor ………………………………………………………23 The Editor ………………………………………………………………………………24 Entering Names / Phone Numbers ……………………………………………………24 Basic Functions........................25 Switching the Handset On / Off …………………………………………………………25 Key Lock ………………………………………………………………………………26...
- Page 5 Table of Contents Editing Lists ..........................41 Local Telephone Book: New Entry…………………………………………………………41 Local Telephone Book: Editing an Entry …………………………………………………42 Local Telephone Book: Creating a Quick Call Entry …………………………………………43 Editing the Redial List ……………………………………………………………………44 Editing the Caller List ……………………………………………………………………45 Info Key ..........................46 Voice Mailbox / Caller List ………………………………………………………………46 Checking Your Voice Mailbox …………………………………………………………46 Checking Your Caller List ………………………………………………………………46...
- Page 6 Table of Contents VoIPon www.voipon.co.uk sales@voipon.co.uk Tel: +44 (0)1245 808195 Fax: +44 (0)1245 808299...
-
Page 7: Using Your Telephone
Using Your Telephone Important Safety Information Communications Regulation Information FCC Notices (U.S. Only) This device complies with part 15 of the FCC Rules. Operation is subject to the following two condi- tions: (1) This device may not cause harmful interference, and (2) this device must accept any inter- ference received, including interference that may cause undesired operation. -
Page 8: Power Supply / Power Failure / Rechargeable Batteries
Using Your Telephone Industry Canada (Canada only) Operation of this device is subject to the following two conditions: (1) this device may not cause interference, and (2) this device must accept any interference, including interference that may cause undesired operation of the device. Privacy of communications may not be ensured when using this telephone. -
Page 9: Overview And Basic Information
Overview and Basic Information General Information The Aastra DECT 142 is a telecommunications device that you can operate on a communications system specified as compatible with an OpenMobilityManagement system (OMM). The newly designed menus enable easy handling and fast access to the many functions and fea- tures provided by your system. -
Page 10: Dect And Gap
Memory Card The Aastra DECT 142 is equipped with a memory card. The log-in data of the handset, the user name, the display language, a local telephone book and the ID of the handset (IPEI) are all saved on the MEM card. -
Page 11: Overview
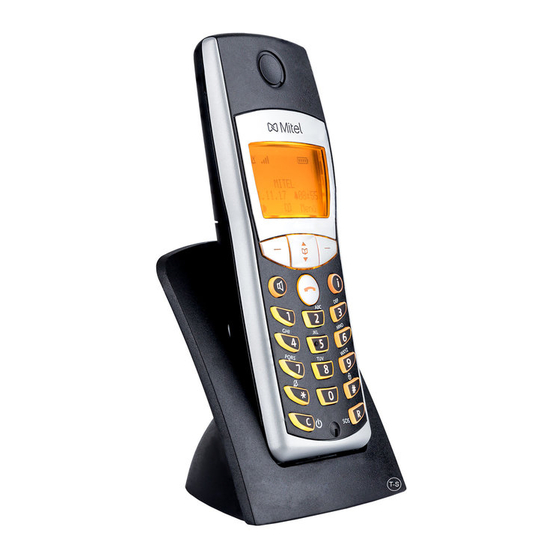
Overview Handset: Earpiece Rear: Display Loudspeaker Arrow keys Softkey Softkey Info key Handsfree key Hook key Dialling keypad Cancel / Delete key R-key Power on/off Emergency call key Anschluss für PC Connector for Headset Microphone VoIPon www.voipon.co.uk sales@voipon.co.uk Tel: +44 (0)1245 808195 Fax: +44 (0)1245 808299... -
Page 12: The Keys On The Handset
Overview The Keys on the Handset Softkeys - the function allocated to each key is shown in the display. The key function changes automatically according to the respective operating state of the handset. If a function only permits you to switch between two options, these are allocated to the left and right softkeys. -
Page 13: Installation
Installation Unpacking and Installing Your Telephone Unpacking Your Telephone The package contains: • Aastra DECT 142 Handset • Charger cradle • 120 V plug-in adapter with a connector cable (10 ft) • Three rechargeable batteries • Memory card (either already inserted or separate, depending on the model) •... -
Page 14: Installing The Charger Cradle
Installation Installing the Charger Cradle In order to start operating your telephone, you must first plug in the charger cradle's power cable. Safety Precautions Use only the plug-in adapter supplied for use with the charger cradle. Connect the cable on the plug-in adapter to the terminal on the bottom of the charger cradle, and then plug the adapter into the electrical outlet. -
Page 15: Installing The Handset
Installation Installing the Handset Important Information about the Batteries Never use the batteries for any purpose other than that for which they were intended. Never use a battery which is damaged or worn out. Heat or cold reduces the performance and service life of the batteries. A handset with hot or cold batteries may be temporarily out of order even if the batteries are fully charged. -
Page 16: Charging And Operating Times
Installation Charging and Operating Times (empty batteries) to full capacity in approx. six to seven hours. Charging time: approx. 12 hours (with fully charged batteries). Talk time: up to 120 hours (with fully charged batteries). Standby time: Note If the battery charge is unknown, they will be fully charged in approx. 14 hours. Inserting the Batteries The battery compartment is on the back of the handset. -
Page 17: Inserting The Memory Card
Installation Inserting the Memory Card If a memory card was not in your handset when you first unpacked the phone, then you will have to insert it in its slot in the battery compartment yourself. Important note on safety Take great care handling the memory card. The contacts should be free of dust, grease, moisture, etc. -
Page 18: Charge Display
Installation Charge Display The charge status of the batteries is indicated on the display: ƒ batteries are 81 - 100% charged „ batteries are 61 - 80% charged √ batteries are 41 - 60% charged … batteries are 21 - 40% charged †... -
Page 19: Registering Your Handset
Installation Registering Your Handset Your handset can be operated on up to ten different communications systems. To do so, it has to be registered to each system. Your system administrator will register the handset for operation on a communications system with OpenMobilityManager. -
Page 20: Display Arrangement, Softkeys, And Other Keys
Display Arrangement, Softkeys, and Other Keys Display Arrangement ‹ œ ¢ Œ ƒ Icon line OMMSIP 5050 System name with internal phone number/Call time pp5050 Programmed user name 19.10.06 ª 16:27 Date / time / alarm Menu ¬ ¤ Softkey line œ... -
Page 21: Text Lines
Display Arrangement, Softkeys, and Other Keys Text Lines The three lines in the center of the five-line display contain information on the current connection state, or lists and menu texts. In the idle state you will see the name of the system along with the internal phone number, your programmed user name, the current time, any alarms that you have programmed, and call forwarding if you have activated it. -
Page 22: Softkeys And Other Keys
Display Arrangement, Softkeys, and Other Keys Softkeys and Other Keys The two keys below the display and the arrow keys are called the softkeys. The functions allocated to these keys are shown in the bottom line of the display. The key function changes automatically according to the respective operating state of the handset. -
Page 23: Softkey: Redialing
Display Arrangement, Softkeys, and Other Keys Softkey: Redialing This enables you to select a phone number from the redial list. Hook key Depending on the current state of the phone — for example in the idle state, during a conversa- tion, or in editing mode —... -
Page 24: R-Key
Display Arrangement, Softkeys, and Other Keys ... when your handset is switched off: press: switches the handset on. short long ... in the idle state: press: opens the caller list. short press: switches the handset off. long ... during an incoming call: press: switches the handset off. -
Page 25: Softkey: Menu
Display Arrangement, Softkeys, and Other Keys When you input text, you use the arrow keys to move the cursor to the beginning or the end of the entry. The -key deletes one letter or digit at a time. The softkey aborts the procedure. For further information, please refer to the section entitled “The Editor”... -
Page 26: Automatic Menu Closure
Display Arrangement, Softkeys, and Other Keys Automatic Menu Closure Menus are automatically closed under the following conditions: • When you receive a call while your phone is in the idle or connection state. • In the connection state, when you perform input that requires a new, connection-dependent menu (for example, when you press the R-key to make an enquiry call;... -
Page 27: Menu Control
Menu Control Example: Main Menu Press the Menu softkey to open the main menu. Menu Key Lock Alarm Ringer Settings ‘ The following items are available: - Key Lock - Alarm - Ringer Settings - Volume Settings - Caller Filter - System - [System name] (the communications system menu/switching functions: Only appears when you are logged into such a system) - Page 28 Menu Control Type Use the arrow keys to select Play once, for example, and press Repeat . Your setting will be activated. Play once “ ‘ Toggling function Some functions permit only two options - ON or OFF. Active (ON) functions are indicated by a , for example Alarm...
-
Page 29: Example: Telephone Book / Editor
Menu Control Example: Telephone Book / Editor This example describes how to create a new entry in the telephone book. For information on further telephone book options, please refer to page page 41ff. Use the arrow key to open the telephone book. Telephone Book Empty Press... -
Page 30: The Editor
Menu Control The Editor Entering Names / Phone Numbers You can use the editor to enter new names or numbers in lists, or edit them (e.g., in the telephone book). The maximum length a phone number can have is 32 digits, and the maximum length of names is 16 characters. -
Page 31: Basic Functions
Basic Functions Switching the Handset On / Off Once the batteries have been charged for the first time, your handset is automatically switched on and is ready for operation. You can switch the handset off so that your batteries will stay charged for longer. -
Page 32: Key Lock
Basic Functions Key Lock Activate the key lock before putting your handset in a bag or your pocket to prevent a call from being made accidentally. If you receive a call, the key lock is deactivated for the duration of the call. You answer the call by pressing the hook key. -
Page 33: Adjusting The Earpiece Volume During A Call
Basic Functions Adjusting the Earpiece Volume during a Call Let’s say you’re making a call using the earpiece, the loudspeaker, or a headset. You use the arrow keys or the number keys to adjust the volume. A single press increases or decreases the volume by one level, e.g., Volume:3 ]]]]] ||| In addition, the bar indicator... -
Page 34: Emergency Number (Sos)
Basic Functions Emergency Number (SOS) In order to be able to make an emergency call with just a single long press of the R key , you must first store this emergency number using the “Telephone Options > Emergency Call” menu item. -
Page 35: Making Calls
Making Calls Dialing Phone Numbers Dialing Phone Numbers Directly Press the hook key. Enter the phone number and press ; the phone number will be dialed right away..or Press Menu Select one of the following menu items and confirm it by pressing Select a phone number from the caller list and initiate dialing Caller List with... -
Page 36: Making Calls Using The Predialing Feature
Making Calls Making Calls Using the Predialing Feature You can use predialing to correct your input before dialing the number or to append phone num- bers from different lists. Enter the phone number while the handset is in the idle state. If necessary, correct any errors you’ve made with the arrow keys (cursor) and the C key by deleting them and entering the right input. -
Page 37: Making Calls Using The Quick Call Feature
Making Calls Making Calls Using the Quick Call Feature Press and hold down the number key “1” – “9” on which the quick call entry is saved until the number appears in the display. Press the hook key to dial the number. For information on creating a quick call entry, please see page 43. -
Page 38: Making Calls From The Redial List
Making Calls Making Calls from the Redial List The redial list contains the last 20 phone numbers you dialed (max. 32 digits long). Every number you subsequently dial overwrites the oldest number in the list. You can view the phone numbers in the redial list, together with the corresponding details (the time of the call, for example), delete them, and copy them to predialing, to the telephone book, or to the caller filter. -
Page 39: Calling From The Local Telephone Book
Making Calls Calling from the local telephone book The local telephone book can contain up to 100 entries, which are automatically sorted into alphabet- ical order. Press the arrow key while the handset is in the idle state and select the name you want search for the name by entering the initial letter (if necessary, press the number key several times in quick succession). -
Page 40: Making Calls From The Caller List
Making Calls Making Calls from the Caller List Press the info key to open a list with the following items for selection: voice box, caller list, redial list and telephone book. The voice box entry only appears if your voice mailbox access number has been registered in the “Telephone Options >... -
Page 41: Answering Calls
Making Calls Answering Calls Incoming calls are indicated on the handset both acoustically and on the display, which is then illu- minated. You’ll see the caller's phone number in the display. In addition, you’ll see the caller's name in the upper text line. œ... -
Page 42: Options During A Call
Making Calls Options during a Call If required, you can select a phone number from one of the available lists and postdial it during the current call by pressing (DTMF postdialing). Menu If required, press briefly. Select one of the following menu items, and confirm this by pressing Open the telephone book. -
Page 43: Answering A Call During A Conversation (Call Waiting)
Making Calls Answering a Call during a Conversation (Call Waiting) If you do not want to be disturbed, you can disable call waiting completely (see page 53). You hear the call-waiting tone and see the call in your display. œ ¢... -
Page 44: Making Another Call During A Conversation (Enquiry Call)
Making Calls Making Another Call during a Conversation (Enquiry Call) In the menu (see page 53) you can set whether you are reminded about waiting subscribers during an enquiry call. If the function is enabled, you hear a short call or brief signal during your call after a set time. -
Page 45: Toggling During The Enquiry Call
Making Calls Toggling during the Enquiry Call If the enquiry call can be established, you can use the R key to speak alternately with the other two parties (this is known as “toggling”)..or: Press Info key to open the service menu. Select , and confirm this by pressing The currently held call will be activated and the active call held. -
Page 46: Consultative Transfer
Making Calls Consultative Transfer You are making an enquiry call and your handset is in the toggle state (see above): Press Info key to open the service menu. Select , and confirm this by pressing call transfer Your handset returns to the idle state. If the desired party is busy or cannot be contacted: Press the R key to return to the first call. -
Page 47: Editing Lists
Editing Lists Local Telephone Book: New Entry The telephone book can contain up to 100 entries. Phone numbers can be up to 32 digits long and names up to 16 characters. When there are no entries in the telephone book: Press the arrow key while your handset is in the idle state. -
Page 48: Local Telephone Book: Editing An Entry
Editing Lists Local Telephone Book: Editing an Entry Press the arrow key while your handset is in the idle state, and scroll to the entry search for the name by entering the initial letter (if necessary, press the number key several times in quick succession). -
Page 49: Local Telephone Book: Creating A Quick Call Entry
Editing Lists Local Telephone Book: Creating a Quick Call Entry You can define important telephone book entries as quick call entries and dial these numbers by pressing just a single key. You can create up to nine quick call entries (corresponding to the number keys "1"... -
Page 50: Editing The Redial List
Editing Lists Editing the Redial List ¤ Press the softkey while your handset is in the idle state, and then select the desired entry, e.g., 43567890 Press Options Select one of the following menu items and confirm this by pressing Copies the phone number to predialing, to the telephone book, or to Add To the caller filter (see page 51). -
Page 51: Editing The Caller List
Editing Lists Editing the Caller List Press the info key while the handset is in the idle state. Select Caller List , and confirm this by pressing 43567890 Select the desired entry, e.g., ¿ Accepted calls are marked with a , missed calls with a , filtered calls with a and rejected Œ... -
Page 52: Info Key
Info Key Voice Mailbox / Caller List Press the info key briefly while your handset is in the idle state. The following options will then be available: voice box, caller list, redial, and telephone book. The info key flashes to signal voicemail and missed calls. Display icon Text in the idle display Meaning ≥... -
Page 53: Customizing Your Telephone
Customizing Your Telephone Menu: Alarm Press Menu Select Alarm , and confirm this by pressing Select one of the following menu items and confirm this by pressing Press to activate or deactivate — the alarm. An activated Alarm active ª alarm appears in the display as At a given 24h time format, enter the time between 00:00 and 23:59. -
Page 54: Menu: Ringer Settings
Customizing Your Telephone Menu: Ringer Settings Press Menu Select Ringer Settings , and confirm this by pressing Select one of the following menu items and confirm this by pressing You can specify different melodies to identify different types of incom- Melody ing calls. - Page 55 Customizing Your Telephone You can specify whether an incoming call is to be indicated by the Device ringer (”buzzer”), the vibrator, or the headset. Select an entry and activate or deactivate the device by – pressing … Buzzer … Vibrator …...
-
Page 56: Menu: Volume
Customizing Your Telephone Menu: Volume Press Menu Select Volume Settings , and confirm this by pressing Select one of the following menu items and confirm this by pressing Use the arrow keys or the number keys "1" to "8" to set the desired vol- Earpiece ume level for the earpiece, then press Use the arrow keys or the number keys "1"... -
Page 57: Menu: Caller Filter
Customizing Your Telephone Menu: Caller Filter You can use the caller filter to block or accept incoming calls from certain phone numbers. The phone numbers in question have to be stored in the caller filter's list of numbers (see below). You can copy phone numbers to the caller filter list from the telephone book, the redial list, or the caller list (see the section entitled "Editing Lists"... -
Page 58: Menu: System
Customizing Your Telephone Menu: System Your handset can be operated on up to ten DECT systems. Before you can make a call via a system, however, your handset has to be registered on the respective system. A system password or regis- tration code may be necessary for the registration process. -
Page 59: Menu: [System Name]
Customizing Your Telephone Menu: [System name] This accesses the communications system menu. This menu is only available when the handset has been logged into a system. The entries and features that are actually available may differ from those described in this user guide as they are dependent on specific conditions. If necessary, contact your system administrator. - Page 60 Customizing Your Telephone This menu item currently has no function. Quit it by pressing Lines This accesses the local menu (corresponds to pressing Menu local menu VoIPon www.voipon.co.uk sales@voipon.co.uk Tel: +44 (0)1245 808195 Fax: +44 (0)1245 808299...
-
Page 61: Menu: Telephone Options
Customizing Your Telephone Menu: Telephone Options You’ll find all the individual settings for your handset in this menu. Press Menu Select Telephone Option , and confirm this by pressing Select one of the following menu items and confirm this by pressing Select one of the available languages for your display, and confirm this Language by pressing... - Page 62 Customizing Your Telephone Select one of the following menu items and confirm by pressing Emergency Call … The SOS number is the phone number which SOS number is selected when the SOS / R button is pressed for a long time. Before entering the SOS number, press the R button.
- Page 63 Customizing Your Telephone phone number in question is first copied to predialing, where you can add digits if required. You can press to activate or deacti- vate this feature. – If this is activated, the keypad will automatically be locked 60 seconds Auto.key lock after your last keypress.
- Page 64 Customizing Your Telephone Select one of the following menu items and confirm by pressing Reset … Following a security check, the handset will Handset be reset to the initial delivery state. This means that all settings / entries will be deleted with the exception of the system registra- tion and PIN.
-
Page 65: Menu: Security
Customizing Your Telephone Menu: Security This menu access option allows you to lock the keypad to prevent unauthorized use. For this, you require a PIN (Personal Identification Number). The default PIN is 0000 (4 zeros). Menu Press Select Security and confirm by pressing Enter your PIN and confirm by pressing Select one of the following menu items and confirm by pressing Confirm by pressing... -
Page 66: Appendix
Appendix Default Settings Alarm: off - Disp.Contrast: 4 Ringer Settings: - Melody - Telephone Book: no entry - internal: 1 - Caller List: no entry - external: 2 - Redial: no entry - unknown number: 4 - Quick Call: 1 ... 9 no entry - VIP: 5 - Alarm: 7 - Date / Time: not adjusted... -
Page 67: Important Information About The Batteries
Appendix Important Information about the Batteries Always switch the handset off before removing the batteries, as otherwise data could be lost. 1. Use only nickel metal hydride (NiMH) rechargeable batteries.The talk times, standby times, and charging times stated below (see the section entitled "Technical Data") only apply when batter- ies with a capacity of 700 mAh are used.Three size AAA NiMH rechargeable batteries are included in the original product package. -
Page 68: Care And Maintenance
Appendix 11. In some countries, the law requires used rechargeable batteries to be returned. Do not throw batteries into your household waste. Dispose of used batteries in accordance with your local regulations, and recycle them whenever you can. The batteries can contain substances such as nickel-cadmium (NiCd), lead (Pb), cadmium (Cd), or mercury (Hg). -
Page 69: Limited Warranty
Aastra warrants this product against defects and malfunctions during a one (1) year period from the date of original purchase. If there is a defect or malfunction, Aastra shall, at its option, and as the exclusive remedy, either repair or replace the telephone set at no charge, if returned within the war- ranty period. -
Page 70: Technical Data
Appendix Technical Data Standard: ......DECT / GAP No. of channels: ..... . . 60 duplex channels Frequencies: . -
Page 71: Menu Structure
Appendix Menu Structure Key Lock on/off Alarm Alarm active Date / Time Melody Ringer Settings Melody Internal External Unknown Number Alarm Emergency call Type Repeat Play once Device Buzzer Vibrator Headset Volume Settings Volume Settings Earpiece Hands-free Headset Buzzer Caller Filter Accept list Block List Filter off... - Page 72 Appendix User Name Attention tones Key Click Coverage Warn Battery alarm Confirm tones End of Menu Emergency Call SOS number SOS beep Hands-free Melody Voice BOX No. Loud environment Auto Answer Silent Charging Charger Answer Auto. Quick Hook Auto.key lock Charging LED Disp.Contrast Date/Time...
-
Page 73: Index Of Key Words
Appendix Index of Key Words Discharged batteries........55 Display..............14 Alarm............47, 48 Display contrast ..........27 Answering a call..........35 Disposal..............62 Attention tones..........55 During a call............36 Auto answer ............56 During a conversation.......37, 38 Auto. key lock............57 Auto. quick hook..........56 Auto. search............52 Earpiece Volume..........27 Automatic Menu Closure ........20 Editing Lists ............41 Editor ..............24 Emergency Call ..........56... - Page 74 Appendix Language ............55 Rechargeable batteries........2 Local telephone book ........33 Redial list .............32, 44 Local Telephone Book: New Entry ....41 Registering the handset........13 Lock handset .............59 Registration ............52 Loud environment..........56 Removing the memory card......11 Reset ..............58 Ringer ..............49 Main menu (example) ........21 Ringer on/off .............27 Maintenance .............62 Making a call during a conversation .....38...
- Page 75 Voice mailbox access number ......56 Volume ...............27 VoIPon www.voipon.co.uk sales@voipon.co.uk Tel: +44 (0)1245 808195 Fax: +44 (0)1245 808299...