Table of Contents
Advertisement
Quick Links
Download this manual
See also:
User Manual
Advertisement
Table of Contents

Related Manuals for Aastra DECT 142


Summary of Contents for Aastra DECT 142
- Page 1 Aastra DECT 142 Quick Guide...
-
Page 2: Using Your Telephone
Thank you for choosing this Aastra telephone. It’s a high-quality product with a superior design. This Quick Guide will help you using your Aastra DECT 142. The complete User Guide is available on the product-CD delivered with your system and provide answers to all your most important ques- tions. -
Page 3: Overview And Basic Information
Overview and Basic Information General Information The Aastra DECT 142 is a telecommunications device that you can operate on a communications system specified as compatible with an OpenMobilityManagement system (OMM). The newly designed menus enable easy handling and fast access to the many functions and fea- tures provided by your system. - Page 4 Memory Card The Aastra DECT 142 is equipped with a memory card. This stores your phone's local settings (including a local telephone book with up to 100 entries) and its identification number (IPEI). This means that if you exchange phones with someone else, you simply take your memory card out of your own phone and plug it into the other one.
-
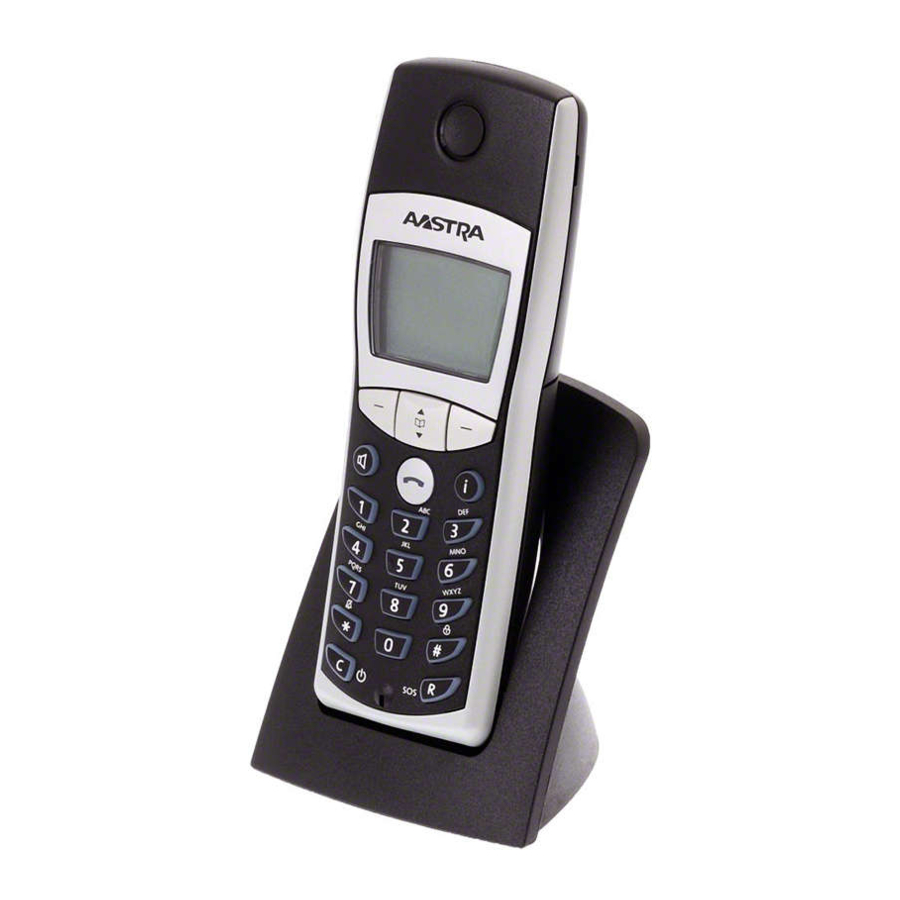
Page 5: The Keys On The Handset
Installation Unpacking and Installing Your Telephone Unpacking Your Telephone The package contains: • Aastra DECT 142 Handset • Charger cradle • 120 V plug-in adapter with a connector cable (9 ft) • Three rechargeable batteries • Memory card (either already inserted or separate, depending on the model) •... -
Page 6: Installing The Charger Cradle
Installation Installing the Charger Cradle In order to start operating your telephone, you must first plug in the charger cradle's power cable. Safety Precautions Use only the plug-in adapter supplied for use with the charger cradle. Connect the cable on the plug-in adapter to the terminal on the bottom of the charger cradle, and then plug the adapter into the electrical outlet. - Page 7 Installation Charging and Operating Times Charging time: (empty batteries) to full capacity in approx. six to seven hours. approx. 12 hours (with fully charged batteries). Talk time: up to 120 hours (with fully charged batteries). Standby time: Note If the battery charge is unknown, they will be fully charged in approx. 14 hours. Inserting the Batteries The battery compartment is on the back of the handset.
-
Page 8: Registering Your Handset
Installation Charge Display The charge status of the batteries is indicated on the display: ƒ batteries are 81 - 100% charged „ batteries are 61 - 80% charged √ batteries are 41 - 60% charged … batteries are 21 - 40% charged †... -
Page 9: Basic Functions
Basic Functions Switching the Handset On / Off Once the batteries have been charged for the first time, your handset is automatically switched on and is ready for operation. You can switch the handset off so that your batteries will stay charged for longer. - Page 10 Basic Functions Adjusting the Earpiece Volume during a Call Let’s say you’re making a call using the earpiece, the loudspeaker, or a headset. You use the arrow keys or the number keys to adjust the volume. A single press increases or decreases the volume by one level, e.g., Volume:3 ]]]]] ||| In addition, the bar indicator...
-
Page 11: Dialing Phone Numbers
Making Calls Dialing Phone Numbers Dialing Phone Numbers Directly Press the hook key. Enter the phone number and press ; the phone number will be dialed right away..or Menu Press Select one of the following menu items and confirm it by pressing Select a phone number from the caller list and initiate dialing Caller List with... -
Page 12: Making Emergency Calls
Making Calls Making Emergency Calls Press and hold down the R key. The stored phone number will be dialed directly. The handset switches to handsfree mode. Press the hook key to end the call. Making Calls from the Redial List The redial list contains the last ten phone numbers you dialed (max. -
Page 13: Making Calls From The Caller List
Making Calls Making Calls from the Caller List Press the info key to open a list with the following items for selection: voice box, caller list, redial list and telephone book. The voice box entry only appears if your voice mailbox access number has been registered in the “Telephone Options >... -
Page 14: Options During A Call
Making Calls Options during a Call If required, you can select a phone number from one of the available lists and postdial it during the current call by pressing (DTMF postdialing). If required, press Menu briefly. Select one of the following menu items, and confirm this by pressing Telephone Book Open the telephone book. -
Page 15: Making Another Call During A Conversation (Enquiry Call)
Making Calls Making Another Call during a Conversation (Enquiry Call) Making an Enquiry Call You are making a call. Press the R key. The first call will be held. Enter a phone number using the number keys, then press Press Menu and select a phone number from the caller list, the redial list, or the tele- briefly... -
Page 16: Menu Structure
Making Calls Consultative Transfer You are making an enquiry call and your handset is in the toggle state (see above): Press Info key to open the service menu. Select , and confirm this by pressing call transfer Your handset returns to the idle state. If the desired party is busy or cannot be contacted: Press the R key to return to the first call. - Page 17 Aastra DECT 142 If you’ve read this owner’s manual and still have problems, please visit our website at www.aastratelecom.com or contact your local retailer for technical assistance. Copyright 2007 Aastra All Rights Reserved Created in May 2007 • Item-No. 69014.033 • The right to technical changes is reserved.