Table of Contents
Advertisement
Available languages
Available languages
SP6677-5 6, 9, 12 & 16 GALLON.qxd
FOR QUESTIONS OR INFORMATION CONTACT US AT
!
WARNING:
To reduce the risk of injury, the user must read and understand the owner's manual
before using this product.
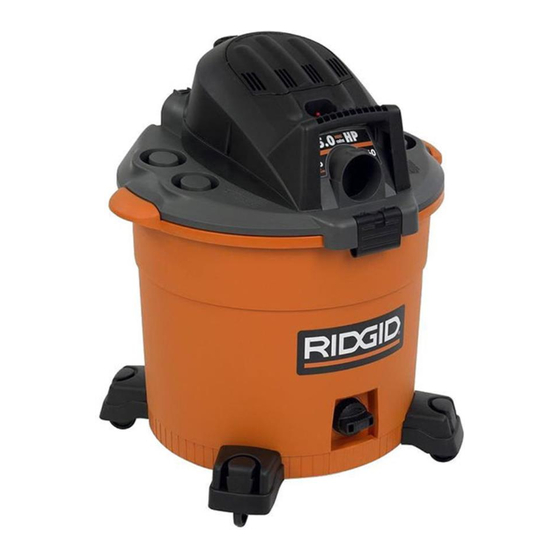
Thank you for buying a RIDGID product.
SAVE THIS MANUAL FOR FUTURE REFERENCE
Part No. SP6677
4/27/10
8:17 PM
OWNER'S MANUAL
6 U.S. GALLON/22.5 LITER
9 U.S. GALLON/34.0 LITER
12 U.S. GALLON/45.0 LITER
16 U.S. GALLON/60.0 LITER
WET/DRY VAC
www.ridgidvacs.com
Page 1
• Español - página 15
Printed in Mexico
Advertisement
Chapters
Table of Contents

Related Manuals for RIDGID 6 U.S. GALLON/22.5 LITER


Summary of Contents for RIDGID 6 U.S. GALLON/22.5 LITER
- Page 1 WARNING: To reduce the risk of injury, the user must read and understand the owner’s manual before using this product. Thank you for buying a RIDGID product. • Español - página 15 SAVE THIS MANUAL FOR FUTURE REFERENCE Part No. SP6677...
-
Page 2: Table Of Contents
SP6677-5 6, 9, 12 & 16 GALLON.qxd 4/27/10 8:17 PM Page 2 Table of Contents Section Page Section Page Important Safety Instructions..2 Emptying the Drum ....9 Introduction . -
Page 3: Save This Manual
WARNING: To reduce the risk of • To reduce the risk of personal injury or electric shock - do not expose to damage to Vac, use only Ridgid rain - store indoors. recommended accessories. SAVE THIS MANUAL... -
Page 4: Introduction
SP6677-5 6, 9, 12 & 16 GALLON.qxd 4/27/10 8:17 PM Page 4 Introduction This Wet/Dry Vac is intended for house- Read this owner’s manual to familiarize hold use. It may be used for vacuuming yourself with the product features and to wet or dry media and may be used as a understand the specific usage of your blower. -
Page 5: Filter Removal And Installation
SP6677-5 6, 9, 12 & 16 GALLON.qxd 4/27/10 8:17 PM Page 5 Filter Removal and Installation Removal and Installation Integrated Filter PUSH of the Qwik Lock™ Filter Plate with Center DOWN Hole Filter Removal: 1. Hold the filter tabs of the Qwik Lock™ Filter filter in each hand. -
Page 6: Wet/Dry Vac Assembly
SP6677-5 6, 9, 12 & 16 GALLON.qxd 4/27/10 8:17 PM Page 6 Wet/Dry Vac Assembly 1. Line up vacuum port in lid with drain cap located on the front of the drum. 2. Place lid on top of drum with the drum latches snug against the drum Vacuum channel. -
Page 7: To Store Your Accessories
SP6677-5 6, 9, 12 & 16 GALLON.qxd 4/27/10 8:17 PM Page 7 To Store Your Accessories 1. Slide extension wands and acces- Car Nozzle sories over the rings on the caster Utility Nozzle feet. 2. To remove wands and accessories, lightly rotate and pull upward. -
Page 8: Vacuuming Dry Materials
SP6677-5 6, 9, 12 & 16 GALLON.qxd 4/27/10 8:17 PM Page 8 Operation (continued) To reduce the risk of electric shock, all Vacuuming Dry Materials models have a polarized plug (one blade 1. The filter must always be in correct is wider than the other), except those with position at all times to avoid leaks and a 230 Volt European style plug. -
Page 9: Emptying The Drum
SP6677-5 6, 9, 12 & 16 GALLON.qxd 4/27/10 8:17 PM Page 9 Emptying the Drum WARNING: Always wear safety eyewear complying with ANSI Z87.1 WARNING: To reduce the risk of (or in Canada, CSA Z94.3) before injury from accidental starting, using as a blower. -
Page 10: Maintenance
SP6677-5 6, 9, 12 & 16 GALLON.qxd 4/27/10 8:17 PM Page 10 Maintenance Cleaning A Dry Filter Filter 1. Some removal of dry debris can be NOTE: The filter is made of high quality accomplished without removing the paper designed to stop very small filter from the Vac. -
Page 11: Cleaning And Disinfecting The Wet/Dry Vac
1. Pour 1 gallon of water and 1 teaspoon performed by Authorized Service chlorine bleach into the drum. Centers, always using RIDGID replacement parts. 2. Let solution stand for 20 minutes, carefully swishing every few minutes, making sure to wet all inside surfaces of the drum. -
Page 12: Repair Parts
8:17 PM Page 12 Repair Parts 6, 9, 12 or 16 U.S. Gallon Wet/Dry Vac RIDGID parts are available on-line at www.ridgidparts.com Always order by Part Number - Not by Key Number WARNING SERVICING OF DOUBLE-INSULATED WET/DRY VAC In a double-insulated Wet/Dry Vac, two systems of insulation are provided instead of grounding. - Page 13 SP6677-5 6, 9, 12 & 16 GALLON.qxd 4/27/10 8:17 PM Page 13 6, 9, 12 or 16 U.S. Gallon Wet/Dry Vac RIDGID parts are available on-line at www.ridgidparts.com SELECT MODELS ONLY...
-
Page 14: Warranty
• No other express warranty applies This FULL LIFETIME WARRANTY is the sole and exclusive warranty for RIDGID ® Wet/Dry Vacs. No employee, agent, dealer, or other person is authorized to alter this warranty or make any other warranty on behalf of Ridge Tool Company. - Page 15 ADVERTENCIA: Para reducir el riesgo de lesiones, el usuario debe leer y entender el manual del operador antes de utilizar este producto. Gracias por comprar un producto RIDGID. GUARDE ESTE MANUAL PARA REFERENCIA FUTURA No. de pieza SP6677 Impreso en México...
-
Page 16: Instrucciones De Seguridad Importantes
SP6677-5 6, 9, 12 & 16 GALLON.qxd 4/27/10 8:17 PM Page 16 Indice Sección Página Sección Página Instrucciones de seguridad importantes ..16 Vaciado del tambor ..... . 23 Introducción . - Page 17 ADVERTENCIA: Para reducir el riesgo de • Para reducir el riesgo de lesiones corporales o sacudidas eléctricas, no exponga la aspiradora daños a la aspiradora, utilice únicamente a la lluvia y almacénela en interiores. accesorios recomendados por Ridgid. GUARDE ESTE MANUAL...
-
Page 18: Introducción
SP6677-5 6, 9, 12 & 16 GALLON.qxd 4/27/10 8:17 PM Page 18 Introducción Esta aspiradora para mojado/seco está diseñada Lea este manual del operador para familiarizarse con solamente para uso doméstico. Se puede utilizar para las características del producto y para entender la recoger materiales mojados o secos y se puede usar utilización específica de su nueva aspiradora. -
Page 19: Remoción E Instalación Del Filtro
SP6677-5 6, 9, 12 & 16 GALLON.qxd 4/27/10 8:17 PM Page 19 Remoción e instalación del filtro Remoción e instalación del filtro Placa de filtro Integrated Filter EMPUJE Qwik Lock™ PUSH HACIA integrada con agujero Plate with Center DOWN ABAJO central Hole Remoción del filtro:... -
Page 20: Ensamblaje De La Aspiradora Para Mojado/Seco
SP6677-5 6, 9, 12 & 16 GALLON.qxd 4/27/10 8:17 PM Page 20 Ensamblaje de la aspiradora para mojado/seco 1. Alinee el orificio de aspiración que se encuentra Tapa en la tapa con la tapa del drenaje ubicada en la parte delantera del tambor. 2. -
Page 21: Para Guardar Los Accesorios
SP6677-5 6, 9, 12 & 16 GALLON.qxd 4/27/10 8:17 PM Page 21 Para guardar los accesorios 1. Deslice los tubos extensores y los accesorios Boquilla para auto Car Nozzle sobre los anillos de las patas para ruedecilla. Boquilla de Utility Nozzle 2. -
Page 22: Recogida De Materiales Secos Con La Aspiradora
SP6677-5 6, 9, 12 & 16 GALLON.qxd 4/27/10 8:17 PM Page 22 Funcionamiento (continuación) Para reducir el riesgo de descargas eléctricas, todos Recogida de materiales secos los modelos tienen un enchufe polarizado (un terminal con la aspiradora es más ancho que el otro), salvo los modelos con un 1. -
Page 23: Vaciado Del Tambor
SP6677-5 6, 9, 12 & 16 GALLON.qxd 4/27/10 8:17 PM Page 23 Vaciado del tambor ADVERTENCIA: Use siempre protectores oculares de seguridad que cumplan con la ADVERTENCIA: Para reducir el riesgo de norma ANSI Z87.1 (o en Canadá, con la norma lesiones debidas a un arranque accidental, CSA Z94.3) antes de utilizar la aspiradora como desenchufe el cordón de energía antes de vaciar... -
Page 24: Mantenimiento
SP6677-5 6, 9, 12 & 16 GALLON.qxd 4/27/10 8:17 PM Page 24 Mantenimiento Filtro Limpieza de un filtro seco NOTA: Este filtro está hecho de papel de alta calidad 1. Se puede lograr una extracción parcial de residuos diseñado para detener partículas de polvo muy sin quitar el filtro de la aspiradora. -
Page 25: Limpieza Y Desinfección De La Aspiradora Para Mojado/Seco
2. Deje que la solución repose durante 20 minutos y Centros de Servicio autorizados, usando siempre agítela cuidadosamente cada pocos minutos, piezas de repuesto RIDGID. asegurándose de mojar todas las superficies interiores del tambor. 3. Vacíe el tambor después de 20 minutos. Enjuá- guelo con agua hasta que el olor a blanqueador desaparezca. -
Page 26: Piezas De Repuesto
Page 26 Piezas de repuesto Aspiradora para mojado/seco de 6, 9, 12, ó 16 galones EE.UU. Las piezas RIDGID se encuentran disponibles en línea conectándose a www.ridgidparts.com Pida siempre por número de pieza —no por número de clave ADVERTENCIA SERVICIO DE AJUSTES Y REPARACIONES DE UNA ASPIRADORA PARA... - Page 27 SP6677-5 6, 9, 12 & 16 GALLON.qxd 4/27/10 8:17 PM Page 27 Aspiradora para mojado/seco de 6, 9, 12, ó 16 galones EE.UU. Las piezas RIDGID se encuentran disponibles en línea conectándose a www.ridgidparts.com SELECT (MODELOS MODELS SELECTOS ONLY SOLAMENTE)
- Page 28 • Cuánto dura la cobertura Esta garantía dura toda la vida de las aspiradoras para mojado/seco RIDGID ® • Cómo puede obtener servicio Para obtener el beneficio de esta garantía, envíe el producto completo mediante transporte prepagado a RIDGE TOOL COMPANY, Elyria, Ohio, o a cualquier CENTRO DE SERVICIO INDEPENDIENTE RIDGID ®...