
Related Manuals for Baumatic BAM253TK


Summary of Contents for Baumatic BAM253TK
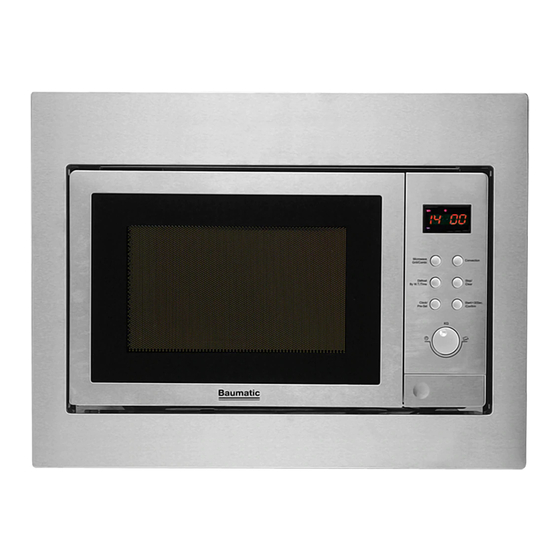
- Page 1 BAM253T 25 Litre combination microwave oven with grill User Manual for your Baumatic...
- Page 2 Dear Customer, Congratulations on purchasing your new product from Think Appliances. To register your parts and labour warranty (some conditions apply please refer to your warranty card for more details) please contact out Customer Care team on: 1800 444 357 Our Customer Care centre is there to ensure you get the most out of your appliance.
- Page 3 BAM253TK 25 Litre combination microwave oven with grill NOTE : This User Instruction Manual contains important information, including safety & installation points, which will enable you to get the most out of your appliance. Please keep it in a safe place so that it is easily available for future reference; for you or any person not familiar with the operation of the appliance.
-
Page 4: Table Of Contents
Contents Environmental note Important safety information 5 – 10 Specifications 11 – 14 Product and aperture dimensions Product specifications 11 - 12 Electrical details Description of the appliance Control panel The turntable LED display Using your microwave 15 – 29 The adjustment dial Setting the clock Before first use... -
Page 5: Environmental Note
Environmental note o The packaging materials that Baumatic uses are environmentally friendly and can be recycled. o Please discard all packaging material with due regard for the environment. -
Page 6: Important Safety Information
Baumatic and outlined in this manual should be followed. o A separate building in kit will be supplied with the microwave, to allow you to complete a built in installation. o IMPORTANT: The adjacent furniture or housing and all materials used in the installation must be able to withstand a minimum temperature of 85°C above the ambient temperature... - Page 7 If you notice that the door seal, door surfaces, power cord and plug are damaged. You should stop using the appliance, disconnect it from the mains supply and contact the Advice Line. Only genuine Baumatic spare parts should be fitted to your appliance. These can be obtained from the THINK appliances.
- Page 8 The door seals and the door surfaces should ALWAYS be kept clean and free from debris. Child Safety o Baumatic strongly recommend that babies and young children are prevented from being near to the appliance and not allowed to touch the appliance at any time.
- Page 9 Any fault attributed to inadequate ventilation may not be covered by warranty. o Baumatic Ltd. declines any responsibility for injury or damage, to person or property, as a result of improper use or installation of this appliance.
- Page 10 Declaration of conformity o CE: Appliance conforming European directives 89/336/EEC, 93/68/EEC, 73/23/EEC and subsequent revisions and “RoHS” directive 2002/95/CE.* o The manufacturer declares that the oven is built using certified materials requires appliance installed accordance with the standards currently in force. This appliance must be used by a trained person for domestic purposes only.
-
Page 11: Specifications
Specifications Product dimensions Aperture dimensions (including frame kit) Height: 460 mm Height: 450 mm Width: 594 mm Width: 600 mm Depth: 465 mm Depth: 550 mm Product specifications o 10 functions: Auto-reheat Vegetables Fish Meat Pasta Potato Pizza Soup Chicken Cake o Quick start o LED full programmer... -
Page 12: Electrical Details
o Capacity: 25 litres o Microwave output: 900 W o Grill output: 1000-1100 W o Hot air output: 2300-2400 W Electrical details Rated Voltage: 230-240 Vac 50 Hz Supply Connection: 10 A plug and cordset Max Rated Inputs: 2300-2400W Mains Supply Lead: 3 x 1.0 mm²... -
Page 13: Control Panel
All food and food containers must ALWAYS be placed on the glass tray during cooking. Turntable ring assembly o If the glass tray or turntable ring assembly cracks or breaks, it must be replaced immediately. Genuine Baumatic parts can be obtained THINK appliances. -
Page 14: Led Display
LED display o The LED display will show the time of day, or if the microwave is in use, it will show the cooking time. Indicates that microwave cooking is taking place. Indicates that convection cooking is taking place. Indicates that grilling is taking place. Indicates that defrosting is taking place. -
Page 15: Using Your Microwave
Using your microwave The adjustment dial o The adjustment dial (E) should only be turned clockwise (towards the book symbol) if you want to use the auto menu function. o For all other purposes and settings, the adjustment dial (E) should be turned anti-clockwise (towards the clock symbol). -
Page 16: Microwave Cooking
Microwave cooking o Once the clock has been set, your microwave is then ready to use. o Use the door button (F) to open the door of the microwave. o Check that the turntable shaft, turntable ring assembly and glass tray are correctly assembled in the cavity. -
Page 17: Second (Quick Start)
+ 30 second button (Quick start) o If you want to cook on the highest power level setting for a period of time, then you can use the +30 second button (D). o Press the +30 second button (D) once and your microwave will operate on full power for 30 seconds. -
Page 18: Grill Cooking
Grill cooking o Press the grill button (I) once and the LED display (A) will show “P100”. o Turn the adjustment dial (E) or keep pressing the grill button (I) until “G-1” appears on the LED display. o Once “G-1” appears on the LED display (A), press the confirm button (D). -
Page 19: Combination Cooking
Combination cooking o Press the combination button (I) once and the LED display (A) will show “P100”. o Turn the adjustment dial (E) or keep pressing the combination button (I) until “C-1”, “C-2”, “C-3” or “C-4” appears on the LED display (see the table below to see the various combination cooking modes that can be selected). -
Page 20: Convection Cooking
Convection cooking o Convection cooking allows you to operate your microwave like a traditional oven. The appliance does not use microwaves to cook the food and the cavity should be preheated before food is placed inside of it. o Use the door button (F) to open the door of the microwave. o Place whatever you are cooking in the centre of the microwave cavity and then close the microwave door. -
Page 21: Interrupting A Cooking Cycle
o Press the start button (D) and the microwave will start to pre- heat the oven cavity to the temperature that you have selected. o Once the required temperature inside the oven cavity has been reached, an audible signal will sound twice and the LED display will flash. -
Page 22: Cancelling A Cooking Cycle
Cancelling a cooking cycle o If you wish to cancel a cooking cycle when it is in progress, you should press the stop/clear button (C). o The microwave will stop heating immediately, give an audible signal and the LED display (A) will return to showing the time of day. -
Page 23: Defrost By Time
Defrost by time o Press the defrost by weight/time button (H) twice and the LED display (A) will show “d-2”. o Turn the adjustment dial (E) to set the defrost time that you require. o Press the start button (D) and your microwave will start to defrost the food. -
Page 24: The Kitchen Timer
The kitchen timer The kitchen timer will countdown a set time and a buzzer will sound when the required time is reached. The kitchen timer is to be used separately from the microwave functions and cannot be used at the same time. -
Page 25: Auto Menu Chart
o The oven will stop heating, so you can open the microwave door to place the cake inside of the cavity. Shut the oven door and then press the start button (D) to begin cooking. Auto menu chart Menu Weight Display Power Reheat... -
Page 26: Safety Lock
Safety lock o When the microwave is not heating, it is possible to switch on the safety lock. o Press and hold down the stop/clear button (C) for 3 seconds. o The microwave will emit a long audible signal and the LED display (A) will display a padlock symbol. -
Page 27: Materials You Can Use In A Microwave Oven
o You should not use ceramic or porcelain crockery, or porous earthenware inside of your microwave. These dishes could absorb moisture from the food whilst it is cooking, which could cause pressure to build up and shatter the dish. o If you are heating certain foods and any liquid, moisture will evaporate and condensation may occur. -
Page 28: Materials Not To Be Placed In A Microwave Oven
Plastic Microwave-safe only. Follow manufacturer’s instructions. It should be labelled as “microwave safe”. Some plastic containers soften as the food inside gets hot. “Boiling bags” and tightly closed plastic bags should be slit, pierced or vented, as described by the package. -
Page 29: Cleaning And Maintenance
* Combination mode applies to microwave + grill and microwave + convection modes. Cleaning and maintenance Cleaning operations must only be carried out when the oven is cool. The appliance should be disconnected from your mains supply before commencing any cleaning process. -
Page 30: Installation
Any damage that is caused to the appliance by a cleaning product will not be fixed by Baumatic free of charge, even if the appliance is within the guarantee period. Installation... - Page 31 This appliance is supplied with a moulded 10A plug, which must be connected to an earthed socket. The earthed socket should be easily accessible after installation. o The wiring in the mains lead is coloured as follows: Brown Live Blue Neutral Green and yellow Earth...
-
Page 32: Aperture And Ventilation Requirements
Aperture and ventilation requirements o The diagram above shows aperture ventilation requirements that you require to build the appliance into a housing unit. o Ensure that the rear panel of the furniture housing unit has been removed. o This oven may be installed without any additional ventilation cut outs being made in the housing unit. -
Page 33: Built Under Installation Requirements
Built under installation requirements IMPORTANT: NO OTHER METHODS OF BUILDING UNDER THE MICROWAVE ARE SANCTIONED BY BAUMATIC. o The rear wall of the housing unit MUST be removed to allow there to be the correct amount of ventilation. o The minimum installation height is 850 mm to allow sufficient ventilation. -
Page 34: Preparing The Housing Unit
Preparing the housing unit o Your appliance will be supplied with an installation template, which you should follow when preparing the housing unit. o Place the template on the base of the housing unit and tape it into position. o IMPORTANT: The edge of template must be completely level with the front edge of the housing unit. -
Page 35: Installing The Oven Into A Housing Unit
o Remove template from the base housing unit. o Fix the bottom brackets to the base of the housing unit, using screw A. o IMPORTANT: These screws must be fully tightened. Installing the oven into a housing unit o Fit adjustment screw B into the adjustment screw-hole on the top of the microwave. - Page 36 o Place the microwave into the housing unit. o IMPORTANT: Do not push the microwave fully into the housing unit, as you still need to be able to access adjustment screw B at this stage of the installation. o IMPORTANT: Make sure that the oven feet are sitting correctly in the grooves on the bottom brackets.
-
Page 37: My Appliance Isn't Working Correctly
Troubleshooting o The microwave will not switch on. * Check that the appliance has been connected to the mains supply correctly. * Check that the fuse in the moulded plug has not blown. * If fuses blow on a regular basis, then we would recommend that you consult with a qualified electrician. - Page 38 Or any installation other than the one specified by Baumatic Ltd. has been completed. IMPORTANT: Baumatic Ltd. operates a policy of continuous improvement and reserves the right to adjust and modify its...
-
Page 39: Contact Details
Think Appliances Pty Ltd. Sales Telephone Service Telephone Website Applico Ltd. Website United Kingdom Sales Telephone Website:...