Table of Contents
Advertisement
Quick Links
®
NEC Versa
UltraLite
V V V V
E R S A
E R S A
E R S A
E R S A
S E R V I C E
S E R V I C E
S E R V I C E
S E R V I C E
™
™
/DayLite
Series Notebook Computers
U U U U
L L L L
L T R A
L T R A
L T R A
L T R A
I T E
I T E
I T E
I T E
A N D
A N D
R E F E R E N C E
R E F E R E N C E
A N D
A N D
R E F E R E N C E
R E F E R E N C E
M A N U A L
M A N U A L
M A N U A L
M A N U A L
/D /D /D /D
L L L L
A Y
A Y
A Y
A Y
I T E
I T E
I T E
I T E
Advertisement
Table of Contents

Related Manuals for NEC VERSA UltraLite


Summary of Contents for NEC VERSA UltraLite
- Page 1 ® ™ ™ NEC Versa UltraLite /DayLite Series Notebook Computers V V V V U U U U L L L L /D /D /D /D L L L L E R S A E R S A E R S A...
- Page 2 NEC is a registered trademark; Versa is a U.S. registered trademark; UltraLite, DayLite, and VersaGlide are trademarks; and UltraCare is a U.S. registered service mark of NEC Corporation and/or one or more of its subsidiaries. All are used under license.
-
Page 3: Table Of Contents
Contents Preface ..............................vii Abbreviations............................ix 1 System Overview About the NEC Versa Notebook ......................1-2 Front Features ............................1-2 LCD Panel and Base Unit ......................1-2 Keyboard............................1-4 Front Features ..........................1-6 Back Features ............................1-7 Left Side Features..........................1-7 Right Side Features..........................1-7 Power Button ..........................1-8 Bottom Features...........................1-8 Component Features ..........................1-9... - Page 4 Beep Codes ........................... 7-5 Diagnostics............................7-6 8 NEC Computers Information Services Service and Support Functions ......................8-2 Technical Support ..........................8-2 NEC Computers Web Site......................8-2 Email to Technical Support Services .................... 8-3 NEC Computers Technical Support Services................8-3 iv Contents...
- Page 5 9 Specifications System Components ..........................9-2 Memory Map ............................9-7 Interrupt Controllers ..........................9-8 Glossary Index Contents v...
-
Page 6: Preface
UltraLite™ notebook and the NEC Versa DayLite™ notebook series. The manual also provides hardware and interface information for users who need an overview of the system design. The manual is written for NEC-trained customer engineers, system analysts, service center personnel, and dealers. -
Page 7: Abbreviations
Abbreviations ampere extended data output alternating current Enhanced Graphics Adapter Advanced Graphics Port enhanced parallel port advanced technology (IBM PC) EPROM erasable and programmable ROM Bulletin Board Service EVGA Enhanced Video Graphics Array binary-coded decimal Fahrenheit BIOS Customized Utility facsimile transmission BIOS basic input/output system Federal Communications Commission... - Page 8 milliamps thin film transistor maximum Technical Support Center megabyte transistor/transistor logic Monochrome Display Adapter tracks per inch modified frequency modulation universal serial bus megahertz volt millimeter volts, alternating current millisecond volts, direct current most-significant bit VESA video electronics standards association NASC National Authorized Service Center VESA-compliant feature connector...
-
Page 9: System Overview
System Overview About the NEC Versa Notebook Front Features Back Features Left Side Features Right Side Features Bottom Features Component Features Chipset Features... -
Page 10: Front Features
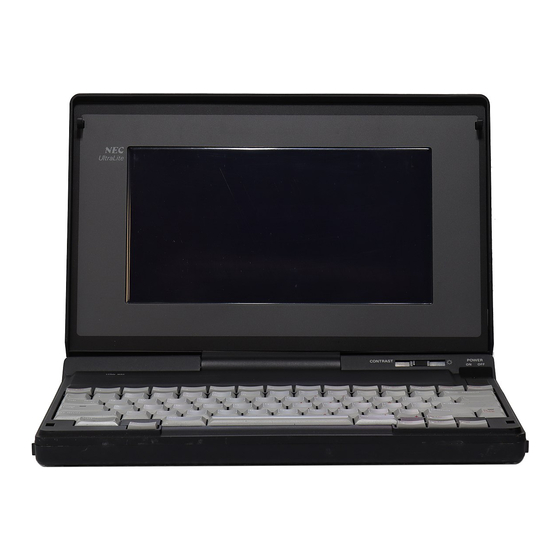
About the NEC Versa Notebook The NEC Versa UltraLite and NEC Versa DayLite series of notebooks consist of the following models: NEC Versa UltraLite notebook with a 10.4-inch Thin Film Transistor (TFT), backlit Extended Graphics Array (XGA), liquid crystal display (LCD) panel NEC Versa DayLite notebook with a 10.4-inch TFT, reflective Super Video Graphics Array... - Page 11 Microphone — Allows recording of monophonic sound directly into the notebook hard drive. NEC VersaGlide Touchpad — Move a fingertip over the VersaGlide Touchpad to control the position of the mouse pointer. Use the selection buttons below the VersaGlide Touchpad to select menu items.
-
Page 12: Keyboard
Operating status LEDs A – Hard Drive C – Scroll Lock B – Caps Lock D – Num Lock — Hard Drive — lights when the notebook writes data to or retrieves data from the internal hard drive. — Caps Lock — lights when Caps Lock is on. —... - Page 13 The following function key combinations are preprogrammed. — toggles between three video modes: LCD, CRT, or both (LCD and CRT). Fn-F3 — sets the beeper volume to low, medium, high, or mute. Fn-F6 — increases the LCD panel brightness. Fn-F8 —...
-
Page 14: Front Features
The secondary battery is connected to the back of the system. IR Port — Use this infrared (IR) port to transfer files between the NEC Versa notebook and an IR-equipped desktop or notebook computer or to print to an IR-capable printer. -
Page 15: Back Features
Back Features The system's secondary lithium-ion (Li-Ion) battery or an optional Extra Life Li-Ion battery can be installed in the battery bay at the back of the notebook. Left Side Features The left side features are shown in the following figure. Feature descriptions follow the figure. Left-side features A –... -
Page 16: Power Button
External Microphone (MIC) Jack — Connect an external microphone to this jack. Plugging in an external microphone disables the built-in microphone. Power Button — Slide the Power button forward to power on, power off, and to resume from Standby mode. For more information, see “Power Button” in the following section. PC Card Slot —... -
Page 17: Component Features
Primary Battery Each notebook is equipped with a rechargeable, non-replaceable, primary Lithium Polymer (Li-Poly) battery. The NEC UltraLite notebook uses a 12-cell battery. The NEC DayLite SVGA reflective notebook uses a 12-cell battery. The NEC DayLite XGA transflective notebook uses a 9-cell battery. -
Page 18: Chipset Features
Chipset Features The following table provides information on the chipset. System Chipset Chip Manufacturer Description TransMeta TM5600 Crusoe TransMeta 600 MHz CPU 82440MX Intel System Controller FDC37N869 Standard Microsystems Super I/O SM721 Silicon Motion Video EV1938 Creative Technology Audio 29F004TC-90 ROM BIOS M38813M4 Mitsubishi... -
Page 19: System Configuration And Setup
System Configuration and Setup Power Sources BIOS Setup Updating the BIOS Transmeta LongRun Utility NEC Customize Utility Application and Driver CD Product Recovery CD... -
Page 20: Power Sources
Power Sources The notebook can be powered using one of the following sources: AC adapter connected to an electrical wall outlet [alternating power (AC) power] primary battery and secondary battery optional Auto adapter (for use, see the accessory sheet that ships with the option). The following sections include specific information about using the power sources. -
Page 21: Powering On The System
Do not cover or place objects on the AC adapter. Keeping the adapter clear of objects lets the adapter cool properly during use. Only use the AC adapter that comes with the NEC Versa notebook. Although other adapters look similar, using them can damage the system. -
Page 22: Batteries
Batteries The notebook comes with a rechargeable Lithium Polymer primary battery, a rechargeable Li-Ion secondary battery, and a rechargeable CMOS battery. In addition, an optional Li-Ion battery can be purchased as a backup battery. The primary battery is installed behind the LCD panel and is not replaceable. The secondary battery is installed in the battery bay and is replaceable. -
Page 23: Low Battery Status
Keep the following in mind when removing or replacing the secondary battery (the primary battery is not replaceable). Use only the NEC Versa notebook battery designed for the notebook. Using other manufacturers’ batteries or using very old batteries can deteriorate battery and equipment performance. -
Page 24: Precautions
Precautions To prevent accidental secondary battery ignition, rupture, or explosion, adhere to the following precautions. There is a danger of explosion if the battery is incorrectly replaced. Replace only with the same or equivalent type recommended by the manufacturer. Discard used batteries according to the manufacturer’s instructions. To avoid personal injury and property damage, read these battery precautions on handling, charging, and disposing of Li-Ion batteries. - Page 25 Locating the battery bay release latch A – Battery Release Latch While holding the battery release latch to the right, slide the battery out of the notebook. Removing the secondary battery A – Battery Bay Connectors C – Secondary Li-Ion Battery B –...
-
Page 26: Bios Setup
BIOS Setup The notebook comes with a BIOS Setup Utility that allows parameter viewing and setting. BIOS Setup also allows setting password features that protect the system from unauthorized use. Use BIOS Setup to: set the current time and date customize the operating system to reflect the computer hardware secure the system with a password balance the performance needs with power conservation. -
Page 27: Main Menu
Setup Key Functions Function Provides help for the parameter field being displayed. Exits the menu. Up or down arrow keys Moves cursor up and down for item selection. Left or right arrow keys Selects next menu. F5/F6 Changes values. Enter Executes a command or selects submenu. - Page 28 Setting items on this menu to incorrect values can cause notebook malfunctions. Main Menu Items Menu Item Settings (default is bold) Set system time in this field. Press Tab or Enter to move System Time between hour, minute, and second fields. Example: 09:30:00 System Date Set system date in this field.
- Page 29 Main Menu Items Menu Item Settings (default is bold) CPU Speed Displays the processor speed. This field is read-only and cannot be changed from BIOS Setup. Example: 600 MHz BIOS Revision Displays the BIOS revision number. This field is read-only and cannot be changed from the BIOS Setup.
-
Page 30: Advanced Menu
Internal HDD Submenu Items Menu Item Settings (default is bold) LBA Mode Control Enabled, Disabled When Enabled is selected, it causes logical block addressing to be used in place of cylinders, heads, and sectors. When Type is set to Auto, the value in the LBA Mode field is auto-detected and the field is read only. -
Page 31: Security Menu
Advanced Menu Menu Item Settings (default is bold) LCD Panel View Expansion Enabled, Disabled Disabled reduces the panel view in some video modes. Enabled expands the panel view. The enabled setting sometimes affects graphic quality. Enabled, Disabled BootUp Message Disabled suppresses the logo screen during boot. Summary Screen Disabled, Enabled. -
Page 32: Boot Menu
Security Menu Items Menu Item Settings (default is bold) Password on Boot Disabled, Enabled When Enabled, requires password entry before boot. System remains in secure mode until the password is entered. Normal, Write Protect Fixed Disk Boot Sector Write Protect protects the boot sector on the hard disk from viruses. -
Page 33: Updating The Bios
Obtaining the BIOS Update Contact NEC Computers Support Services to obtain the BIOS Update Diskette. Or you can download the BIOS update from the NEC Computers web site (see Section 8 for web site information). Download the BIOS Update onto a diskette. -
Page 34: Setting The Dip Switch
Setting the DIP Switch Several system settings, including BIOS Flash, are set through a six-position DIP switch located on the bottom of the notebook, under the memory bay cover. The following list identifies each switch, its default setting, and its function. Procedures for setting the switches follow the list. Switch 1 —... -
Page 35: Performing The Bios Update
A message similar to the following appears. The NEC BIOS Update Utility should not be used to modify the BIOS in a Versa system which is docked. If your Versa is docked, please exit the BIOS Update Utility, power down, and undock your Versa before running the utility. -
Page 36: Transmeta Longrun Utility
Force the processor to stay at the higher 600MHz speed when speed is necessary, or when the notebook is running on an AC power source. To install the LongRun utility, run the NEC Customize utility (see “NEC Customize Utility” later in this section) and select “Install/Uninstall LongRun Utility.” Press and reboot the notebook after the installation is completed. -
Page 37: Uninstalling The Longrun Utility
A variety of third-party software applications, drivers, utilities, internet browsers, and the NEC INFO Center are provided on the Application and Driver CD that ships with the NEC Versa notebook. Some of the drivers are already installed as part of the operating system environment. -
Page 38: Product Recovery Cd
The Product Recovery CD and Utility provides a number of choices. Move the cursor over each selection on the NEC Product Recovery Utility screen to display a description of the selection in the window at the right side of the screen. -
Page 39: Full Disk Drive Restore
Only use the Full Disk Drive restore option if the preinstalled software is unusable. Use these steps to perform a Full Disk Drive restore. Check the Product Recovery CD title and make sure that it is the correct CD for the NEC Versa notebook and operating system. -
Page 40: Partition Only Restore
C: is unusable. Use these steps to perform a Partition Only restore as follows: Check the Product Recovery CD title and make sure that it is the correct CD for the NEC Versa notebook and operating system. Power off the system before connecting the external CD-ROM drive to the notebook. - Page 41 Press , click , or press to reboot the notebook. Enter Reboot Alt-R A series of hardware detection screens display, the notebook reboots, and the Windows Setup screen appears. Follow the on-screen instructions to set up Windows. You are required to reenter the Microsoft license number. System Configuration and Setup 2-23...
-
Page 42: Disassembly And Reassembly
Disassembly and Reassembly Required Tools and Equipment Disassembly Reassembly... -
Page 43: Required Tools And Equipment
Required Tools and Equipment All NEC Versa UltraLite/DayLite notebook disassembly/reassembly procedures are performed using the following tools: set of small Phillips screwdrivers (small and large #0 and #1) set of small flat-head screwdrivers (1/32 inch through 1/8 inch) magnifying glass tweezers. -
Page 44: Secondary Battery
Remove the secondary battery as follows. Note Use the batteries specifically designed for use in the NEC Versa notebook. Installing another manufacturer’s battery can deteriorate battery and equipment performance. Save any open files, exit Windows, and turn off notebook power. -
Page 45: Memory Module
Memory Module Remove the memory module as follows. Save any open files, exit Windows, turn off notebook power, unplug the power cable, and disconnect any peripherals. Close the LCD panel, turn over the notebook, and locate the memory module bay. Remove the screw and bay cover. -
Page 46: Hard Drive
Hard Drive Remove the internal hard drive as follows. Save any open files, exit Windows, turn off notebook power, unplug the power cable, and disconnect any peripherals. Close the LCD panel, turn over the notebook, remove the secondary battery, and locate the hard drive bay cover. -
Page 47: Keyboard
Keyboard Remove the keyboard assembly as follows. Save any open files, exit Windows, turn off notebook power, unplug the power cable, and disconnect any peripheral devices. Close the LCD panel, turn the notebook over, and remove the secondary battery. Remove the three screws holding the keyboard in place. Removing the keyboard screws A –... -
Page 48: Top Cover Assembly
Top Cover Assembly Remove the top cover assembly as follows. Note The top cover assembly consists of the top cover, VersaGlide Touchpad, and speaker. The assembly is replaceable as a whole unit. Save any open files, exit Windows, turn off notebook power, close the LCD panel, unplug the power cable, and disconnect any peripheral devices. - Page 49 Open the LCD panel approximately half way. Remove the left and right inside caps by carefully pushing each cap towards the middle of the notebook until it pops off the top cover assembly. The caps are held tightly in place by three internal tabs. Removing the inside cap A –...
-
Page 50: Speaker
During reassembly and after the cover assembly is snapped in place, check that the switch slides smoothly and returns to the off position when released. Slide the switch and release it quickly so that power is not turned on. Lift the top cover assembly off the two LCD panel hinges and remove the from the base. Speaker Remove the speaker from the top cover assembly as follows. -
Page 51: Mini Pci Board
Mini PCI Board Remove the Mini PCI LAN/modem board as follows. Save any open files, exit Windows, turn off notebook power, close the LCD panel, unplug the power cable, and disconnect any peripheral devices. Remove the secondary battery, hard drive cover, keyboard, and top cover assembly. Unplug the Mini PCI board cable from connector P34 on the communication board and the Mini PCI board cable from connector P43 on the USB connector board (see the following figure). -
Page 52: Main Board
Main Board Remove the main board as follows. Save any open files, exit Windows, turn off notebook power, close the LCD panel, unplug the power cable, and disconnect any peripheral devices. Remove the secondary battery, hard drive, keyboard, top cover assembly, and USB connector board. -
Page 53: Processor Assembly
Processor Assembly Remove the processor assembly as follows. Save any open files, exit Windows, turn off notebook power, close the LCD panel, unplug the power cable, and disconnect any peripheral devices. Remove the secondary battery, hard drive cover, keyboard, top cover assembly, USB connector board, and main board. -
Page 54: Lcd Panel
LCD Panel Remove the LCD panel as follows. Save any open files, exit Windows, turn off notebook power, close the LCD panel, unplug the power cable, and disconnect any peripheral devices. On the back of the notebook, remove the adhesive backed foot and screw from each side of the battery bay. -
Page 55: System Boards
System Boards Mini-PCI Board Power Switch Board USB Connector Board Main Board Communications Board... - Page 56 This chapter includes information on the five circuit boards used in the notebook. Mini PCI Board The Mini PCI LAN/modem board is located under the top cover assembly. The board is mounted on the communications board. The Mini PCI board connectors include communications board cable connector J1, a modem cable connector, and a LAN cable connector.
- Page 57 Main Board The main board (G7EZA B A2) is located under the keyboard and the top cover assembly . The following figure shows the board and its connectors and ports. The back of the main board contains the processor (non-removable), communications board connector P12, memory module connector P1, hard drive connector P6, and a DIP switch.
-
Page 58: Illustrated Parts Breakdown
Illustrated Parts Breakdown Illustrated Parts Breakdown Parts List... - Page 59 Illustrated Parts Breakdown The NEC Versa UltraLite/DayLite notebook computers illustrated parts breakdown (IPB) is shown in the following figure. See the table, “Field-Replaceable Parts List,” later in this chapter for a list of field-replaceable unit (FRU) parts. NEC Versa UltraLite/DayLite Notebook illustrated Parts Breakdown...
-
Page 60: Parts List
Parts List The following table contains a listing of the NEC Versa UltraLite/DayLite notebook computers field-replaceable unit (FRU) parts. Field-Replaceable Parts List Item Description USB Connector Board Cable USB Connector Board USB Connector Board Bracket RJ-11 Connector Assembly CMOS Battery... - Page 61 Field-Replaceable Parts List Item Description External USB CD-ROM Drive External USB Diskette Drive UltraLite Backlight LCD Panel DayLite Reflective LCD Panel DayLite Transflective LCD Panel UltraLite Backlight LCD Cable DayLite Reflective LCD Cable DayLite Transflective LCD Cable UltraLite Backlight Inverter DayLite Transflective Inverter Speaker Bracket Speaker Cable...
-
Page 62: Preventive Maintenance
Preventive Maintenance Cleaning the Exterior Cleaning the Interior Protecting the Hard Disk Drive Maintaining the Secondary Battery... -
Page 63: Protecting The Hard Drive
This section contains general preventive maintenance information for cleaning the notebook case, LCD, and keyboard. Unplug the AC adapter and remove the secondary battery (or optional battery, if installed) before performing maintenance. Voltage is present inside the notebook and LCD even after it is turned off. Cleaning the Exterior Clean the exterior of the notebook as follows. -
Page 64: Maintaining The Secondary Battery
® ® Use the Microsoft Windows operating system ScanDisk program to correct any errors found in the directory and File Allocation Table (FAT). This also frees up space from any unused sectors. Never turn the notebook off when the hard drive is being accessed. Use a hard drive maintenance program like the Microsoft Windows operating system DEFRAG program to eliminate fragmentation and improve the hard drive access time. -
Page 65: Troubleshooting
Troubleshooting Problem Checklist Startup Problems Diagnostics... -
Page 66: Problem Checklist
This chapter provides information to help isolate and repair notebook malfunctions at the field level. The notebook has a built-in program that automatically checks its components when the notebook is powered on. If there is a problem, the notebook displays an error message. If this happens, follow any instructions on the screen. -
Page 67: Startup Problems
Troubleshooting Problem What to Do Information on the LCD screen Use the Fn-F8 and Fn-F9 function keys to adjust the brightness is difficult to see. control. An optional component does Make sure the component is securely installed or connected. not work. Verify that the parameter for the I/O port configuration is set correctly in Setup. - Page 68 Post Error Messages Message Resolution Address line is short Error in the address decoding circuit on the main board. C: Drive Error Hard disk drive C: does not respond. Confirm that C: hard disk type in Setup is correct. C: Drive Failure Hard disk drive C: does not respond.
-
Page 69: Beep Codes
Post Error Messages Message Resolution Off Board Parity Error Parity error in an expansion slot. Check that the memory module is installed correctly. The error format is: OFF BOARD PARITY ERROR ADDR(HEX) = (XXXX) XXXX is the hex address where the error occurred. On Board Parity Error Parity error in main board memory. -
Page 70: Diagnostics
Beep Codes Number of Beeps Error Description CMOS Shutdown The shutdown register for CMOS Register Read/Write RAM failed. Error Cache Error/External The external cache is faulty. Cache Bad Diagnostics This section summarizes problems that might develop during notebook operation and lists suggested corrective actions. - Page 71 Diagnostics Problem or Symptoms Corrective Actions Battery power does not last Make sure that the power management options under BIOS Setup are long enabled and set properly. Recharge the secondary battery for at least 4.5 hours before using. Discharge and recharge the secondary battery twice. Replace the secondary battery.
- Page 72 Check if the PC Card assembly is firmly plugged into its connector on the main board. Otherwise, replace the PC Card assembly. Replace the main board. NEC VersaGlide™ Touchpad Check if the PS/2 or Alps mouse driver is properly installed. does not work Check if the VersaGlide Touchpad cable is firmly connected to P18 on the main board.
-
Page 73: Nec Computers Information Services
NEC Computers Information Services Service and Support Functions Technical Support... -
Page 74: Technical Support
If you have access to the Internet (via a network or a modem connection), you can access the NEC Computers web site. You can do this through a commercial online service or through your Internet account. The NEC Computers web site contains general information about NEC Computers and its products. -
Page 75: Email To Technical Support Services
Computers technical support is for U.S. and Canadian customers only; international customers should check with their sales provider.) Direct assistance is available 24 hours a day, 7 days a week. Call the NEC Computers Technical Support Center, toll free, at (U.S. -
Page 76: Specifications
Specifications System Components Memory Map Interrupt Controllers... - Page 77 System Components The following system component specifications are standard except where noted. Note The components that ship with the system are subject to change without notice. System Processor 600-MHz Transmeta Crusoe TM5600 microprocessor Architecture 64-bit Peripheral Component Interconnect (PCI) Random Access Memory System Memory —...
- Page 78 Speaker One built-in speaker, 1 watt Mono speaker Sound Blaster PRO compatible ® Solo-1 PCI AudioDrive + ESS 1946S Software-controlled sound and beep volume LCD Panel UltraLite (Reflective) — 10.4-inch high-resolution active-matrix illuminated reflective XGA — 1024 x 768 resolution TFT display DayLite (Reflective) —...
- Page 79 Hard Drive Specifications vary depending upon model: Busmaster IDE, Ultra DMA/33 support Capacity — Internal 10- or 20-GB Drive height — 9.75 mm Read/write track-to-track seek rate — 3 ms Average seek time — 12 ms – 14 ms Revolutions per minute — 4200 Data transfer rate —...
- Page 80 Power AC Adapter Input Voltage — 100 to 240 volts (V) AC, 50 or 60 Hz, maximum 2.8A Output Voltage — 16.0 V DC, 45 watt Australia, Europe, and Asia use an AC power cable specific to each country's standards. Batteries Primary Battery —...
- Page 81 Memory Map The system supports system and video shadowing, both controlled through complementary metal oxide semiconductor (CMOS). The system supports BIOS as a cacheable area with write protection. The following table shows the system's memory map. System Memory Map Memory Space Size Function FFFE 0000H-FFFF FFFFH...
-
Page 82: Interrupt Controllers
Interrupt Controllers Using interrupts, hardware can request software services. If non-Plug and Play software is being used, the interrupt may need to be moved for software application or driver compatibility. Some interrupts cannot be moved. Fifteen interrupts can be used with a cascade connection of 8259INTC x 2. -
Page 83: Glossary
AC Adapter A device that connects an NEC Versa portable computer and an AC wall outlet to provide AC power for running the system or recharging the battery. Advanced Graphics Port is an interface specification designed for the throughput demands of 3D graphics. - Page 84 Electronic timer used to synchronize computer operations. CMOS Complementary Metal Oxide Semiconductor. A chip that contains nonvolatile memory in the NEC Versa. CMOS is backed up by an internal lithium battery that preserves clock/calendar data and system configuration parameters stored in CMOS. cold boot Process of starting up the computer by turning on the power.
- Page 85 (KB) 1024 bytes. Local Area Network. Liquid Crystal Display. An LCD consists of a thin sandwich of two glass plates with sealed edges, containing nematic liquid-crystal material that forms the screen image. The NEC Versa displays are LCD type. load To copy a program into the computer's memory from a storage device.
- Page 86 Usually contained on a single chip that includes an arithmetic logic unit, control logic, and control-memory unit. mode A method of operation; for example, the NEC Versa operates in either normal or power- saving modes. modem MOdulator-DEModulator. A device that links computers over a telephone line.
- Page 87 parameter A characteristic of a device or system. password A string of characters that the user must enter before the system allows access or system privileges. PCMCIA A credit card sized peripheral interface standard for portable devices. Types of PCMCIA cards currently offered by major vendors include fax/modems, LAN, storage cards, and wireless communications devices.
- Page 88 The main printed circuit board inside the system unit into which other boards and major chip components, such as the system microprocessor, are connected. Thin Film Transistor. A type of NEC Versa LCD color screen that supports 256 colors and provides exceptional screen display.
- Page 89 warm boot Process of resetting the computer without turning off the power through keyboard input (pressing Ctrl, Alt, and Del keys simultaneously) or the reset button. The system returns to an initial or arbitrarily selected condition. write To record or store information to a storage device. Glossary 7...
-
Page 90: Index
Battery Control keys, 1-5 bay, 1-7 Cursor control keys, 1-5 charging, 2-5 Customize Utility charging LED, 1-6 NEC, 2-19 CMOS, 1-9 determining power status, 2-4 extending life, 2-4 Determining battery status, 2-4 handling, 2-5 Diagnostics, 7-6 low power status, 2-5... - Page 91 Function keys, 1-4 VersaGlide Touchpad, 1-3 NEC Computers Graphics email support, 8-3 ATI RAGE, 9-3 Technical support services, 8-3 web site, 8-2 NEC Customize Utility Hard disk using, 2-19 removal, 3-5 Num lock, 1-4 Hard drive Numeric keypad, 1-5 features, 1-9...
- Page 92 Utility removal, 3-3 Transmeta LongRun, 2-18 replacing, 2-6 Service and Support contact information, 8-2 Web site Speaker, 1-3 NEC Computers, 8-2 removal, 3-9 Windows keys, 1-5 Specifications calendar clock, 9-2 CD-ROM drive, 9-5 diskette drive, 9-4 hard drive, 9-4 input/output facilities, 9-3...
-
Page 93: Regulatory Statements
Regulatory Statements The following regulatory statements include the Federal Communications Commission (FCC) Radio Frequency Interference Statement, compliance statements for Canada and Europe, and battery disposal and replacement information. FCC Statement for United States Only Changes or modifications to this unit not expressly approved by the party responsible for compliance could void the user’s authority to operate the equipment. -
Page 94: Battery Replacement
Battery Replacement A lithium battery maintains system configuration information. In the event that the battery fails to maintain system configuration information, NEC Computers recommends that you replace the battery. For battery replacement information, see Chapter 3 in this manual. There is a danger of explosion if the battery is incorrectly replaced. - Page 95 NEC Computers Inc. 819-200725-000 15 Business Park Way 8/2001 Sacramento, CA 95828 *819-200725-000*...