
Related Manuals for NETGEAR N750 DGND4000


Summary of Contents for NETGEAR N750 DGND4000
- Page 1 N750 Wireless Dual Band Gigabit DSL Modem Router—Premium Edition DGND4000 User M anua l 350 East Plumeria Drive San Jose, CA 95134 March 2013 202-11047-02...
- Page 2 Trademarks NETGEAR, the NETGEAR logo, and Connect with Innovation are trademarks and/or registered trademarks of NETGEAR, Inc. and/or its subsidiaries in the United States and/or other countries. Information is subject to change without notice. © NETGEAR, Inc. All rights reserved.
-
Page 3: Table Of Contents
NETGEAR genie Setup ........ - Page 4 NETGEAR genie App......... 39 NETGEAR genie Mobile App ....... . . 40 Chapter 4 NETGEAR genie ADVANCED Home Setup Wizard .
- Page 5 N750 Wireless Dual Band Gigabit ADSL Modem Router DGND4000 Chapter 8 Administration Upgrade the Wireless Modem Router Firmware ....84 View Wireless Modem Router Status ......85 Router Information .
- Page 6 N750 Wireless Dual Band Gigabit ADSL Modem Router DGND4000 VPN Policies..........129 Add or Edit an Auto VPN Policy .
-
Page 7: Chapter 1 Hardware Setup
Simultaneous dual band. Runs both 2.4 GHz and 5 GHz bands concurrently, ensuring top speeds and the greatest range while minimizing interference. • NETGEAR genie. Easy setup and dashboard control to manage, monitor, and repair home networks. • Ultrafast wired. Four-Gigabit Ethernet ports deliver ultrafast wired connections for gaming and video. - Page 8 N750 Wireless Dual Band Gigabit ADSL Modem Router DGND4000 • NETGEAR green features. Use Power and WiFi On/Off buttons, and schedule WiFi to turn on and off to save energy when not in use. • Compatibility. Compatible with all major ADSL Internet service providers (ISPs).
- Page 9 If you did not set up your new modem router already using the installation guide that comes in the box, this chapter walks you through the hardware setup. Chapter 3, NETGEAR genie BASIC Settings, explains how to set up your Internet connection.
- Page 10 N750 Wireless Dual Band Gigabit ADSL Modem Router DGND4000 This chapter contains the following sections: • Unpack Your New Router • Hardware Features • Position Your Wireless Router • ADSL Microfilters • Cable Your N750 Wireless Modem Router • Verify the Cabling Hardware Setup...
-
Page 11: Unpack Your New Router
• Installation guide with cabling and router setup instructions If any of the parts are incorrect, missing, or damaged, contact your NETGEAR dealer. Keep the carton, including the original packing materials, in case you need to return the product for repair. -
Page 12: Hardware Features
N750 Wireless Dual Band Gigabit ADSL Modem Router DGND4000 Hardware Features Before you cable your router, take a moment to become familiar with the label and the front and back panels. Pay particular attention to the LEDs on the front panel. Label The label on the bottom of the wireless modem router shows the router’s Restore Factory Settings button, WiFi network name (SSID), network key (password), and MAC address. -
Page 13: Back Panel
N750 Wireless Dual Band Gigabit ADSL Modem Router DGND4000 Back Panel The back panel has the Power On/Off button and port connections shown in the figure: 1. ADSL line 2. USB port 3. Gigabit Ethernet LAN ports 4. Gigabit Ethernet WAN port for connecting to external cable or fiber modem 5. -
Page 14: Front Panel
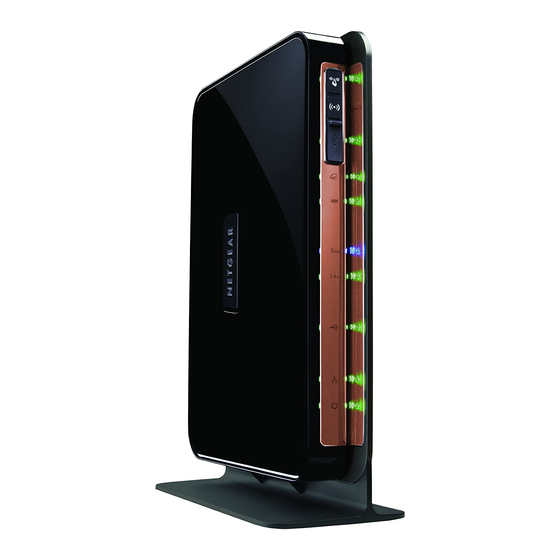
N750 Wireless Dual Band Gigabit ADSL Modem Router DGND4000 Note: You can use either the ADSL or Gigabit Ethernet port for WAN connectivity. AC power adapter input Power On/Off button Front Panel The wireless modem router front panel has the 10 status LEDs, icons, and ports shown in the figure. - Page 15 N750 Wireless Dual Band Gigabit ADSL Modem Router DGND4000 Table 1. WPS button and LED Icon LED Activity Description Solid green Indicates that wireless security was enabled. Blinking green WPS-capable device is connecting to the device. WPS is not enabled. For information about the use of this button, see Wi-Fi Protected Setup (WPS) Method on page 26.
- Page 16 N750 Wireless Dual Band Gigabit ADSL Modem Router DGND4000 Table 5. DSL LED Icon LED Activity Description Solid green You have an ADSL connection. In technical terms, the ADSL port is synchronized with an ISP’s network-access device. Blinking green Indicates that the wireless modem router is negotiating the best possible speed on the ADSL line.
-
Page 17: Position Your Wireless Router
N750 Wireless Dual Band Gigabit ADSL Modem Router DGND4000 Table 9. LAN LED Icon LED Activity Description Solid green A LAN port has detected an Ethernet link with a device. Blinking green Data is being transmitted or received. No link is detected on these ports. Table 10. -
Page 18: Adsl Microfilters
N750 Wireless Dual Band Gigabit ADSL Modem Router DGND4000 Also be aware that when you use multiple access points, it is better if adjacent access points use different radio frequency channels to reduce interference. The recommended channel spacing between adjacent access points is five channels (for example, use Channels 1 and 6, or 6 and 11). -
Page 19: Two-Line Adsl Microfilter (Included)
N750 Wireless Dual Band Gigabit ADSL Modem Router DGND4000 Two-Line ADSL Microfilter (Included) Use an ADSL microfilter with a built-in splitter when there is a single wall outlet that provides connectivity for both the wireless modem router and your telephone equipment. Plug the ADSL microfilter into the wall outlet, plug your phone equipment into the jack labeled Phone, and plug the wireless modem router into the jack labeled ADSL. -
Page 20: Verify The Cabling
N750 Wireless Dual Band Gigabit ADSL Modem Router DGND4000 The installation guide that came in the box has a cabling diagram on the second page. Step 2: Connect to ADSL Cable your computer. if connecting directly Phone cable to a DSL line. Ethernet cable Line (not included) -
Page 21: Chapter 2 Get Started With Netgear Genie
Con n e ct to the wireles s mo d em router This chapter explains how to use NETGEAR genie to set up your wireless modem router after you complete cabling as described in the installation guide and in the previous chapter in this book. -
Page 22: Prepare To Set Up The Wireless Modem Router
N750 Wireless Dual Band Gigabit ADSL Modem Router DGND4000 Prepare to Set Up the Wireless Modem Router You can set up your wireless modem router with the NETGEAR genie automatically, or you can use the genie menus and screens to set up your wireless modem router manually. -
Page 23: Netgear Genie Setup
NETGEAR genie Setup NETGEAR genie runs on any device with a web browser. It is the easiest way to set up the wireless modem router because it automates many of the steps and verifies that those steps have been successfully completed. -
Page 24: Use Netgear Genie After Installation
When you first set up your wireless modem router, NETGEAR genie automatically starts when you launch an Internet browser on a computer that is connected to the wireless modem router. You can use NETGEAR genie again if you want to view or change settings for the wireless modem router. -
Page 25: Wireless Modem Router Dashboard (Basic Home Screen)
ReadySHARE. If you connected a USB storage device to the wireless modem router, then it is displayed here. • Guest Network. Set up a guest network to allow visitors to use your wireless modem router’s Internet connection. Get Started with NETGEAR genie... -
Page 26: Add Wireless Devices Or Computers To Your Network
Settings. Using this tab requires a solid understanding of networking concepts. • Help & Support. Go to the NETGEAR support site to get information, help, and product documentation. These links work once you have an Internet connection. Add Wireless Devices or Computers to Your Network Choose either the manual or the WPS method to add wireless devices and other equipment to your wireless network. -
Page 27: Chapter 3 Netgear Genie Basic Settings
NETGEAR genie BASIC Settings You r I nternet c on n e ct ion a nd n et work This chapter contains the following sections: • Internet Basic Settings • Attached Devices • Parental Controls • ReadySHARE USB Storage and Printer •... -
Page 28: Internet Basic Settings
Enter the settings for the IP address and DNS server. The default settings usually work fine. If you have problems with your connection, check the ISP settings. Click Apply to save your settings. Click Test to test your Internet connection. If the NETGEAR website does not display within 1 minute, see Chapter 10, Troubleshooting. -
Page 29: Attached Devices
You have to use the one computer allowed by the ISP. • Use This MAC Address. Enter the MAC address that you want to use. Attached Devices You can view all computers or devices that are currently connected to your network here. NETGEAR genie BASIC Settings... - Page 30 Device Name. If the device name is known, it is shown here. • MAC Address. The unique MAC address for each device does not change. The MAC address is typically shown on the product label. You can click Refresh to update this screen. NETGEAR genie BASIC Settings...
-
Page 31: Parental Controls
The first time you select Parental Controls from the BASIC Home screen, you are automatically directed to the Internet, where you can learn more about Live Parental Controls or download the application. The following screen displays: NETGEAR genie BASIC Settings... -
Page 32: Readyshare Usb Storage And Printer
Volume Name. Volume name from the storage device (either USB drive or HDD). Total Space and Free Space. Show the current utilization of the storage device. Click the Edit button to edit the Available Network Folders settings. NETGEAR genie BASIC Settings... -
Page 33: Readyshare Printer
Note: The preset SSID and password are uniquely generated for every device to protect and maximize your wireless security. NETGEAR recommends that you do not change your preset security settings. If you do decide to change your preset security settings, make a note of the new settings and store it in a safe place where you can easily find it. - Page 34 The screen sections, settings, and procedures are explained in the following sections. Make any necessary changes, and click Apply to save your settings. Set up and test your wireless devices and computers to make sure that they can connect wirelessly. If they do not, check the following: NETGEAR genie BASIC Settings...
-
Page 35: Wireless Settings Screen Fields
(maximum) name in this field. This field is case-sensitive. The default SSID is randomly generated, and NETGEAR strongly recommends that you do not change this. Channel. This setting is the wireless channel used by the gateway. Enter a value from 1 through 13. -
Page 36: Change Wpa Security Option And Passphrase
The Security Options section of the Wireless Setup screen lets you change the security option and passphrase. NETGEAR recommends that you do not change the security option or passphrase, but if you want to change these settings, this section explains how. -
Page 37: Guest Networks
You can add a guest network to each wireless network: 2.4 GHz b/g/n and 5.0 GHz a/n To set up a guest network: From the BASIC Home screen, select Guest Network. Select any of the following wireless settings: NETGEAR genie BASIC Settings... -
Page 38: Guest Network Wireless Security Options
It is also possible to set up a guest network without wireless security. NETGEAR does not recommend using no security on a wireless network. Wi-Fi Protected Access (WPA) encryption is built into all hardware that has the Wi-Fi-certified seal. -
Page 39: Netgear Genie App
ReadySHARE Number of devices 16 Click here Click here Visit the NETGEAR genie web page at www.netgear.com/genie. From the genie app, you can select the following: • Internet. Monitor and repair Internet connectivity issues, for both wired and wireless connections. -
Page 40: Netgear Genie Mobile App
To install the genie mobile app: Using your mobile device, navigate to the Apple AppStore or Google Play for Android, and search for NETGEAR genie. You can use the following QR codes to speed up this process: iPad app... -
Page 41: Chapter 4 Netgear Genie Advanced Home
NETGEAR genie ADVANCED Home Sp e cif y custom set t ings The ADVANCED screens are for advanced users who want to specify custom settings.This chapter contains the following sections: • Setup Wizard • WPS Wizard • VPN Wizard •... -
Page 42: Setup Wizard
N750 Wireless Dual Band Gigabit ADSL Modem Router DGND4000 Setup Wizard The NETGEAR genie installation process is launched the first time you set up the wireless modem router. After setting up the wireless modem router the first time, if you want to perform this task again, you can run Setup Wizard from the Advanced tab of the genie. - Page 43 N750 Wireless Dual Band Gigabit ADSL Modem Router DGND4000 The Setup Wizard searches your Internet connection for servers and protocols to determine your ISP configuration. NETGEAR genie ADVANCED Home...
-
Page 44: Wps Wizard
To use the push button method, either click the WPS button on this screen, or press the WPS button on the top of the wireless modem router. Within 2 minutes, go to the wireless client and press its WPS button to join the network without entering a password. NETGEAR genie ADVANCED Home... -
Page 45: Vpn Wizard
Association, traffic selectors, authentication algorithm, and encryption. These parameters are based on the VPNC recommendations. More information about the VPNC recommendations is presented in the VPN Wizard summary page. To use the VPN Wizard: Select ADVANCED > VPN Wizard. NETGEAR genie ADVANCED Home... - Page 46 If this information does not match the LAN IP address and subnet mask in the remote gateway, the secure tunnel fails to connect. • The IP address range used on the remote LAN has to be different from the IP address range used on the local LAN. NETGEAR genie ADVANCED Home...
-
Page 47: Setup Menu
WAN Setup. Internet (WAN) setup. See WAN Setup on page 49. • LAN Setup. Local area network (LAN) setup. See LAN Setup on page 52. • QoS Setup. Quality of Service (QoS) setup. See Quality of Service Setup on page 55. NETGEAR genie ADVANCED Home... -
Page 48: Adsl Setup
Select ADVANCED > Setup > ADSL Settings. • Multiplexing Method. Your ISP indicates whether your multiplexing method is VC-BASED or LLC-BASED. • VPI, VCI. Your ISP indicates which VPI and VCI combination is used for your service. NETGEAR genie ADVANCED Home... -
Page 49: Wan Setup
ISPs, you might need to reduce the MTU. This change is rarely required, and should not be done unless you are sure that it is necessary for your ISP connection. See Change the MTU Size on page 50. NETGEAR genie ADVANCED Home... -
Page 50: Default Dmz Server
If any device in the data path has a lower MTU setting than the other devices, the data packets have to be split or “fragmented” to accommodate the device with the smallest MTU. NETGEAR genie ADVANCED Home... - Page 51 N750 Wireless Dual Band Gigabit ADSL Modem Router DGND4000 The best MTU setting for NETGEAR equipment is often just the default value, and changing the value might fix one problem but cause another. Leave the MTU unchanged unless one of these situations occurs: •...
-
Page 52: Lan Setup
If you change the LAN IP address of the wireless modem router while connected through the browser, you are disconnected. You have to open a new connection to the new IP address and log in again. Select ADVANCED > Setup > LAN Setup. NETGEAR genie ADVANCED Home... -
Page 53: Lan Setup Screen Settings
Use the Wireless Modem Router as a DHCP Server By default, the wireless modem router functions as a DHCP server, allowing it to assign IP, DNS server, and default gateway addresses to all computers connected to the wireless NETGEAR genie ADVANCED Home... -
Page 54: Address Reservation
In the Address Reservation section of the screen, click the Add button. In the IP Address field, type the IP address to assign to the computer or server. (Choose an IP address from the wireless modem router’s LAN subnet, such as 192.168.0.x.) NETGEAR genie ADVANCED Home... -
Page 55: Quality Of Service Setup
For an application to receive the benefits of WMM QoS, both it and the client running that application have to have WMM enabled. Legacy applications that do not support WMM and applications that do not require NETGEAR genie ADVANCED Home... - Page 56 Click the Setup QoS rule button to see the existing priority rules. a. Edit or delete a rule by selecting its radio button and clicking either the Edit or Delete button. b. Delete all of the rules by clicking the Delete All button. NETGEAR genie ADVANCED Home...
- Page 57 In the QoS Policy for field, enter a descriptive name for the new application or game. c. In the Connection Type list, select either TCP, UDP, or both (TCP/UDP), and specify the port number or range of port numbers used by the application or game. NETGEAR genie ADVANCED Home...
- Page 58 Internet. The options are Low, Normal, High, and Highest. Click Add to add this rule to MAC Device List. Click Apply to save this rule to the QoS Policy list and return to the QoS Setup screen. NETGEAR genie ADVANCED Home...
- Page 59 Click Delete to remove the QoS policy. • Click Edit to edit the QoS policy. Follow the instructions in the preceding sections to change the policy settings. Click Apply in the QoS Setup screen to save your changes. NETGEAR genie ADVANCED Home...
-
Page 60: Chapter 5 Usb Storage
USB Storage Ac c es s a nd c on figu re a USB storage d rive This chapter describes how to access and configure a USB storage drive attached to your wireless modem router. The USB port on the wireless modem router can connect only to USB storage devices like flash drives or hard drives. -
Page 61: Usb Drive Requirements
The wireless modem router should work with most USB-compliant external flash and hard drives. For the most up-to-date list of USB drives supported by the wireless modem router, visit: http://kbserver.netgear.com/readyshare The wireless modem router supports both read and write access for FAT16, FAT32, NTFS, and Linux file systems (EXT2 and EXT3). -
Page 62: File-Sharing Scenarios
N750 Wireless Dual Band Gigabit ADSL Modem Router DGND4000 File-Sharing Scenarios You can share files on the USB drive for a wide variety of business and recreational purposes. The files can be any Windows, Mac, or Linux file type including text, Word, PowerPoint, Excel, and MP3 files, pictures, and multimedia. -
Page 63: Usb Storage Basic Settings
N750 Wireless Dual Band Gigabit ADSL Modem Router DGND4000 Share Large Files over the Internet Sending files that are larger than 5 MB can pose a problem for many email systems. The wireless modem router allows you to share large files such as PowerPoint presentations or .zip files over the Internet. -
Page 64: Add Or Edit A Network Folder
N750 Wireless Dual Band Gigabit ADSL Modem Router DGND4000 By default, the USB storage device is available to all computers on your local area network (LAN). To access your USB device: Click the network device name or the share name in your computer’s network folders list. -
Page 65: Usb Storage Advanced Settings
N750 Wireless Dual Band Gigabit ADSL Modem Router DGND4000 USB Storage Advanced Settings You can set up the device name, workgroups, and network folders for your USB device. On the Advanced tab, select USB Storage > Advanced Settings. You can use this screen to specify access to the USB storage device. •... -
Page 66: Safely Remove A Usb Drive
N750 Wireless Dual Band Gigabit ADSL Modem Router DGND4000 Available Network Folders You might need to scroll down to view this section of the screen: • Share Name. If only one device is connected, the default share name is USB_Storage. You can click the name shown, or you can type it in the address field of your web browser. -
Page 67: Media Server Settings
By default, the wireless modem router is set up to act as a Ready DLNA Media server, which lets you view movies and photos on DLNA/UPnP AV–compliant media players. These media players include Xbox360, Playstation, and NETGEAR’s Digital Entertainer Live. To view these settings, select ADVANCED > USB Storage > Media Server. -
Page 68: Specify Approved Usb Devices
N750 Wireless Dual Band Gigabit ADSL Modem Router DGND4000 Specify Approved USB Devices For more security, you can set up the wireless modem router to share approved USB devices only. You can access this feature from the Advanced Setup menu on the Advanced tab. To set up approved USB devices: ... -
Page 69: Connect To The Usb Drive From A Remote Computer
N750 Wireless Dual Band Gigabit ADSL Modem Router DGND4000 To add an approved USB device, select it from the Available USB Devices list, and click Add. Select the Allow only approved devices check box. Click Apply so that your change takes effect. If you want to work with another USB device, you have to click the Safely Remove USB Device button for the currently connected USB device. -
Page 70: Readyshare Cloud
If your friends and family do not have a ReadySHARE Cloud account, they are invited to create one so they can access the shared contents. To create an account to make your files and folders accessible visit http://readyshare.netgear.com. In addition to remotely sharing anything stored on the USB device connected to your router, you can: •... -
Page 71: Chapter 6 Usb Printer Control
USB Printer Control Ac c es s a nd c on figu re a USB pri nter This chapter describes how to access and configure a USB printer attached to your wireless modem router. • Control Center Configuration • USB Printer •... - Page 72 The utility has to be installed on each computer on your network from which you want to control the device. You can download this utility at www.netgear.com/landing/en-us/readyshare.aspx. When you launch the USB Control Center utility, a screen similar to the following displays: This screen is the main screen, which shows a device icon, the description for this USB device, and its status.
-
Page 73: Control Center Configuration
N750 Wireless Dual Band Gigabit ADSL Modem Router DGND4000 • Waiting to Connect. You need to connect to this device from the computer that you are using. If you are connecting for the first time, you might be prompted to install the device driver. -
Page 74: Scan With A Multifunction Printer
N750 Wireless Dual Band Gigabit ADSL Modem Router DGND4000 Note: Some USB printers (for example, HP and Lexmark printer) request that you do not connect the USB cable until prompted by the installation software. If the USB printer is detected and connected automatically, you need to disconnect the printer, and wait for the prompt asking you to click Connect. -
Page 75: Chapter 7 Security
Security Ke ep u nwa nted c ontent out of you r net work This chapter explains how to use the basic firewall features of the wireless modem router to prevent objectionable content from reaching the computers and other devices connected to your network. -
Page 76: Keyword Blocking Of Http Traffic
N750 Wireless Dual Band Gigabit ADSL Modem Router DGND4000 Keyword Blocking of HTTP Traffic Use keyword blocking to prevent certain types of HTTP traffic from accessing your network. The blocking can be always or according to a schedule. Select ADVANCED > Security > Block Sites. Select one of the keyword blocking options: •... -
Page 77: Firewall Rules
N750 Wireless Dual Band Gigabit ADSL Modem Router DGND4000 Firewall Rules Services are functions performed by server computers at the request of client computers. For example, web servers serve web pages, time servers serve time and date information, and game hosts serve data about other players’ moves. When a computer on the Internet sends a request for service to a server computer, the requested service is identified by a service or port number. - Page 78 N750 Wireless Dual Band Gigabit ADSL Modem Router DGND4000 The Firewall Rules screen lists all firewall rules that have been changed from their default settings. The default rules allow all outgoing traffic and block all incoming traffic. • To change the firewall rules for outbound traffic, you need to edit them from the Outbound Services screen as described in Step •...
-
Page 79: Add Custom Services To Allow Or Block
N750 Wireless Dual Band Gigabit ADSL Modem Router DGND4000 • BLOCK by schedule, otherwise Allow. Allow the traffic covered by this rule, unless it is blocked according to the schedule specified on the Schedule screen in Schedule for Firewall Rules on page 81. - Page 80 N750 Wireless Dual Band Gigabit ADSL Modem Router DGND4000 described in Firewall Rules on page 77) and the Inbound Services screen (as described in Port Forwarding and Triggering on page 109). To add a custom service: Click Add Custom Service to add a service. The Add Service screen allows you to specify or edit your own custom service definition.
-
Page 81: Schedule For Firewall Rules
N750 Wireless Dual Band Gigabit ADSL Modem Router DGND4000 Schedule for Firewall Rules You can specify the days and time that you want to block Internet access. To specify the firewall rule schedule: Select ADVANCED > Security > Schedule. Set up the schedule for blocking keywords and services. -
Page 82: Security Event Email Notifications
N750 Wireless Dual Band Gigabit ADSL Modem Router DGND4000 Security Event Email Notifications To receive logs and alerts by email, provide your email information in the E-mail screen and specify which alerts you want to receive and how often. To set up email notifications: ... -
Page 83: Chapter 8 Administration
Administration M a nage your net work This chapter describes the settings for administering and maintaining your wireless modem router and home network. See also Remote Management on page 122 for information about upgrading or checking the status of your wireless modem router over the Internet, and Traffic Meter on page 125 for information about monitoring the volume of Internet traffic passing... -
Page 84: Upgrade The Wireless Modem Router Firmware
N750 Wireless Dual Band Gigabit ADSL Modem Router DGND4000 Upgrade the Wireless Modem Router Firmware The wireless modem router firmware (routing software) is stored in flash memory. You can update the firmware from the Administration menu on the Advanced tab. You might see a message at the top of the genie screens when new firmware is available for your product. -
Page 85: View Wireless Modem Router Status
N750 Wireless Dual Band Gigabit ADSL Modem Router DGND4000 View Wireless Modem Router Status To view wireless modem router status and usage information, select ADVANCED Home, or select Administration > Router Status. Router Information Hardware Version. The wireless modem router model. Firmware Version. - Page 86 IP Subnet Mask. The IP subnet mask used by the Internet (WAN) port of the wireless modem router. Domain Name Server. The Domain Name Server addresses used by the wireless modem router. A Domain Name Server translates human-language URLs such as www.netgear.com into IP addresses. Show Statistics Button On the Router Status screen, in the Internet Port pane, click the Show Statistics button.
-
Page 87: Wireless Settings (2.4 Ghz) And Wireless Settings (5 Ghz)
N750 Wireless Dual Band Gigabit ADSL Modem Router DGND4000 To stop the polling entirely, click Stop. Connection Status Button On the Router Status screen in the Internet Port pane, click the Connection Status button to view connection status information. Figure 10. View connection status information The Release button returns the status of all items to 0. -
Page 88: Guest Network (2.4 Ghz) And Guest Network (5 Ghz)
Guest Network (2.4 GHz) and Guest Network (5 GHz) Name (SSID). The 11N wireless network name (SSID) used by the wireless modem router. The default names are NETGEAR-Guest and NETGEAR-5G-Guest. Wireless AP. Indicates whether the radio feature of the wireless modem router is enabled. If this feature is not enabled, the Wireless LEDs on the front panel are off. -
Page 89: View Vpn Status
N750 Wireless Dual Band Gigabit ADSL Modem Router DGND4000 View VPN Status The log is a detailed record of the websites you accessed or attempted to access. Up to 256 entries are stored in the log. Log entries appear only when keyword blocking is enabled and no log entries are made for the trusted user. -
Page 90: Attached Devices
N750 Wireless Dual Band Gigabit ADSL Modem Router DGND4000 Select ADVANCED > Administration > Logs. The Logs screen shows the following information: • Date and time. The date and time the log entry was recorded. • Source IP. The IP address of the initiating device for this log entry. •... -
Page 91: Back Up Settings
N750 Wireless Dual Band Gigabit ADSL Modem Router DGND4000 Back Up Settings To back up the wireless modem router’s configuration settings: Select ADVANCED > Administration > Backup Settings. Click Backup Settings to save a copy of the current settings. Choose a location to store the .cfg file that is on a computer on your network. -
Page 92: Set Password
Click Apply so that your changes take effect. Password Recovery NETGEAR recommends that you enable password recovery if you change the password for the router’s user name of admin. Then you have an easy way to recover the password if it is forgotten. -
Page 93: Diagnostics
Perform a DNS Lookup. A DNS (Domain Name Server) converts the Internet name (for example, www.netgear.com) to an IP address. If you need the IP address of a web, FTP, mail, or other server on the Internet, do a DNS lookup to find the IP address. - Page 94 N750 Wireless Dual Band Gigabit ADSL Modem Router DGND4000 • Reboot the Router. Click this button to perform a remote restart of the router. Use this operation if the router seems to have become unstable or is not operating normally. Note: Rebooting breaks any existing connections either to the router (such as this one) or through the router (for example, LAN users accessing...
-
Page 95: Time Machine
N750 Wireless Dual Band Gigabit ADSL Modem Router DGND4000 Time Machine Time Machine works only on Mac computers. It automatically backs up everything on your computer to a USB hard drive that is connected to the Mac. Set Up Time Machine If you are already using Time Machine software with your USB hard drive, you can skip the setup and go directly to the following section, Access the Connected USB Hard... -
Page 96: Access The Connected Usb Hard Drive
N750 Wireless Dual Band Gigabit ADSL Modem Router DGND4000 Access the Connected USB Hard Drive After the initial set up explained in the previous section, you can access the connected USB hard drive from Your Mac or Windows computer. To access the drive: ... - Page 97 N750 Wireless Dual Band Gigabit ADSL Modem Router DGND4000 You are prompted to log in. Time Machine Time Machine Show All Enter your name and password for the server “DGND4000” so that Time Machine can access it. Connect as: Guest Registered User Name: admin...
-
Page 98: Before You Back Up A Large Amount Of Data
N750 Wireless Dual Band Gigabit ADSL Modem Router DGND4000 Before You Back Up a Large Amount of Data Before you back up a large amount of data with Time Machine, NETGEAR recommends that you do the following to ensure a successful operation: Upgrade the Mac's operating system. - Page 99 N750 Wireless Dual Band Gigabit ADSL Modem Router DGND4000 c. On the Security screen, leave the Log out after minutes of inactivity check box cleared (not selected). Administration...
-
Page 100: Change The Partition Scheme
N750 Wireless Dual Band Gigabit ADSL Modem Router DGND4000 Change the Partition Scheme To run with the router, the partition scheme on your Mac has to be set to either GUID or MBR. To make sure the partition scheme is set to one of these supported schemes: ... -
Page 101: Chapter 9 Advanced Settings
Advanced Settings Fine -tuning your net work This chapter describes the advanced features of your wireless modem router. The information is for users with a solid understanding of networking concepts who want to set the wireless modem router up for unique situations such as when remote access from the Internet by IP or domain name is needed. -
Page 102: Advanced Wireless Settings
N750 Wireless Dual Band Gigabit ADSL Modem Router DGND4000 Advanced Wireless Settings Select ADVANCED > Advanced Setup > Wireless Settings: The following settings are available in this screen: Enable Wireless Router Radio. You can completely turn off the wireless portion of the wireless modem router by clearing this check box. - Page 103 N750 Wireless Dual Band Gigabit ADSL Modem Router DGND4000 You can use this feature to turn off the wireless signal from your wireless modem router at times when you do not need a wireless connection. For example, you could turn it off for the weekend if you leave town.
- Page 104 N750 Wireless Dual Band Gigabit ADSL Modem Router DGND4000 On this screen, you can restrict access to your network to specific devices based on their MAC address. Advanced Settings...
-
Page 105: Wireless Repeating Function (Wds)
N750 Wireless Dual Band Gigabit ADSL Modem Router DGND4000 Wireless Repeating Function (WDS) You can set the N750 Modem Router up to be used as a wireless access point (AP). Doing this setup enables the wireless modem router to act as a wireless repeater. A wireless repeater connects to another wireless wireless modem router as a client where the network to which it connects becomes the ISP service. -
Page 106: Wireless Repeating Function
N750 Wireless Dual Band Gigabit ADSL Modem Router DGND4000 Wireless Repeater. The wireless modem router sends all traffic from its local wireless or wired computers to a remote access point. To configure this mode, you have to know the MAC address of the remote parent access point. The DGND4000 wireless modem router is always in dual-band concurrent mode, unless you turn off one radio. -
Page 107: Set Up The Base Station
N750 Wireless Dual Band Gigabit ADSL Modem Router DGND4000 If you are setting up a point-to-point bridge, select this check box. If you want all client traffic to go through the other access point (repeater with wireless client association), leave this check box cleared. Wireless MAC of this router. -
Page 108: Set Up A Repeater Unit
Use a wired Ethernet connection to set up the repeater unit to avoid conflicts with the wireless connection to the base station. Note: If you are using the DGND4000 base station with a non-NETGEAR wireless modem router as the repeater, you might need to change additional configuration settings. In particular, you should disable the DHCP server function on the wireless repeater AP. -
Page 109: Port Forwarding And Triggering
N750 Wireless Dual Band Gigabit ADSL Modem Router DGND4000 Click Apply to save your changes. Verify connectivity across the LANs. A computer on any wireless or wired LAN segment of the wireless modem router can connect to the Internet or share files and printers with any other wireless or wired computer or server connected to the other access point. -
Page 110: Port Triggering To Open Incoming Ports
N750 Wireless Dual Band Gigabit ADSL Modem Router DGND4000 modem router stores the original information and then modifies the source information in the request message, performing Network Address Translation (NAT): • The source address is replaced with your wireless modem router’s public IP address. This requirement is necessary because your computer uses a private IP address that is not globally unique and cannot be used on the Internet. - Page 111 N750 Wireless Dual Band Gigabit ADSL Modem Router DGND4000 the wireless modem router to open additional incoming ports when a particular outgoing port originates a session. An example is Internet Relay Chat (IRC). Your computer connects to an IRC server at destination port 6667.
-
Page 112: Port Forwarding To Permit External Host Communications
N750 Wireless Dual Band Gigabit ADSL Modem Router DGND4000 Port Forwarding to Permit External Host Communications In both of the preceding examples, your computer initiates an application session with a server computer on the Internet. However, you might need to allow a client computer on the Internet to initiate a connection to a server computer on your network. -
Page 113: How Port Forwarding Differs From Port Triggering
N750 Wireless Dual Band Gigabit ADSL Modem Router DGND4000 How Port Forwarding Differs from Port Triggering The following points summarize the differences between port forwarding and port triggering: • Port triggering can be used by any computer on your network, although only one computer can use it at a time. - Page 114 N750 Wireless Dual Band Gigabit ADSL Modem Router DGND4000 Select ADVANCED > Advanced Setup > Port Forwarding/Port Triggering. Port Forwarding is selected as the service type. Click Add. From the Service list, select the service or game that you host on your network. If the service does not appear in the list, see Add a Custom Service on page 115.
-
Page 115: Add A Custom Service
N750 Wireless Dual Band Gigabit ADSL Modem Router DGND4000 Add a Custom Service To define a service, game, or application that does not appear in the Service Name list, you have to first determine which port number or range of numbers is used by the application. You can usually determine this information by contacting the publisher of the application or user groups or newsgroups. -
Page 116: Set Up Port Triggering
N750 Wireless Dual Band Gigabit ADSL Modem Router DGND4000 Application Example: Making a Local Web Server Public If you host a web server on your local network, you can use port forwarding to allow web requests from anyone on the Internet to reach your web server. To make a local web server public: ... - Page 117 N750 Wireless Dual Band Gigabit ADSL Modem Router DGND4000 ports. You can usually determine this information by contacting the publisher of the application or user groups or newsgroups. To set up port triggering: Select ADVANCED > Advanced Setup > Port Forwarding/Port Triggering. Select the Port Triggering radio button to display the port triggering information.
-
Page 118: Dynamic Dns
N750 Wireless Dual Band Gigabit ADSL Modem Router DGND4000 Click Add Service. In the Service Name field, type a descriptive service name. In the Service User list, select Any (the default) to allow this service to be used by any computer on the Internet. -
Page 119: Static Routes
N750 Wireless Dual Band Gigabit ADSL Modem Router DGND4000 account and host name that you configure in the wireless modem router. Then, whenever your ISP-assigned IP address changes, your wireless modem router automatically contacts the Dynamic DNS service provider, logs in to your account, and registers your new IP address. - Page 120 N750 Wireless Dual Band Gigabit ADSL Modem Router DGND4000 As an example of when a static route is needed, consider the following case: • Your primary Internet access is through a cable modem to an ISP. • You have an ISDN wireless modem router on your home network for connecting to the company where you are employed.
- Page 121 N750 Wireless Dual Band Gigabit ADSL Modem Router DGND4000 In the Route Name field, type a name for this static route (for identification purposes only). Select the Private check box if you want to limit access to the LAN only. If Private is selected, the static route is not reported in RIP.
-
Page 122: Remote Management
N750 Wireless Dual Band Gigabit ADSL Modem Router DGND4000 Remote Management The remote management feature lets you upgrade or check the status of your N750 Modem Router over the Internet. To set up remote management: Select ADVANCED > Advanced Setup > Remote Management. Note: Be sure to change the wireless modem router’s default login password to a very secure password. -
Page 123: Usb Settings
N750 Wireless Dual Band Gigabit ADSL Modem Router DGND4000 Normal web browser access uses the standard HTTP service port 80. For greater security, enter a custom port number for the remote web management interface. Choose a number from 1024 through 65535, but do not use the number of any common service port. - Page 124 N750 Wireless Dual Band Gigabit ADSL Modem Router DGND4000 To turn on Universal Plug and Play: Select ADVANCED > Advanced Setup > UPnP. The available settings and information in this screen are: Turn UPnP On. UPnP can be enabled or disabled for automatic device configuration. The default setting for UPnP is disabled.
-
Page 125: Ipv6
N750 Wireless Dual Band Gigabit ADSL Modem Router DGND4000 IPv6 You can use this feature to set up an IPv6 Internet connection type if NETGEAR genie does not detect it automatically. To set up an IPv6 Internet connection type: ... - Page 126 N750 Wireless Dual Band Gigabit ADSL Modem Router DGND4000 To monitor Internet traffic: Click ADVANCED > Advanced Setup > Traffic Meter. To enable the traffic meter, select the Enable Traffic Meter check box. If you would like to record and restrict the volume of Internet traffic, select the Traffic volume control by radio button.
-
Page 127: Readyshare Cloud
You need a ReadySHARE Cloud account. If you do not have one, click the link provided in this screen to go to NETGEAR ReadySHARE Cloud page to create an account. Enter a valid email address that is used to recover your user name and password. - Page 128 You can also register the router with another account after unregistering the router from previous account. Log in to http://readyshare.netgear.com with your account. You should see the USB device that is connected to your router. By default, all contents of the USB device are accessible.
-
Page 129: Device Mode
N750 Wireless Dual Band Gigabit ADSL Modem Router DGND4000 Device Mode When the wireless modem router is in Router mode, this screen allows switching to Modem mode, where the wireless modem router acts as a pure bridge or DSL modem. Routing, firewall, wireless support, USB, and the traffic meter are not available in Modem mode. - Page 130 N750 Wireless Dual Band Gigabit ADSL Modem Router DGND4000 There are two types of VPN policies: • Manual. All settings (including the keys) for the VPN tunnel are input manually at each end (both VPN endpoints). No third-party server or organization is involved. •...
-
Page 131: Add Or Edit An Auto Vpn Policy
N750 Wireless Dual Band Gigabit ADSL Modem Router DGND4000 • Cancel. Discard any unsaved changes to the Enable setting for each policy. • Add Auto Policy. Change to the input screen for an Auto policy. When the new policy is saved, it appears in the bottom row of the Policy Table. See Add or Edit an Auto VPN Policy on page 131. - Page 132 N750 Wireless Dual Band Gigabit ADSL Modem Router DGND4000 Otherwise, select the desired option (IP address or domain name) and enter the address of the remote VPN endpoint you wish to connect to. The remote VPN endpoint must have this VPN gateway’s address entered as its remote VPN endpoint.
- Page 133 N750 Wireless Dual Band Gigabit ADSL Modem Router DGND4000 Initiator and Responder. Both incoming and outgoing connections are allowed. Exchange Mode. Currently, only Main Mode is supported. Ensure that the remote VPN endpoint is set to use Main Mode. Diffie-Hellman (DH) Group. The Diffie-Hellman algorithm is used when the connection exchanges keys.
-
Page 134: Add Or Edit A Manual Vpn Policy
N750 Wireless Dual Band Gigabit ADSL Modem Router DGND4000 Add or Edit a Manual VPN Policy A Manual VPN policy requires all settings (including the keys) for the VPN tunnel to be manually input at each end (both VPN endpoints). No third-party server or organization is involved. - Page 135 N750 Wireless Dual Band Gigabit ADSL Modem Router DGND4000 Range address. Enter the starting IP address in the Single/Start IP address field, and the finish IP address in the Finish IP address field. This setting must be an address range used on your LAN. Subnet address.
-
Page 136: Chapter 10 Troubleshooting
Troubleshooting Diagnose and solve problem s This chapter provides information to help you diagnose and solve problems you might have with your wireless modem router. If you do not find the solution here, check the NETGEAR support site at http://support.netgear.com/general/contact/default.aspx for product and contact information. -
Page 137: Quick Tips
N750 Wireless Dual Band Gigabit ADSL Modem Router DGND4000 Quick Tips This section describes tips for troubleshooting some common problems. Sequence to Restart Your Network Be sure to restart your network in this sequence: Turn off and unplug the modem. Turn off the wireless modem router and computers. -
Page 138: Troubleshoot With The Leds
Make sure that the power cord is securely connected to your wireless modem router and that the power adapter is securely connected to a functioning power outlet. • Make sure that you are using the 12V DC, 5A power adapter that NETGEAR supplied for this product. •... -
Page 139: Leds Never Turn Off
148. If the error persists, you might have a hardware problem and should contact technical support at www.netgear.com/support. Internet or Ethernet Port LEDs Are Off If either the Ethernet port LEDs or the Internet LED does not light when the Ethernet connection is made, check the following: •... -
Page 140: Cannot Log In To The Router
• If you are attempting to set up your NETGEAR wireless modem router as an additional router behind an existing router in your network, consider replacing the existing router instead. NETGEAR does not support such a configuration. - Page 141 N750 Wireless Dual Band Gigabit ADSL Modem Router DGND4000 Access the wireless modem router interface at http://www.routerlogin.net. Select Administration > Router Status. Check that an IP address is shown for the Internet port. If 0.0.0.0 is shown, your wireless modem router has not obtained an IP address from your ISP. If your wireless modem router cannot obtain an IP address from the ISP, you might need to force your cable or DSL modem to recognize your new wireless modem router.
-
Page 142: Troubleshoot Pppoe
N750 Wireless Dual Band Gigabit ADSL Modem Router DGND4000 Troubleshoot PPPoE If you are using PPPoE, try troubleshooting your Internet connection. To troubleshoot a PPPoE connection: Log in to the wireless modem router. Select Administration > Router Status. Click Connection Status. If all of the steps indicate OK, then your PPPoE connection is working. -
Page 143: Changes Not Saved
N750 Wireless Dual Band Gigabit ADSL Modem Router DGND4000 If the wireless modem router does not save changes you have made in the browser interface, check the following: • When entering configuration settings, be sure to click Apply before moving to another screen or tab, or your changes could be lost. -
Page 144: Wireless Signal Strength
Power LED continues to blink, the unit might be defective. If the error persists, you might have a hardware problem and should contact technical support at http://www.netgear.com/support. Troubleshoot Your Network Using the Ping Utility Most network devices and routers contain a ping utility that sends an echo request packet to the designated device. -
Page 145: Test The Lan Path To Your Router
N750 Wireless Dual Band Gigabit ADSL Modem Router DGND4000 Test the LAN Path to Your Router You can ping the wireless modem router from your computer to verify that the LAN path to your wireless modem router is set up correctly. To ping the wireless modem router from a computer running Windows: ... - Page 146 N750 Wireless Dual Band Gigabit ADSL Modem Router DGND4000 where <IP address> is the IP address of a remote device such as your ISP’s DNS server. If the path is functioning correctly, replies like the examples shown in the previous section are displayed.
-
Page 147: Appendix A Supplemental Information
Supplemental Information Factor y set t i n gs a nd te ch n ic a l s p e ci fic at ion s This appendix provides factory default settings and technical specifications for the N750 Wireless Dual Band Gigabit ADSL Modem Router DGND4000. •... -
Page 148: Factory Settings
N750 Wireless Dual Band Gigabit ADSL Modem Router DGND4000 Factory Settings You can return the wireless modem router to its factory settings. Use the end of a paper clip or some other similar object to press and hold the Restore Factory Settings button on the back of the router for at least 5 seconds. - Page 149 N750 Wireless Dual Band Gigabit ADSL Modem Router DGND4000 Table 13. Factory default settings (continued) Feature Default Behavior Wireless Wireless communication Enabled SSID name See router label Security Enabled Broadcast SSID Enabled Transmission speed Auto Country/region United States in the US; otherwise varies by region RF channel 6 until region selected Operating mode...
-
Page 150: Technical Specifications
N750 Wireless Dual Band Gigabit ADSL Modem Router DGND4000 Technical Specifications Table 14. DGND4000 Router specifications Feature Description Data and routing protocols TCP/IP, RIP-1, RIP-2, DHCP, PPPoE, Dynamic DNS, UPnP, and SMB Power adapter • North America: 120V, 60 Hz, input •... -
Page 151: Appendix B Notification Of Compliance
This transmitter must not be co-located or operating in conjunction with any other antenna or transmitter. FCC Declaration of Conformity We, NETGEAR, Inc., 350 East Plumeria Drive, San Jose, CA 95134, declare under our sole responsibility that the N750 Wireless Dual Band Gigabit ADSL Modem Router DGND4000 complies with Part 15 Subpart B of FCC CFR47 Rules. -
Page 152: Fcc Caution
N750 Wireless Dual Band Gigabit ADSL Modem Router DGND4000 FCC Radio Frequency Interference Warnings & Instructions This equipment has been tested and found to comply with the limits for a Class B digital device, pursuant to Part 15 of the FCC Rules. These limits are designed to provide reasonable protection against harmful interference in a residential installation. - Page 153 5250-5350 MHz et 5650-5850 MHz et que ces radars pourraient causer du brouillage et/ou des dommages aux dispositifs LAN-EL. Interference Reduction Table The following table shows the recommended minimum distance between NETGEAR equipment and household appliances to reduce interference (in feet and meters). Household Appliance...
-
Page 154: Index
Index connecting wirelessly country setting AC power adapter input crossover cable access CTS/RTS Threshold remote custom service (port forwarding) viewing logs access points accessing remote computer adding dashboard custom services data packets, fragmented guest network date and time priority rules daylight savings time QoS policy wireless devices... - Page 155 DHCP LEDs troubleshooting games, online, QoS for verifying cabling gateway IP address Live Parental Controls genie, NETGEAR local servers, port forwarding to setup, initial logging in using, after installation logs guest networks emailing viewing...
- Page 156 N750 Wireless Dual Band Gigabit ADSL Modem Router DGND4000 outgoing mail server router interface, described Router mode router status, viewing packets, fragmented Parental Controls passphrases, changing scheduling keyword and service blocking passwords secondary DNS recovering security restoring security options photos, sharing security PIN poll interval sending logs by email...
- Page 157 N750 Wireless Dual Band Gigabit ADSL Modem Router DGND4000 drive requirements file sharing ReadySHARE access remote computer connection specifying approved devices unmounting a USB drive USB devices, approved USB port USB port LED USB printer user-defined services WAN IP address, troubleshooting WAN setup wireless channel wireless connections, troubleshooting...