Advertisement
Advertisement
Table of Contents

Related Manuals for Baumatic BT2745SS


Summary of Contents for Baumatic BT2745SS
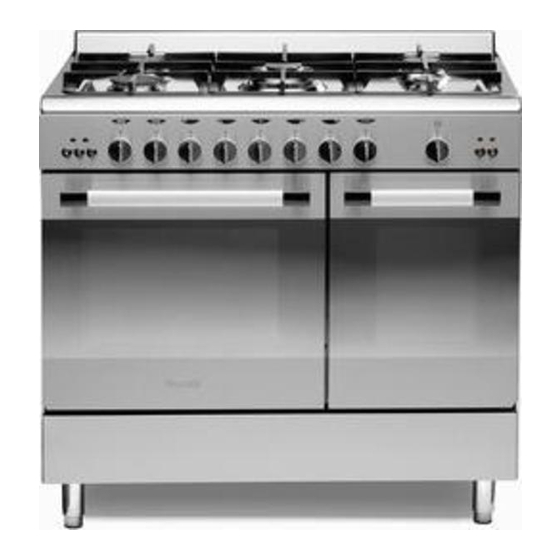
- Page 1 Instruction manual BT2745SS 90cm Twin cavity gas oven cooking theatre...
- Page 3 INSTRUCTION HANDBOOK ENGLISH ENGLAND / IRELAND...
- Page 4 - 2 -...
- Page 5 - 3 -...
- Page 6 - 4 -...
-
Page 7: Gas Connection
IMPORTANT CAREFULLY READ THE INSTRUCTIONS CONTAINED IN THIS HANDBOOK AS THEY PROVIDE IMPORTANT INFORMATION CONCERNING SAFETY, USE AND MAINTENANCE OF THE APPLIANCE. This instruction handbook is provided for various cooker models. There may be descriptions of functions or parts that do not refer to the appliance in use. -
Page 8: Adaptation To Different Types Of Gas
IMPORTANT After installation, make sure the unions are securely fixed. It is advisable to use a foamy solution, and never a flame, for the tightness check on gas circuits. ELECTRICAL CONNECTION. The outlet or installation must be provided with an efficient earth connection. The plug must have a 13 amp fuse (fig. - Page 11 TABLE OF ELECTRIC POWERS (MIXED, ELECTRIC, MULTIFUNCTION OVENS) TYPE OF COOKER AND OVEN 96, 16 55, 65, 75, P85 56, 66, 76, P96 85, 86, 96, 16 (2 OVENS) small medium-size medium-size large oven small medium- oven oven oven giant oven oven size FUNCTION...
- Page 12 TABLE OF ELECTRIC POWERS (MIXED, ELECTRIC, VITROCERAMIC TOPS) DIAMETER POWER TYPE OF ELECTRIC HOT-PLATES Electric hot-plate 1500 Electric hot-plate 2000 Electric hot-plate 14.5 1000 HL round hot-plate 14.5 1200 HL round hot-plate 1800 HL round hot-plate 2200 HL extensible hot-plate 17/26.5 1400/2200 HL extensible hot-plate...
-
Page 13: Gas Oven
OVEN TYPES AND FUNCTIONS GAS OVEN 0…250 OVEN GRILL burner burner MIXED OVEN 0…250 OVEN electric burner GRILL MIXED OVEN WITH FAN 0…250 OVEN electric burner GRILL ELECTRIC OVEN 0…250 OVEN LIGHT ROOF ROOF FLOOR GRILL FLOOR MULTIFUNCTION OVEN - 3 POSITIONS 0…250 ROUND GRILL +... -
Page 14: Cooking Suggestions
USER INSTRUCTIONS LIGHTING COOKTOP BURNERS (fig. 17). Bring a match (a spark generator or flame) to the burner, press and turn the corresponding knob anticlockwise to MAX. setting. (In some models the burner incorporates an electric igniter device activated by a separate pushbut- ton or by pressing the knob). -
Page 15: Oven Functions
For significant energy saving, in long cooking the residual heat can be used by turning the oven off a few minutes before the average times given in the recipes, and keeping the door closed. The oven compartment’s perfect insulation will ensure perfect cooking of the dish. -
Page 16: Maintenance
MAINTENANCE Before carrying out any maintenance or cleaning, close the main gas cock and disconnect the appliance from the power sup- ply. GREASING THE COCKS. If the movement of a cock or thermostat eventually becomes difficult, greasing can be carried out. This op- eration must only be performed by authorised personnel. -
Page 17: Electronic Timer
SEMIAUTOMATIC OPERATION: END OF COOKING TIME. Press the End of cooking time button and set the required time with the +/- buttons. The A symbol (automatic program) and the pot symbol appear. The relay output is activated. At the end of cooking the acoustic signal sounds, the relay is deactivated and the A symbol flashes. - Page 18 Baumatic appliance. * In addition, your appliance is covered by a 5 year parts warranty. Baumatic Ltd will provide free of charge the parts required to repair the appliance, only if they are fitted by a Baumatic engineer, for any defect that arises due to faulty materials or workmanship within a period of 5 years from the original purchase date.
- Page 19 Headquarters Baumatic Ltd. Baumatic Buildings, 6 Bennet Road, Reading, Berkshire RG2 0QX, United Kingdom Sales Telephone +44 118 933 6900 Sales Fax +44 118 931 0035 Service Telephone +44 118 933 6911 Service Fax +44 118 986 9124 Spares Telephone...
- Page 20 Baumatic ® w w w . b a u m a t i c . c o m 01X633...