Advertisement
Table of Contents
- 1 Table of Contents
- 2 Description of the Coffee Machine
- 3 Description of the Control Panel: Touch Control
- 4 Intended Use
- 5 Instructions for the First Use of the Machine
- 6 Accessories
- 7 Drawer
- 8 Hot Water
- 9 Steam
- 10 Programming the Quantity of Ground Coffee
- 11 Programming the Quantity of Coffee Poured in the Cup
- 12 Programming the Quantity of Hot Water
- 13 Cleaning
- 14 Installation
- 15 What to Do if
- 16 Technical Specifications
- Download this manual
See also:
Manual
CONTENTS
1.
2.
3.
Safety instructions
4.
5.
6.
7.
Making Coffee
8.
9.
13. Coffee menus
18. After-sales Service, spare parts and guarantee
44/209
ENGLISH
Advertisement
Table of Contents

Related Manuals for AEG PE8038-M


Summary of Contents for AEG PE8038-M
-
Page 1: Table Of Contents
ENGLISH CONTENTS Description of the coffee machine Description of the control panel: touch control Safety instructions Instructions for the first use of the machine Accessories Drawer Making Coffee Hot water Steam 10. Programming the quantity of ground coffee 11. Programming the quantity of coffee poured in the cup 12. -
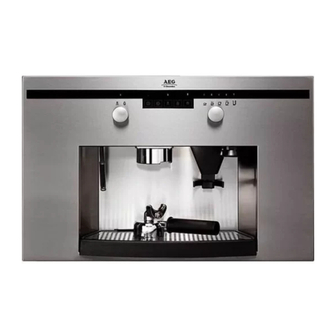
Page 2: Description Of The Coffee Machine
1. DESCRIPTION OF THE COFFEE MACHINE 1. Filter holder ring nut 2. Steam/water nozzle 3. Coffee press 4. Coffee Grinder button 5. Coffee measuring device 6. Grinding regolation knob 7. Coffee beans container 8. Water reservoir 9. Drip tray 10. Brita filter 11. -
Page 3: Description Of The Control Panel: Touch Control
2. DESCRIPTION OF THE CONTROL PANEL: TOUCH CONTROLS Water temperature indicator ON/stand-by indicator Coffee indicator Water indicator Steam indicator Light indicator LEDs of coffee measures (Small coffee, large coffee, 2 small cups of strong coffee, 2 large cups of weak coffee) Water refill indicator Steam/water knob 10. -
Page 4: Intended Use
3. SAFETY Please read this instruction book before using thè appliance and retain for future reference. These warnings are provided in the interests of your safety, ensure you understand them fully before using the appliance. Intended use • The appliance is intended for use in the home. If the appliance is used for purposes other than those intended or used incorrectiy, no liability can be accepted by thè... - Page 5 FOR INSTALLATION AND SERVICING Keep this instruction manual together with the machine for any future reference. If the machine is sold or transferred to another person, make sure that this instruction manual is given to the new user, so that he/she can become familiar with the machine’s functions and with the recommendations given.
-
Page 6: Instructions For The First Use Of The Machine
4. INSTRUCTIONS FOR THE FIRST USE OF THE MACHINE FILLING UP THE WATER RESERVOIR Squeeze together unlocking levers available under the drip tray and pull the machine as it is shown in the figure. Gently pull coffee machine forward from the housing by sliding it along the telescopic runners. - Page 7 Hardness of water: Before filling up the water reservoir, make sure that the decalcifying Brita filter has been soaked in cold water for at least 30 min. Follow the instructions printed on the filter package. After this operation insert the filter into position inside the water reservoir as it is shown in the figure.
- Page 8 Ensure the mains ON/OFF switch(at rear) is Push the machine back into the housing until a “CLICK” can be heard. This indicates that the machine has been locked in position. FILLING UP THE CONTAINER WITH COFFEE BEANS Press unlocking levers available under the drip tray and pull the machine as it is shown in the figure.
- Page 9 Pour approximately 200 g of coffee beans into the container on the top as shown in the figure. Push the machine back into the housing until a “CLICK” can be heard. This indicates that the machine has been locked in position. WATER REFILL INDICATOR CONTROL PANEL-8 This machine has a sensor which detects when the water reservoir is empty the reservoir empty led will illuminate.
- Page 10 INITIAL START-UP Ensuring the water reservoir is full, turn the steam/water knob anti clockwise as shown above. Switch the coffee machine on by pressing the on-off/stand-by control pressed until the red LED stops flashing and remains lit. This indicates the operating condition of the machine (flashing: STAND-BY;...
- Page 11 When the water is flowing close the steam/water knob by turning clockwise. (if necessary, repeat the process several times) When the water temperature light goes out, the machine has reached the correct temperature and it is ready to make coffee. Only the on-off indicator is now lit. RESETTING STANDARD VALUES This coffee machine is calibrated in the factory to make the optimum Italian espresso, as approved by the coffee University of Naples and complying with ILLY...
- Page 12 All the LEDs will briefly illuminate to indicate the factory values have been reset. N.B.: The standard values only concern the quantity of water required for each cup of coffee. Then the measures of ground coffee will not vary. CAUTION – ADJUSTING THE GROUND COFFEE This machine is calibrated in the factory for an optimum level of ground coffee.
- Page 13 Pull the coffeee machine forward from it’s housing by sliding it along it’s telescopic runners . Turning the proper adjusting knob (A-10) will adjust the coffee texture. Turning knob clockwise direction will lead to a fine texture for a stronger coffee. Turning the knob anti-clockwise will lead to a coarse texture for a weaker coffee.
-
Page 14: Accessories
STAND-BY MODE Once powered and inserted into the cabinet, the machine is in stand-by mode: this will be signalled by the on/off LED blinking. Keep the on/off button pressed as it is shown in the figure. As soon as the machine is ready to operate, the LED will be kept on as it is shown in the figure. -
Page 15: Drawer
6. DRAWER This machine is be provided with a well-equipped drawer PES 8038-m, This drawer has a lot of useful compartments: a large compartment for cups and saucers a basin for coffee grounds a compartment for all accessories (filters, measuring spoon) preparation stand. - Page 16 Insert the filter holder under the coffee measuring device by pressing the button briefly. The programmed quantity ground coffee will automatically be dispended into the filter. When the filter has been filled with the desired quantity, press the ground coffee firmly against the press as shown.
- Page 17 Lock the filter holder firmly turning the handle from left to right. If preparing espresso use the special cup rack inserting it’s feet into the four holes in the drip tray. Ensure this is stable Position the cup/s under the nozzle and make sure that the red LED of water temperature is out, or wait until it goes out...
- Page 18 Press the coffee control as shown. Coffee will be dispensed into the cup(s). Remove the filter holder from the ring nut and dispose of the used coffee taking care as the filter will be hot. When the two-cup nozzle is used, the two cups od coffee are not always filled to the same level.
- Page 19 This machine is also designed to operate with coffee pods, these are single portions of roasted coffee Proceed as with ground coffee. After coffee has been made, remove the filter holder from the locking nut and dispose of the used pod. HOW TO PREPARE AN EXCELLENT ESPRESSO A clean machine and the right temperature are the most important elements for preparing a good espresso.
-
Page 20: Hot Water
8. HOT WATER The steam/water pipe can be moved to the back of the cabinet when not in use to allow easy access to the filter holder ring nut. Pull forward when required. Do not touch when not To dispense hot water Place a container around the steam/water nozzle; then turn the steam/water knob in an anticlockwise direction,as shown. -
Page 21: Steam
Close the steam/water knob again. 9. STEAM HEATING LIQUIDS Press the steam control once. Both the steam and water temperature indicators are lit. Wait until both these indicators go out. Pressing the steam control again. If the water temperature indicator is not lit, steam is ready to be dispensed. - Page 22 Place a jug with the liquid to be heated under the steam nozzle and turn the steam knob anticlockwise as shown. Move the jug around the nozzle, ensuring effective heat distribution throughtout the liquid. Then close the steam knob by turnig clockwise,as shown. Attention: when preparing milk for cappuccino, shake the milk jug a little to improve the result.
-
Page 23: Programming The Quantity Of Ground Coffee
10. PROGRAMMING THE QUANTITY OF GROUND COFFEE This coffee machine has already been calibrated in factory to dispense the ideal measure of ground coffee for one cup of coffee. However this quantity of ground coffee can be increased or reduced, then the selected measure is stored. -
Page 24: Programming The Quantity Of Coffee Poured In The Cup
11. PROGRAMMING THE QUANTITY OF COFFEE POURED IN THE CUP The quantity of coffee can be adjusted as desired. Select the coffee programme required by turning the knob as shown. Grind a measure of coffee in the filter holder. Insert the filter holder in the ring nut, then put one or two cups under the filter holder according to the programme selected. -
Page 25: Programming The Quantity Of Hot Water
When the desired quantity of coffee has been dispensed press the control again and the coffee measure will be stored automatically. 12. PROGRAMMING THE QUANTITY OF HOT WATER Place a jug under the steam/water nozzle and turn the steam/water knob anticlockwise, as shown. - Page 26 Release the control when the water starts to flow; then, once the desired quantity of water is obtained press the control again and this measure will be stored automatically. Then close the steam/water knob again by turning anticlockwise. 13. RECIPES ITALIAN CAPPUCCINO This is a normal espresso with steam-heated milk giving the coffee a milder flavour and a rich, delicious frothy topping.
- Page 27 VIENNESE CAPPUCCINO This variation is the result of the age-old Austrian tradition. Prepare a 'weak' espresso on the machine for 30-35 seconds, then add hot milk topped by whipped cream. Serve in a medium-sized cup (midway between an espresso cup and a cappuccino cup).
-
Page 28: Cleaning
14. CLEANING OUTER PARTS Clean the stainless steel parts of the machine with a soft cloth without using aggressive detergents. Never use any abrasive sponges nor steel wool to clean the parts of steel. Dry well with a soft cloth. DRIP TRAY Remove the drip tray from the machine as shown in the figures above. - Page 29 FILTER – FILTER-HOLDER – LOCKING NUT Always keep filters, filter-holder and locking nut clean. Any coffee residue can alter the taste of the next cups of coffee. Wash filters and filter holder in dishwasher every month. The steam nozzle should be periodically cleaned. After preparing milk for cappuccinos etc.
-
Page 30: Installation
Fill up the water reservoir with 1.5 litres of water adding half a glass of vinegar or citric acid. Carry out the same operations as preparing some cups of coffee (refer to the previous Chapter “Coffee”), but without ground coffee or pods, so that only water will flow out of the filter holder until the reservoir is completely empty. - Page 31 ELECTRICAL CONNECTION Fix the power cable onto the left side of the cabinet using one of the self-threading screws equipment and the proper cable clamp as shown in the figure. Unscrew the cable clamp available on the machine. Fix the power cable onto the machine as it is shown in the figure.
- Page 32 Connect the power cable as shown figure. This machine is designed for a single phase voltage of 230V The power supply requires only outlets of 13 A fuse and a double pole isolation switch with at least 3 mm between contacts.
- Page 33 compensate for the different possible measures. They should be used to compensate for the internal width compartment, leading to a width of 560/570 mm. Fix the U base plate inserting 4 self- threading screws into the 4 front holes of the same plate. Then screw the telescopic runners to each side with the remaining 8 self-threading screw.
- Page 34 Slide the machine into the cabinet until the “click” indicates that it is locked into position. COMPONENTS FOR INSTALLING THE DRAWER This drawer will be installed into compartments with height of 80 mm and width ranging from 560 mm to 568 mm. The espresso machine is equipped with some components for the installation: 1 fixing base 12 self-threading screws 3.9X19...
- Page 35 INSTALLING MACHINE + DRAWER Lay the fixing base of the drawer onto the proper shelf of the cabinet. Insert the side plates of the drawer for compensating for any space. width compartment housing the drawer depends on the thickness of the cabinet’s sides.
- Page 36 Fix the base plate inserting 4 self- threading screws into the 4 fore holes of the plate. Then assemble the 2 slides with the remaining 10 self-threading screws. All these screws are supplied together with the drawer. Position the fixing base of the machine laying onto the fixing base of the drawer.
- Page 37 Four side plates (two being 2 mm thick and two 1 mm thick) are provided together with machine, to compensate for the different possible measures. They should be used to compensate for internal width compartment, leading to a width of 562/560 mm.
-
Page 38: What To Do If
Insert the machine coupling its slides with those already mounted onto the cabinet’s sides and slide it into the cabinet to the stops until the safety locks close. 16. WHAT TO DO IF... If this machine does not work, please make sure that the fault is not due to: no power no water in the reservoir. -
Page 39: Technical Specifications
17. TECHNICAL SPECIFICATIONS As regards the general dimensions of the machine, please see the fig. D Width 594 mm Depth 260 mm Height 378 mm Capacity of water reservoir 2.5 l Net weight 17 kg Gross weight 19 kg Supply voltage 230 V Rated power 1150 W... - Page 40 CUSTOMER CARE For general enquiries concerning your AEG appliance or for further information on AEG products please contact our Customer Care Department by letter or telephone at the address below or visit our website at www.aeg.co.uk...
- Page 41 This guarantee does not cover such parts as light bulbs, removable glassware or plastic. 3. Should guarantee repairs be necessary the purchaser must inform the nearest AEG Service Force Centre (manufacturer’s service or authorised agent). AEG reserves the right to stipulate the place of the repair (i.e.