Table of Contents
Advertisement
Kaffee-Espresso-Vollautomat
d
Fully Automatic Espresso Maker
g
Machine à café/expresso entièrement automatique
f
Volautomatische koffie- en espressomachine
l
Macchina espresso automatica
i
Máquina automática para Café Expresso
e
Máquina de café Espresso- totalmente automática
p
Πλήρως αυτόµατη µηχανή εσπρέσσο
r
CG 6400
Gebrauchsanweisung
Operating instructions
Mode d'emploi
Gebruiksaanwijzing
Istruzione per l'uso
Instrucciones de uso
Instruções de serviço
Εγχειρίδιο οδηγιών χρήσης
Advertisement
Table of Contents

Related Manuals for AEG CG 6400


Summary of Contents for AEG CG 6400
- Page 1 CG 6400 Kaffee-Espresso-Vollautomat Fully Automatic Espresso Maker Machine à café/expresso entièrement automatique Volautomatische koffie- en espressomachine Macchina espresso automatica Máquina automática para Café Expresso Máquina de café Espresso- totalmente automática Πλήρως αυτόµατη µηχανή εσπρέσσο Gebrauchsanweisung Operating instructions Mode d’emploi Gebruiksaanwijzing Istruzione per l'uso Instrucciones de uso Instruções de serviço...
-
Page 7: Table Of Contents
Dear Customer Please read this user manual carefully, paying special attention to the safety notes! Keep the manual in a safe place for later reference, and pass it on to any new owner. Contents Figure captions 13 Menu settings 1.1 Front view (Fig. 1) 13.1 Setting the language 1.2 Front view with open service door 13.2 Setting the coffee temperature... -
Page 8: Figure Captions
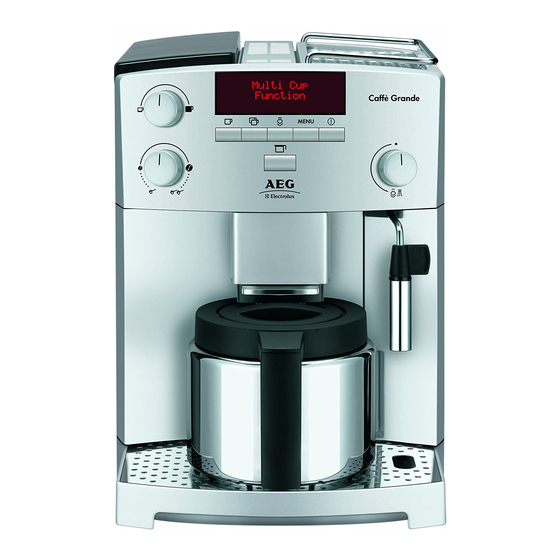
Figure captions Front view with open service door (Fig. 2) Front view (Fig. 1) Service door (open) A Drip grid Q Waste coffee container (removable) B Thermos jug R Tilt compartment C Main switch (rear side of appliance) Brewing unit D Height-adjustable coffee dispenser Knob for setting grinding texture Control panel (see Fig. -
Page 9: Coffee And Espresso
Coffee and espresso Safety Information Your fully automated coffee machine This appliance conforms to accepted guarantees you absolute ease of technological standards with regard to operation, both in making coffee and safety, and to the Appliance Safety in maintenance and care. Law. - Page 10 Use fee machine, or only roasted coffee beans! Remove any • the AEG/Electrolux Service Line. foreign bodies from the coffee beans. If the machine is misused or incor- Failure to do this invalidates the guar- rectly operated the manufacturer antee.
-
Page 11: Overview Of The Menu Items
Overview of the menu Menu mode items You can switch to the Menu mode by pressing the "Menu" key. In Menu Below is an overview of those menu mode, you can navigate by means of items where you can change and save the "1 cup of coffee"... -
Page 12: Filling With Water
The grinder settings may be changed Filling with water only whilst coffee is being ground. Each time before switching on the cof- Making adjustments to the stationary fee machine, check that there is water grinder can damage the coffee in the water tank, and refill if neces- machine. -
Page 13: Switching On The Machine
progress bar will be complete and the ing cycles that are carried out each display shows «TURN STEAM time the appliance is switched on or KNOB». off. 0 Turn the steam knob clockwise (Fig. 10) 0 Switch the machine on with the "On/ as far as it will go, to the position , to Off"... -
Page 14: Making Coffee With Beans
0 Then press the scrolling keys "<" or ">" the machine to the water hardness level corresponding to the local water (Fig. 5) until the determined hardness hardness. You can use the enclosed test level is displayed. strip to determine the water hardness, 0 Confirm the selection with the "OK"... - Page 15 0 As soon as delivery is complete, to gram (Programming the fill level)“, page 48. increase the quantity of coffee, simply press and hold the key for "1 cup" You can also choose coffee with an until the desired quantity is reached extra-mild, mild, normal, strong or (this operation must be performed extra-strong strength.
-
Page 16: Tips For Making Hotter Coffee
0 Confirm the menu item with the "OK" water from the steam nozzle for a few seconds. key (Fig. 5). The display shows «RINSING», and an advancing When using the appliance for the first progress bar with a percentage indica- time, at least 4-5 cups of coffee need 40%». -
Page 17: Using Pre-Ground Coffee
In the upper line, the display shows the press the "JUG“ key (Fig. 19). Once coffee strength as set in the "Jug" you have done this, the appliance will menu, e.g. «EXTRA-MILD JUG». The deliver just the last 2 cups, to reach the lower line of the display shows the programmed quantity of 8 cups. -
Page 18: Frothing Milk
Once the coffee has been prepared, to appliance will not make the coffee, the go back to making coffee using beans, ground coffee will be dispersed inside turn the "Coffee strength / Pre-ground the appliance, dirtying it, or the coffee coffee"... -
Page 19: Cleaning The Steam Nozzle
To avoid any residual water mixing in 120 sec. for the machine to automati- with the milk when frothing, the water cally return to the coffee mode; the display shows «PLEASE WAIT…». should be drained off beforehand. To do this, place a container under the Now the machine is once again ready steam nozzle and turn the knob for for making coffee;... -
Page 20: Preparing Hot Water
Avoid turning the knob for setting the Preparing hot water grinding texture too far, otherwise The hot water can be used to pre-heat when you select 2 cups, the coffee may cups and for making hot drinks, e.g. tea emerge drop by drop. or instant soups. -
Page 21: Setting The Coffee Temperature
The factory setting is «AUTO SHUT- 13.2 Setting the coffee temperature OFF TIME 1 H». You can change this There are three temperature levels to setting as follows: choose from. The coffee temperature 0 Press the "Menu" key (Fig. 4). levels are defined as follows: The menu item «CHOOSE LAN- «TEMPERATURE LOW»... -
Page 22: Setting The Coffee Program (Programming The Fill Level)
0 Press the scrolling keys "<" or ">" (Fig. matically to the coffee mode without 5) until the menu item «JUG PRO- storing the setting. GRAM» appears. After programming, the display returns 0 Confirm the menu item with the "OK" automatically to the menu item «JUG key (Fig. -
Page 23: Establishing The Number Of Coffees Dispensed, The Number Of Jugs Dispensed And The Number Of Descalings (Statistics)
If "OK" is not pressed, after about shows the number of jugs dispensed in the respective cup size, e.g. «JUG 4 120 sec. the appliance returns auto- CUPS 12» where 12 jugs, each con- matically to the coffee mode without storing the setting. -
Page 24: Cleaning And Care
Cleaning and Care 14.2 Emptying the waste coffee container To ensure consistent coffee quality and The appliance counts the number of faultless operation, always keep your coffees made. Every 14 single coffees coffee machine clean. (or 7 doubles) the appliance displays the message: «EMPTY WASTE 14.1 Regular cleaning COFFEE CONTAINER»... -
Page 25: Cleaning The Brewing Unit
0 Remove any remaining coffee beans front of the machine. It should not be (you could use the vacuum cleaner disconnected from the mains. with the hose or crevice tool attach- Attempting to remove the brewing ment for this). unit when the appliance is on may cause serious damage. -
Page 26: Running The Descaling Program
(Fig. 9). recommended by AEG/Electrolux. If 0 Turn the knob for steam and hot water other descaling agents are used, AEG/ to the position Electrolux accepts no liability for any damage. You can obtain descaling liq-... -
Page 27: Ordering Accessories
appliance. The upper line of the display Ordering Accessories shows the alternating messages «RINSING» and «TURN STEAM To ensure years of satisfaction with your coffee machine and prevent KNOB», whilst the lower line shows a faults arising, it is very important to progress bar with the percentage indi- descale the coffee machine regularly. -
Page 28: Problems That Can Be Resolved Before Calling The Customer Service Centre
«INSERT WASTE COFFEE unit“, page 51. If the message is still CONTAINER» displayed after cleaning, contact the Customer Service Centre. • The waste coffee container has pro- bably not been replaced after cleaning. 0 Open the service door and insert the Problems that can be waste coffee container. - Page 29 Important: The brewing unit can only The coffee runs out too quickly be removed if the appliance is turned • The coffee is ground too coarsely. off with the ON/OFF key at the 0 Turn the knob for setting grinding tex- front.
-
Page 30: Technical Data
0 Remove the brewing unit and thor- Disposal oughly clean the inside of the appli- ance, as described in the section Packaging material „Cleaning the brewing unit“, page 51. The packaging materials are environ- Repeat the operation, but switch the mentally friendly and can be recycled. -
Page 31: If Service Is Needed
If service is needed If repairs should become necessary, including replacement of the mains cable, please telephone in the first instance our AEG-Electrolux Service Line. For Germany : 01801 - 20 30 60* (*Local tariff on Deutsche Telekom's landline network) Monday to Friday 8.00 am - 6.00 pm...