Advertisement
Available languages
Available languages
Quick Links
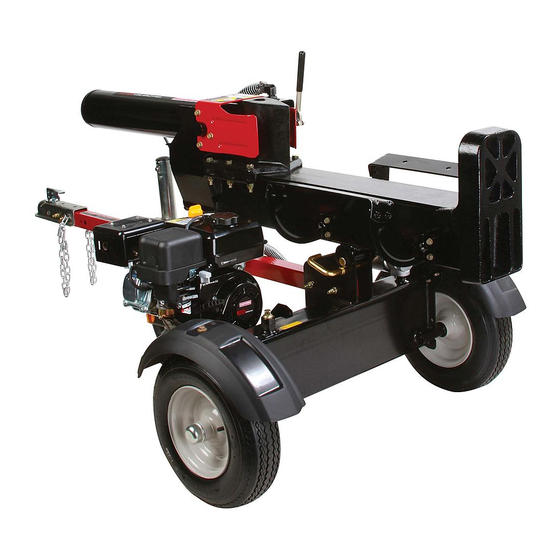
Operator's
Manual
CRRF rSM
®
675 Series
LOG SPLITTER
Model No. 247.77640
CAUTION:
Before
using
this
product,
read this
manual
and follow
all
safety
rules
and operating
instructions.
o SAFETY
ASSEMBLY
OPERATION
MAINTENANCE
PARTS LIST
Espa_ol
Sears, Roebuck
and Co., Hoffman
Estates,
IL 60179, U.S.A.
Visit our web site:
www.sears.com/craftsman
FORMNO. 769-05144
6/7/2009
Advertisement

Related Manuals for Craftsman 675 Series 247.77640


Summary of Contents for Craftsman 675 Series 247.77640
- Page 1 SAFETY ASSEMBLY OPERATION MAINTENANCE PARTS LIST CAUTION: Before using Espa_ol this product, read this manual and follow safety rules and operating instructions. Sears, Roebuck and Co., Hoffman Estates, IL 60179, U.S.A. Visit our web site: www.sears.com/craftsman FORMNO. 769-05144 6/7/2009...
- Page 2 Service Numbers ........BackCover Maintenance ..........es 15-17 CRAFTSMAN F ULLWARRANTY Whenoperated andmaintained a ccording t oallsupplied instructions, ifthisCraftsman l ogsplitter f ailsdueto a defectinmaterial orworkmanship withinoneyearfromthedateof purchase, call1-800-4-MY-HOME® arrange forfreerepair (orreplacement if repair proves impossible). Thiswarranty applies foronly90daysfromthedateof purchase ifthislogsplitter i s everusedforcommercial or rental p urposes.
- Page 3 This machine was built to be operated according to the instructions which, if not followed, could safe operation practices in this manual. As with any type of This symbol points out important safety power equipment, carelessness or error on the part of the endanger the personal safety and/or property operator can result in serious injury.
- Page 4 Preparation Operation Always wear safety shoes or heavy boots. Before starting this machine, review the "Safety Instructions". Failure to follow these rules may result in serious injury to the Always wear safety glasses or safety goggles when operating operator or bystanders. this machine.
- Page 5 When splitting in the vertical position, stabilize the log before Maintenanceand Storage moving the control. Split as follows: Place log on the end plate and turn until it leans against the beam and is stable. This machine is equipped with an internal combustion engine When splitting...
- Page 6 SafetySymbols This page depicts and describes safety symbols that may appear on this product. Read, understand, and follow all instructions on the machine before attempting to assemble and operate. ° I °_ READ THE OPERATOR'S MANUAL(S) Read, understand, and follow all instructions in the manual(s) before attempting to assemble...
- Page 7 NOTE:Yourlog splitteris shippedwith motoroil in the engine. Attaching the Tongue However, y ou MUSTcheckthe oil levelbeforeoperating.Be careful With the log splitterstill standingupright,removethe two hex notto overfill. bolts and hex nuts fromthe tank bracket.See Figure2. NOTE:All referencesin this manualto the left or right sideof the log splitterare from theoperatingpositiononly.See OperatorZonein the Operationsectionof the SafetyInstructions.
- Page 8 Disconnectthe dislodgerfrom the beamweld bracketby remov- Lift and slidethe cylinderup to the top of beamand intothe weld ing the six hex screws.See Figure4. brackets.See Figure6. Figure4 Figure6 Disconnectthe log cradlebracketon the controlvalveside of the Attachthe dislodgeroverthe wedgeassemblyand secureit to the beam.See Figure5.
- Page 9 If necessary,with the log splitteron levelground,usea funnelto Replacethe venteddipsticksecurely, t ighteningit untilthe top of fill enginewith oil to the FULLmarkon the dipstick.Be careful not the threadsare flush with topof thepipe. to overfill.Overfillingwill causethe engineto smokeprofuselyand Disconnectthe sparkplug and primethe pumpby pullingthe will resultin poor engineperformance.
- Page 10 Cylinder Control Handle lodger Horizontal Beam Lock Coupler Hitch ,Beam Assembly Tongue Jack S tand ine Controls Vertical Cradle Beam ChokeControl Reservoir Lock Tank StopSwitch ure 8 Be familiarwith all the controlsand their properoperation.Knowhow Readthis operator'smanualand the safetyrulesbeforeoperating to stop the machineand disengagethemquickly. yourlog splitter.Comparethe illustrationsbelowwith yourequipment to familiarizeyourselfwith the locationof variouscontrolsand adjust- ments.Savethis manualfor future reference.
- Page 11 TO STOP ENGINE TONGUE Thetongueis usedto attachto a towingvehiclefor transportation. Pushthe stop switchto the OFF position.See Figure9. CHOKE CONTROL Disconnectspark plugwireand ground it to preventaccidental startingwhilethe equipmentis unattended. Thechokecontrol is usedto chokethe carburetorand assist in starting USING THE LOG SPLITTER the encinc.
- Page 12 Standin front of the log splitterto operatethe controlhandleand Log Dislodger to stabilizethe log. See Figure12. The log dislodgerisdesignedto removeanypartiallysplit woodfrom thewedge.This may occur whilesplittinglarge diameterwoodor freshlycut wood. Neverremovepartiallysplit woodfrom the wedgewith your hands. Fingersmaybecometrappedbetweenthe split wood. Tofreethe wedgefroma partiallysplit pieceof wood,placethe controlhandlein the REVERSE position.As it movesback,the split woodportionwillcontactthe log dislodgerand become detachedfrom the wedge.
- Page 13 Standbehindthe reservoirtank to operatethe controlhandleand Attachthe couplerhitchto a class I or higher2" ball on a towing to stabilizethe log,See Figure14, vehicle.Latchsecurely. If the couplerhitch does notfit on the ball: Turnthe adjustmentnut locatedunderthe couplerhitch one turn counter-clockwise. If the couplerhitch is too looseon the ball:Turntheadjust- mentnut locatedunderthe couplerhitch one turnclockwise.
- Page 14 FLEXIBLE PUMP COUPLER Theflexiblepumpcoupleris a nylon"spider"insert,locatedbetween Do notat any time makeanyadjustmentswithoutfirststopping the pumpand theengine shaft.Overtime,the couplerwill hardenand theengine,disconnecting spark plugwire and groundingit against deteriorate.If you detectvibrationor noisecomingfromthe area be- theengine.Alwayswearsafetyglassesduringoperationor while tweenthe engineand the pumpcontactan authorizedservicedealer. _performng anyadjustmentsor repars. If thecouplerfails completely, y ou will experience a loss of power. WEDGE ASSEMBLY ADJUSTMENT TIRES...
- Page 15 Maintenance Schedule TASKS SERVICEDATES ¢, * -- Heavyloador high ambienttemperature use. Figure 17 GENERAL RECOMMENDATIONS Alwaysobservethe safety ruleswhenperforming any mainte- Do notat any time makeanyadjustmentswithoutfirststoppingthe nance. engine,disconnecting the spark plugwire and groundingit against The warrantyon this log splitterdoesnotcover itemsthat have theengine.Alwayswearsafetyglassesduringoperationor while been subjectedto operatorabuseor negligence.Toreceivefull performinganyadjustmentsor repairs.
- Page 16 HYDRAULIC FLUID AND iNLET FILTER BEAM AND SPLITTING WEDGE Beforeeachuse, lubricateboth sidesof the beam(whereit comesinto contactwith the splittingwedge)with engineoil. The wedgeplateon Stopthe engineand relievehydraulicsystempressurebeforechang- the log splitteris designedsothe gibs on the sideof thewedgeplate ing or adjustingfittings,hoses,tubing,or othersystemcomponents. can be removedand rotatedand/or turnedoverfor evenwear. Makecertainto readjusttheadjustmentbolts so the wedgemoves Checkthehydraulicfluid levelin the log splitterreservoirtank before freely,butno excessspaceexistsbetweenthe wedgeplateand the...
- Page 17 Service Spark Plug Cleanthe sparkplug and resetthe gap to .030"at leastonce a seasonor every 50 hoursof operation. Cleanthearea aroundthe sparkplug. Removeand inspectthe spark plug. Replacethe spark plug if the electrodesare pitted,burnedor the porcelainis cracked. NOTE:Contacta SearsPartsand RepairCenteror 1-800-4-MY- HOME®for a replacementsparkplug,Champion®partnumber RJ19LM.
- Page 18 FUEL STABILIZER Prepareyour log splitterfor storageat the end of the seasonor if the log splitterwill not be usedfor 30 days or more. NOTE: Fuelstabilizeris an acceptablealternativein minimizingthe formationof fuel gumdepositsduring storage. Pleasefollowthe instructionsbelowfor storingyourlog splitterwith Neverstorethe machinewith fuelin thefuel tank insideof building fuel and stabilizerin the engine: wherefumesmay reachan open flameor sparkor whereignition Add stabilizerto the gasolinein the fueltank or storagecontainer.
- Page 20 Beforeperforming any type of maintenance/service, disengageall controlsand stop theengine.Wait untilall movingparts havecome to a completestop.Disconnectspark plugwire and groundit againstthe engineto preventunintendedstarting.Alwayswearsafetyglassesduring operationor whileperformingany adjustmentsor repars. Thissectionaddresses minorserviceissues.To locatethe nearest Sears Service Centeror to scheduleservice,simplycontactSears at 1-800-4-MY-HOME®. Enginefails to start Sparkplugwire disconnected. Connectwireto spark plug.
- Page 21 Beforeperforming any type of maintenance/service, disengageall controlsand stop theengine.Wait untilall movingparts havecome to a completestop.Disconnectspark plugwire and groundit againstthe I engineto preventunintendedstarting.Alwayswearsafetyglassesduringoperationor whileperforminganyI [adjustmentsor repars. Thissection addresses minorservice issues.To locate the nearest Sears Service Centeror to scheduleservice,simplycontact Sears at 1-800-4-MY-HOME®. Returnunitto Searsservicecenter.
- Page 22 Craftsman Log Splitter Model 247.77641...
- Page 23 iVlodel 247 918-0769A 710-0521 Hex Bolt3/8-16x 3" HydraulicCylinder 727-04166 719-0353 HydraulicTube CouplingShield 710-1018 914-0122 Hex CapScrew 1/2-20x 2.75 SquareKey3/16" x.75 737-0192 710-1842 90 DegreeSolidAdapter Screw,1/4-20x .38 918-0481A ControlValve 718-04392 Coupling,.500 737-0153 ReturnElbow 718-04395 Coupling,.875 737-0238 735-04103 NipplePipe 1/2-14 SpiderCoupling 710-1806 712-04063 Hex CapScrew 1/2-13x 3.25 FlangeLock Nut,5/16-18...
- Page 24 Briggs & Stratton Engine IViodel 126T02 For Craftsman Log Splitter IViodel 247.77640 684 _ 306A 51Ac(. c 5.o_ 1_£1 842 _-i[_ _ 524 '\_-_ 1095 VALVE GASKET SET...
- Page 25 Briggs & Stratton Engine IViodel 126T02 For Craftsman Log Splitter IViodel 247.77640 365 '%. © _ ",_ 633A 633 @ 276 _s 276 ¢_i_ PRIMER SYSTEM CHOKE SYSTEM 633A 1633 ii_ _ 1_601 601A AUTOC#OKE SYSTEa ] / i_, 670 _...
- Page 26 Briggs & Stratton Engine Model 126T02 For Craftsman Log Splitter Model 247.77640 968B 967A 445A 443A J_G\ [ ..677 _'_ 613A " © 677 _ 677 _?) 8369 _ _ 836B_ C_" _/_¢_ 346 _ _" 346 _£; 1388 i...
- Page 27 Briggs & Stratton Engine Model 126T02 For Craftsman Log Splitter Model 247.77640 188 % 843 <_## 843A < ..209B d_ _'_Z_ 209A _-_ ' 268 _ .._:-_ __'" 265 _:__ 271 _6f_9'%=")' 270'_ 265A_' 265B 356B "_ ..
- Page 28 Briggs & Stratton Engine IViodel 126T02 For Craftsman Log Splitter IViodel 247.77640 _" 921 P 921A 921 H 969A 969A _ 921 R // ,t-_--_-----_ _ 921J 969A 969A 969A 921K 921 U 969A 969_ 969 _l 921 L 921W...
- Page 29 Briggs & Stratton Engine Model 126T02 For Craftsman Log Splitter Model 247.77640 604A 1211 742 _#_; 1210 564B 564B 6O4B/ / 651 2 604C 689 d p> 783A @ 597 _ 697 % 803 i 1005 742 '_ _L _...
- Page 30 Briggs & Stratton Engine IViodel 126T02 For Craftsman Log Splitter IViodel 247.77640 592 _ 1211 564 _:_ 742 '_r*_ 1210 564B ¢_ 651 t_ 604C 689 _19 783A @ 597 _) 564B 697 _ '\.. 1005 853 __..,'f_.
- Page 31 Briggs & Stratton Engine Model 126T02 For Craftsman Log Splitter Model 247.77640 o® BS-697322 CylinderAssembly BS-690837 Screw(RewindStarter) BS-399269 Bushing/SealKit BS-691108 Screw(FlywheelGuard) BS-299819S Oil Seal BS-691740 MufflerScrewLock BS-493279 EngineSump BS-691636 Screw(ThrottleValve) BS-493267 ThrottleShaft BS-691160 CylinderHead BS-692249 CylinderHeadGasket BS-493280 Idle SpeedKit BS-691242...
- Page 32 Briggs & Stratton Engine Model 126T02 For Craftsman Splitter Model 247.77640 BS-794307 EngineGasketSet BS-791128 Control Bracket(Fixed Speed) BS-19069 FlywheelPuller 222E BS-692982 Control Bracket(ManualFriction,5 PositionManualChoke) BS-691688 Screw(Carburetor) BS-690783 GovernorControlLever BS-89838S SparkPlugWrench BS-691636 Screw (ChokeValve) BS-690272 Washer(GovernorCrank) BS-691826 LockoutLink 425A BS-690670 Screw(Air CleanerCover)
- Page 33 Briggs & Stratton Engine IViodel 126T02 For Craftsman Log Splitter IViodel 247.77640 BS-497680 RewindStarter BS-695266 StarterHousing BS-499034 MufflerGuard 613 , BS-691340 Screw(Muffler) 832A BS-691424 MufflerGuard 613A BS-691653 Screw(Muffler) BS-690340 GovernorShaft Retainer 832B BS-497683 MufflerGuard BS-698801 GovernorCrank 832E BS-793568 MufflerGuard BS-270344...
- Page 34 Briggs & Model 247.77640 Stratton Engine Model 126T02 For Craftsman Log Splitter BS-691994 Brake BS-694395 CarburetorPrimer 923A BS-695891 Brake BS-498261 Carburetor GasketSet BS-691994 Brake BS-691959 KeySet 923A BS-695891 Brake BS-398067 SparkArrestor 923B BS-796136 Brake 994B BS-792245 SparkArrestor BS-696310 DebrisShield BS-795403...
- Page 35 Craftsman Log Splitter Model 247.77641 777S32061 777D12600 777123022 HYDRAULIC FLUID Maintain fluid bevel within r_ges _ecified dipstick. OV_:t_F_LH Check when fluid cold with unit bevel. Never below this level Pump will ruined. Change }_/draullo fluid every hours Change }_dmullo filter...
- Page 36 Congratulations on makinga smart purchase.YournewCraftsman® Once youpurchasethe Agreement,a simplephonecall isall that it productis designedand manufactured for yearsof dependableopera- takesfor youto scheduleservice.Youcan call anytimedayor night, or tion. But likeall products,it mayrequirerepairfrom time to time.That's schedulea serviceappointmentonline. whenhavinga RepairProtectionAgreementcan saveyoumoneyand The RepairProtectionAgreement i sa risk-freepurchase.If you cancel aggravation.
- Page 37 Cuando son operados y mantenidos de acuerdo con tas instrucciones suministradas en su totalidad, si este registro Craftsman bifurcador falla debido a un defecto de material o mano de obra dentro de un a_o a partir de ta fecha de compra, flame al 1-800-4-MY-HOME ®...
- Page 38 Esta m_quina rue construida para set operada de acuerdo con las reglas de seguridad contenidas en este manual. de instrucciones importantes de seguridad La presencia de este sfmbolo indica que se trata AI igual que con cualquier tipo de equipo motorizado, se deben respetar para evitar...
- Page 39 Nunca deje la m_quina en funcionamiento sin vigilancia. Preparativos No utilice la m_quina bajo la influencia del alcohol, las drogas Siempre use zapatos de seguridad o botas reforzadas. o un medicamento. Siempre use anteojos o antiparras de seguridad cuando hace Nunca permita a nadie operar esta m_quina sin recibir antes la...
- Page 40 Cuando corte en posici6n vertical, estabilice el tronco antes de La v_lvula de descarga de presi6n viene preconfigurada mover el control. Corte segun se indica a continuaci6n: f_brica. No la ajuste. Coloque el tronco en la placa del extremo y girelo hasta No intente nunca mover la m_quina en terreno en pendiente...
- Page 41 Simbolos DeSeguridad Esta p_gina representa y describe los simbolos de seguridad que pueden aparecer en este producto. Leido, entienda, y siga todas las instrucciones en la m_quina antes de _rocurar montary funcionar. LEA EL MANUAL(S) DEL OPERADOR leido, entienda, y siga todas las instrucciones en el manual(s) antes de procurar montar y funcionar ADVERTENCIA-- MACHACAMIENTO...
- Page 42 NOTA:Su rn_.quina rornpetroncos se enviaconaceite en el motor.Sin Colocaci6n de la leng_eta embargo,usted DEBEcontrolarel nivelde aceiteantesde hacerlo Con la rn_.quina rornpetroncos fija en posici6nvertical, retirelos funcionar.Tengacuidadode no Ilenaren exceso. dos pernoshexagonales y las tuercashexagonales del soporte NOTA:Lasreferencias quecontieneeste manual s obreloslados del tanque.Vea la Figura2.
- Page 43 2. Desconecte elliberador del s oporte soldado devigueta retirando 4. Levante ydeslice elcilindro hacia a rriba h asta e ltope dela losseis tornillos hexagonales. Vea laFigura 4. vigueta ydentro delossoportes soldados. Vea laFigura 6. Figura 4 Figura6 Coloqueel liberadorencirnadel rnontajede la cubay fijelo en los Desconecte larn_nsula del b astidor detroncos del l ado d ela...
- Page 44 Si es necesario,conel rornpetroncos sobreuna superficie Controleel nivelde fluidocon la varillade nivel.Vea la Figura7. nivelada,use un ernbudoparaIlenarel motor de aceite hastala NoIleneel dep6sitoen exceso. rnarcaFULLde la varilla. Tengacuidadode no Ilenaren exceso. Vuelvaa colocar la varillade nivelventeaday apri_telabien hasta El Ilenadoen excesohaceque el motorernanernuchohurnoy que el topede las roscasquedeal rasdel tope del tubo.
- Page 45 Cilindro Manija de Liberador control larnadera Bloqueode la viga horizontal Cuba Montajede la vigueta Gato Controlesdel motor Bloqueo troncos de la viga Controldel cebado_ Tanquedel vertical dep6sito Interruptor d e detencidn ura 8 Farniliaricese con todos loscontrolesy sucorrectofuncionarniento. Lea este manualdel operadory las reglasde seguridadantesde Sepa c6rnodetenerla rn_.quina y c6rnodesconectarloscontroles poneren funcionarniento la rn_.quina c ortadorade rnadera.Compare r_.pidarnente.
- Page 46 CONTROL DEL CEBADOR PARA DETENER EL MOTOR El controldel cebadorse usa paracebarel carburadory ayudara que Ernpujeel interruptorde detenci6na la posici6nApagado.Veala el motorarranque. Figura9. Desconecte el cablede la bujiay haga rnasapara evitarque se enciendaaccidentalrnente el equipoal dejarlo sinvigilancia. USO DE LA M.&.QUINA ROMPETRONCOS Coloquela rn&quinarornpetroncos sobreuna superficienivelada y seca.
- Page 47 Liberador de la madera P_.rese delantede la unidadparaoperar la manijade controly estabilizarel tronco.Vea la Figura12. El liberadorde rnaderaest,. dise_adopara sacarde la cubala rnadera parcialmente cortada.Esto puedesucedercuandose corta maderade grandi_.metro o recientemente cortada. NoutiNcenuncalas manospara sacarde la cubala madera parcialmente cortada.Losdedospuedenquedaratrapadosentrela maderacortada.
- Page 48 P_.rese detr_.s del tanquede dep6sitoparaoperarla rnanijade Sujeteel engancheacopladora una bola clase I o superiorde 2" en un vehiculode rernolque.Sujetebien. controly estabilizarel tronco.Vea la Figura14. Si el engancheacopladorno encajasobrela bola: Girela tuerca de ajuste ubicadadebajodel engancheacoplador unavuelta a la izquierda. Si el engancheacopladorest,. dernasiadoflojosobrela bola:Gire la tuerca de ajuste ubicadadebajodel enganche acopladoruna vueltaa la derecha.
- Page 49 ABRAZADERAS DE LA MANGUERA • Antesde cadauso,verifiqueque todas lasabrazaderasde Nuncarealicening[3n ajustesin antesdetenerel motor,desconectar rnangueras est_.najustadas. el cable de la bujia y hacerrnasacontra el motor.Utilicesiernpre ACOPLADOR FLEXIBLE DE LA BOIVIBA I anteojosde seguridaddurantela operaci6no rnientrasrealizaajustes I o reparaciones, El acopladorflexiblede la bornbaes una piezade sujeci6n"ara_a" AJUSTE DEL MONTAJE DE LA CUi_A...
- Page 50 Programa de mantenimiento TAREAS FECHASDELOSSERVlCIOS ¢, * -- Uso concarga pesadao en ternperatura arnbienteelevada. Figura 17 RECOMENDACIONES GENERALES Respetesiernprelas reglasde seguridadcuandorealicetareas Nuncarealicening[3n ajuste sinantes detenerel motor,desconectar de rnantenirniento. el cablede la bujiay hacerrnasacontrael motor.Utilicesiernpre La garanfiade este rornpetroncos no cubreelernentos que ban anteojosde seguridaddurantela operaci6no rnientrasrealiza estado sujetosal rnalusoo la negligenciadel operador.Para ajusteso reparaciones.
- Page 51 LJQUIDO HIDRAULICO Y FILTRO DE ENTRADA VIGUETA Y CUi_IA DE CORTE Antes de cada uso,lubriquecon aceitede motorlosdos [adosde la vigueta(dondehacecontactocon la cuffade corte). La placade [acuffade [a m_.quina rompetroncos est,. diseffadapara que los retenedores queest_.na[ costadode la mismase puedanquitary rotar del sistema, y/o dar vuelta para queel desgastesea parejo.
- Page 52 IVlantenimiento de la bujia Lirnpielabujia y ajuste el espacioa 0.030"al rnenosuna vez por ternporadao cada 50 horasde funcionarniento. Lirnpieel _.reaalrededorde la bujfa. Saquee inspeccionela bujfa. Carnbiela bujia si loselectrodosest_.npicados,quernados o la porcelanaest,. rota. NOTA:P6ngaseen contactocon un centro de piezasy reparaci6n Searso con 1-800-4-MY-HOME®...
- Page 53 ESTABILIZADOR DE COMBUSTIBLE Preparela rn_.quina rornpetroncos para sualrnacenarniento al finalizar la ternporadao si la unidad no se utilizar_, durante30 dias o rn_.s. NOTA: El usode estabilizadores de combustiblees una alternativa aceptablepara rninirnizar l a forrnaci6nde dep6sitosde gornade Nuncaalrnacenela rn_.quina c on combustibleen el tanquedentro combustibleduranteel alrnacenarniento.
- Page 54 Antes derealizar cualquier tipo demantenimiento oservicio, desenganche todos l os controbs ydetenga elmotor. Espere aque sedetengan compbtamente todas l aspiezas m6vibs. Desconecte elcable d e labujia y p6ngalo haciendo masa c ontra elmotor para e vitar que se encienda accidentalmente. Utilice siempre anteojos deseguridad durante laoperaci6n...
- Page 55 Antesde realizarcualquiertipode rnantenirniento o servicio,desenganche todos loscontrolesy detenga el motor.Esperea que se detengancornpletarnente t odas las piezasrn6viles.Desconecte el cablede Ila bujia y p6ngalohaciendornasacontrael motor paraevitar que se enciendaaccidentalrnente. Utilice [siernpreanteojosde seguridaddurantela operaci6no rnientrasrealizaajusteso reparaciones. Esta secci6nanaliza problemasrnenoresde servicio.Paraubicar el Centrode Servicio Sears m_scercanoo para programarun servieio,sirnplernente eornuniquese con Sears al tel_fono 1-800-4-MY-HOME®.
- Page 59 Felicitaciones por haberrealizadouna adquisici6ninteligente.El Unavezadquiridoel Acuerdo,puedeprograrnar el serviciocon productoCraftsman@ que ha adquiridoest_ dise_adoy fabricado tan s61orealizaruna Ilarnadatelef6nica.PuedeIlarnaren cualquier para brindarrnuchosa_osde funcionarniento confiable.Perocorno mornento del dia o de la nocheo prograrnar un servicioen linea. todoslos productosa vecespuederequerirde reparaciones.Esen El Acuerdode Protecci6nde Reparaci6n es una cornprasin riesgo. esernornentocuandoel disponerde un Acuerdode protecci6npara Si ustedanula por alguna raz6nduranteel periodode garantiade reparaciones le puedeahorrardineroy problernas.
- Page 60 Your Home For expert troubleshooting and home solutions advice: www.managemyhome.com For repair - in your home - of all major brand appliances, lawn and garden equipment, or heating and cooling systems, no matter who made it, no matter who sold it! For the replacement parts, accessories owner's manuals that you need to do-it-yourself.