Advertisement
Available languages
Available languages
Quick Links
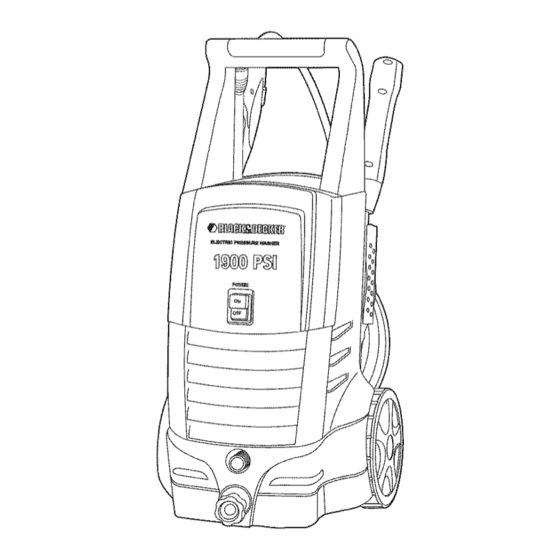
Model o Modelo 11BLE-325
iNSTRUCTiON
MANUAL
MANUAL DE INSTRUCCIONES
If your pressure washer is not working
properly or if there are parts missing or
broken, please DO NOT RETURN IT TO THE PLACE OF PURCHASE. Contact our
customer service department at wwwopower-washerous
or 1-800-381-0999.
Si su lavadora a presi6n no trabaja
correctamente
6 encuentra
partes rotas
6faltantes,
pot favor
NO LA REGRECE AL LUGAR
DONDE LA COMPRO.
Contactese
con nuestro Departamento
de Servicio al Cliente Ilamando al www.
_ower=washer.us
o 1-800-381-0999.
VEA EL ESPA_JOL EN LA CONTRAPORTADA.
INSTRUCTIVO DE OPERACION, CENTROS DE SERVICIO
Y POLIZA DE GARANT{A. ADVERTENCIA:
LFtASE ESTE
INSTRUCTIVO ANTES DE USAR EL PRODUCTO.
SAVE THIS MANUAL
FOR FUTURE
REFERENCE,
Part No. XXXXXXX Rev. 1 DEC 2010
Advertisement

Related Manuals for Black & Decker 11BLE-325


Summary of Contents for Black & Decker 11BLE-325
- Page 1 Model o Modelo 11BLE-325 iNSTRUCTiON MANUAL MANUAL DE INSTRUCCIONES If your pressure washer is not working properly or if there are parts missing or broken, please DO NOT RETURN IT TO THE PLACE OF PURCHASE. Contact our customer service department at wwwopower-washerous or 1-800-381-0999.
-
Page 2: Easy Installation
EASY iNSTALLATiON Z_ WARNING: CAREFULLY READ THE OPERATORS iNSTRUCTiONS BEFORE USING THE PRESSURE WASHER FOR THE FIRST TIME. ALWAYS STORE YOUR PRESSURE WASHER IN A LOCATION WHERE TEMPERATURE WILL NOT FALL BELOW 40°F (4°C) . FREEZE DAMAGE IS NOT COVERED BY THE WARRANTY. INSTALACION FACIL AVERTENCIA: LEA ATENTAMENTE... - Page 3 TRABAN EN LUGAR. TURN INCOMING WATER ON. ABRA COMPLETAMENTE NOTE: USE COLD WATER ONLY. GIRE EL AGUA ENTRANTE. NOTA: UTILIZAR SOLO AGUA FR|A FULLY OPEN PLUG GFCI (C) iNTO POWER RECEPTACLE. FIRMLY PRESS RELEASE TEST BUTTON (Z), THEN PRESS AND RELEASE THE RESET BUTTON (Y).
- Page 4 This manual contains information that is important for you to know and understand. This information relates to protecting YOUR SAFETY and PREVENTING EQUIPMENT PROBLEMS. To help you recognize this information, we use the symbols below. Please read the manual and pay attention to these symbols. Z_ DANGER: Indicates an imminently hazardous situation which, if not avoided, will result in death or serious injury.
- Page 5 This product is provided with a 22. Never tie knots or kink the high Ground Fault Circuit Interrupter pressure hose as damage could built into the power cord plug. If result. Inspect the high-pressure hose regularly. Replace the hose replacement of the plug or cord immediately if it is damaged, worn needed,...
-
Page 6: Safety Features
31. Never defeat thesafety f eatures of GROUND-FAULT CIRCUIT thisproduct. INTERRUPTER PROTECTION 32. Do not operatemachine with This pressure washer is provided with a missing, broken or unauthorized Ground-Fault Circuitqnterrupter (GFC0 parts. built into the plug of the power supply cord. - Page 7 EXTENSION CORDS Inspect cord before using. Do not use if cord is damaged. Use only extension cords that intended outdoor use. These Keep all connections dry and off extension cords are identified by a the ground. marking "Acceptable with Do not touch plug with wet hands. outdoor appliances: store...
- Page 8 NOTE: Photographs and line drawings Motor and Pump in Case used in this manual are for reference Power Supply Cord with GFCI only and do not represent a specific ON/OFF Switch model. On-board Detergent Tank Compare the illustrations with your unit to familiarize yourself with the location High Pressure Outlet (metal) of various...
- Page 9 PRESSURE WASHER TERMINOLOGY Locate and remove all loose parts PSi: Pounds per Square Inch. The from the carton. unit of measure for water pressure. With handle oriented as shown, Also used for air pressure, hydraulic align grooves in carry handle (P) pressure, etc.
-
Page 10: Pressure Washer Operating Features
PRESSURE WASHER CAUTION: High Pressure OPERATING FEATURES Stream spray position is very aggressive. We recommend that for CLICK=N-CLEAN + SPRAY LANCE most cleaning applications a fan spray (Fig. 4) pattern (U or V) be used to avoid Z_ WARNING: Do not move the nozzle damage to the surface being sprayed. - Page 11 Remove the tank cap (W) present Application of detergent on the back of the machine. z_ CAUTION: Avoid working on hot Fill tank (J) with suitable surfaces or in direct sunlight to mini- cleaning solution. mize the chance of the soap damaging painted surfaces.
- Page 12 Turn incoming water on and fully Connect the high pressure hose (E) open valve to insure maximum to the machine outlet (K). Ensure water flow to machine. the threads are aligned properly and the connection is secure. Plug GFCI (C) into power receptacle. Firmly press and release the TEST Connect the garden hose (Y) to the button (Z), then press and release...
- Page 13 LU BRICATiON Squeeze the trigger to start motor pressure washer designed and begin pressure washing. with a permanent lubrication system. NOTE: The motor only runs when Conventional oil checks and changes the gun trigger is depressed are not necessary. water is spraying. NOTE: [n case of oil leakage, contact SHUTTING DOWN...
- Page 14 Wrap high pressure hose power supply cord onto storage Z_ CAUTION: Prior to moving the unit, rack and snap power supply cord always disconnect the garden hose via into place as shown. the garden hose connector. CAUTION: Always store your pressure washer in a location where the temperature will not fall below 40°...
- Page 15 Please complete return enclosed Customer Information Card. Model 11BLE-325 Return of this card is not required to validate this warranty. A store issued PSI Max* 1900 psi receipt or credit card statement showing GPM Max* 1.5 gpm the purchase date is an acceptable warranty validation.
- Page 16 Implied Warranties Any implied warranties, including implied warranties of merchantability and fitness for a particular purpose, are limited in duration to one year on all components excluding the spray gun, high pressure hose, lance, and ground fault circuit interrupter (GFCI) which are only covered for 90 days;...
- Page 17 Detergent is Detergent is not Use only detergents, degreasers, waxes and not dispensing pressure washer other cleaning solutions, that are designed approved specifically for pressure washers. Cleaners in this category will clearly state on the label that they are meant for use in pressure washers.
- Page 18 GFCI Plug For GFC[ reset procedure see Ground=fault Malfunction Circuit Interrupter Protection paragraph under Power Supply & Electrical Info this manual. To order a replacement GFC[ or for GFC[ installation instructions, please contact our customer service department www.power-washer.us calling 1-800-381-0999. Spray gun, improperly Verify...
- Page 19 No water Nozzle is Clean the nozzle according to the instructions coming out clogged _rovided in the Nozzle paragraph under of nozzle Maintenance section of this manual. Water inlet Remove the filter screen (O) from the water filter screen inlet (M) and clean it thoroughly. Replace the filter screen.
- Page 20 Connecting and To attach the Lance - apply steady downward Disconnecting 3ressure on the lance (In the direction of the the Spray Lance trigger) while simultaneously twisting lance 90 ° counterclockwise. It may help if NOTE: Due you set the gun vertically on a flat surface to the high with the lance pointing upwards.
- Page 21 Este manual contiene importante informaci6n para que usted sepa y comprenda. Esta informaci6n se relaciona con la protecci6n de SU SEGURIDAD Y LA PREVENCION DE PROBLEMAS AL EQUIPO. Para ayudarlo a reconocer informaci6n, utilizamos los simbolos indicados mas abajo. Sirvase leer el manual y prestar atenci6n a dichos simbolos.
- Page 22 No se extralimite ni se coloque 18. Use siempre ambas manos cuando sobre soporte inestable. se utiliza la maquina de lavar a Adopte siempre una posici6n presi6n, con el fin de mantener un estabilidad y equilibrio. completo control del tubo/de manguera.
- Page 23 CARACTER|STICAS eventual chispa el6ctrica podria SEGURIDAD provocar explosi6n incendio. A LA SEGURIDAD AUTOMATIC 26. Para reducir al maximo la cantidad TOTAL STOP ® de agua podria entrar maquina lavar presi6n la maquina de lavar a presi6n, est& dotada de un dispositivo durante el uso, col6quela Io mas...
- Page 24 MANUTENCION DE UN EQUIPO Si es necesario substituir el enchufe o CON DOBLE AISLAMIENTO el cable, usen s61o piezas de repuesto del mismo tipo. Para una substituci6n aislamiento est#_ dotado correcta, contacte al servicio al cliente. dos sistemas de aislamiento equipo doble ADVERTENCIA:...
- Page 25 Utilice el alargador correctamente ADVERTENCIA: Para reducir no tire del cable para desconectar posibilidad electrocuci6n, aparato. Mantenga las extensiones mantengan la extensi6n seca y fuera lejos de fuentes de calory de angulos de tierra. No toquen el enchufe con las cortantes.
- Page 26 NOTA: Las fotografias y los dibujos lineales utilizados en este manual son solo referencias y no representan modelo especffico Compare las ilustraciones con su unidad para familiarizarse con la ubicaci6n de sus controles y regulaciones. Conserve este manual para referencias futuras. Pistola rociadora Lanza de pulverizaci6n Click-N-...
- Page 27 (Unidades limpieza) boquilla Click-N-Clean® puede multiplicadosporPSI. (GPM x PSI = CU) ajustarse en cuatro posiciones. Gire el Sistema de Inyecci6n de detergente: cuello 90 ° para ajustar a la posici6n Mezcla los limpiadores o los solventes que desee. de limpieza con agua para mejorar la efectividad de la limpieza.
- Page 28 BOQUILLA ATOMIZADORA Llene los dep6sitos (J) con POWESWIVEL ®(FIG. 5) soluci6n de limpieza ade-cuada. Z_ATENCI6N: La Boquilla se puede regular a 360°; el ajuste solamente se puede modificar con el accionador la pistola completamente soltado. intentar ajustar la boquilla de pl&stico rojo cuando la maquina esta funcionando.
- Page 29 Aplicaci6n de detergente Z_ AVERTENClA: Riesgo de ingerirlo o de lesiones. No dirija el chorro hacia si Z._ATENCl6N: Eviten trabajar sobre mismo o hacia otras personas. superficies calientes o a la luz directa del sol, para disminuir Io m&s posible z_ AVERTENClA: Riesgo de operaci6n las posibilidades de que el jab6n daSe...
- Page 30 AVERTENClA: Si la lanza se traba con seguridad, podria expulsada con alta presi6n durante la operaci6n, posiblemente estropeando Situar el interruptor en la posici6n de lesion. on (I). Tenga en cuenta que el motor Prende la agua entrante a la v&lvula se encendera momentaneamente encendido completamente...
- Page 31 Si la lavadora a presi6n se usa en Z_,CTENCl6N: Si no se mantiene condiciones inusuales, como de alta limpio el filtro, el flujo del agua hacia temperatura o polvo, se requiere un la maquina de lavar a presi6n se ve mantenimiento mas frecuente.
- Page 32 INSTRUCCIONES DE ALMACENAJE 10. Guardar la maquina en un espacio Y FINALIZACION DE USO seco temperatura Despu6s de utilizar la lavadora a controlada. No guardar la maquina presi6n, se deben vaciar y aclarar o los acesorios en un espacio los dos dep6sito de detergente. donde temperatura pueda...
- Page 33 La garantia no cubre: Esta garant[a no cubre las piezas, como las boquillas, regrese este producto al vendedor. que deben reemplazarse como parte Cont&ctese con nuestro Departamento del mantenimiento normal del equipo, de servicio al cliente Ilamando al www. que como el resultado de un power-washer.us o 1-800-381-0999.
- Page 34 los da_os resultantes o accidentales, y comerciales o de alquiler. Esta garantia las fallas debidas al mal uso, abuso, o le otorga derechos especificos, pero uso y desgaste normales. Esta garantia podria tener tambi6n otros derechos se aplica s61o a productos utilizados que varian segQn el estado.
- Page 35 CAUSA ..... CORRECCION PROBLEMA Circuito Viajes o fusible del Verifique que el circuito sea clasificado interruptor soplados sobrecargado 15 amperios o mayor. No asegure ninguna en caja del fusible otra aplicaci6n esta dibujando energia del mismo circuito (circuito dedicado). Cuerda de No recomendamos el uso de las cuerdas la extensi6n...
- Page 36 PROBLEMA CAUSA CORRECClON La presi6n baja/que El grifo no esta Verifique grifo entrante se afloja o el motor completamente abastecimiento de agua est6 abierto en el abierto no para cuando ajuste maximo. el disparador del La manguera Utilice Iongitud maxima arma de aerosol del jardin es manguera del jardin de.
- Page 37 PROBLEMA CAUSA OORRECClON La unidad no La unidad no Verifique el interruptor con./desc. comenzarb, la se priende (I) est6 contratado completamente a la nora: iLa unidad 3osici6n de trabajo. comenzara El enchufe Confirme enchufe GFCI y funcionarb. de GFCi no reajustado y de funcionamiento segOn...
- Page 38 PROBLEMA CAUSA CORRECCION Conectando y Para unit la lanza =aplique constantemente desconectando la presi6n hacia abajo en la lanza (en la i la NOTA de la direcci6n del disparador) mientras lanza del aerosol: simult&neamente tuerce la lanza 90 ° a la Debido alas altas izquierda.
- Page 39 Black & Decker and the Black & Decker logo are trademarks of The Black & Decker Corporation and are used under license. All rights reserved. Orange & Black is a trademark of The Black & Decker Corporation. Product in this box may differ slightly from that pictured. Not all accessories shown in photography are included in this package.