
Related Manuals for Motorola LS700 - 7" Digital Photo Frame


Summary of Contents for Motorola LS700 - 7" Digital Photo Frame
- Page 1 User’s Guide For LS700 7" Digital Photo Frame with Slideshow Warning Use only the power adapter supplied with your product.
- Page 2 Motorola Digital Photo Frame! Please retain your original dated sales receipt for your records. For warranty service of your Motorola product, you will need to provide a copy of your dated sales receipt to confirm warranty status. Registration is not required for warranty coverage.
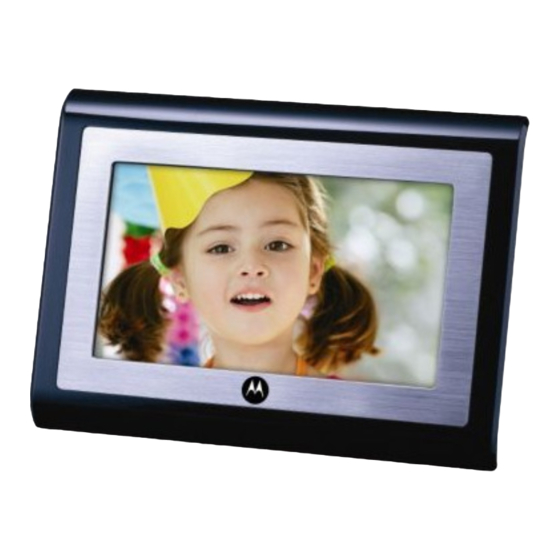
- Page 3 Frame overview 1. LCD screen 2. Face plate 1. Power supply jack 2. USB connector 3. Memory card slot 4. Power/Exit button 5. Down/Rotate button 6. Previous button 7. OK/Play/Pause/Zoom button 8. Up/Rotate button 9. Next button 10. Wall mount hangers 11.
-
Page 4: Table Of Contents
1. Getting started ..........5 3. Help..............14 2. Doing more with your Digital Photo Frame ..9 4. General Information ........14 2.1 Choose Photo Location ........9 2.2 Change View Mode ..........9 2.3 Photos Mode ............9 2.3.1 Display a photo in full-screen ....9 2.3.2 Start/Stop automatic transition in full-screen view ........ -
Page 5: Getting Started
• If the LCD screen breaks, do not touch the glass or Attaching the stand liquid. Contact Motorola customer support for assistance. • Use only the power adapter supplied with your Digital Photo Frame. Compatible picture format Your Digital Photo Frame can only display pictures that are in JPEG format. - Page 6 Connecting the power cable plug You can set to display your frame in landscape or portrait orientation. Push the stand into the slot on the back of the frame and slide it into either directions as indicated below. Landscape Portrait IMPORTANT Use only the power adapter supplied with your Digital Photo Frame.
- Page 7 Inserting a memory card Connecting a USB device Your Digital Photo Frame supports SD, SDHC and MMC Your Digital Photo Frame supports USB flash drive and card memory cards. reader. To insert a memory card, push the card firmly into the NOTE memory card slot in the correct direction as indicated above.
- Page 8 Mounting your Digital Photo Frame on the wall Your Digital Photo Frame will also power up automatically when the power source is connected and switched on for the first time. Mounting holes Switching your Digital Photo Frame to standby mode Press and hold button for 2 seconds.
-
Page 9: Doing More With Your Digital Photo Frame
2. Doing more with your Digital To change view mode: Photo Frame 1. In the main menu screen, press to select Photos Calendar CONGRATULATIONS! 2. Press Now that you have set up your Digital Photo Frame and Photos Mode enjoyed your first slideshow, you are ready to learn about This mode lets you view pictures/slideshows in full-screen or more great features of your Digital Photo Frame. -
Page 10: Changing Pictures Manually
2.3.5 Rotate picture 3. To return to thumbnail view, press You can rotate a picture clockwise or counterclockwise. 2.3.3 Changing pictures manually You can change the picture that is showing on the screen without having to wait for automatic transition. Press to change to the previous picture, or press change to the next picture. -
Page 11: Copy Picture From Memory Card To Internal Memory
Calendar Mode 2.3.7 Copy picture from Memory Card to Internal Memory This mode lets you view a calendar and clock on the right of Memory 1. In the main menu screen, press to select the screen and a picture/slideshow on the left of the screen. Card and press 2. -
Page 12: Settings Mode
Settings Mode No effect Random Fade 2. Press to select a setting ( out Fade in Left to Right Horizontal open Horizontal close ) and The settings mode allows you to change the various settings of your Digital Photo Frame. press 3. -
Page 13: Programmable On/Off Time (On/Off Schedule)
2.5.6 Programmable On/Off time (On/Off 2.5.7 Display schedule) You can change the display brightness and contrast. You can set the Digital Photo Frame to switch on and off Display 1. Press to select and press automatically at a specific time of the day. Brightness Contrast 2. -
Page 14: Help
• Make sure you are using the power adapter that was 2. Visit our website: included with your Digital Photo Frame. www.motorola.com • Make sure the frame is turned on (page 8). My Digital Photo Frame does not recognize 3. Contact Customer Service at: 1-888-331-3383 in US and Canada the memory card. - Page 15 What Other Limitations Are There? branded consumer products that it manufactures (“Products”) ANY IMPLIED WARRANTIES OR CONDITIONS and the Motorola branded or certified accessories sold for use IRRESPECTIVE OF WHETHER THEY ARE IMPOSED BY with these Products that it manufactures (“Accessories”) to be...
- Page 16 DAMAGES OR CLAIMS IN EXCESS OF THE PURCHASE Products or Accessories Length of Coverage PRICE OF THE PRODUCT OR ACCESSORY, OR FOR Covered ANY INDIRECT, INCIDENTAL, SPECIAL OR Consumer Products One (1) year from the date of CONSEQUENTIAL DAMAGES OF ANY KIND, OR LOSS purchase by the first consumer OF REVENUE, SAVINGS OR PROFITS, LOSS OF purchaser of the product.
- Page 17 Product or Accessory to abnormal usage or conditions; or (e) other acts or omissions which are not the 1-888-331-3383 in US and Canada fault or neglect of Motorola or Binatone Electronics 0845 218 0890 in UK International LTD., are excluded from coverage.
-
Page 18: Fcc Compliance And Advisory
FCC compliance and advisory made by any agent employee or staff of BINATONE ELECTRONICS INTERNATIONAL LTD., that may have This equipment has been tested and found to comply with been made in connection with the said purchase. the limits for a Class B digital device, pursuant to Part 15 of the FCC Rules. -
Page 19: Fcc And Industry Canada
the product, they must be used in order to ensure compliance with FCC regulation. FCC and Industry Canada This device complies with Industry Canada RSS-210 and FCC Rules. Operation is subject to the following two conditions: (1) this device may not cause harmful interference, and (2) this device must accept any interference received, including interference that may cause undesired operation. - Page 20 MOTOROLA and the Stylized M Logo, and other Motorola trademarks and trade dress are owned by Motorola, Inc. and are used under license from Motorola, Inc. MOTOROLA and the Stylized M Logo are registered in the US Patent &...