
Related Manuals for Motorola LS1000W


Summary of Contents for Motorola LS1000W
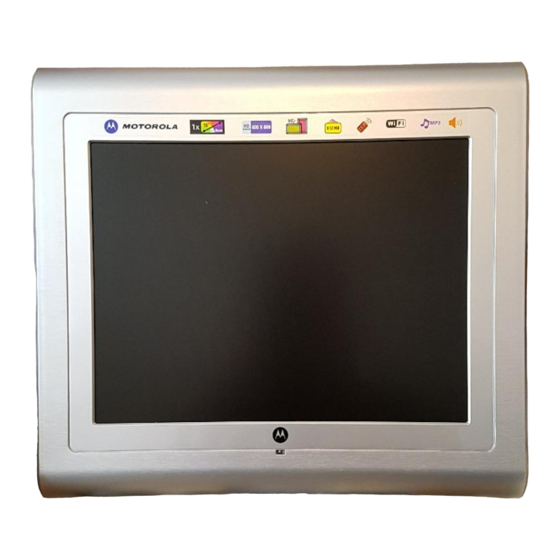
- Page 1 User’s Guide For LS1000W 10.4” (26.4 cm) Digital Photo Frame ® Wi-Fi Enabled Warning Use only the power adapter supplied with your product.
- Page 2 Motorola Digital Photo Frame! Please retain your original dated sales receipt for your records. For warranty service of your Motorola product, you will need to provide a copy of your dated sales receipt to confirm warranty status. Registration is not required for warranty coverage.
- Page 3 Frame Overview 1. Navigation and buttons 2. EXIT button 3. ON/OFF button 4. Hanging slot (Portrait position) 5. Hanging slot (Landscape position) 6. Stand locking slot 7. Loudspeakers 8. Earphone jack for connecting to an earphone/headset or external speaker to play the audio. 9.
-
Page 4: Table Of Contents
......34 Inserting a memory card or a USB flash drive ....8 3.5.3.3.1 Setting up FrameChannel to Replacing the remote control battery.......9 work with LS1000W ....34 Using the photo frame..............10 3.5.3.3.2 Deactivating the active Using the control buttons ..........10 FrameChannel account...35 Using the remote control ..........13... -
Page 5: Getting Started
Do not disassemble your digital photo frame; there are no user-serviceable parts inside. If the LCD screen breaks, do not touch the glass or liquid. Contact Motorola customer support for assistance. Use only the power adapter supplied with your digital photo frame. -
Page 6: Installing The Stand
Insert the stand into the stand locking slot as illustrated, Installing the stand until the stand is secured to the photo frame. 1.1.1 Landscape position To place the photo frame in landscape position, follow the steps below to install the stand. Hold the photo frame in landscape position. -
Page 7: Portrait Position
1.1.2 Portrait position Insert the stand into the stand locking slot as illustrated, until the stand is secured to the photo frame. To place the photo frame in portrait position, follow the steps below to install the stand. Hold the photo frame in portrait position. Attach the stand to the stand locking slot on the back of the photo frame. -
Page 8: Connecting To Power
Connecting to power Inserting a memory card or a USB flash drive Follow the steps below to connect the photo frame to a power outlet to turn on the power. The photo frame is preloaded with some photos in the Plug one end of the AC power adapter to the power internal memory. -
Page 9: Replacing The Remote Control Battery
Replacing the remote Insert the new battery into the battery holder. The battery must be placed with the positive pole facing control battery upwards in the illustrated position. The supplied remote control comes installed with a CR2025 lithium battery. When you need to replace the battery, follow the steps below. -
Page 10: Using The Photo Frame
Description 2. Using the photo frame Navigation and buttons To operate the photo frame, you can: Use the control buttons on the back of the photo frame Use the supplied remote control Using the control a. UP/VOL+: moves up/increases the volume. buttons b. - Page 11 When using the Main Menu When playing a slideshow Button Function Button Function UP/VOL+ Selects Internal Memory, USB or Starts/pauses the playback. Memory Card. EXIT Goes back to the previous page. DOWN/VOL- Selects Internal Memory, USB or Memory Card. When using the Music menu LEFT Selects Photo, Music, Calendar, Wi-Fi or Settings menu.
- Page 12 When using the Calendar menu When using the Settings menu Button Function Button Function LEFT Selects Photo, Music, Calendar, UP/VOL+ Moves up to the previous sub-menu Wi-Fi or Settings menu. in Settings. RIGHT Selects Photo, Music, Calendar, DOWN/VOL- Moves down to the next sub-menu Wi-Fi or Settings menu.
-
Page 13: Using The Remote Control
Using the remote control Description ON/OFF The following table describes the buttons and their functions Turns on the screen backlight. that are available on the supplied remote control. Turns off the screen backlight to enter Standby mode. MENU You can press this button to activate or deactivate Copy One, Copy All, Delete One or Delete All options in Photo Viewer and Music Player. - Page 14 Description You can press this shortcut key to access RSS WEB Radio reader, when a Wi-Fi connection has been set up. You can press this shortcut key to access WEB PICASA Radio in Wi-Fi List to listen to radio stations on the ™...
-
Page 15: Using The Menus
To exit slideshow mode and return to the Main Menu, press 3. Using the menus the EXIT button on the back of the photo frame. Using the Main Menu After turning on the power of the photo frame, photos will play in slideshow mode automatically. -
Page 16: Using The Photo Menu
To browse or select a photo, use the UP/VOL+, Using the Photo menu DOWN/VOL-, LEFT and RIGHT buttons. NOTE To play photos in full screen single photo mode, The photo frame only supports JPEG (*.jpg) image file press the button. Press the button again format. -
Page 17: Copying One Or All Photos
3.2.1 Copying one or all photos Press the UP/VOL+ or DOWN/VOL- button to select Yes, and then press the button. NOTE To copy photos from your memory card or USB to the Press the UP/VOL+ or DOWN/VOL- button to internal memory, please insert your memory card or USB flash drive first. -
Page 18: Auto Rotation
3.2.3 Auto rotation • When the photo frame is placed in portrait position, rotate the photo frame 90 degrees clockwise to enable The photo frame has a built-in tilt sensor that allows auto auto rotation. rotation of photos. Follow the instructions below to enable auto rotation. -
Page 19: Using The Music Menu
Using the Music menu To select the next track, press the DOWN/VOL- or RIGHT button. NOTE To play the selected track, press the button. The photo frame only supports MP3 (*.mp3) audio file During music playing, volume bar shows on top right format. -
Page 20: Copying One Or All Music Files
3.3.1 Copying one or all music Press the LEFT or RIGHT button to select Copy One files or Copy All, and then press the button. NOTE Press the UP/VOL+ or DOWN/VOL- button to To copy music files from your memory card or USB to the select Yes, and then press the button. -
Page 21: Deleting One Or All Music Files
3.3.2 Deleting one or all music Press the button to enter the Calendar preview files screen, and then press the button again to enter NOTE full screen mode in the Calendar menu. The slideshow Use the supplied remote control for this operation. automatically starts. -
Page 22: Using The Wi-Fi Menu
If you are using automatic IP network: Using the Wi-Fi menu Select DHCP for automatic connection in the ™ To enjoy the provided web services, such as Picasa Wi-Fi Setup menu. ® ™ Flickr and FrameChannel from the photo frame, you need to sign up for a new account for the web service you want to use on the Internet. - Page 23 The Select Access Point screen appears and Enter the password in the KEY field. When shows access points that are available nearby. finished, select Done, and then press the button. Use the UP/VOL+ or DOWN/VOL- button to select an access point you want to connect to, For details about how to use the keyboard, see and then press the button.
- Page 24 TIPS Once the connection is established, the screen On-screen keyboard use: shows the “Your connection was successful” To select an item, press the message in the middle and the icon on the buttons on the remote control. top right corner. Press the EXIT button to return to To enter/confirm your selection, press the the Wi-Fi menu.
- Page 25 If you are using static IP connection: The Choose AP screen appears. Use the keyboard to enter your IP address, subnet mask, Select Static IP Address in the Wi-Fi Setup gateway and DNS server settings. menu. For details about how to use the keyboard, see the tips below.
-
Page 26: Step 2: Configuring Your Accounts
To move the cursor backwards, select Prev, Choose AP page and press the button repeatedly to and then press the button. manually connect to the Wi-Fi network. To go to the next field or move among fields, 3.5.2 Step 2: Configuring your select Done, and then press the button. -
Page 27: Configuring Your Flickr
® In the Keyboard screen that appears, enter your 3.5.2.2 Configuring your Flickr account in the Account field. account NOTE Before making the following configurations, you need to sign up for a Flickr account on the Internet first if you don’t have an existing account. -
Page 28: Configuring Rss
In the Keyboard screen that appears, enter your 3.5.2.3 Configuring RSS ® Flickr account (full email address) in the Email Adr: RSS (Really Simple Syndication) is a method used to field. publish frequently updated web site content, such as news headlines, blog entries or podcasts. -
Page 29: Configuring Your Email Account
The Keyboard screen appears and shows the web 3.5.2.4 Configuring your email account address of the default RSS channel. You can clear the ™ Sign up for a new Gmail (referred to as Google Mail web address by using the Backspace key, and then in some countries/regions) email account. - Page 30 NOTE Confirm the Authentication option, and then press IMPORTANT: Depending on server settings, emails may to complete the settings. be deleted from server after received by the photo frame. DO NOT use email account currently using for email For details about email server settings, refer to the table communication.
-
Page 31: More Information About On-Screen
URL addresses. This page is accessed by selecting the Shift key on the bottom left of the screen. This Note that when entering information using the LS1000W key acts as a toggle between the two pages. -
Page 32: Step 3: Using Web Services
3.5.3 Step 3: Using web services NOTE To copy a photo, select the photo in thumbnail mode and ™ 3.5.3.1 Using Picasa press the MENU button on the remote control. When the NOTE Copy One option appears, press the button to select Use the supplied remote control for this operation. -
Page 33: Using Flickr
® 3.5.3.2 Using Flickr Press the button to enter the selected album. To play photos in full screen single photo mode, NOTE The photo frame is limited to access public photos from press the button. Flickr account owners over the age of 18. For details, review the terms and conditions of use on Flickr's web To start running slideshow, press the site. -
Page 34: Using Framechannel
Setting up FrameChannel to work log into your FrameChannel account. with LS1000W Step 2: Enter the Activation Code displayed on your LS1000W in the field below, and then click Press the button on the remote control to access Go!. FrameChannel on your LS1000W. -
Page 35: Deactivating The Active Framechannel Account
To quit, press the EXIT button again. You can deactivate the currently active FrameChannel account and set up another FrameChannel account to work NOTE with your LS1000W. • To copy a photo, select the photo in thumbnail mode Go to integrated.framechannel.com, and log into your FrameChannel account. -
Page 36: Using Rss
3.5.3.4 Using RSS Click Frame Activation, and then click Deactivate frame. NOTE Use the supplied remote control for this operation. Press the button to go to RSS. The screen will display the most recently updated RSS feeds from the subscribed channel set in Account Cfg. When the “Are you sure you wish to deactivate your frame?”... -
Page 37: Using Web Radio
3.5.3.5 Using WEB Radio To add the selected program entry to the Favorites list, press the MENU button on the NOTE remote control. When Add to favorites appears, the selected program entry has been added to the Use the supplied remote control for this operation. Favorites list. - Page 38 NOTE If you have added radio program entries to the Favorites list, the WEB Radio screen will show To play another program entry in the Favorites list, you Favorites, Search and Delete One options when you need to stop the current program playback first by pressing access WEB Radio next time.
-
Page 39: Using Email
3.5.3.6 Using Email 3.5.3.6.1 Adding your contacts to the Welcome list Press the button to go to Email. To receive photo The photo frame is designed to avoid junk mails, which only emails, you must add your contacts to the Welcome list first. displays photo emails received from the contacts in the Follow the instructions in “3.5.3.6.1 Adding your contacts to Welcome list. -
Page 40: Receiving Photo Emails
3.5.3.6.2 Receiving photo emails When finished, use the control buttons to select Done, and then press the button to complete. Press the button on the remote control to access Once you have added your contacts to the Welcome Email in Wi-Fi List. list, you will be able to receive photo emails from these The “Checking email”... - Page 41 Once the download completes, downloaded photo(s) Once the photo(s) have been downloaded and saved will be saved into the internal memory of the photo to the internal memory, the following screen appears, frame. asking whether you want to play photo(s) received in email(s) in slideshow mode.
-
Page 42: Viewing Received Photo Emails On Inbox
Photo(s) received from email(s) are saved in the You can press the UP/VOL+ or DOWN/VOL- internal memory. button to browse photo emails received from different NOTE contacts, and then press the button to view photo To delete the received photo(s), go to the Photo menu and select Internal Memory. -
Page 43: Sending A Photo By Email
3.5.3.6.4 Sending a photo by email Select Yes and then press the button to continue. NOTE Use the supplied remote control for this operation. In Email, press the LEFT or RIGHT button to select Send Mail, and then press the button. -
Page 44: Editing Or Deleting The Contacts
Editing a contact: When the photo has been sent successfully, the “Send Press the LEFT or RIGHT button to select Edit. success” message appears. Press the UP/VOL+ or DOWN/VOL- button to NOTE select the contact you want to edit. If the photo is not sent successfully, the “Send fail” message Use the keyboard to edit the selected contact. -
Page 45: Faq And Troubleshooting
3.5.4 FAQ and troubleshooting Account configurations ™ I have configured my Picasa account in Account System Cfg in the Wi-Fi menu, but still cannot access my Picasa account in Wi-Fi List. There is no response from the photo frame and the •... - Page 46 ™ ® ™ Account configurations (Continued) Picasa , Flickr , FrameChannel , RSS, WEB Radio and Email web services I have configured Mail Config settings in Account When accessing web services in Wi-Fi List, a “No Cfg in the Wi-Fi menu, but the photo frame still Wifi connection”...
- Page 47 ™ ® ™ Picasa , Flickr , FrameChannel , RSS, WEB Radio and Email web services (Continued) I cannot access the Flickr account that has been configured in Account Cfg. Make sure the Flickr account you are accessing meets the age requirements. The photo frame is limited to access public photos from Flickr account owners over the age of 18.
-
Page 48: Using The Settings Menu
Using the Settings menu You can control all function settings of the photo frame from the Settings menu. Refer to the table below for more In the Main Menu, press the LEFT or RIGHT button to information. select the Settings menu. Sub-menu Option Description/Function... - Page 49 Languages English Selects an OSD Sub-menu Option Description/Function (On-screen display) Français Date & Time Year Allows you to set up the language. setting date and time. Deutsch Month Italiano Español Hour Português Minute Nederlands Time Format Pусский Alarm setting Alarm Activates/deactivates the Svenska on/off...
- Page 50 Copy option Original Use the original file size Sub-menu Option Description/Function size when copying photos. On/Off Auto On/Off Enables/disables the Auto Reduce Use the reduced file size schedule power on/power off options. size when copying photos. Auto on Powers on the photo frame Default EXIT Cancels the task.
-
Page 51: Setting An Alarm
Continue to adjust the alarm hour, minute, volume, Sub-menu Option Description/Function tone and Day. Startup mode Slideshow Enters Slideshow mode In the Day option, you can select Everyday or upon system startup, when Weekday. When Everyday is selected, alarm repeats photos in Internal Memory, everyday, including Saturday and Sunday. -
Page 52: Enabling Auto On/Off
3.6.2 Enabling auto on/off The photo frame comes with the Programmable On/Off Time feature, making it possible to power on and off automatically according to the time you set. In the Main Menu, press the LEFT or RIGHT button to select the Settings menu. -
Page 53: General Information
Subject to the exclusions and limitations contained below, Visit our website: Binatone Electronics International LTD. warrants the www.motorola.com Motorola branded consumer products that it manufactures (“Products”) and the Motorola branded or certified accessories sold for use with these Products that it Contact Customer Service: manufactures (“Accessories”) to be free from defects in... - Page 54 INTERNATIONAL LTD. MAKES NO OTHER WARRANTIES that vary from state to state or from one country/jurisdiction OR CONDITIONS, EXPRESS OF IMPLIED. IN NO EVENT to another. SHALL MOTOROLA OR BINATONE ELECTRONICS General information...
- Page 55 Unauthorized Service or Modification. Defects or excluded from coverage. damages resulting from service, testing, adjustment, installation, maintenance, alteration, or modification in any way by someone other than Motorola, Binatone Electronics International LTD. or its authorized service centers, are excluded from coverage. General information...
- Page 56 ELECTRONICS INTERNATIONAL LTD. regarding the tampering; (c) mismatched board serial numbers; or (d) Products or Accessories purchased by you, and supersede nonconforming or non-Motorola branded housings, or parts, any prior agreement or representations, including are excluded from coverage. representations made in any literature publications or promotional materials issued by BINATONE Communication Services.
- Page 57 Compliance Information Declaration of Conformity General information...
- Page 58 WARNING FCC Statement You are cautioned that changes or modifications not This device complies with Part 15 Subpart B of the FCC expressly approved by the party responsible for compliance Rules. Operation is subject to the following two conditions: could void your authority to operate the equipment. (1) this device may not cause harmful interference, and (2) this device must accept any interference received, including IMPORTANT NOTE:...
- Page 59 Canadian DOC statement This Class B digital apparatus complies with Canadian ICES-003. Cet appareil numérique de la classe B est conforme à la norme NMB-003 du Canada. WEEE Directive Produced after 13 August 2005. Waste electrical should not be disposed of with household waste. Please recycle where facilities exist.
-
Page 60: Technical Specifications
5. Technical specifications Screen size 10.4” (26.4cm) diagonal Supported audio file MP3 (*.mp3) TFT LCD format Aspect ratio Auto rotation Built-in tilt sensor ® Panel resolution 800 (H) x 600 (V) pixels Wi-Fi module 802.11b/g 2.4GHz WLAN ™ ® Internal memory size 512MB (Around 100MB Supported web services Picasa... -
Page 61: Wall Mounting Instructions
6. Wall mounting instructions Insert 8mm and 9.5mm head screws (to be purchased separately) into the holes and tighten the screws. Then, align Landscape wall mounting your photo frame with the screws. Cut the illustration below and drill holes in the wall exactly as illustrated. - Page 62 Wall mounting instructions...
- Page 63 Portrait wall mounting Mount your photo frame in portrait position on the wall. Drill a hole in the wall and insert an 8mm head screw (to be purchased separately) into the hole. Align your photo frame with the screw. Wall mounting instructions...
- Page 64 Wall mounting instructions...
- Page 65 Logo, and other Motorola trademarks and trade dress are owned by Motorola, Inc. and are used under license from Motorola, Inc. MOTOROLA and the Stylized M Logo are registered in the US Patent & Trademark Office. Wi-Fi is a registered trademark of the Wi-Fi Alliance.