Table of Contents
Advertisement
Quick Links
Advertisement
Table of Contents

Related Manuals for AEG C65301KF-n


Summary of Contents for AEG C65301KF-n
- Page 1 C65301KF-n Ceramic glass hob Operating Instructions Installation Instructions...
-
Page 2: Dear Customer
Dear customer, Please read these operating instructions carefully. Pay particular attention to the section “Safety information” on the first few pages. Please retain these operating instructions for later refer- ence. Pass them on to possible new owners of the appliance. The following symbols are used in the text: Safety instructions Warning: Information concerning your personal safety. -
Page 3: Table Of Contents
Contents Operating Instructions Safety ............Disposal . - Page 4 Installation Instructions ........32 Technical Data ..........32 Regulations, Standards, Directives .
-
Page 5: Operating Instructions
Operating Instructions Safety The safety aspects of this appliance comply with accepted technical standards and the German Appliance Safety Law. However, as manufac- turers we also believe it is our responsibility to familiarise you with the following safety instructions. Electrical Safety •... -
Page 6: Safety When Cleaning
Operating Instructions • Overheated fats and oils catch fire quickly. You should supervise cooking when preparing foods in fat or oil (e.g. chips). • Switch off the cooking zones after use. Safety When Cleaning • For safety reasons do not clean the appliance with a steam jet or high pressure cleaner. -
Page 7: Disposal
Disposal Disposing of the Packaging Material • All parts of the packaging can be fully recycled; foil and expanded polyurethane parts are appropriately identified. Please dispose of packaging material and, if appropriate, your old appliance properly. • Please follow the national and regional regulations and material identification (material separation, refuse collection, waste disposal sites). -
Page 8: The Key Features Of Your Appliance
Operating Instructions The Key Features of Your Appliance • Ceramic glass cooking surface: The appliance has a ceramic glass cooking surface and 4 rapid response cooking zones. The particularly powerful radiant heater elements significantly shorten the amount of time taken for the zones to heat up. •... -
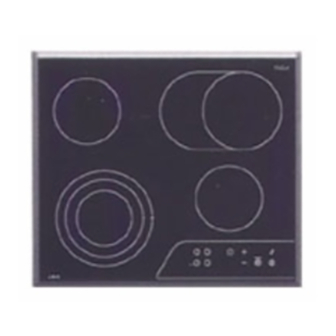
Page 9: Description Of The Hob
Description of the hob Single ring cooking zone 1200W Triple ring cooking zone 2300W Casserole zone indicator Triple ring Cooking zone selection with indicator displays for heat setting/re- sidual heat Operating Instructions Single ring cooking zone Control panel 1200W ”Timer“ with control display Booster button Heat setting selector... -
Page 10: Digital Display
Operating Instructions Digital Display The four display fields correspond to the four cooking zones, and give the following indications: – ”-“, when switched on, and when switched off automatically by the safety function, – ”0. “ , when a cooking zone is selected, –... -
Page 11: Before Using For The First Time
Before using for the first time Initial Cleaning Wipe the ceramic glass surface with a damp cloth. Important: Do not use any caustic, abrasive cleaners! The surface could be damaged. Operating Instructions... -
Page 12: Operating The Hob
Operating Instructions Operating the hob When a cooking zone is switched on, it may hum briefly. This is a char- acteristic of all glass ceramic cooking zones and does not impair either the function or the life of the appliance. TOUCH CONTROL sensor field. -
Page 13: Switching Off The Appliance
Switching Off the Appliance To switch off the appliance completely activate the “On/Off” n sensor field. Touch the “On/Off” sensor field for approx. 1 second. When an individual cooking zone or the entire hob is switched off, any residual heat is shown with an h (for “Hot”) in the digital display for the appropriate cooking zones. -
Page 14: Heat Setting Selection + And
Operating Instructions Heat Setting Selection For setting and adjusting the heat setting (V to 9. ) for the selected cooking zone. Use sensor field + to increase the heat setting. Lower the heat setting with sensor field -. If several cooking zones are being used simultaneously, the required cooking zone must be selected by touching the appropriate sensor field before adjusting the heat setting. -
Page 15: Switching The Casserole Zone On And Off
Switching the Casserole Zone On and Off 1. Select the appropriate cooking zone. 2. Set the required heat setting. 3. To switch the casserole zone on or off place your finger flat on the “booster” touch control sensor field, until the control indicator comes on or goes off. -
Page 16: Switching The Triple Ring Cooking Zone On And Off
Operating Instructions Switching the Triple Ring Cooking Zone On and Off Depending on the size of the pot or pan, when using the triple ring cooking zone each of the larger cooking rings can be switched on in turn, in addition to the smallest cooking zone, using the “booster” sen- sor field on the control panel. - Page 17 3. Touch the “booster” sensor field. The middle ring is switched on. The control indicator under the symbol II is illuminated. 4. Touching the “booster” sensor field again activates the outer heating ring. The control indicator under symbol III is illuminated. 5.
-
Page 18: Stop+Go Function
Operating Instructions Stop+Go Function By touching the "Stop+Go" sensor field, all cooking zones in use can be switched simultaneously to the "keep warm“ setting. The "keep warm“ setting is indicated on the display by a If the "Stop+Go" sensor field is touched again, the previously selected settings are restored. -
Page 19: Switching Off A Cooking Zone
Switching off a cooking zone 1. Select the required cooking zone with the cooking zone sensor fields. 2. Touch sensor fields + and - simultaneously to switch off or turn sen- sor field - back to zero. A cooking zone may only be switched off when the decimal point is on in the cooking zone display. -
Page 20: Residual Heat Indicator
Operating Instructions Residual Heat Indicator When an individual cooking zone or the entire hob is switched off, any residual heat is shown with an h (for “Hot”) in the digital display for the appropriate cooking zones. Even after the cooking zone has been switched off, the residual heat indicator only goes out when the cooking zone is cold. -
Page 21: Cooking With The Automatic Warm Up Function
Operating Instructions Cooking with the automatic warm up function. All four of the hob's cooking zones can be controlled in nine stages and have an automatic warm up function: – !, lowest heat setting – ), highest heat setting – a, automatic warm up function When you select the required heat setting using the + sensor field, the cooking zone will work for a specific time on full power and then switch automatically to the selected heat setting. -
Page 22: Cooking Without The Automatic Warm Up Function
Operating Instructions If during the automatic warm up function you select a higher setting, eg. from # to %, the warm up time is adjusted to match. If you select a lower setting, the warm up time ends at once. If you start cooking again on a cooking zone that is still warm, the au- tomatic warm up function uses the residual heat. -
Page 23: Timer
Timer A cooking duration can be set with the integrated timer for all cooking zones. When the end of the cooking duration is reached, the cooking zone switches itself off automatically. 1. Using the cooking zone sensor field, select the required cooking zone and set the required heat setting. - Page 24 Operating Instructions To set the timer more quickly, leave your finger on the + or - sensor field until the required time is reached. If the - sensor field is operated first, the time setting will begin at 99 minutes; if the + sensor field is operated first, the time setting will begin at 1 minute.
-
Page 25: Uses, Tables And Tips
Uses, tables and tips Pans The better the pan, the better the results. • You can recognise good pans by their bases. The base should be as thick and flat as possible. • Pay particular attention when buying new pans to the diameter of the base. -
Page 26: Advice On Cooking With And Without Automatic Warm Up
Operating Instructions Advice on cooking with and without automatic warm up The automatic warm up function is suitable for: • dishes that start off cold, are heated up at high power and do not need to be continually watched when cooking on the selected heat setting, •... -
Page 27: Typical Heat Settings
Typical Heat Settings The information given in the following table is for guidance. The heat setting required for cooking depends on the quality of the pans and on the type and quantity of food. Automatic Warm Up Heat Setting Time (Min.) 1) When cooking without the automatic warm up function, the warm up time can be selected as required. -
Page 28: Cleaning And Care
Operating Instructions Cleaning and care Important: Cleaning agents must not come into contact with the hot ceramic glass surface! All cleaning agents must be removed with plenty of clean water after cleaning because they can have a caustic effect when the rings are next heated! Do not use any aggressive cleaners such as grill or oven sprays, coarse scourers or abrasive pan cleaners. -
Page 29: Problem Dirt
Problem Dirt 1. Remove burnt-on sugar, melted plas- tic, aluminium foil or other meltable materials with a glass scraperimme- diately and while still hot. Important: There is a risk of burning yourself when the glass scraper is used on a hot cooking zone! 2. -
Page 30: What To Do If
Operating Instructions What to do if ... Rectifying faults It is possible that faults have been caused by a minor error, which you can correct yourself with the help of the following instructions. Do not attempt any further repairs if the following instructions do not help in each specific case. - Page 31 Operating Instructions ... after switching off the cooking zones, neither j nor h for re- sidual heat appears in the display? Check whether – the cooking zone was only used for a short period and is therefore not hot enough. If the cooking zone is hot, call AEG customer service.
-
Page 32: Installation Instructions
Installation Instructions Installation Instructions Important! The new appliance may only be installed and connected by a registered specialist. Please observe this instruction, otherwise the warranty will not cover any damage that may occur. Technical Data Appliance Dimensions Width Depth Height Cut-Out Dimensions Width Depth... -
Page 33: Regulations, Standards, Directives
Regulations, Standards, Directives This appliance meets the following standards: • EN 60 335-1 and EN 60 335-2-6 relating to the safety of electrical appliances for household use and similar purposes and • EN 60350, or DIN 44546 / 44547 / 44548 relating to the operating features of electric cookers for household use. -
Page 34: Safety Instructions For The Installer
Installation Instructions Safety Instructions for the Installer • A device must be provided in the electrical installation which allows the appliance to be disconnected from the mains at all poles with a contact opening width of at least 3 mm Suitable isolation devices include line protecting cut-outs, fuses (screw type fuses are to be removed from the holder), earth leakage trips and contactors. -
Page 35: Electrical Connection
Electrical Connection Before connecting, check that the nominal voltage of the appliance, that is the voltage stated on the rating plate, corresponds to the avail- able supply voltage. The rating plate is located on the lower casing of the hob. The heating element voltage is AC230 V ~. - Page 36 Installation Instructions...
-
Page 37: Assembly
Assembly Assembly... - Page 38 Assembly...
- Page 39 Assembly Removal...
-
Page 40: Service & Spare Parts
Service & Spare parts Service & Spare parts & Spare parts If you wish to purchase spare parts or require an engineer, contact your local AEG Service Force Centre by telephoning: 08705 929 929 Your telephone call will be automatically routed to the Service Centre covering your post code area. - Page 41 Service & Spare parts Customer Care For general enquiries concerning your AEG appliance or for further in- formation on AEG products please contact our Customer Care Depart- ment by letter or telephone at the address below or visit our website at www.aeghome.co.uk.
-
Page 42: Warranty Conditions
– The guarantee is for the same period and to the same extent for labour and parts as exist in the new country of use for this brand or range of products. – This guarantee relates to you and connot be transferred to another user. - Page 44 AEG Hausgeräte GmbH Postfach 1036 D-90327 Nürnberg http://www.aeg.hausgeraete.de © Copyright by AEG 319 626 600-NO-120202-01 Subject to change without notice...