Cisco Linksys NMH410 User Manual
Nmh series media hub home entertainment storage
Hide thumbs
Also See for Linksys NMH410:
- User manual (81 pages) ,
- Quick installation manual (104 pages)
Table of Contents
Advertisement
Advertisement
Table of Contents

Related Manuals for Cisco Linksys NMH410


Summary of Contents for Cisco Linksys NMH410
- Page 1 Media Hub Home Entertainment Storage User Guide NMH Series...
-
Page 2: About This Guide
Network Security www.linksysbycisco.com/security Copyright and Trademarks Specifications are subject to change without notice. Linksys, Cisco, and the Cisco logo are registered trademarks or trademarks of Cisco Systems, Inc. and/ or its affiliates in the U.S. and certain other countries. Other brands are the trademarks or registered trademarks of their respective holders. -
Page 3: Table Of Contents
Table of Contents Chapter 1: Product Overview Front Panel of the Media Hub with LCD (NMH400 Series) ....1 Front Panel of the Media Hub (NMH300 Series) ......2 Back Panel . - Page 4 Model NMH405 - Media Hub with LCD ....... .48 Model NMH410 - Media Hub with LCD ....... .49 Appendix C: Warranty Information Limited Warranty .
-
Page 5: Chapter 1: Product Overview
Press the right arrow to move to a lower menu level. Press the left arrow to move to a higher Thank you for choosing the Linksys by Cisco Media Hub. menu level. One Serial-ATA (SATA) hard disk is pre-installed (except for the NMH300 model), and a second SATA hard drive bay is To select a menu choice, press the OK button. -
Page 6: Front Panel Of The Media Hub (Nmh300 Series)
Product Overview Product Overview Chapter 1 Chapter 1 Front Panel of the Media Hub (NMH300 Power Button and LED (Blue/Red) To power on the Media Hub, press the Power button. Series) To shut down the Media Hub, press and hold the button until the Power LED starts flashing (this may take more than three seconds). -
Page 7: Top Panel
Product Overview Chapter 1 Install a Second Hard Disk Security Slot The security slot is where you can attach a lock to protect the Media Hub from theft. NOTE: If you plan to install a second disk The USB port connects to a USB storage and mirror (RAID 1) these disks, then match device. - Page 8 Product Overview Chapter 1 To replace a hard disk, follow these instructions: 10. Push down on the hard disk to make sure the connectors are securely seated. 1. To shut down the Media Hub, press and hold the Power button until the Power LED starts flashing. If this step does not shut down the Media Hub, then proceed to step 2.
-
Page 9: Chapter 2: Getting Started
Double-click the system tray icon to access the Media Importer. Importer System Tray Icon (Active) Importer System Tray Icon (Closed) If you do not see the icon, go to Start > All Programs > Cisco Media Hub > Linksys Media Importer > Linksys Media Importer. Media Hub... -
Page 10: Nti Shadow
Shadow will not be available. To install NTI Shadow, run the Setup Wizard on the enclosed CD-ROM and click Connect Computers. Access Go to Start > All Programs > Cisco Media Hub > NTI Shadow. After you have accessed NTI Shadow for the first time, the Manage Media Importer system tray icon appears. -
Page 11: Drag-And-Drop
Getting Started Chapter 2 Main Menu NOTE: For more information about NTI Shadow, click Help. The main menu appears. Drag-and-Drop Use Windows Explorer and the Drag-and-Drop feature to manually copy files to the Media Hub. Drop or paste music to the music folder, photos to the photos folder, and videos to the videos folder. - Page 12 Getting Started Chapter 2 1. To open Windows Explorer, go to Start > Programs > Accessories > Windows Explorer. (You can also right-click Start and click Explore.) 2. Right-click My Computer (Windows XP) or Computer (Windows Vista). 3. Select Map Network Drive. 4.
- Page 13 Getting Started Chapter 2 If you accessed the Media Hub through its Friendly Name or IP address, the name of the USB storage device is displayed. Double-click the name to access its files. Data Imported from USB Storage Device Backup Folder The backup folder stores the data backed up from USB USB Storage Device Accessed Through Friendly Name storage devices.
- Page 14 Getting Started Chapter 2 Instructions to Copy Media Files to the Media Hub NOTE: Additional information about Windows Explorer is available in Windows Help. Follow these guidelines: Copy files of a single file type together at one time. • For example, copy music files at one time; do not copy WEB: For more information about the Media music, photo, and video files at the same time.
-
Page 15: Chapter 3: Ways To Use The Media Hub
Ways to Use the Media Hub Chapter 3 Chapter 3: Ways to Use the Local Access Media Hub Media files are typically stored on different computers and other network devices throughout the house. You can copy all of the media files to the Media Hub, so your media Overview content is stored in one location for convenient access. -
Page 16: Digital Media Sharing
Ways to Use the Media Hub Chapter 3 Digital Media Sharing For example, if you have a digital media adapter that sends content to your entertainment system, then the The Media Hub automatically indexes the digital media digital media adapter can locate the Media Hub using the files it stores, so you can use a web browser to access them UPnP AV standard. -
Page 17: On-Demand Backups
Ways to Use the Media Hub Chapter 3 Download Videos Remotely 5. On the Media Browser screen, click File Browser. Then click the Upload to Media Hub option You want to share videos from your recent trip, but they Now you can upload the photos to your Media Hub. are stored on your Media Hub. - Page 18 Ways to Use the Media Hub Chapter 3 Default Backup Job The Setup Wizard creates a default backup job that backs up specific files in the My Documents folder. These files use the following file formats and extensions: .doc, .xls, .pdf, .ppt, .adb, .rtf, .xml, .htm, .html, .txt, and .pst.
-
Page 19: Chapter 4: Use Of The Media Browser
Use of the Media Browser Chapter 4 Chapter 4: Use of the 3. If you do not have Adobe Flash Player (version 9 or higher) installed, you will be prompted to install it. Media Browser Follow the on-screen instructions. (An active Internet connection is required.) The Media Browser screen of the web-based utility appears. - Page 20 Use of the Media Browser Chapter 4 NOTE: The Media Hub’s built-in viewer only supports the jpeg format. Other files will open in the default viewer for the files’ specific file Media Browser > Configuration, Re-Scan, Search, ? (link to User Guide) extension(s).
- Page 21 Use of the Media Browser Chapter 4 Double-click the USB icon to access status information or import media files. A new screen appears. Refer to Devices, page 20. Devices For the selected device, the amounts of used, available, and total storage space are displayed. Search Results Use Search Results Search results for...
-
Page 22: Music
Use of the Media Browser Chapter 4 Music Shuffle Playlist To shuffle the songs on the playlist, • click the Shuffle Playlist button. After you click the Music option, the Music screen appears. • Clear Playlist To clear the playlist of all songs, click View your music files by category: the Clear Playlist button. - Page 23 Use of the Media Browser Chapter 4 Genre The genre of the song is displayed. For more information about an album, double-click its thumbnail or name (list view). Music > Artist (Thumbnail View) Thumbnail View Each artist displays an album thumbnail and artist name. Music >...
-
Page 24: Photos
Use of the Media Browser Chapter 4 List View Play To play the music using the Media Hub’s built-in player, click the Play button. The songs are listed in a table with the following options Add to Playlist To add a song to the playlist, click the and information: Add to Playlist button. - Page 25 Use of the Media Browser Chapter 4 Mouse over a photo to display a larger thumbnail, or click a photo to display it within your web browser. Photos > Album (Thumbnail View) Thumbnail View Photos > Slideshow Each album displays its name and date. Options are listed at the top of the screen and are Play To begin a slideshow, click the Play button.
-
Page 26: Videos
Use of the Media Browser Chapter 4 Photo The name of the photo is displayed. Photo-Album The name of the album is displayed. Size The size of the file is displayed. Dimension The dimensions in width by height (in pixels) are displayed. - Page 27 Use of the Media Browser Chapter 4 Name The alphabet is displayed at the top of the screen. Click the letter that starts the name of the video you want. Videos > Recent (Thumbnail View) When you are viewing any video category, select the video file you want.
-
Page 28: File Browser
Use of the Media Browser Chapter 4 File Browser Recent The files with the most recent file dates are displayed. Use the File Browser option to access the Media Hub’s folder directory and manage your media files. NOTE: With the File Browser, you have access to the Media Hub only. - Page 29 Use of the Media Browser Chapter 4 Delete File Select a file, and then click this option. On the New Folder Click this option to create a new folder. On Delete screen, click Yes to delete the file. the New Folder screen, enter the name, and then click Submit.
- Page 30 Use of the Media Browser Chapter 4 Upload to Media Hub Click this option to upload files to the Media Hub. The Upload Files screen appears. • Browse Click this option to select files. • Remove To remove a file from the upload list, select the file, and then click this option.
-
Page 31: Chapter 5: Use Of The Lcd Menu
Use of the LCD Menu Chapter 5 Chapter 5: Use of the While the Media Hub is booting up, press the OK • button to boot backup firmware from the hard drive. LCD Menu • To display the main menu, press the OK button. How to Access the LCD Menu This chapter describes functions of the LCD menu, which is only featured on the Media Hub with LCD (NMH400... -
Page 32: Status
Use of the LCD Menu Chapter 5 PC Backup Select this option to initiate backup jobs specified by the backup software on your computer. (Your computer must be powered on for the jobs to run.) NOTE: The PC Backup option only supports Windows computers installed with the backup software. -
Page 33: Settings
Use of the LCD Menu Chapter 5 Usage Select this option to view the percentages of the Screensaver Select this option to configure the wait time Media Hub used by Music, Photos, Videos, and Other before the screensaver activates. media. Screensaver Usage Never... -
Page 34: Power Off
Use of the LCD Menu Chapter 5 Firmware Select this option to view the version numbers of the current and latest firmware. You can also upgrade the firmware of the Media Hub. New Device Alert On the Alert screen, click Yes to copy media files of the new device to the Media Hub, or click No to cancel. -
Page 35: Chapter 5: File Backup
NTI Shadow NTI Shadow Main Menu Access Create Backup Job Go to Start > All Programs > Cisco Media Hub > NTI Create Backup Job Click this option to create a backup Shadow. job. Follow the instructions in the section, Create Backup Job, page 34. - Page 36 File Backup Chapter 6 2. Click Browse to select the Media Hub. Save your folder/file changes every Select this • option to start a backup job according to the schedule you specify. Select On Demand if you want to start the backup job using the Backup feature on the Media Hub (refer to On-Demand Backup, page 37 for more information).
-
Page 37: Backup Jobs
File Backup Chapter 6 Modify Backup Job 6. Review the settings. To change the settings, click Back. Backup jobs are listed in this section. If the settings are correct, click Finish to save the backup job. Default Backup Job The Setup Wizard creates a default backup job that backs up specific files in the Documents folder. - Page 38 File Backup Chapter 6 On-Demand Backup There are two ways to initiate a backup job using the Media Hub: back up button • web-based utility • You can also use the backup software to initiate a backup job. NOTE: When you set up the options of your backup job through the backup software, make sure the “On Demand”...
-
Page 39: Chapter 6: Advanced Configuration
Advanced Configuration Chapter 7 Chapter 6: NOTE: To access the Media Browser from a Mac, use one of the following: Advanced Configuration • http://<Device_Name>.local • <Device_Name>.local NOTE: When first installing the Media Hub, • http://<IP_address_of_Media_Hub> you should use the Setup Wizard on the Setup CD-ROM. -
Page 40: Overview
Advanced Configuration Chapter 7 System 5. The password screen appears. Enter the password you created during the Setup Wizard (the default is The name and local IP address of the Media Hub are admin). Click Submit. displayed. Configure System Click this option to access system settings. - Page 41 Advanced Configuration Chapter 7 Firmware Version The version number of the firmware NOTE: If you change the IP address, you may is displayed. have to re-assign the drive letter to the Media Hub. Run the Setup Wizard on the enclosed Media Browser Software Version The version number CD-ROM (click Connect Computers), or refer to...
- Page 42 Advanced Configuration Chapter 7 Update Firmware The Media Hub will search for the latest version. Click Update to begin the firmware update, or click Cancel to cancel the update. Change System Date Current Media Hub Date • The current date and time WARNING: Do not reboot or power off the are displayed.
-
Page 43: Disk
Advanced Configuration Chapter 7 Disk Disk Usage by Space The amounts of used, available, and total disk space are Access the disk usage information and disk configuration displayed. settings, which will vary depending on the number of disks installed. Current Disk Configuration Disk 1/Disk 2 (if installed) Vendor The manufacturer of the hard disk is displayed. - Page 44 Advanced Configuration Chapter 7 ? Increase Space (available only for two installed disks) Depending on disk size, disk synchronization • To maximize storage space, click this option, also known may take from several minutes to several hours. as Linear 2 mode. Total capacity is equal to the capacity of Synchronization progress can be viewed from the Disk the two hard disks.
-
Page 45: Backup
Advanced Configuration Chapter 7 Backup Remote Access Configure this feature to enable access of the Media Hub The Setup Wizard automatically installs a backup tool on over the Internet. The status of the remote access feature your computer to run backup jobs (unless you choose not and the Remote Device Name (if configured) are displayed. - Page 46 Advanced Configuration Chapter 7 Video Playback over Remote Access 3. Enter the Remote Device Name of the Media Hub, and then click Go. Follow these guidelines: NOTE: Depending on the web browser you Make sure the computer you are using has the proper •...
- Page 47 Advanced Configuration Chapter 7 Find Shared Media on My Local Network To find • shared media files on your local network, select this option. The Media Hub scans its local content and any media content stored in UPnP AV-compatible servers connected to the local network. Indexing of media files on your computers is possible with Windows Media Player (WMP);...
-
Page 48: Appendix A: Troubleshooting
Troubleshooting Appendix A Appendix A: 1. Access the web-based utility of the Media Hub. (Refer to Chapter 6: Advanced Configuration, page 35.) Troubleshooting 2. On the Media Browser screen, click Configuration. 3. Click Configure System. 4. For the Media Hub Name and Workgroup settings, click The power LED of the Media Hub continuously flashes Change, and then follow the on-screen instructions. - Page 49 Troubleshooting Appendix A For remote access to the Media Hub, you entered its 2. Click Add Exception. Remote Device Name at the Linksys-supported website, http://www.ciscomediahub.com, and a certificate or security warning screen appears. Depending on the web browser you are using, certificate or security warning screens may appear.
- Page 50 Troubleshooting Appendix A 2. Click OK. 12. Click the Disk tab. 13. Click Revert to Single Disk Mode. Please wait until the Media Hub automatically reboots. Then the Media Hub will be ready for use. WARNING: When a hard disk fails in Increase Protection: Linear 2 mode, not all data may be recovered.
- Page 51 Troubleshooting Appendix A 6. To install the replacement hard disk, make sure 5. Right-click the hard disk you want to remove. Then the screw holes of the hard disk line up with click Delete Partition. the screw holes of the drive bay. For additional information, refer to Windows Help, and search for this phrase, “Delete Partition”.
-
Page 52: Appendix B: Specifications
Specifications Appendix B Appendix B: Security Features Password for System Administration and Specifications Remote Access Hard Disk Included One 500 GB SATA Environmental Model NMH300 - Media Hub Dimensions 7.80" x 4.37" x 6.61" Standards IEEE 802.3, IEEE 802.3u, (198 x 111 x 168 mm) IEEE 802.3ab Weight 4.50 lb (2.04 kg) -
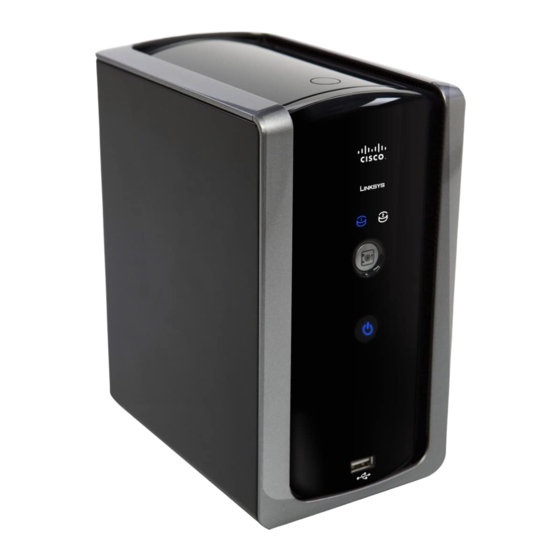
Page 53: Model Nmh410 - Media Hub With Lcd
Specifications Appendix B Operating Humidity 10 to 90%, Noncondensing Storage Humidity 5 to 95%, Noncondensing Model NMH410 - Media Hub with LCD Standards IEEE 802.3, IEEE 802.3u, IEEE 802.3ab Ports One Power, One Gigabit Ethernet (10/100/1000), Two USB 2.0 Memory Cards Supported CompactFlash, Memory Stick®, Memory Stick Pro®,... -
Page 54: Appendix C: Warranty Information
Warranty Information Appendix C Appendix C: not warrant that the operation of the product or software will be uninterrupted or error free. Also, due to the Warranty Information continual development of new techniques for intruding upon and attacking networks, Linksys does not warrant that the product, software or any equipment, system or Limited Warranty network on which the product or software is used will be... - Page 55 Warranty Information Appendix C DATED PROOF OF ORIGINAL PURCHASE IS REQUIRED TO PROCESS WARRANTY CLAIMS. If you are requested to return your product, you will be given a Return Materials Authorization (RMA) number. You are responsible for properly packaging and shipping your product to Linksys at your cost and risk.
-
Page 56: Appendix D: Regulatory Information
Regulatory Information Appendix D Appendix D: WARNING: Primary Lithium Coin Battery - California USE Only Regulatory Information This Perchlorate warning applies only to primary CR (Manganese Dioxide) Lithium coin cells sold or FCC Statement distributed ONLY in California, USA “Perchlorate Material-special handling may apply. See This device complies with Part 15 of the FCC Rules. -
Page 57: User Information For Consumer Products Covered By Eu Directive 2002/96/Ec On Waste Electric And Electronic Equipment (Weee)
Regulatory Information Appendix D User Information for Consumer Products Čeština (Czech) - Informace o ochraně životního prostředí pro zákazníky v zemích Evropské unie Covered by EU Directive 2002/96/EC on Evropská směrnice 2002/96/ES zakazuje, aby zařízení označené Waste Electric and Electronic Equipment tímto symbolem na produktu anebo na obalu bylo likvidováno s netříděným komunálním odpadem. - Page 58 Regulatory Information Appendix D Eesti (Estonian) - Keskkonnaalane informatsioon Français (French) - Informations environnementales Euroopa Liidus asuvatele klientidele pour les clients de l’Union européenne Euroopa Liidu direktiivi 2002/96/EÜ nõuete kohaselt on La directive européenne 2002/96/CE exige que l’équipement seadmeid, millel on tootel või pakendil käesolev sümbol sur lequel est apposé...
- Page 59 Regulatory Information Appendix D Lietuvškai (Lithuanian) - Aplinkosaugos informacija, Nederlands (Dutch) - Milieu-informatie voor klanten skirta Europos Sąjungos vartotojams in de Europese Unie Europos direktyva 2002/96/EC numato, kad įrangos, kuri ir De Europese Richtlijn 2002/96/EC schrijft voor dat apparatuur die kurios pakuotė...
- Page 60 Regulatory Information Appendix D Português (Portuguese) - Informação ambiental para Slovenščina (Slovene) - Okoljske informacije za stranke clientes da União Europeia v Evropski uniji A Directiva Europeia 2002/96/CE exige que o equipamento Evropska direktiva 2002/96/ES prepoveduje odlaganje opreme s que exibe este símbolo no produto e/ou na sua embalagem tem simbolom –...
-
Page 61: Appendix E: Software End User License Agreement
If you would like a copy of the GPL or certain to a person or entity to which you transfer ownership of other open source code in this Software on a CD, Cisco will the complete Cisco product containing the Software or mail to you a CD with such code for $9.99 plus the cost of... - Page 62 You permitted by law notwithstanding this provision); (iii) agree that Cisco is not responsible or liable for any loss share, sell, rent, lease, or sublicense the Software or or damage of any sort incurred as the result of any such related Documentation;...
- Page 63 Cisco product and/or Software indicates your acceptance ALL FAULTS AND WITHOUT WARRANTY OF ANY KIND. of the terms of the Cisco Privacy Policy, so please review Without limiting the foregoing, Cisco does not warrant the policy carefully and check the Web site above to that the operation of the product, software or services will review updates to it.
- Page 64 Disclaimer of Liabilities. TO THE EXTENT NOT PROHIBITED supersedes any conflicting or additional terms contained BY APPLICABLE LAW, IN NO EVENT WILL CISCO BE LIABLE in any purchase order or elsewhere. FOR ANY LOST DATA, REVENUE OR PROFIT, OR FOR SPECIAL,...
- Page 65 If this Cisco product contains open source software any problems introduced by others will not reflect on the licensed under Version 2 of the “GNU General Public...
- Page 66 Software End User License Agreement Appendix E 1. You may copy and distribute verbatim copies of the distribution of derivative or collective works based on Program’s source code as you receive it, in any medium, the Program. provided that you conspicuously and appropriately In addition, mere aggregation of another work not publish on each copy an appropriate copyright notice based on the Program with the Program (or with a...
- Page 67 Software End User License Agreement Appendix E 4. You may not copy, modify, sublicense, or distribute on consistent application of that system; it is up to the Program except as expressly provided under the author/donor to decide if he or she is willing to this License.
- Page 68 If this Cisco product contains open source software licensed with the library after making changes to the library and under Version 2.1 of the “GNU Lesser General Public recompiling it.
- Page 69 Software End User License Agreement Appendix E Public License permits more lax criteria for linking other either verbatim or with modifications and/or translated code with the library. straightforwardly into another language. (Hereinafter, translation is included without limitation in the term We call this license the “Lesser”...
- Page 70 Software End User License Agreement Appendix E (For example, a function in a library to compute square If distribution of object code is made by offering roots has a purpose that is entirely well-defined access to copy from a designated place, then offering independent of the application.
- Page 71 Software End User License Agreement Appendix E a) Accompany work with complete 7. You may place library facilities that are a work based corresponding machine-readable source code on the Library side-by-side in a single library together for the Library including whatever changes were with other library facilities not covered by this License, used in the work (which must be distributed and distribute such a combined library, provided that...
- Page 72 Software End User License Agreement Appendix E 11. If, as a consequence of a court judgment or allegation license version number, you may choose any version of patent infringement or for any other reason (not ever published by the Free Software Foundation. limited to patent issues), conditions are imposed on 14.
- Page 73 (tjh@cryptsoft.com). BUT NOT LIMITED TO, PROCUREMENT OF SUBSTITUTE GOODS OR SERVICES; LOSS OF USE, DATA, OR PROFITS; In addition, if this Cisco product contains open source OR BUSINESS INTERRUPTION) HOWEVER CAUSED AND software licensed under the OpenSSL license then the...
- Page 74 Software End User License Agreement Appendix E 2. Redistributions in binary form must reproduce the above copyright notice, this list of conditions and the following disclaimer in the documentation and/or other materials provided with the distribution. 3. All advertising materials mentioning features or use of this software must display the following acknowledgement: “This product includes cryptographic software written...