Table of Contents
Advertisement
Quick Links
Advertisement
Table of Contents

Related Manuals for ViewSonic NMP-500


Summary of Contents for ViewSonic NMP-500
- Page 2 Systems, Inc. and/or its affiliates in the U.S. and other countries. Corporate names and trademarks are the property of their respective companies. Disclaimer: ViewSonic Corporation shall not be liable for technical or editorial errors or omissions contained herein; nor for incidental or consequential damages resulting from furnishing this material, or the performance or use of this product.
-
Page 3: Table Of Contents
SETUP Connect NMP-500 to PC ......6 Manually Configure your PC ..... . 6 Login . - Page 4 Specifications ....... . 36 Limited Warranty ......37 ViewSonic NMP-500...
-
Page 5: Introduction
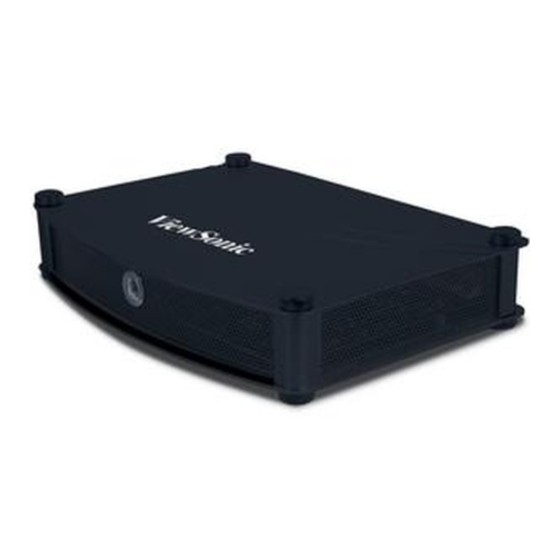
INTRODUCTION ® Thank you for buying the ViewSonic Network Media Player. This section introduces you to the NMP-500. ACKAGED ONTENTS Please check that all the following items are in the package: S-Video/YPbPr Adapter DVI-VGA Adapter AC Power Adapter NMP-500 Quick Start Guide... -
Page 6: Requirements
EQUIREMENTS The NMP-500 requires the following: YSTEM EQUIREMENTS System requirements include a display, a network environment, and a PC with network capability. PC R EQUIREMENTS ® • Operating System: Any Windows or Linux OS capable of running a web server ®... -
Page 7: Features
• Display content in landscape or portrait mode ODES OF OMMUNICATION There are two modes of communication with the NMP-500: an HTTP web interface and a Telnet advanced command line interface. This document focuses on the web interface only. Web-based interface is executed using the HTTP protocol. -
Page 8: Two Modes Of Operation
ODES OF PERATION TANDALONE This setup allows the NMP-500 to act as an independent network device used to control a Plasma Display Panel (PDP) or a Liquid Crystal Display (LCD) for digital signage or narrowcasting applications. DVI-VGA Adapter Ethernet cable... -
Page 9: Front View
RONT Blue LED: Power Green LED: Activity VIDEO OUT AUDIO OUT DVI/VGA Power-5V DC S-VIDEO/YPbPr Ethernet 10/100 CVBS OPTICAL RIGHT S/PDIF LEFT EMOTE ONTROL POWER button On/Standby ViewSonic NMP-500 5 of 38... -
Page 10: Setup
SHOWN IN THE FOLLOWING STEPS BEFORE CONNECTING TO THE NETWORK! 1. C NMP-500 ONNECT Use an Ethernet cable to connect the NMP-500. Use the AC power adapter included to connect the NMP-500 to an AC power source like a wall outlet. Ethernet cable NMP-500 Server... -
Page 11: Login
OS user guide or your Network Administrator. 4. C NMP-500 ONNECT THE TO A ISPLAY Connect the NMP-500 to a display such as a Plasma Display Panel (PDP) or a Liquid Crystal Display (LCD). Network NMP-500 Display ViewSonic NMP-500... - Page 12 NMP-500 and the display are set to the same video output settings: i.e., S-Video to S-Video, or VGA to VGA, etc. To change the output setting, login to the NMP-500 (Step 3) and select Management > Video/Audio for the screen shown below. For more information, see the Video/Audio Configuration section later in this guide.
-
Page 13: Put Batteries In Remote Control
Remove the back cover from the remote control as shown below. Put two AA batteries in the battery compartment. Be sure to match the positive end of the battery with the positive end in the compartment. Put the cover back on the remote control. ViewSonic NMP-500 9 of 38... -
Page 14: Management
The Network Configuration screen allows you to select the video that appears on-screen when you boot up the NMP-500. To go to the Network Configuration screen after logging into the NMP-500, select Management > Startup. The Startup URLs screen and the Network Configuration screen appears as shown below. -
Page 15: Browser Configuration
In the Screen rotation angle (clockwise) field, select one from the pull-down menu for the angle of rotation of the HTML content displayed on-screen. This feature is useful when the NMP-500 is installed vertically. In the Browser Proxy field, select Enabled or Disabled from the pull-down menu. - Page 16 10 If any changes were made to this screen, do the following: • To enable the changes, click Apply • To save the changes, click the Administration menu > click Save Configuration > click Save. ViewSonic NMP-500 12 of 38...
-
Page 17: Vnc Client
VNC full screen mode lets you set the client to start up as full screen all the time. VNC auto restart mode reconnects the client in the event of network interruption. Delay before restart VNC sets the time between reconnects. ViewSonic NMP-500 13 of 38... -
Page 18: Video/Audio Configuration
Move the Audio Channel Volume (right) slider: values range between 0 and 100 If any changes were made to this screen, do the following: • To enable the changes, click Apply • To save the changes, click the Administration menu > click Save Configuration > click Save. ViewSonic NMP-500 14 of 38... -
Page 19: Tas Configuration
If any changes were made to this screen, do the following: • To enable the changes, click Apply • To save the changes, click the Administration menu > click Save Configuration > click Save. NOTE: FTP server is only for Network Displays with local storage. ViewSonic NMP-500 15 of 38... -
Page 20: System Services Configuration
Network, Browser, Video/Audio, TAS, and System Services. Click Management > System services. The screen shown below appears. In the Network Media Player (port 6666) field, select Yes to access the NMP-500 using a Telnet client on port 6666. If you do not want this, select No. -
Page 21: Actions
In the Port field, type the Port number used to receive the multicast. To tell the system to listen to the UDP multicast stream from the IP on the Port that you entered, click Start. ViewSonic NMP-500 17 of 38... -
Page 22: Video Http
In the URL field, type the URL that corresponds to the HTTP stream that you want to appear on the display (for example: http:192.168.12.x/movie.mpg, or, http://<server-ip>/file.mpg). To tell the system to listen to the HTTP stream from the entered URL, click Start. ViewSonic NMP-500 18 of 38... -
Page 23: Playlist
A Playlist is a text file that can be created in any text editor with an extension of .txt. A Playlist is necessary when you want the NMP-500 to play specific content, in a specific order, usually looped. A Playlist can be created for the http streams. Example of a looped Playlist: loop http http://192.168.12.x/movie1.mpg... -
Page 24: Vnc Client
In the Password field, type the password of the VNC server whose IP is entered above. IMPORTANT! The password must be at least six (6) characters (can be alpha-numeric). To display the remote desktop click Start. ViewSonic NMP-500 20 of 38... -
Page 25: Transparency
0 = no OSD, 255 = no video, 128 = equal transparency between video and OSD layers. OSD very transparent OSD not transparent To apply the entered transparency value to the image on the NMP-500, click Apply. ViewSonic NMP-500 21 of 38... -
Page 26: Go To Url
To go to a web page on the browser, click Actions > Go to URL. The screen shown below appears. In the URL field, type the desired URL. To redirect the browser to the URL that you entered, click Go. The web page appears on your display. ViewSonic NMP-500 22 of 38... -
Page 27: Administration
In the Height of destination window, type the height of the destination window. If any changes were made to this screen, do the following: • To enable the changes, click Apply • To save the changes, click the Administration menu > click Save Configuration > click Save. ViewSonic NMP-500 23 of 38... -
Page 28: Security
ECURITY To change the User name and Password of the NMP-500, click Administration > Security. Current settings automatically appear in each field as shown below: default User name/ Password is admin/admin. In the Password field, type a new password. In the Repeat Password field, re-type the new password. -
Page 29: Save Configuration
To save your settings on the NMP-500, click Administration > Save Configuration. The screen shown below appears. Click Save. EFAULT ETTINGS To restore the NMP-500 back to factory settings, click Administration > Default Settings. The screen shown below appears. Click Restore. User-defined settings will be lost. ViewSonic NMP-500 25 of 38... -
Page 30: Reboot
To reboot the NMP-500, click Administration > Reboot. The screen shown below appears. Click Reboot. The NMP-500 reboots. IRMWARE PGRADE To upgrade the firmware on the NMP-500, click Administration > Firmware. The screen shown below appears. Click Browse to open the firmware file > click Start upgrade. ViewSonic NMP-500 26 of 38... -
Page 31: Help
HELP TATUS Status refers to the log where you can track activity on a specific NMP-500. To show the Status log, click Help > Status. The screen shown below is for information only (no inputs). ViewSonic NMP-500 27 of 38... -
Page 32: License
ICENSE To activate the license on the NMP-500, click Help > License. The License Key may appear automatically in the screen shown below (read-only). BOUT To show the current version of the product, click Help > About. The screen shown below appears (information only). -
Page 33: Appendix
The antenna(s) used for this transmitter must not be co-located or operating in conjunction with any other antenna or transmitter. Mercury warning This product contains mercury. Dispose of in accordance to local, state and federal laws. ViewSonic NMP-500 29 of 38... - Page 34 Concentration Lead (Pb) 0.1% < 0.1% Mercury (Hg) 0.1% < 0.1% Cadmium (Cd) 0.01% < 0.01% Hexavalent Chromium (Cr 0.1% < 0.1% Polybrominated biphenyls (PBB) 0.1% < 0.1% Polybrominated diphenyl ethers (PBDE) 0.1% < 0.1% ViewSonic NMP-500 30 of 38...
- Page 35 Power supply safety notice The power supply provided with this device is for use with this device only. Replace only with the same or equivalent type power supply as recommended by the manufacturer. ViewSonic NMP-500 31 of 38...
-
Page 36: Screens
CREENS ANAGEMENT ViewSonic NMP-500 32 of 38... - Page 37 CTIONS DMINISTRATION ViewSonic NMP-500 33 of 38...
- Page 38 ViewSonic NMP-500 34 of 38...
-
Page 39: Customer Support
USTOMER UPPORT For the nearest ViewSonic service provider, see the table below or contact your reseller. You will ® need the product’s serial number on-hand when you call. Country/Region Website T = Telephone (for email address also) F = FAX United States viewsonic.com... -
Page 40: Specifications
7" (W) x 5.1" (H) x 1.6 " (D); 178 mm (W) x 130 mm (H) x 25 mm (D) Regulatory approvals FCC-15B, IC-ES003B, UL/c-UL, CB X indicates supported resolution. Specifications are subject to change without notice. Corporate names and trademarks stated herein are the property of their respective companies. ViewSonic NMP-500 36 of 38... -
Page 41: Limited Warranty
“Warranty Period”, as indicated below. If a product proves to be defective in material or workmanship during the Warranty Period, ViewSonic will, at its sole option, repair or replace the product with a similar product. - Page 42 11. ViewSonic will not be responsible for any damage to, loss of, or consequential loss from the inability to use, any programs, data or other information stored on any media or any part of any Product serviced hereunder.