Casio TE-2000 User Manual
Cash register user manual
Hide thumbs
Also See for TE-2000:
- Service manual (58 pages) ,
- Operation manual (16 pages) ,
- Service manual (3 pages)
Table of Contents
Advertisement
Quick Links
Advertisement
Table of Contents

Related Manuals for Casio TE-2000


Summary of Contents for Casio TE-2000
- Page 1 ELECTRONIC CASH REGISTER TE - 2000 USER'S MANUAL U.K.
-
Page 2: Safety Precautions
Safety Precautions To use this product safely and correctly, read this manual thoroughly and operate as instructed. After reading this guide, keep it close at hand for easy reference. Please keep all informations for future reference. Always observe the warnings and cautions indicated on the product. About the icons In this guide various icons are used to highlight safe operation of this product and to prevent injury to the operator and other personnel and also to prevent damage to property and this... - Page 3 Never try to take the register apart or modify it in any way. High-voltage components inside the register create the danger of fire and electric shock. • Contact CASIO service representative for all repair and maintenance. Power plug and AC outlet Use only a proper AC electric outlet (100V~240V) .
-
Page 4: Table Of Contents
Introduction & Contents ... 4 Getting Started ... 7 Remove the cash register from its box..7 Remove the tape holding parts of the cash register in place..7 Install the three memory backup batteries..7 Install receipt/journal paper..9 Plug the cash register into a wall outlet. - Page 5 Calculator functions ... 67 About the daylight saving time ... 68 Printing read/reset reports ... 69 Reading the cash register's program... 75 Troubleshooting ... 78 When an error occurs ... 78 When the register does not operate at all ... 79 In case of power failure ...
-
Page 6: Unpacking The Register
Congratulations upon your selection of a CASIO Electronic Cash Register, which is designed to provide years of reliable operation. Operation of a CASIO cash register is simple enough to be mastered without special training. Everything you need to know is included in this manual, so keep it on hand for reference. -
Page 7: Getting Started
Getting Started This section outlines how to unpack the cash register and get it ready to operate. You should read this part of the manual even if you have used a cash register before. The following is the basic set up procedure, along with page references where you should look for more details. - Page 8 • Never leave dead batteries in the battery compartment. • Remove the batteries if you do not plan to use the cash register for long periods. • Replace the batteries at least once a year, no matter how much the cash register is used during the period.
-
Page 9: Install Receipt/Journal Paper
Install receipt/journal paper. Important! Take away the head protection sheet from the printer and close the platen arm. Caution! (in handling the thermal paper) • Never touch the printer head and the platen. • Unpack the thermal paper just before your use. •... -
Page 10: Install Journal Paper
Getting Started To install journal paper Step 1 Remove the printer cover. Step 2 Open the platen arm. Step 3 Ensuring the paper is being fed from the bottom of the roll, lower the roll into the space behind the printer. Step 4 Put the leading end of the paper over the printer. -
Page 11: Plug The Cash Register Into A Wall Outlet
The display should change to the following. Plug the cash register into a wall outlet. Be sure to check the sticker (rating plate) on the side of the cash register to make sure that its voltage matches that of the power supply in your area. C-A32... -
Page 12: Set The Date
Getting Started Set the date. Mode Switch Set the time. Mode Switch :: :: :: 61s 6 Year Month Current date Example: 15, March 2002 2 020315 : : : : 6 1s 6 Current time Example: 08:20 AM 2 0820 09:45 PM 2 2145... -
Page 13: Tax Table Programming
This cash register is capable of automatically calculating up to four different sales taxes. The sales tax calculations are based on rates, so you must tell the cash register the rates, the type of tax (add-in or add- on), and the type of rounding to apply. Note that special rounding methods (page 15) are also available to meet certain local tax requirements. - Page 14 Getting Started Tax table programming (continued…) Programming tax calculations (with special rounding) Prepare the following subjects: 1. Tax rates 2. Rounding method for tax calculation (Round up/Round off/Cut off) 3. Tax calculation system (No/Add-on/Add-in) 4. Rounding system (Special rounding 1/Special rounding 2/Special rounding 3/Danish rounding /Australian rounding) :only effective for Tax Table 1 Programming procedure Assign tax table 1.
- Page 15 When you press the key, the unrounded subtotal is printed and shown on the display. If the cash register is also set up to apply an add-on tax rate, the add-on tax amount is also included in the subtotal that is printed and displayed.
- Page 16 Getting Started For Australia only You can set some programmable options to suit the Australian GST by the following procedure. Mode Switch 6 01012001s 6 6 a After completion of this procedure, the “GST system was changed” message was printed on receipt and; 1 Tax symbol (*) is printed.
-
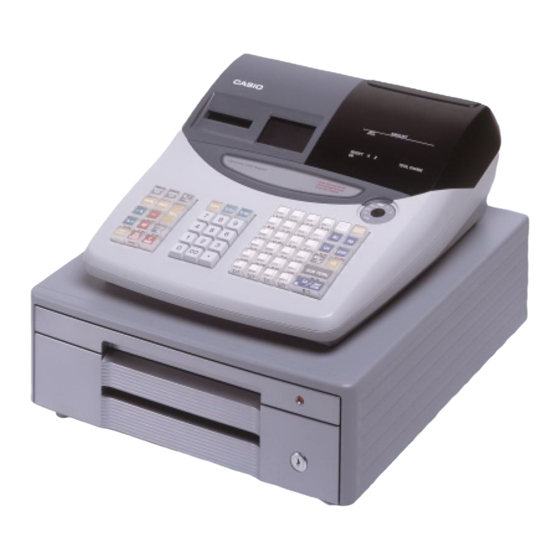
Page 17: Introducing Te-2000
Introducing TE-2000 General guide This part of the manual introduces you to the cash register and provides a general explanation of its various parts. display drawer keyboard pop-up display printer cover take-up reel main operator customer Take-up reel Roll paper... -
Page 18: Mode Switch
Introducing TE-2000 Mode switch Use the mode keys to change the position of the mode switch and select the mode you want to use. Lock/unlock the multipurpose tray Lock (Red) When the cash drawer does not open! In case of power failure or the machine is in malfunction, the cash drawer does not open automatically. -
Page 19: Displays
Displays Main Display (alphanumeric + numeric display) Item registration (by department/PLU) AMOUNT RECEIPT Repeat registration AMOUNT "50 RECEIPT Totalize operation AMOUNT 1"34 RECEIPT 1 Amount/Quantity This part of the display shows monetary amounts. It also can be used to show the current time. (The current date is shown in the alphanumeric display.) 2 Item/Key descriptor... -
Page 20: Keyboard
Introducing TE-2000 Keyboard RECEIPT JOURNAL FEED FEED OPEN PRICE % – — DATE TIME POST ERR.CORR RECEIPT CANCEL C/AC • Register Mode 1 Paper feed key Hold this key down to feed paper from the printer. 2 Non-add/No sale key Non-add key: To print reference number (to identify a personal check, credit card, etc.) during a transaction, use... -
Page 21: Calculator Mode
H VAT key Use this key to print a VAT breakdown. I Receipt on/off key Use this key twice to change the status “receipt issue” or “no receipt.” In case of “receipt issue”, the “RECEIPT ON” indicator is lit. J Received on account key Use this key following a numeric entry to register money received for non-sale transactions. -
Page 22: Basic Operations And Setups
• You can choose the journal skip function (page 44). If the journal skip function is selected, the cash register will print the total amount of each transaction, and the details of premium, discount and reduction operations only, without printing department and PLU item registra- tions on the journal. -
Page 23: How To Use Your Cash Register
How to use your cash register The following describes the general procedure you should use in order to get the most out of your cash register. BEFORE business hours… DURING business hours… • Register transactions. • Periodically read totals. AFTER business hours…... -
Page 24: Displaying The Time And Date
Basic Operations and Setups Displaying the time and date You can show the time and date on the display of the cash register whenever there is no registration being made. To display and clear the time and date Preparing coins for change You can use the following procedure to open the drawer without registering an item. -
Page 25: Preparing And Using Department Keys
Preparing and using department keys Registering department keys The following examples show how you can use the department keys in various types of registrations. Single item sale Unit price $1.00 Item Quantity Dept. Payment Cash $1.00 Repeat Unit price $1.50 Item Quantity Dept. -
Page 26: Programming Department Keys
Basic Operations and Setups Programming department keys To program a unit price for each department Mode Switch To program the tax calculation status for each department Tax calculation status This specification defines which tax table should be used for automatic tax calculation. See page 13 for information on setting up the tax tables. -
Page 27: Registering Department Keys By Programming Data
Registering department keys by programming data Preset price Unit price ($1.00) Item Quantity Dept. Payment Cash $1.00 ( ): Preset value Preset tax status (Add-on tax) Unit price ($2.00) Quantity Item 1 Dept. Taxable Unit price ($2.00) Quantity Item 2 Dept. -
Page 28: Preparing And Using Plus
Preparing and using PLUs This section describes how to prepare and use PLUs. CAUTION: Before you use PLUs, you should first tell the cash register how it should handle the registration. Programming PLUs To program a unit price for each PLU... -
Page 29: Registering Plus
Registering PLUs The following examples show how you can use PLUs in various types of registrations. Registering by subdepartment, see the “Convenient Operations and Setups” on page 60. PLU single item sale Unit price ($2.50) Item Quantity Payment Cash $3.00 ( ): Preset value PLU repeat Unit price... -
Page 30: Preparing And Using Discounts/Premiums
Basic Operations and Setups Preparing and using discounts/premiums This section describes how to prepare and register discount and premium. Programming discounts/premiums You can use the \ key to register discounts (percentage decreases) and the ] key to register premium (percent increases). -
Page 31: Registering Discounts/Premiums
Registering discounts/premiums The following example shows how you can use the \/] key in various types of registration. Discount for items and subtotals Unit price $5.00 Item 1 Quantity Dept. Unit price ($10.00) Item 2 Quantity Discount Rate (5%) Subtotal Rate 3.5% Discount... -
Page 32: Preparing And Using Reductions
Basic Operations and Setups Preparing and using reductions This section describes how to prepare and register reductions. Programming for reductions You can use the m key to reduce single item or subtotal amounts. The following procedure lets you program the tax calculation method for the m key. To program tax calculation status Mode Switch Taxable status of the... -
Page 33: Registering Reductions
Registering reductions The following examples show how you can use the m key in various types of registration. Reduction for items Unit price $5.00 Item 1 Quantity Dept. Reduction Amount $0.25 Unit price ($6.00) Item 2 Quantity Reduction Amount ($0.50) Payment Cash $11.00... -
Page 34: Registering Charge And Check Payments
Basic Operations and Setups Registering charge and check payments The following examples show how to register charges and payments by check. Check Unit price $10.00 Item Quantity Dept. Payment Check $10.00 Charge Unit price $15.00 Item Quantity Dept. Reference Number 0123 Payment Charge... -
Page 35: Registering Returned Goods In The Reg Mode
Registering returned goods in the REG mode The following example shows how to use the R key in the REG mode to register goods returned by customers. Unit price $2.35 Item 1 Quantity Dept. Unit price $2.00 Item 2 Quantity Dept. -
Page 36: Registering Returned Goods In The Rf Mode
Basic Operations and Setups Registering returned goods in the RF mode The following examples show how to use the RF mode to register goods returned by customers. Normal refund transaction Unit price $1.50 Item 1 Quantity Returned Dept. Unit price ($1.20) Item 2 Quantity... -
Page 37: Registering Money Received On Account
Registering money received on account The following example shows how to register money received on account. This registration must be performed out of a sale. Received amount $700.00 Registering money paid out The following example shows how to register money paid out from the register. -
Page 38: Making Corrections In A Registration
Basic Operations and Setups Making corrections in a registration There are three techniques you can use to make corrections in a registration. • To correct an item that you input but not yet registered. • To correct the last item you input and registered. •... - Page 39 To correct the last item you input and registered OPERATION 1-& 10-: R2-' R220' 20-a 15-a — — Clearance — — — Correction of PLU No. — — — Correction of sub- department unit price — — — Correction of quantity —...
-
Page 40: No Sale Registration
In case of occurrence of this error, register these items in the RF mode. • You can program the cash register that this cancel operation is not allowed. No sale registration You can use the following procedure to open the drawer without registering a sale. -
Page 41: Printing The Daily Sales Reset Report
Printing the daily sales reset report This report shows daily sales totals. OPERATION Mode Switch Zero totalled departments (the amount and item numbers are both zero) are not printed. Taxable amount and tax amount are printed only if the corresponding tax table is programmed. These items can be skipped by programming. -
Page 42: Convenient Operations And Setups
Convenient Operations and Setups This section describes more sophisticated setups and operations that you can use to suit the needs of your retail environment. Clerk control function Clerk name printing on receipt/journal, and sales amounts summing by clerk. To use clerk function, refer to page 45. Clerk sign on and sign off Any time you begin any registration or program, clerk sign on operation is necessary. -
Page 43: Post-Finalization Receipt Format, General Printing Control, Compulsory, Machine Features
• The transaction must be finalized in the REG or RF mode using the a, h or k key. Post-finalization receipt example You can program the cash register to print the transaction total only (below Total format) or full details (below Detailed format) on the post-finalization receipt. -
Page 44: Programming General Printing Control
Convenient Operations and Setups Programming general printing control Suppress printing of the subtotal line during tender operation. Print the total line even if no tender operation is made. Print tax total. (only for Australia) Print the current time. Skip the date on journal. Skip the consecutive number. -
Page 45: Programming Compulsory And Clerk Control Function
Programming compulsory and clerk control function Force operation before finalization. Force a money declaration before allowing a daily read/reset and financial read operation. Always “00” Multiplication procedure; 1 Quantity amount, 2 Amount quantity Clear the key buffer when a receipt is issued. Perform auto sign-off when a receipt/report is issued. -
Page 46: Programming Read/Reset Report Printing Control
Convenient Operations and Setups Programming read/reset report printing control Print the first and the last consecutive number of the day (consecutive No. range) on the daily sales reset report. Skip zero total lines on department and transaction read/reset report. Skip zero total lines on PLU read/reset report. Skip zero total lines on hourly sales report. -
Page 47: Programming To Clerk
6 3s6 Mode Switch When a training clerk signs on, the cash register automatically enters the training mode. In the training mode, no operations are affected on any totalizers nor counters. The training mode symbols are printed in the columns of receipt entries produced in the training mode. -
Page 48: Programming Descriptors And Messages
Convenient Operations and Setups Programming descriptors and messages The following descriptors and messages can be programmed; • Report descriptor (such as gross total, net total, cash in drawer…) • Grand total • Special character (such as mode symbol, taxable symbol…) •... -
Page 49: Grand Total, Special Character
Grand total, special character Memory Program code Grand total Amount/@/No./Quantity (2 each) Amount/@/No./Quantity (Australian GST) (2 each) Item count/Customer (2 each) Multiplication/Split pricing (2 each) Taxable status 1 ~ 4 (2 each) Taxable status 1 (Australian GST) (2 each) All taxable status Foreign currency symbol (2 each) REG mode/Refund mode (4 each) not used (4)/Program mode (3) -
Page 50: Receipt Message
Convenient Operations and Setups Receipt message Refer to “Programming receipt message/logo stamp control function” on page 52. Memory Program code 1st line of logo message 2nd line of logo message 3rd line of logo message 4th line of logo message 5th line of logo message 6th line of logo message 1st line of commercial message... -
Page 51: Programming Plu Descriptor
Programming PLU descriptor 62s 6 Mode Switch PLU No. Contents PLU001 PLU002 PLU003 PLU004 PLU005 PLU006 PLU007 PLU008 PLU009 PLU010 PLU011 PLU012 PLU013 PLU014 PLU015 PLU016 PLU017 PLU018 PLU019 PLU020 PLU021 PLU022 PLU023 PLU024 PLU025 PLU026 PLU027 PLU028 PLU029 PLU030 PLU031 PLU032 PLU033... -
Page 52: Programming Function Key Descriptor
Convenient Operations and Setups Programming function key descriptor Mode Switch Cash/amount tendered Charge Check Received on account Paid out Minus Discount Premium Refund Error correct/Cancel Non-add/No sale Post receipt Currency exchange 1 Currency exchange 2 Price Open Clerk No. Subtotal Receipt on/off Multiplication/Date time Programming receipt message/logo stamp control function... -
Page 53: Entering Characters
Entering characters In this section, the method to enter descriptors or messages (characters) to the cash register during programming is described. Characters are specified by character keyboard or by codes. In the first half of this section, the usage of character keyboard is described. -
Page 54: Entering Characters By Code
Convenient Operations and Setups Entering characters by code Every time you enter a character, choose character codes by the character code list (below) and press the to settle it. Example: Input “ enter “ 255^65^ 112^ 112^ 108^ 101^ 32^ 74^ 117^ 105^ 99^ 101^ Character code list Chara Code... -
Page 55: Department Key Feature Programming
Department key feature programming There are two different methods you can use to assign features to department keys. With “Batch feature programming”, you can use a single operation to assign multiple features. “Individual feature programming”, on the other hand, let you assign features one-by-one. This method is recommended for programming of special features to individual department keys. -
Page 56: Individual Feature Programming
Convenient Operations and Setups Individual feature programming With this procedure, you can assign individual features to specific departments. Please select the command code of the contents you want to program, and follow the procedure below. Mode Switch Command code Negative department 0166 Hash department 1866... -
Page 57: Plu Feature Programming
PLU feature programming There are two different methods you can use to assign features to PLUs. With “Batch feature programming”, you can use a single operation to assign multiple features. “Individual feature programming”, on the other hand, let you assign features one-by-one. This method is recommended for programming of special features to individual PLUs. -
Page 58: Individual Feature Programming
Convenient Operations and Setups Individual feature programming With this procedure, you can assign individual features to specific PLUs. Please select the command code of the contents you want to program, and follow the procedure below. Mode Switch Command code Negative PLU 0166 Hash PLU Single item sale... - Page 59 Registering example Locking out and releasing high digit limitation Unit price $10.50 Quantity Item Dept. Max. digit Payment Cash $11.00 ( ): Preset value Single item sales items You can issue a receipt by simply touching the single item sales department or PLU. The following examples show how you register single-item-sale departments.
- Page 60 Convenient Operations and Setups Examples of registering subdepartments Single item sale Unit price $6.00 Item Quantity Subdept. Payment Cash $10.00 Repeat Unit price ($3.00) Item 1 Quantity Subdept. Unit price $2.00 Item 2 Quantity Subdept. Payment Cash $20.00 ( ): Preset value Multiplication Unit price $6.00...
-
Page 61: Printing Vat Breakdowns
Printing VAT breakdowns The following example shows how to get VAT breakdown. Anytime you press the v key in a transaction, VAT breakdown is automatically printed out at the end of the transaction. Unit price $10.00 Quantity Item Dept. Taxable Payment Cash $10.00... -
Page 62: Currency Exchange Programming
Convenient Operations and Setups Currency exchange programming When the ) key is pressed, a current subtotal including tax is converted directly into foreign currency and the result is displayed, and the subsequent finalization is handled using the foreign currency. The currency exchange function is released by finalizing a transaction, partial tender operation, receipt issuance, or by pressing the key. -
Page 63: Registering Foreign Currency
Registering foreign currency 1) Full amount tender in foreign currency * Preprogrammed exchange rate: ¥ 1 = $0.0090 to the Z key Important! Tenders in a foreign currency can be registered using the a and k keys only. Other finalize keys cannot be used. - Page 64 Convenient Operations and Setups 2) Partial tender in a foreign currency * Preprogrammed exchange rate: ¥ 1 = $0.0090 to the Z key Important! Partial tender in a foreign currency can be registered using the a key and k keys only. Other finalization keys cannot be used, but the remaining tender can be finalized using any finalize key.
-
Page 65: Other Function Key Feature Programming
Other function key feature programming You can define a selection of features for the function keys by specifying an 8-digit program code for each key. 63s 6 Mode Switch Cash, Charge, Check key Restrict (to 0, 5) on the last digit for amount tendered (except (only for Australia) Always “0”... -
Page 66: Minus Key, Discount Key And Premium Key
Convenient Operations and Setups Received on account, Paidout key Always “00” High amount limit specification for change amount due. (refer to on the previous page.) Always “0000” Minus key Always “00” Allow credit balance. High digit limit specification Taxable status 1 Taxable status 2 Taxable status 3 Taxable status 4... -
Page 67: Calculator Functions
Calculator functions While registering at the REG mode, you can switch to CAL mode and then return to REG mode to resume the registration. Example 1 (Calculation examples) Clear 5+3-2= (23-56) 78= 12 % on 1500 Example 2 (Memory recall) Unit price $10.00 Item 1... -
Page 68: About The Daylight Saving Time
Convenient Operations and Setups Programming calculator mode control Open drawer when Open drawer when Print calculator total on the daily report. Always “0000” Mode Switch About the daylight saving time It is possible to set the internal clock forward/backward by 1 ~ 9 hour(s) for the daylight saving time. •... -
Page 69: Printing Read/Reset Reports
You should print reset reports at the end of the business day. Important! • The reset operation issues a report and also clears all sales data from the cash register's memory. • Be sure to perform the reset operations at the end of each business day. Otherwise, you will not be able to distinguish between the sales data for different dates. -
Page 70: To Print The Financial Read Report
Money declaration: Count how much cash is in the drawer and input this amount (up to 8-digits). The cash register will automatically compare the input with the cash in drawer in the memory and print the difference between these two amounts. - Page 71 To print the PLU/subdepartment read/reset report This report shows sales for PLUs/subdepartments. OPERATION X mode Read: Z mode Reset: Mode Switch To print the hourly sales read/reset report This report shows hourly breakdowns of sales. OPERATION X mode Read: Z mode Reset: Mode Switch REPORT...
- Page 72 Convenient Operations and Setups To print the monthly sales read/reset report This report shows monthly breakdowns of sales. OPERATION X mode Read: Z mode Reset: Mode Switch REPORT — Reset mode/date/time — Clerk/consecutive No. — Report code/report title/reset symbol/reset counter —...
- Page 73 Money declaration: Count how much cash is in the drawer and input this amount (up to 8-digits). The cash register will automatically compare the input with the cash in drawer in the memory and print the difference between these two amounts.
- Page 74 Convenient Operations and Setups To print the periodic-1/-2 sales read/reset reports These reports show sales breakdowns of sales by any two kinds of period you want. OPERATION X mode Read: Z mode Reset: Mode Switch (Periodic-1 Read) (Periodic-2 Read) (Periodic-1 Reset) (Periodic-2 Reset) Zero totalled departments (the amount and item numbers are both zero) are not printed.
-
Page 75: Reading The Cash Register's Program
Reading the cash register's program To print unit price/rate program (except PLU) OPERATION PGM mode Mode Switch To print the PLU program OPERATION PGM mode Mode Switch PLUs without being programmed are not printed on this report. Departments without being programmed are not printed on this report. - Page 76 Convenient Operations and Setups To print key descriptor, name, message program (except PLU) OPERATION PGM mode Mode Switch REPORT — Mode/date/time — Clerk/consecutive No. — Program read symbol — Gross character — Net character — Cash in drawer character — Charge in drawer character —...
- Page 77 To print the print control, compulsory clerk program (except PLU) OPERATION PGM mode Mode Switch Departments without being programmed are not printed on this report. REPORT — Mode/date/time — Clerk/consecutive No. — Program read symbol — General control — Tax table 1 —...
-
Page 78: Troubleshooting
Troubleshooting This section describes what to do when you have problems with operation. When an error occurs Errors are indicated by an error tone. When this happens, you can usually find out what the problem is as shown below. Does the display show an error code? Error code (Message) Mode switch position changed before... -
Page 79: When The Register Does Not Operate At All
When the register does not operate at all Perform the following check whenever the cash register enters an error condition as soon as you switch it on. The results of this check are required by service personnel, so be sure to perform this check before you contact a CASIO representative for servicing. -
Page 80: In Case Of Power Failure
In case of power failure If the power supply to the cash register is cut by a power failure or any other reason, simply wait for power to be restored. The details of any ongoing transaction as well as all sales data in memory are protected by the memory backup batteries. -
Page 81: User Maintenance And Options
Slide the printed journal from the take-up reel. Step 7 Open the platen arm. Step 8 Remove the old paper roll from the cash register. Step 9 Load new paper. Go to the step 3 described on page 10 of this manual. -
Page 82: To Replace Receipt Paper
REG position and remove the printer cover. Step 2 Open the platen arm. Step 3 Remove the old paper roll from the cash register. Step 4 Load new paper. Go to the step 3 described on page 9 of this manual. 6200... -
Page 83: Specifications
Specifications Input method Entry: 10-key system; Buffer memory 8 keys (2-key roll over) Department: Full key system Display Amount 8 digits (Zero suppression) ; No. of repeats, Receipt On/Off Character 8 digits; Item descriptor, Key descriptor, Mode Printer Printer: Dot matrix thermal printer (Receipt and journal printing) 24 digits (Amount 10 digits/descriptor 8, 12 or 24 digits) Journal: Automatic take up roll winding... -
Page 84: Index
Index alphabet keys 53 arithmetic operation key 21 Australian rounding 15 backspace/character code fixed key 53 bottom message 22 CAL mode 18 calculator mode 18, 21, 67 cancel 20, 40 CAPS key 53 cash amount tendered key 21 change preparation 24 character code list 54 character enter key 53 character entering 53... - Page 85 Index open 20, 59 operator display 17, 19 operator key 17 paid out 37 paper feed key 20 paper installation 9 paper loading 9 paper replacement 81, 82 percent 20, 30 periodic report 74 PGM mode 18 PLU 20, 28, 29, 51, 57, 69, 71, 75 pop-up display 17, 19 post receipt 20, 43 power failure 80...
- Page 88 MO0201-A Printed in Indonesia CASIO COMPUTER CO., LTD. TE-2000*E 6-2, Hon-machi 1-chome Shibuya-ku, Tokyo 151-8543, Japan Printed on recycled paper.